
Sascha Feider

Forum Replies Created
-
AuthorPosts
-
February 22, 2025 at 8:51 pm in reply to: Key-Map Spacebar press as Confirm (same as using Enter key) #93435
No, sorry. I guess you could go through the preferences -> keymap and search for the settings you’re looking for, if it’s a specific function you want them to have. You can search by key and see what they’re mapped to.
Personally I only use space for search and enter for confirming value entries.February 22, 2025 at 7:56 pm in reply to: Key-Map Spacebar press as Confirm (same as using Enter key) #93433“Shift + R” is the shortcut to repeat the last active action.
It is now a compositor node only. You’ll have to go to the compositor and add the glare node, set to bloom.
Then back in the viewport you’ll have to activate the viewport-compositor under the viewport shading tab. Set to either camera or always, depending on if you always want to see it or just in camera view.If you click “shade auto-smooth” Blender will automatically add the smooth by angle modifier for you. You can then set the desired angle at which the smoothing kicks in there.
Auto-smoothing has undergone several revisions between 4.0 and 4.2, so it can get confusing, but that’s how it is now.
If it’s too confusing for now you can always download the Blender version used in the tutorial to follow along. You’ll learn to spot the differences and how to solve them with more experience.That’s the view clipping cutting into your mesh. If you open the n-panel and check under “view” you’ll find “clip start”. If you reduce that value you’ll be able to get closer.
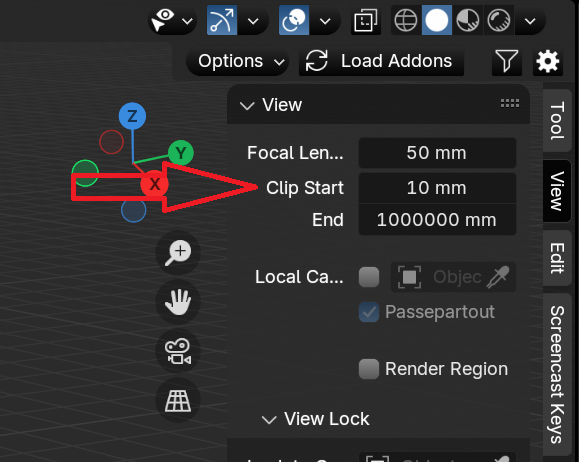
Note for camera views: A camera has it’s own clipping values, so when you set up a camera for a shot and want to get close you might have to adjust its clipping value separately.
Dwayne is right, you can turn on the timing option in the node overlays and it will show the processing on each node if that’s what you meant.
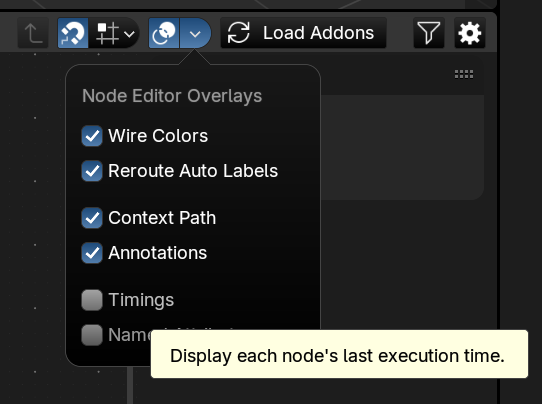
From what I’ve seen so far it’s heavily depending on the node itself with some having almost no impact at all and some are super heavy. I would image you wouldn’t want to duplicate something with a boolean operation attached to it. Then again what do I know about this voodoo stuff 😀
February 3, 2025 at 9:02 pm in reply to: How to Fix Transparency Issue with PNG Hair Textures in Blender 4.3 (Cycles) #92922Actually the transparent bounces are independent from the total max. I guess it’s why they are separated from the rest. From Blender Manual:
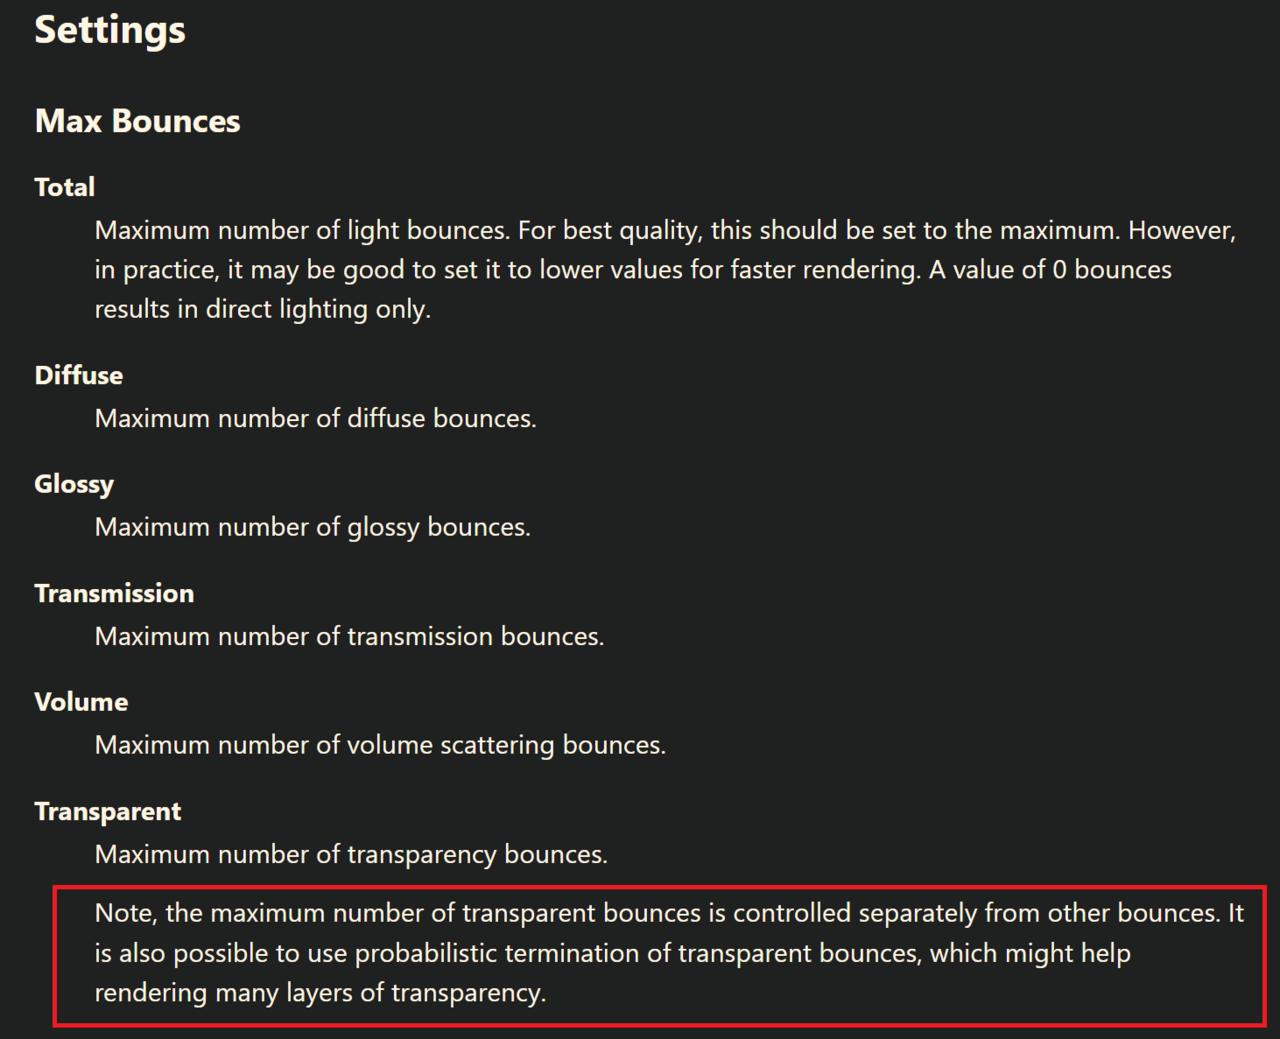
It’s more the transmission bounces where that usually collides, because it’s easy to forget to set the total high too.
That looks like artifacts from denoising to me. You’re going to want to increase your render samples. Looks like right now there is still too much noise when the denoiser kicks in and it can’t quite handle it.
i like the keypad too. Also nice colour scheme. Well done.
Could you post a screenshot of your light and the node setup, so we can help troubleshoot?
You’ll have to go under edit -> preferences -> extensions, that’s where you’ll find it now. Make sure under system the online access is allowed to be able to download extensions.
Looks like a classic case of double vertices. Go into edit mode, A to select everything and then M -> Merger by distance. You’ll get notified on the bottom if any vertices got removed.
I’d have to refer you to Blender Market too. There are a bunch of geo-node building generators for example and modular asset packs. None which I have tested though.
Getting one that does any moment in history is a big ask, I don’t think that exists, too much variety. You’d probably have to get separate ones for different styles.
Your best bet might be getting a bunch of asset packs from different time periods and then plugging them apart and plugging them back together to create variations.Because some designs just stand the test of time. 🙂
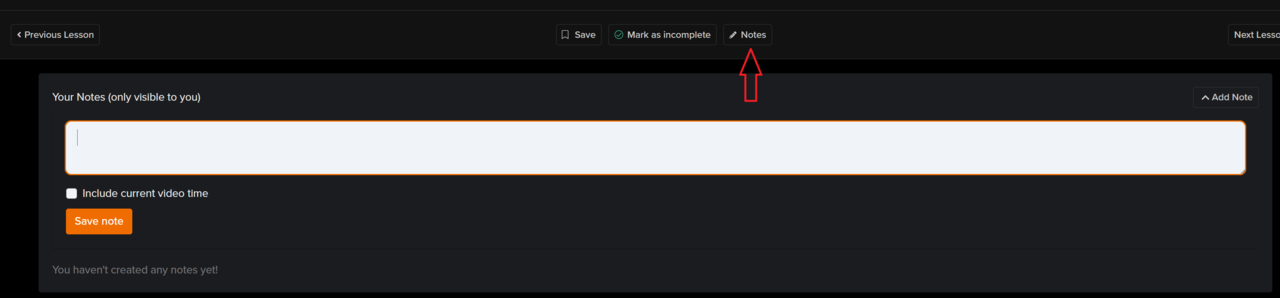
Nicely done!True, the subtitles work too. But I was more referring to the notes you can add yourself:
-
AuthorPosts
