
Sascha Feider

Forum Replies Created
-
AuthorPosts
-
For stuff like this I’d highly recommend checking out hbit project on YT, he’s a master of stuff like this.
I too would start with tracing it with a little plane and extruding quads. And of course make use of the mirror modifier.
It’s how I made this quite some time ago (yes, the middle is a bit too dense):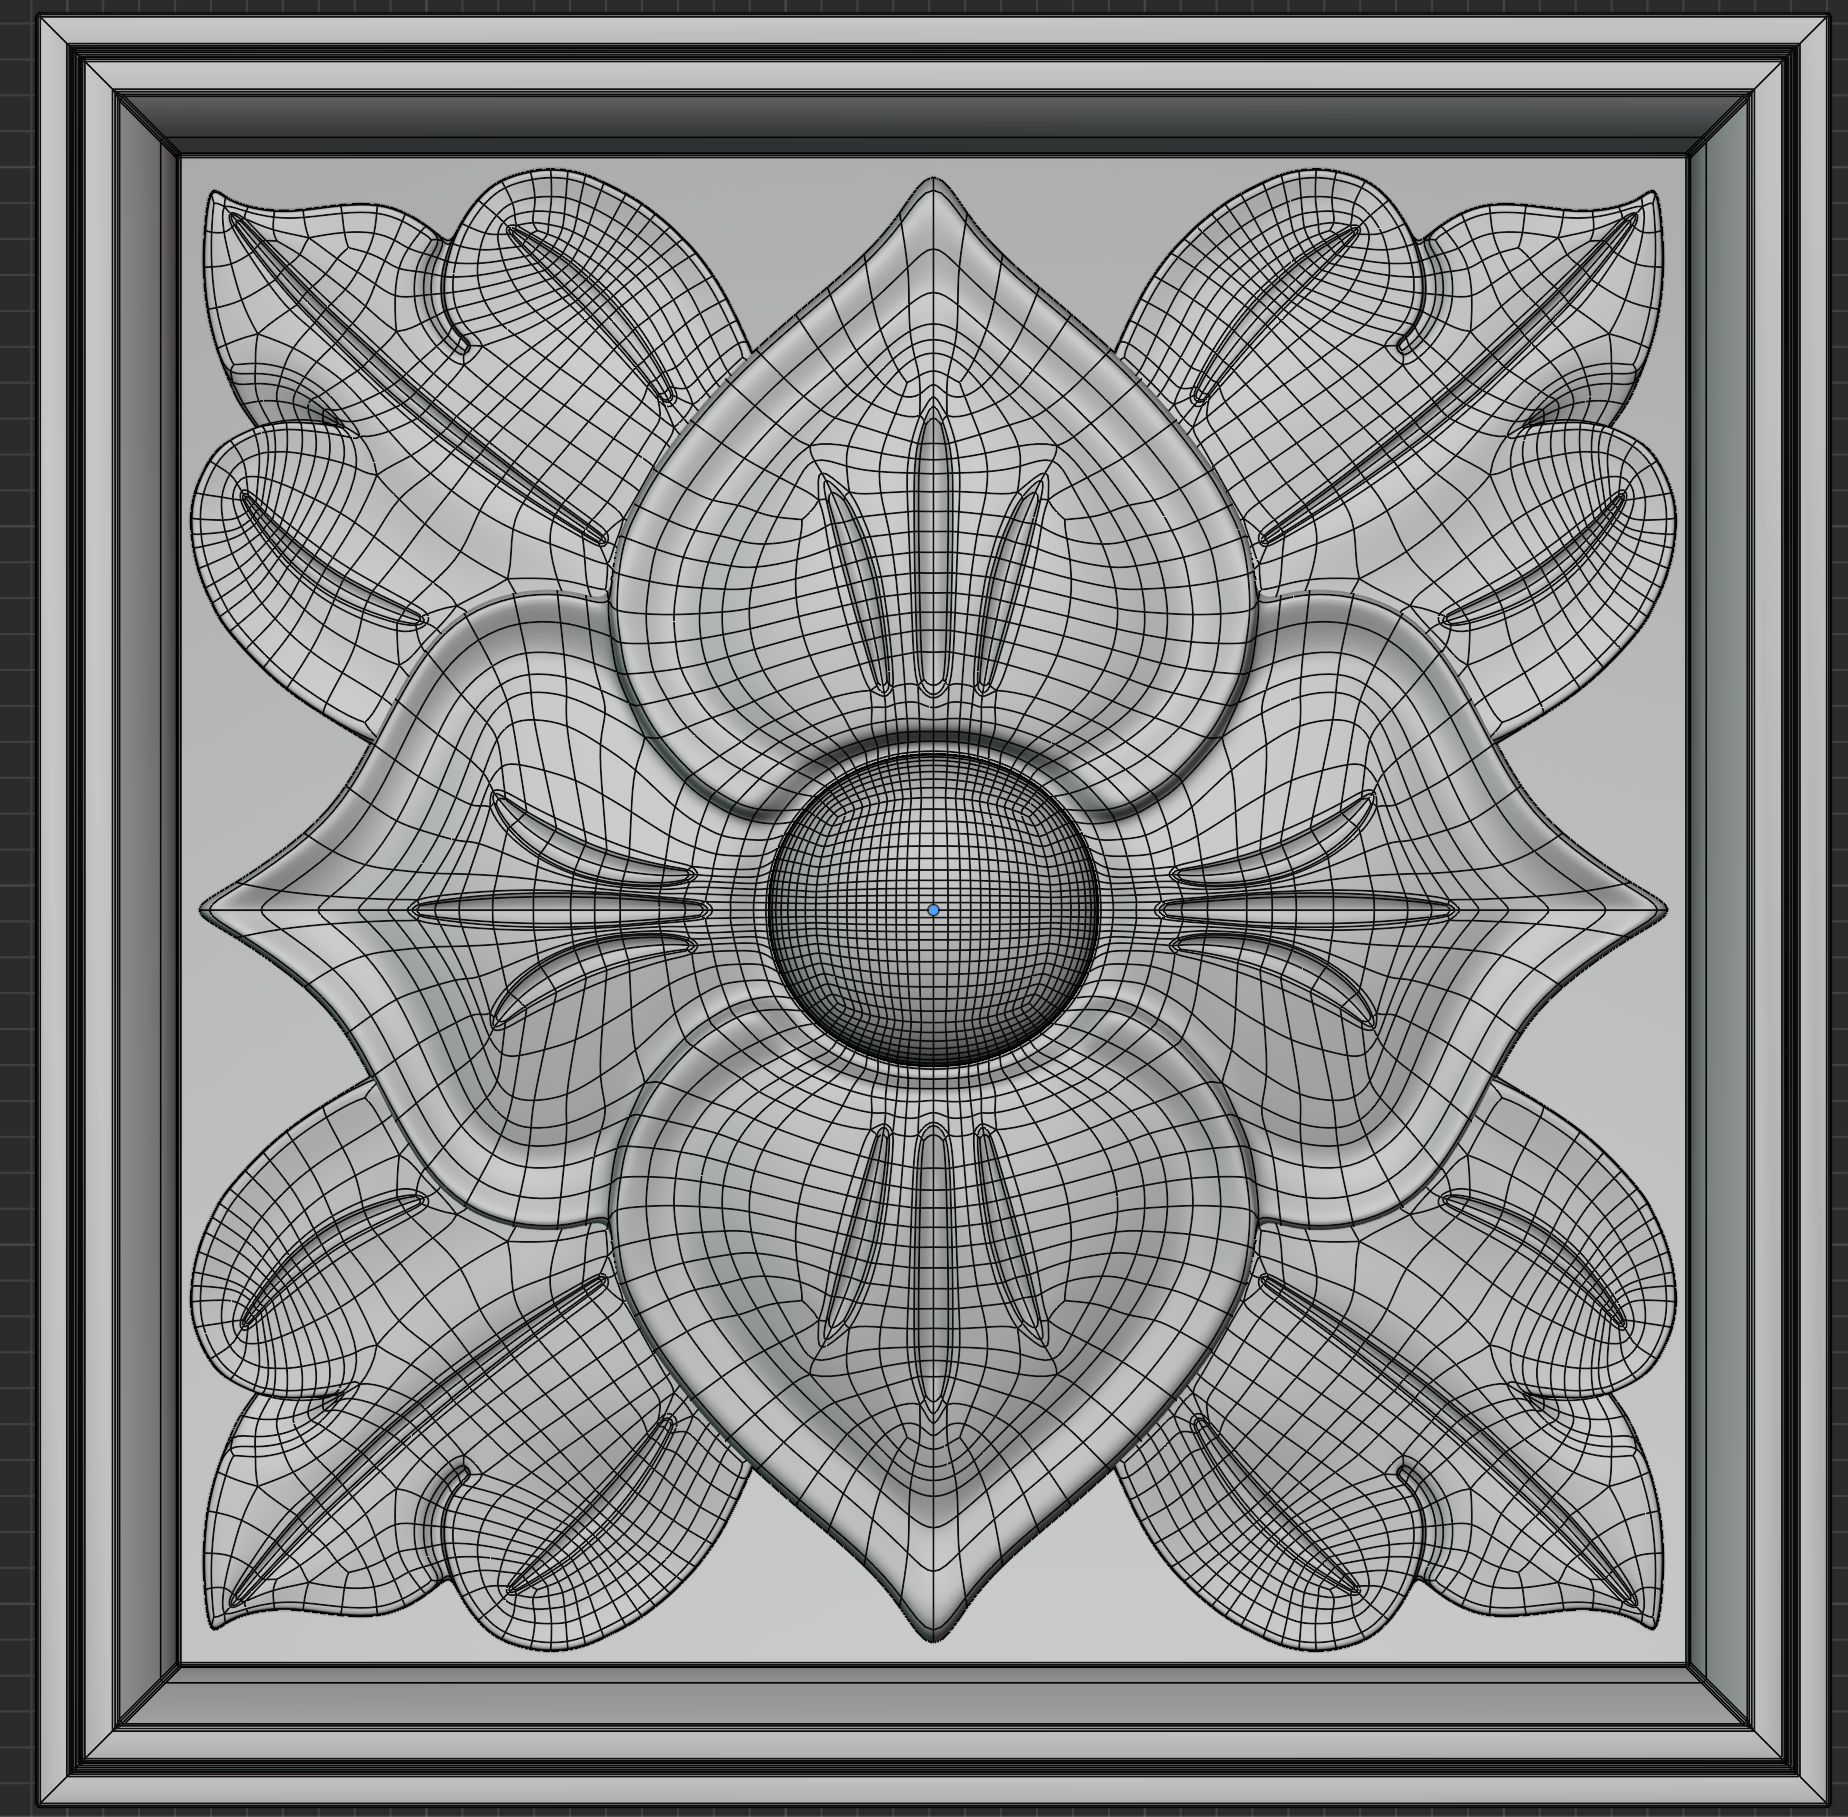
Ah yes, so you are using the auto-boolean, just not in the n-panel, by adding the shift to your shortcut. ctrl + shift + – performs the auto-boolean.
Ctrl + – performs the brush boolean and your modifiers stay intact.
Did you by chance use the bool tool in the n-panel and chose auto-boolean? Because that will indeed simply perform the boolean operation and convert the target to mesh, and with it applying all modifiers on it.
You want to use either the brush boolean, or the shortcut ctrl+ numpad-, which uses brush boolean too.
Nice one! Maybe light it up a bit more, so we can see it better. 😉
December 19, 2025 at 1:24 am in reply to: Edge Loop (Alt + Click) not working in Blender 4.5 & 5.0.1 #98576What you’re describing is totally normal behaviour. Your are not trying to select an edge loop, when you select one of the outer edges on a cube. The edges on a cube end in a pole, in this case a vertex connected to three edges. An edge loop will not continue there.
When you add an edge loop down the middle of the cube, that’s an edge loop, because you don’t run into a pole. So alt-clicking one of the default edges on a default cube does note select an edge loop, because there is none.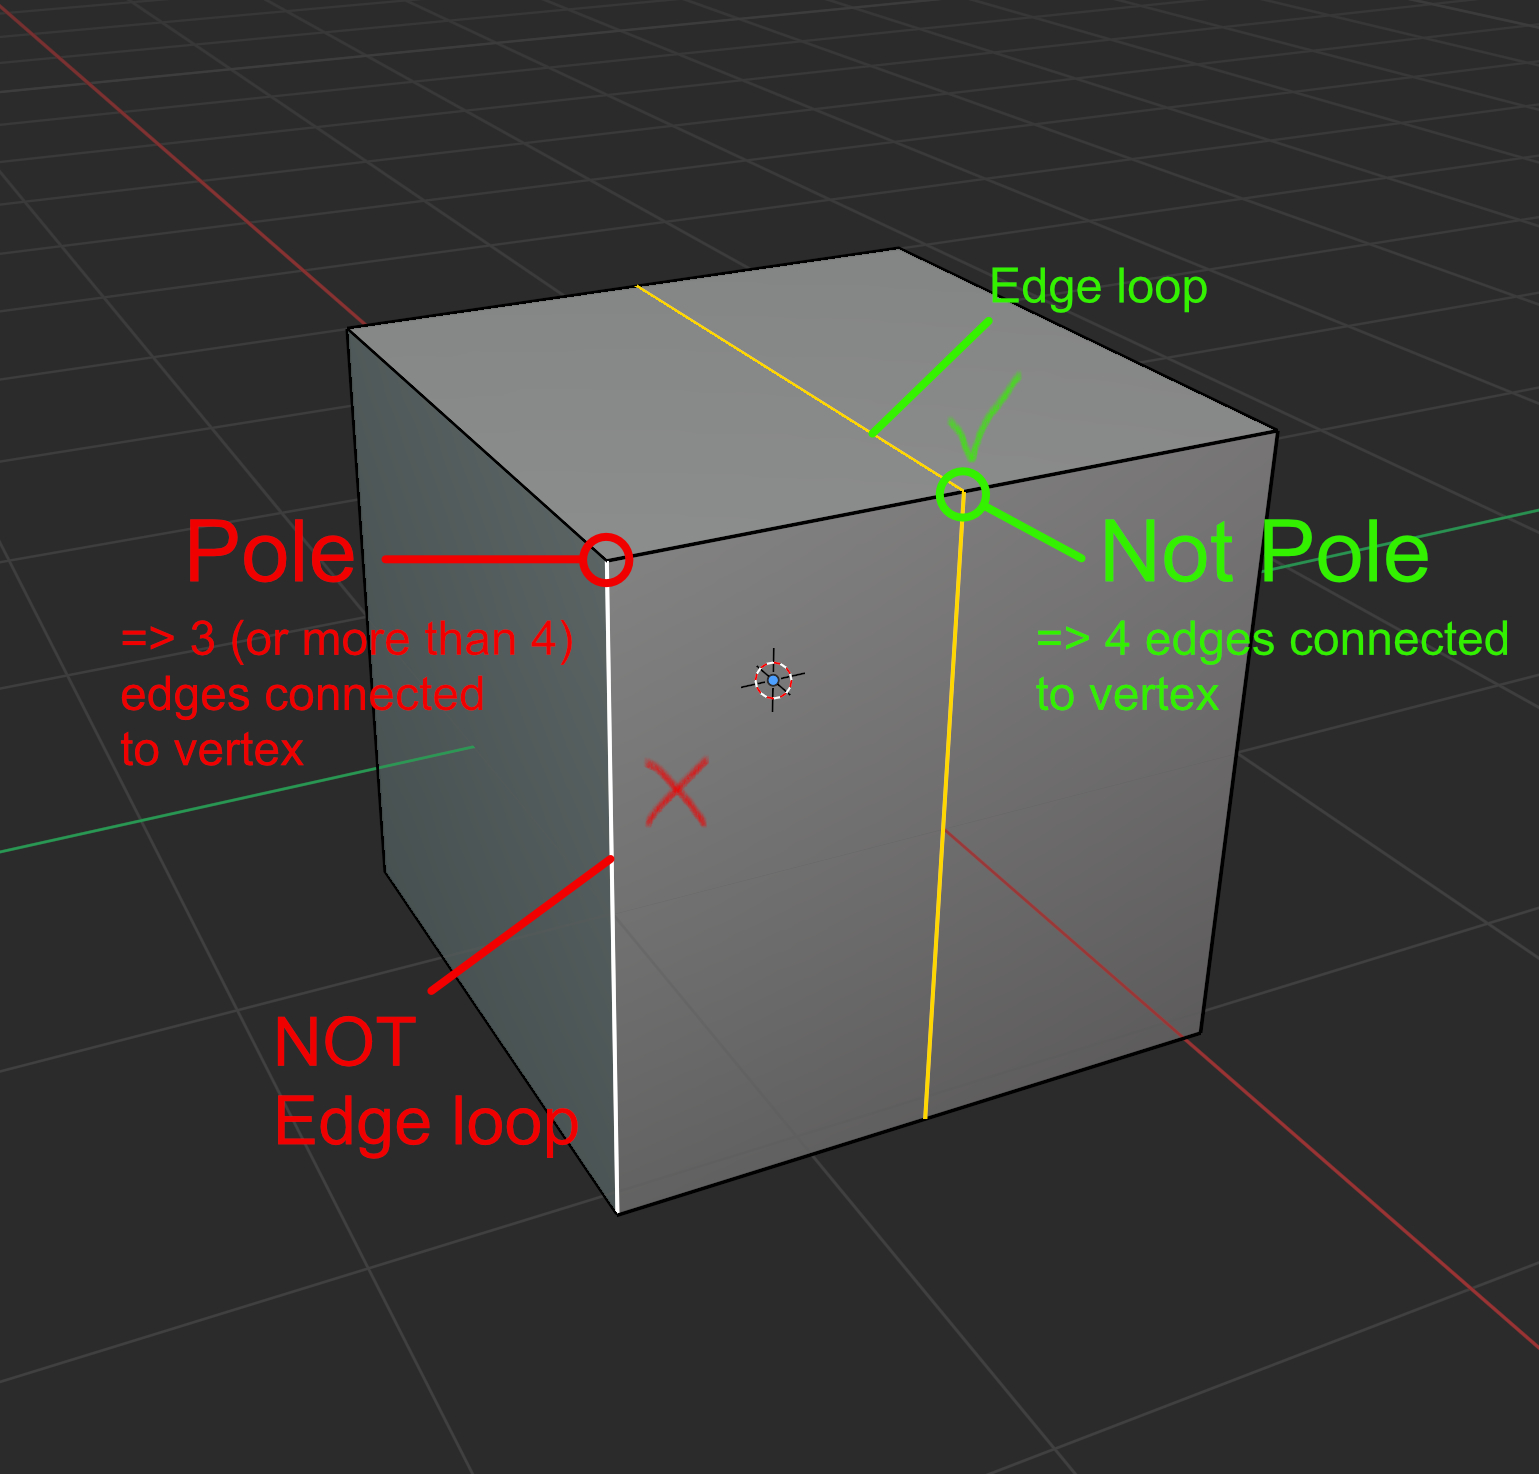 December 18, 2025 at 5:31 pm in reply to: Edge Loop (Alt + Click) not working in Blender 4.5 & 5.0.1 #98573
You’ve tried on a default cube? Maybe what you’re trying to alt-click select isn’t an edge loop, because the default cube doesn’t have edge loops.
For the alt-click to work you have to select edges that are connected end-to-end in a line. When you hit a pole, like on the cube where the edge ends on a vertex connected to three edges, then the loop selection stops there.
You can read more on it with examples here: https://docs.blender.org/manual/en/latest/modeling/meshes/selecting/loops.htmlAwesome work from everybody. Very awe-inspiring what people come up with.
Alternatively (or additionally), if you’re using a sky texture instead of an HDRI, you can animate the sun elevation and rotation to simulate a sunrise/sunset.
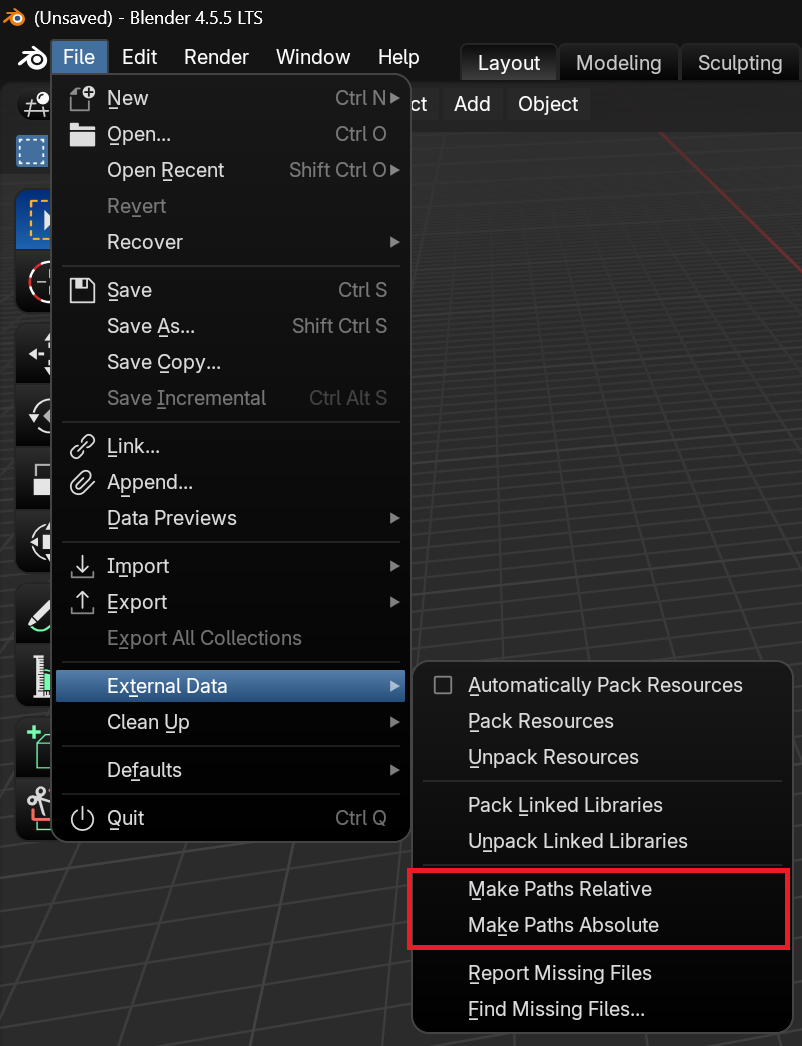
You can find the option under file -> external data. There you could alternatively also pack all textures into the .blend file directly, which might be the better option, if you want to share the file packed in a zip.
Thanks, guys. That is helpful. Going to jot down “Mode Shifting” as a situation to avoid. I guess the rest will come in time, if and when I run into this kind of situation.
November 8, 2025 at 8:50 pm in reply to: Why can’t I see topology when I switch to object mode? #97880Hi Vanessa,
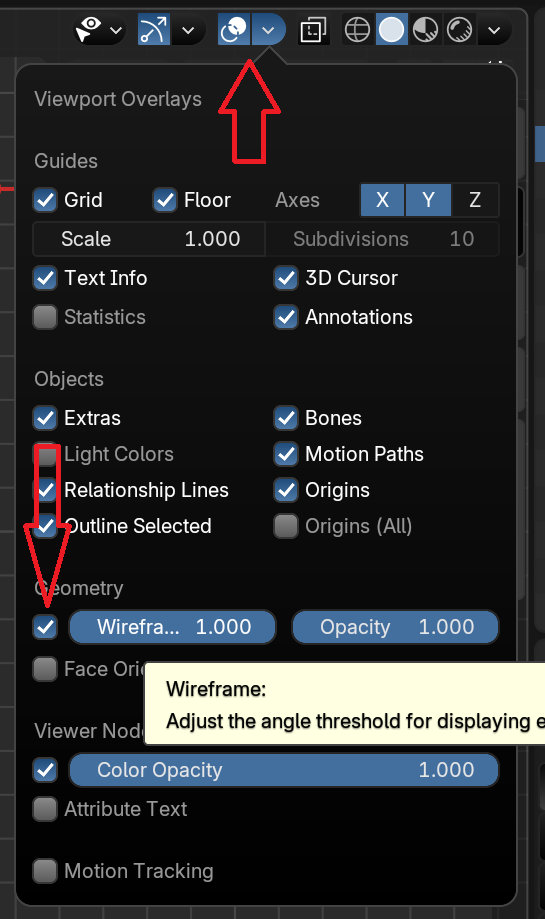
Jonathan has the wireframe overlays turned on. You can find the setting in the viewport overlays on the top right corner of the viewport and check the box next to wireframe.
I think your problem here is that the two vertices pointed to in blue are not aligned with the ones pointed to in green. So when they merge you get that indent in the tire.
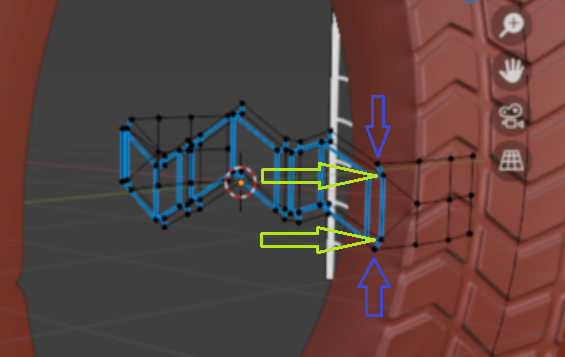
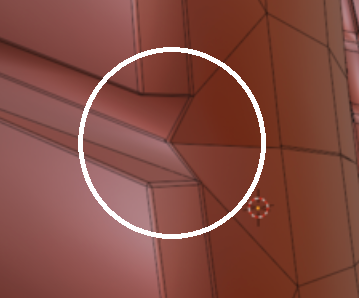
That section should look like this: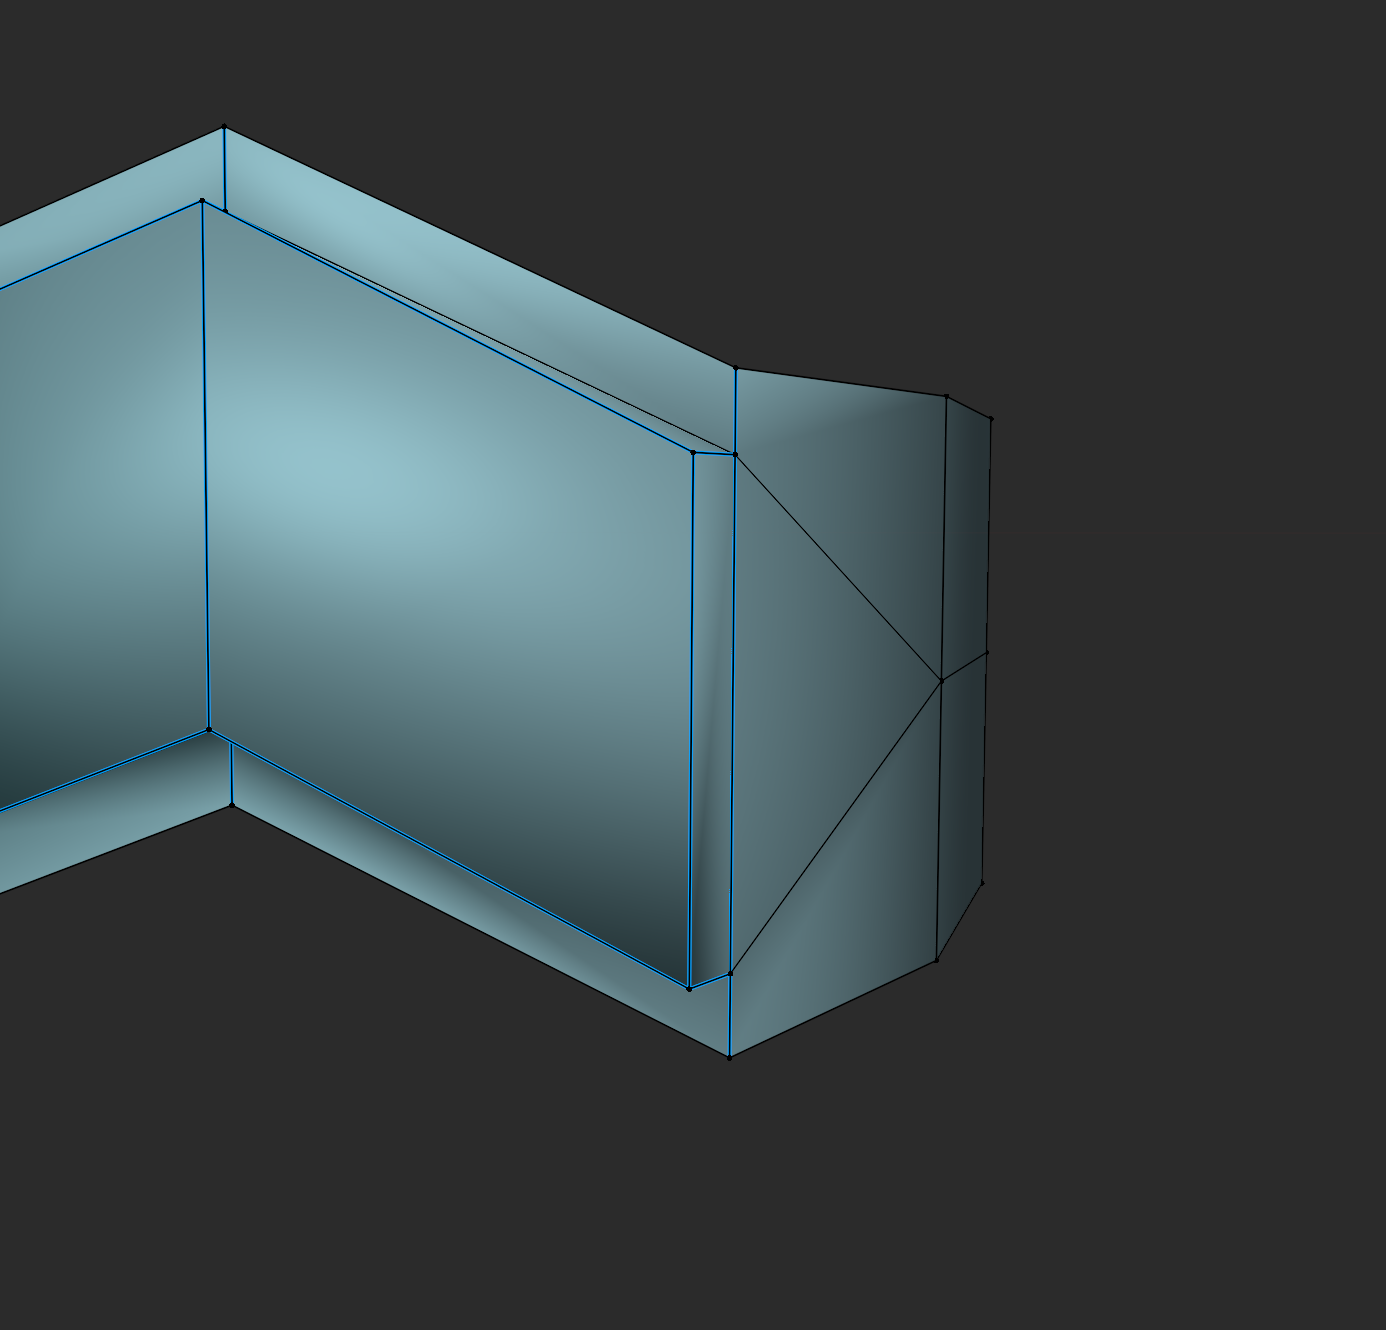
I seem to remember having a similar issue and thickness fixed it. I think zero thickness is always a bit tricky with that stuff.
Giving the plane some thickness could help too.
I don’t think you’ll need all those loop-cuts there.
Since that door is not going to deform, you can comfortably go with a big n-gon for it and take a similar approach to some elements in the “Press Start” course. So basically place your oval shape where you want it and extrude it inwards, bevel and all. Then connect the oval shape with the rest of the door with a couple of bigger faces. Maybe outset the outer edge of the oval to be able to bevel it too.
If all your fronts are the same, you could then simply copy the door around and resize as needed. -
AuthorPosts
