
Sascha Feider

Forum Replies Created
-
AuthorPosts
-
Looking good.
You can just keep replying to your post and keep track that way.Nicely done.
When it comes to making everything look more detailed bevels will be your friend but also consider that not everything needs to be geometry. Eventually you’ll have textures and with a proper UV-unwrap you can make it look very detailed and like it’s constructed.Looking good.
Little tip: When you intend to do a stiles & rails construction it’s easiest to work your way from the outside in, doing them first and then the paneling and other details.Looks good. I’d still mix a tiny bit of noise in to break it up a bit.
Human: How many vertices can you fit on a model?
Artificial Un-Intelligence: YES!
😁That may be caused by the boolean modifier not being first in line when you applied it. Note the little blue message on the bottom.
Try undoing the operation if you can and move the boolean modifier to the top of the stack and then apply it.
When applying modifiers you should ideally always work from top to bottom.Looks like they’re hidden by the mesh. Maybe try scaling them up a bit.
Or send the ranger on a diet. 😀January 31, 2026 at 6:40 pm in reply to: Dice disappear when viewed from camera in rendered mode #99368Are you adjusting the clipping distance in the n-panel under view, or in the camera settings? Because that’s independent from each other.
If that’s not it, can you post a screenshot with your full UI? It’ll help troubleshooting.Splendid. That does look so much better. Glad you found the lesson helpful.
Love the colour scheme on the crate. Nice job. 🙂
January 17, 2026 at 7:11 pm in reply to: How to create bloom on specific objects and not others #99181Yes, this is definitely something that’s done after rendering, especially with cycles.
January 17, 2026 at 1:41 am in reply to: How to create bloom on specific objects and not others #99178Sure, it would look somewhat like this:
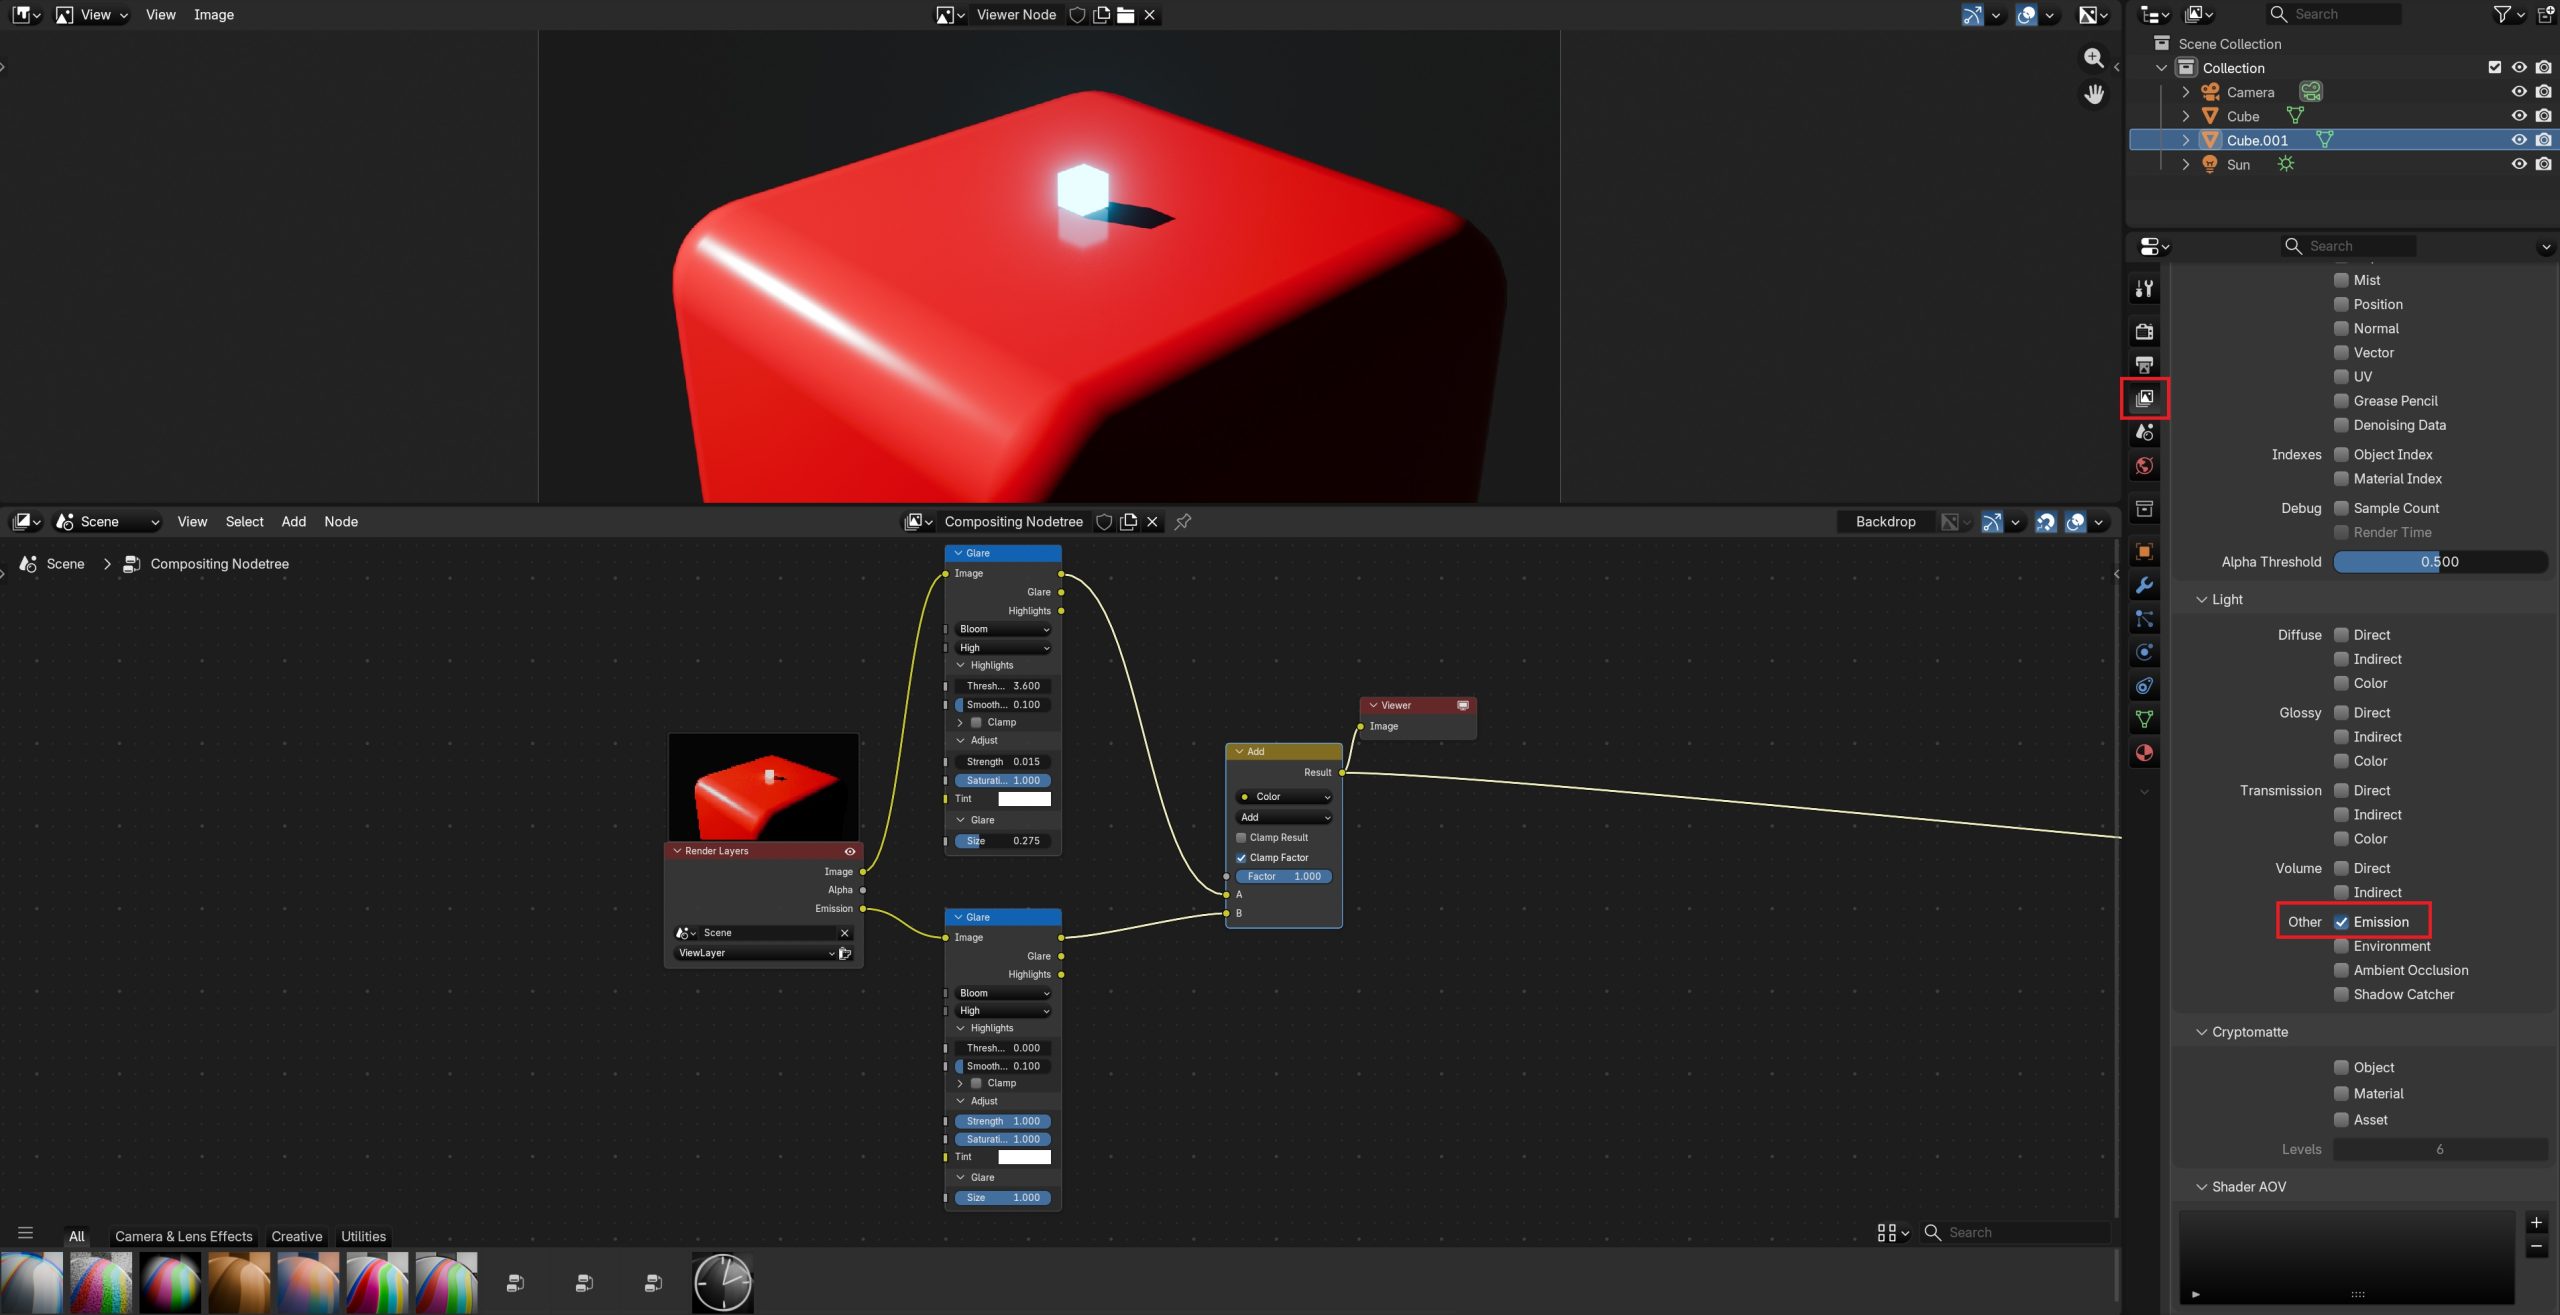
After activating the Emission pass on the right, you’ll get the output in the render layers node in the compositor, which you can then bloom independently. The thresholds of course depend a lot on your individual scene.
Depending on how the strengths are on the various surfaces, the threshold might not get you there. In that case the cryptomatte method might be better, or render layers, which is a more extensive topic. Lots of info on that though in the CORE Compositing, which is excellent.January 15, 2026 at 11:28 am in reply to: How to create bloom on specific objects and not others #99174If you want to target emission specifically, you can use an emission pass (activate in render passes) for this. It’ll give you an extra output on your render layer node, which you can then use to add bloom. For the rest you can use a separate glare node with a threshold adjusted to only show what you want effected.
Then add them together for the final image.
If that doesn’t work you can always do separate render layers for the different objects and composite them back together.Yup, that is true. Welcome to my hell. 😁
Generally speaking it depends on what you’re doing. I guess for stylized stuff a procedural wood is okay.
For realistic work I haven’t found one yet where I couldn’t tell that it’s a procedural one. I also need to be able to show specific species for what I do, which is even harder with procedural materials.
So I rely on PBR materials with photo scanned image textures. It’s as good as you can get, but not perfect either. Especially when it comes to the transition to end grains, which usually gets ignored in textures.
The magic is all in a proper UV unwrap, keeping in mind how a tree grows and how you’d work the wood in real life to get the piece you want to create in CG. In case of your sled there’s good potential to make it look a lot better with the same texture, if the UV unwrap is better.I have a full lesson about only this topic in Craftsman: Texturing with wood
That looks really great, bud.👍
-
AuthorPosts
