
Sascha Feider

Forum Replies Created
-
AuthorPosts
-
That looks like you added a subdivision surface modifier. If I remember correctly the topology in this project is not suited for a subdiv modifier so it would definitely mess up the model like this.
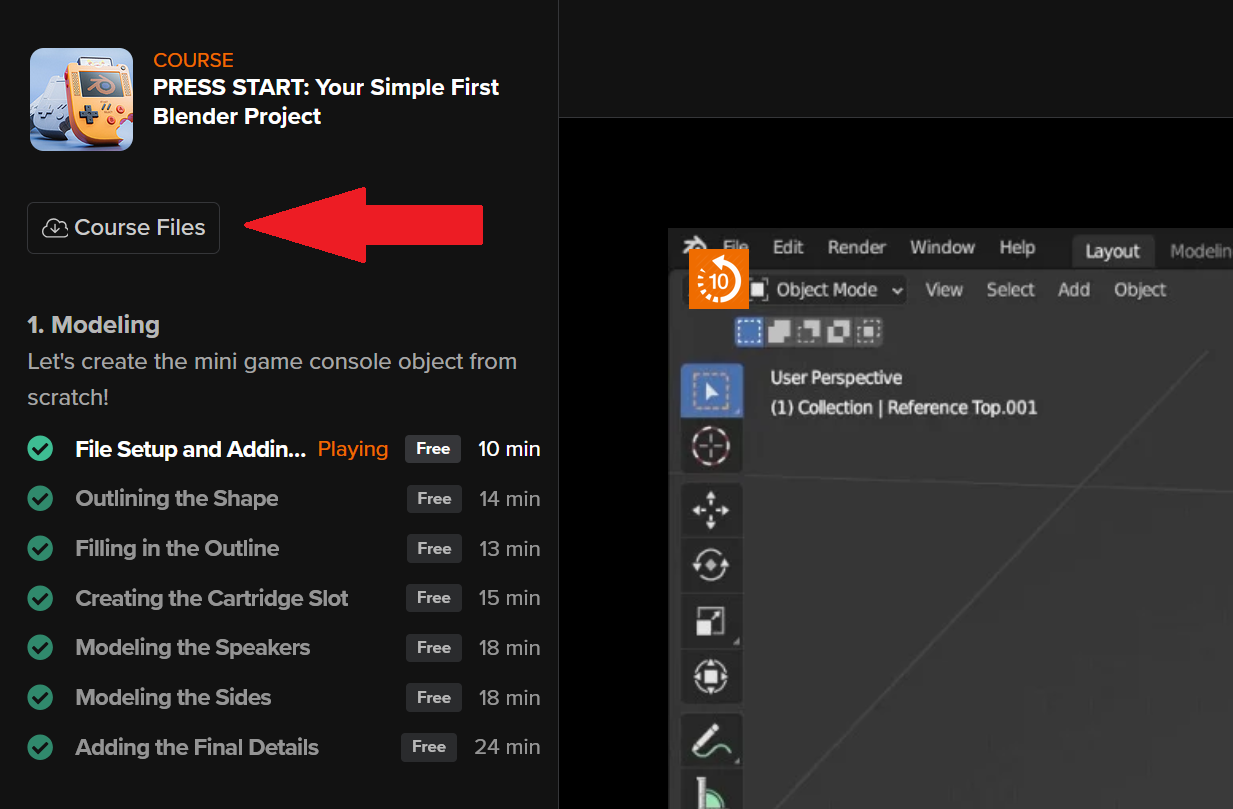
You’ll find the course files on the top left above the chapters. 🙂
 September 9, 2025 at 7:07 pm in reply to: Confusing issue with loop cuts and deform in edit mode #96999
Hi Vanessa
Don’t worry, it’s all working correctly. What you’re seeing there is, similar to say a subdivision modifier, that the modifier isn’t actually deforming the geometry, it’s just simulating it. If you were to apply the modifier in object mode now, the geo would follow the shape.
If you want to see the geo following the deformation without applying the modifier, you can toggle on the “on cage” option in the modifier, which is currently grey.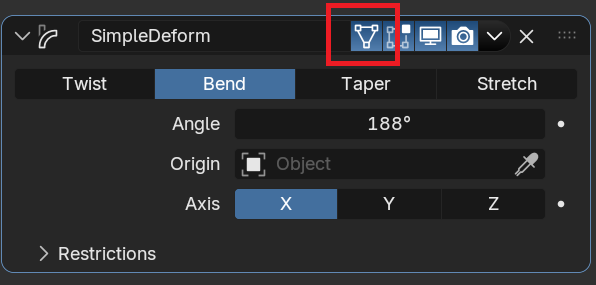
You could also toggle off the modifier in edit mode (next button over) and you’ll see that the shape will not appear deformed until you go back to object mode.
It’s just various ways to work with modifiers and display them however needed in any given situation. 🙂
Gotcha! Sculpting = Anarchy until the Mesh-topologian Police arrives 😁
Thanks, Martin. That’s what I was hoping. Memory not quite ruined – check 🙂
Adding to the above:
Scale in Blender works as a multiplier/percentage. So whenever your scale is not uniformly 1/1/1 and you perform an operation like extrude by a certain value, that value gets multiplied by the scale value in the various directions.
So when you scale in object mode: CTRL + A -> Apply scale as Martin said.Welcome to the cookie world, Jacob.
Please sweep up your own crumbs. 😜
Great extension, integral part of my workflow.
Tip for the visuals: Make sure you toggle the little ghost icon next to the show/hide button. That way you’ll only ever see the dimensions when the measured object is selected. Keeps the viewport much cleaner.Cool, hope you’ll learn something that gets you going in that direction. Once you learn how to work with precision within Blender, you should be able to make anything you want pretty quickly. The principles are pretty much the same. Just how the programs work under the hood is different.
@Dostovel CAD will be covered in a way, but like I just said, it’s more knowing how to use Blender with precision. Been using CAD since ’06.
Do you have a specific type of objects in mind? CAD can do many categories from carpentry over machining to manufacturing.
For 3D printing there are already 2 courses on CGC. Have you checked those?
https://cgcookie.com/courses/make-it-3d-printing-with-blender
https://cgcookie.com/courses/printlab-your-guide-to-3d-printing-with-blender-and-a-prusa-printerI do own Construction Lines, but haven’t used it in forever. There were a few updates since I last used it. Back then I had a bunch of issues here and there, that I stopped using it.
Precision Drawing Tool is helpful, albeit a tad convoluted for my taste. I only use it in specific cases when I need a precise tangent between two circles for example.Don’t worry, you posted in the right location. Questions under lessons always go straight to the forum.
As for the jpg v png I’d say it really depends on the quality of the result you’re aiming for. From my point of view if you do anything under 2K resolution and you’re working on a texture that’s not required to show ultimate detail in a close-up shot, then a jpg is totally fine. Especially if you’re texture painting some minor details or blemishes you’re generally good.
On the other hand if you’re creating a texture that will be seen very up-close and you want as much detail as somewhat possible, then I’d bite the storage bullet and opt for a png, if you need more color values even a tiff. For lots of post processing work consider exr.
Also if you’re going 4K and up I’d opt for png or better, as jpg will always have compression artifacts, even if you choose the best quality you can get out of a jpg.
Example: I bought a texture pack once, which included the same textures in 2k, 4k and 8k. Nowhere in the description did it state, that it was all jpg. Unfortunately this made the 4k and 8k pretty useless for up-close because of the artifacts and for far away it was overkill.
So bottom line: It’s a case by case thing for me, depending on what I want the result quality to be.That face is created because you don’t have clipping activated in your mirror modifier. Without that option Blender basically treats the mirrored part as a separate mesh island, like when you have disconnected parts in the same mesh. With clipping it gets treated as one connected mesh and you won’t get that face.
So undo the extrusion and click on the clipping check mark in the mirror modifier and try again. 🙂May 14, 2025 at 12:43 am in reply to: Adding vertex groups cause Blender to lag in Render Mode/BLENDER RANDOMLY LAGS WHEN IT WANTS. WHY does Blender do this? #95027HI Kimberly,
I just tested Dream10 (slow) and it runs buttery smooth for me.
I hate to say it, but looking at your specs I’d almost assume it’s the computer. Laptops are generally not the best for Blender. The specs don’t mention a dedicated gpu, so I’m guessing it’s all through the cpu graphics? That’ll slow things down fast. Also 16GB RAM is not a whole lot for modern versions either.All good things have been mentioned already. To add to that, I keep saying: “Never compare yourself to others, only to yourself from yesterday.”
Now with that in mind you have a good way to gauge your personal progress here, even more so since you didn’t have to come up with the idea, but worked off a reference. Since you timed yourself with this building, make notes of that. Move on to other projects, keep learning and progressing. After a while, maybe a month or so, of more learning, do the exact same project again, no iterations, just a carbon copy and time yourself again. I’m gonna bet you will be faster and notice more efficiency in your workflow. That is of course if you have targeted your learning.
If you still run into the same issues as before, you’ll know that you have to refocus your learning. Either way it will give you either confidence or direction. Or both. 🙂The important thing is not how long it took you, but if you had to do it again, would you still have the same struggles or are you improving from the first go-around.
Hi Mischa,
There’s a drop down menu behind the little arrow, which opens up and you can click on apply.
Or you can hover your mouse over the modifier and press ctrl+A.
Note that you can only apply those in object mode. 🙂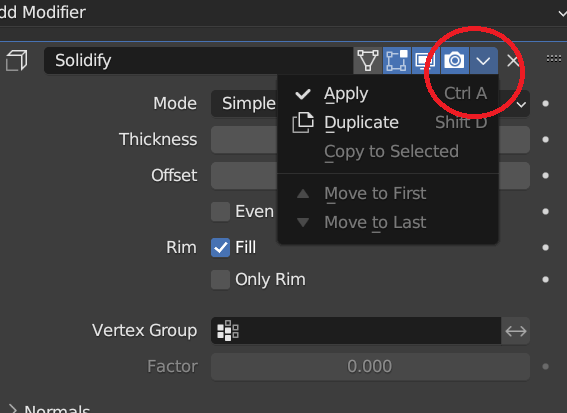
-
AuthorPosts
