
[ENDED] BC1-1801 – January Class Homepage – Getting Started with 3D Modeling & Blender
Forum Archive › [ENDED] BC1-1801 – January Class Homepage – Getting Started with 3D Modeling & Blender
- This topic has 662 replies, 53 voices, and was last updated 8 years, 7 months ago by
LJ Simpson.
-
AuthorPosts
-
January 14, 2018 at 10:08 pm #32565
Wow! That’s amazing.
January 14, 2018 at 10:10 pm #32566Creepy. I think I’ll use speakphone from now on. lol
January 14, 2018 at 10:21 pm #32567Ugh the flu claimed my wife this weekend. Sorry to hear you had the same this week, Scott. Thanks for powering through and submitting as well as still being so active in the thread 🙇🏻
The table looks great. Not much to say – just a thumbs up!
The chair looks like it gave you some trouble indeed. I hope this crit doesn’t come across like kicking you when you’re down, but the wireframe appears overly dense for what the shape is. Usually when the base mesh is that dense, it makes the modelers job much harder. Which is the impression I get from the images.
Bummer to hear you had so much trouble with the curve modifier. I’m not really sure how you were using the curve to accomplish the back spokes… 🤔 Maybe drop a link to your .blend and I’ll take a look?
The candle and gem pouch look good though they too are on the high-poly-count side. Did you apply a subsurf?
PLEASE don’t be discouraged with a B grade. You clearly know your way around the modeling tools. Though I feel there’s some room for improvement – perhaps just a symptom of your less-than-ideal week – you still accomplished the assignment!
January 14, 2018 at 10:42 pm #32568BC1-1801 Week 2 Homework Submission
Unfortunately I didn’t have the time I would have like to put towards homework this week but I did watched the live stream again and follow along and complete the wheel and mug model. I also watch the recommended videos and completed the basic shapes assignment but struggled with the wheel when trying to add the rim and tread on my own. Which means I will have to spend more time in this area when I can. So here’s the stream examples I completed. The basic shapes from the first recommend videos.
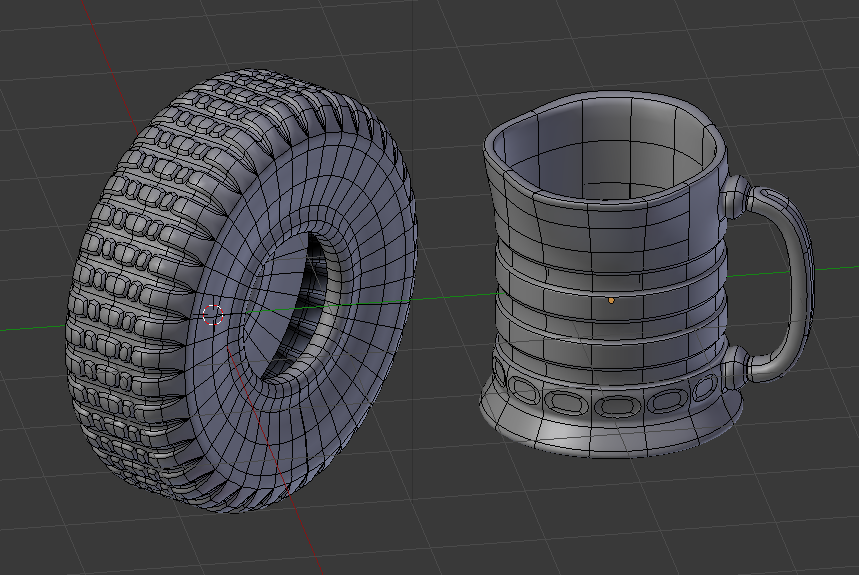
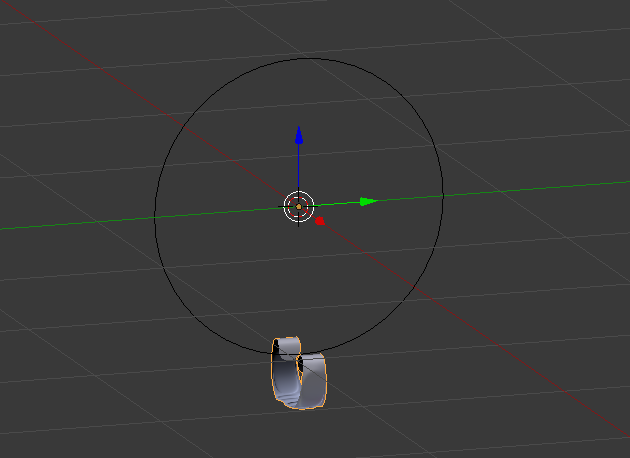
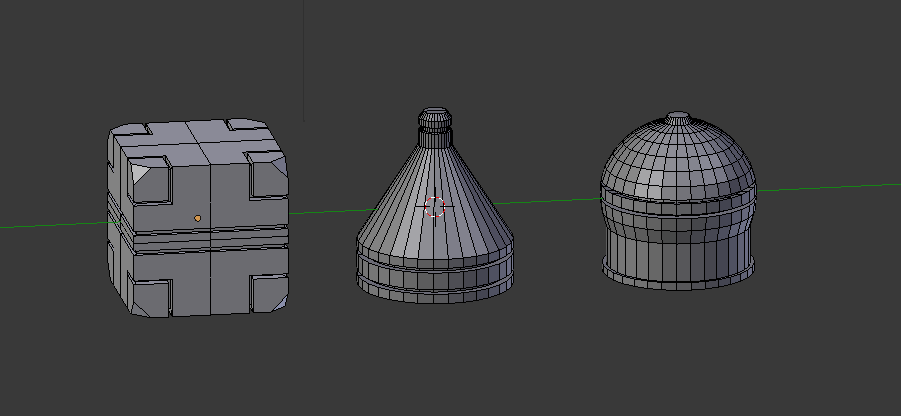 Lastly, I don’t know how this happened but when I started the wheel exercise and used the array modifier, for some reason my original object kept appearing at the bottom of the array making it a little tricky to work with. Example below.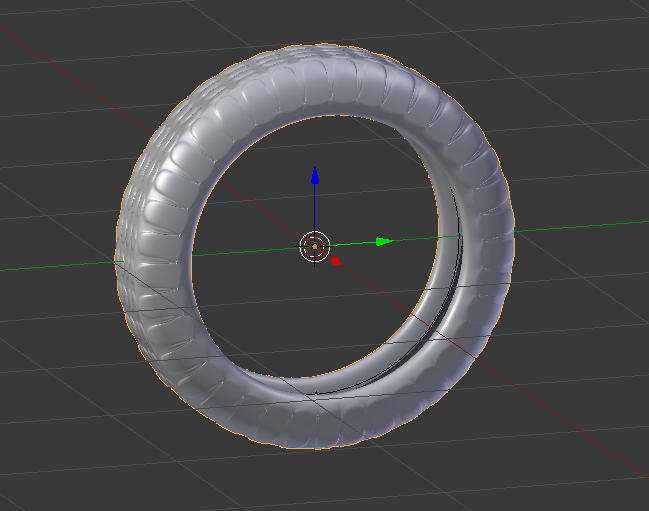
 January 15, 2018 at 2:19 am #32569
BC1-1801 Week 2 Homework Submission Pt 2

One of the things that I struggled with this week was deciding what to work on… That fit within the lessons of this week. Here, I went with a shield, something that I needed for one of my projects I’m working on anyway. This one wasn’t too hard, and may go in and add a rim going around the shield, but this is at least the basics of it. For the rivets on the back, I didn’t do a lot of modeling because they’re going to be tiny and hidden, and rarely seen up close anyway, so they’re just relatively basic shapes, but it was a detail that at least needed to be present. the straps and the shield design itself were essentially created from a cube using the techniques from this week.
January 15, 2018 at 2:55 am #32570BC1-1801 Week 2 Homework Submission Pt 3

I put this table separate from the other because this one I felt I wanted to give a little more explanation on. I didn’t want to do a basic table, so part of the challenge was finding something worthy of what I know I can do, but at the same time wasn’t one I’d already modeled before.
One thing I often hear Kent talk about (and am surprised he hasn’t said anything about this time around) is the importance of references. For this one, I searched a number of varieties of tables until I found one I liked. Then, I used one of my handiest 3D modeling tools — a tape measure (which measures both imperial and metric). Since I didn’t have the dimensions on the one I wanted to model, I took measurements from one I have (and have actually used as reference on a previous project) to get an idea of how big I should make it.
Here’s where another great tip comes from, particularly if you’re doing a room. Whenever possible, model to scale! In the Properties Panel on the Scene tab (The third one that looks like it has 3 objects on it, between the one that looks like two sheets of paper and the world one), you can set the units to Blender units, Metric Units, or Imperial. What’s handy is if you have it set to either Metric or Imperial, you can enter in the measurement in ANY metric or imperial unit, and if it’s not in the base unit you are using, it will convert it for you! I typically like to model in metric (for conversion reasons), but the important thing is that you have some kind of units set.
That’s where the wireframe box comes in. That is what gave me the size for the table, so I knew how big to make it. For the rest, I took educated guesses on sizes, but I would have measured something similar. For example, The top part of the table looked like a reasonably similar thickness of my desk, so used a measurement of the thickness of my desk and figured the main pieces of the rest were based off of a 4in x 4in, a 1in x 2in, and a 1in x 4 in piece of wood, and made the lengths of them fit the spaces I needed filled.
The leg placements were easy with a mirror modifier in X and Y using the table top as the mirror object. Same with the side pieces and braces, but just on one of those two axis. To get the detail on the long panel, I used an array and a mirror. (And beveling and insets to get the details).
As for the leg shape, that was the most interesting to figure out (other than the detailing of the array), and probably the least easy to see what I did. For the legs, I started with a 12 vert, 2″ radius cylinder. (I knew I was going to want 4 corners with 2 holding edges, so three at each corner x 4 corners = 12, and for a 4×4, 2xRadius = 4, so I needed a 2 in radius to get a 4″ diameter). Next, I marked off a 4″ section from the bottom (because it looked to be about the same length for that part as the width of the leg) and a 6″ section from the top (because it looked a little longer). Then, I just added loop cuts and scaling at various points to get the shape of the middle part with an occasional bevel to make some of the edges have a bit more room to work with at that point (and a little scaling on the Z here and there).
Once the design on the middle, round part was set, it was just a matter of taking an edge from the top and bottom part and sliding them over to the corner piece to form a more square shape, but keep the round of the middle part. Only after doing all of that did I add in the holding edges for the square parts, but just on the tops and bottoms, not along the sides, since I’d already done that with the edge slide.
All of this was done in pieces, rather than a single object, because sometimes (such as in this case), it’s easier to figure out just what you need to do to model something taking cues from the real world because it would be made in pieces, and it can be easier to figure out the shapes of those pieces individually and combine them into the whole.
And if you get nothing else from this, remember, Use references (both images and physical). Model to scale when possible. And play around. Sometimes it take a bit to come up with the solution that works.
January 15, 2018 at 2:59 am #32571And in typing that explanation, I remembered that I’d forgotten one mirror modifier, which, because of the angle, you wouldn’t have known it was missing 😀 But that has been fixed now.
January 15, 2018 at 3:30 am #32572I like that chocolate… 😀
Nice work… keep it up!
January 15, 2018 at 4:17 am #32573Kent, maybe you can help me…
Does Blender has some similar possibilities in package design like Cinema 4D?
January 15, 2018 at 4:21 am #32574One last one…

In some ways, this one might appear to be closer to last weeks, but there’s a number of things I did on this one that actually took advantage of things from this week’s lessons. For example, the loincloth, the band around the helmet, and the wristbands all use modifiers for their thickness. And there’s a bit of using a subsurf modifier, applying it, and extruding pieces from the result.
This is actually one of the characters from the clay modeling book I had mentioned previously. As you can see, most of the shapes are very simple, though a few take a little tweaking.
Everything I did in creating this character is pretty much how I did a previs for a scene idea I wanted to test (though I used a few more primitives within the shapes on that particular one). I share this just to show that even characters are just taking what you’ve already learned and breaking them into small pieces.
Also, particularly for creatures, I think this can be just as effective way to create a basemesh… something that I believe is in this coming week’s lessons… to use for sculpting, and can sometimes get you closer to the shape you want than using the skin modifier.
(This character is from the Modeling Clay: Fantasy Characters book, but done using “digital” clay.)
January 15, 2018 at 9:24 am #32575Looks like you’ve been accomplishing all sorts of exercises. lol. And all look very nice. The mug appears to have a ‘lattice modifier’ effect, no?
January 15, 2018 at 10:38 am #32576@alexsr Thanks for the submission. Trying to figure out what the object is..a small compost canister? Anyhoo, it’s a good shape but you could accomplish this shape with significantly less geometry. With that in mind, it easily accomplishes the assignment with a B 👌
As for the split along the seam, adding a holding edge to the bottom would be a solution, like this:

And here’s how I would go about generating a cross-hair-based circular mesh (as opposed to a triangle fan circular mesh):
 January 15, 2018 at 10:50 am #32577
The smartphone vortex! Creeeepy @pffsfs is right! Tight fit for the rest of the bod. lol
January 15, 2018 at 10:53 am #32578Woah, busting out the grimy textures! Nice job @mathias67. The shape is defined well and the topology is even and minimal. Solid model: Grade A+ stuff.
January 15, 2018 at 10:57 am #32579Angry Birds…the novel?
Looking good, Scott! The topology is a good balance between even and minimal. Nice details in the twine wrapped around the Y-shape. This is an A grade 👍
-
AuthorPosts


- The topic ‘[ENDED] BC1-1801 – January Class Homepage – Getting Started with 3D Modeling & Blender’ is closed to new replies.