
Dwayne Savage

Forum Replies Created
-
AuthorPosts
-
Since it’s done with primitives( if I remember correctly) just add 2 toruses make them thin. That will be the 3 cross lines. Then use several cylinders for the up and down lines. Then use a black material. Later when you start working with editing meshes you will figure out the better solution of loop cuts and inset with multiple materials. You can also replace it with grease pencil when you get to that course. So many options.
August 27, 2026 at 11:41 am in reply to: Product Viz – Labels and Lighting – Feedback, recommendations? #133721I like the first one better and think it’s great. I can see the flatness that you are talking about. I think if you did some color adjustment on the second one you can get the lighter look with the depth of the second one. You can do it in the compositor, but I’d recommend trying with color management in the properties editor on the render tab first. You can adjust this after you render and see the results in the render results (Image Editor). If memory serves me right, I’m thinking a slight gamma adjustment and switch to high or very high contrast. Also, this might be one of those times where filmic would work better than AGX.
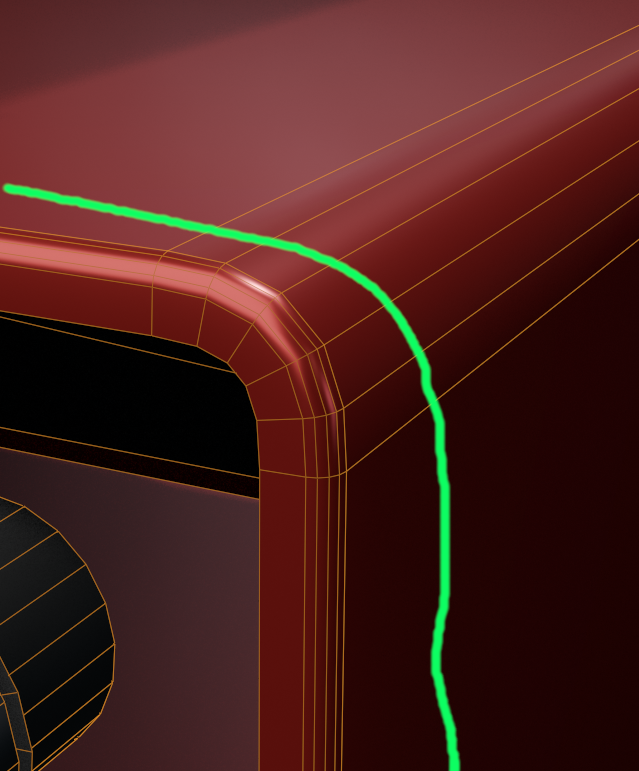
August 26, 2026 at 9:48 pm in reply to: Beveling an Edge Through Another Beveled Edge with Multiple Segments #133715It’s the normal calculation. You can reduce it by adding an edge loop and then slide it until has a smoother transition. you could also manually adjust the normals but that is hard then it sounds. Also make sure you don’t have any flipped faces.
To build a library. Save the blend file in the asset library folder. In the blend file you will need to mark what you want as an asset. This can be done in outliner thru right click menu. You can also do it thru the name. For example for a material goto the material tab of properties editor or the shading editor. Were the material name is you can right click and mark as asset. You can use name field to mark most things as assets. Such as animations, objects, node groups, etc
In outliner you can select multiple objects, collection or materials and mark them as assets . Note: you can use the filter (funnel icon) to show only materials. This makes it easier to mark a large group of assets.
Blender has an asset manager build in. You can add additional asset library(folders) thru preferences (Ctrl+comma or F4->preferences or edit menu->preferences) in 4.5 it’s under files section. In 5.2 it’s under asset library section. You can access the library by changing an editor window (like the timeline editor in layout workspace) to the East browser editor. The hotkey is shift+F1 (usually twice. First time usually is the file browser.) note: the mouse cursor needs to be over the editor area you want to change.
August 25, 2026 at 4:28 pm in reply to: Migrating to our new platform update – September 1st #133688Uuu.mmmmm cookies
August 25, 2026 at 1:29 pm in reply to: Migrating to our new platform update – September 1st #133686Thanks for the update. Excited to see the new home.
I could be wrong, but I believe you will get an e-mail that will give a link to setup your password when it goes live.
Yeah, that happens when you don’t clean the barrel,😆😆 great animation.
Just fair warning: P2 Design’s animation course can be difficult to go through at the beginning, but in the long run it’s nice that he shows all the little adjustments and tweaking, because when I started animating I realized that it’s not going to be perfect in just a few passes. Even pros have to continuously make adjustments. Funny thing is I started learning Blender as a video editor, because that’s what my friend was using it for. Later I started learning the other features of Blender.
I’m not a professional, but I have worked with some talented people in the independent film scene here in Dallas, Texas USA. Rigging, TD, and video editing are my main areas of focus. In addition to CGCookie I’d recommend Humane Rigging:
https://youtube.com/playlist?list=PLE211C8C41F1AFBAB&si=g8HjBqFAlK9AqZsP
Even though it’s a very old version of Blender the information about rigging still applies. As for a payed course, I like the one Wayne recommended in one of his videos. Don’t remember if it was one of the course or on YouTube.
Oops. Well I learned something new. Thanks for the correction and info @spikeyxxx
Eevee was rewritten and now has the option to turn on raytracing and doesn’t have to fake AO.
I think it’s just a limitation of the variable. {Float in this case) Basically it breaks down to something like this: First bit is the sign. (Negative or positive) Bits 2 through 12 determine the exponent. Bits 13 through 64 determine the number. Then there is a precision level of the floating point processor built in the CPU.
Then it might be easier to do a shuttle piece. Basically, a mesh object that has a follow path constraint on it. There are 2 things that need to be check. Something like follow and curve radius. Sorry, I don’t remember the exact wording. By checking those the mesh will deform around the curves of the curve. use it to create the light and tail. then you can parent the cylinder to the shuttle piece. I’d recommend checking fixed position as well. That allows you to keyframe the constraints offset. 0 will be the start of the curve and 1 will be the end of the curve. If you don’t check this it will use the animation path settings of the curve, which by default is 100 frames. 0 being the beginning of the curve and 100 being the end. You can still keyframe the constraint. If it doesn’t move, then you will need to click the animate path button. Note: I don’t know the technical term for this. I used it once to create an effect of data moving along a cable. We started calling it a shuttle piece, because without the textures it looked like a shuttle riding along the tube.
-
AuthorPosts
