
I WILL make it through the HUMAN course!
Forum Archive › I WILL make it through the HUMAN course!
- This topic has 68 replies, 3 voices, and was last updated 1 week, 2 days ago by
Grady Pruitt.
-
AuthorPosts
-
July 28, 2026 at 1:36 am #100592
Now that you mention it… after fixing the overhang, it does seem a bit “wide eyed”. Waiting on the skin specular variation render to run, but I’ll add that to the things to revisit 😀
July 29, 2026 at 4:09 pm #100593Going to circle around back to finish the skin (only have a couple of steps left to implement, plus tweaks), but skipped ahead to the shirt. Instead of the fully procedural method Kent used, I had a cotton cloth texture from Poly Haven that I used, modifying the color and adding a noise + AO to add a little dinginess. I don’t think I ever realized how much softness adding even a little fuzz to clothing would add, even if it’s subtle
 July 30, 2026 at 3:52 am #100594
Oh yes, that fuzz really works here!
A bit of nitpicking:
Something feels off about this texture and I don’t know what; maybe it’s the Scale (Texture too large), the Rotation (I know nothing about fabric, but I’d expect it to be rotated 90°, so it wouldn’t stretch vertically (from gravity) as much as horizontally. Not cloth science, but my imagination!), or something else. Anyway, you know how people sometimes say, that Texture looks Procedural? Well this one looks like an Image Texture (to me!).
But, what bothers me more, is that the cloth looks too thin, which should be easy enough to fix.
July 30, 2026 at 4:13 am #100595I’ll have to double check, but I think I may have forgotten to turn the solidfy on or something. I was having some issues with the particles only showing up on the inside, so I think I had turned it off.. As for the rotation… I think it’s right around the collar, but for the rest, looking at reference, I might have that wrong. After I get done reworking the skin I’ll look at that.
July 30, 2026 at 4:38 am #100596“I was having some issues with the particles only showing up on the inside”
I think that might be caused by so-called ‘Broken Quads’ produced by the Cloth sim. Try adding a Triangulate Modifier (default Method should be fine). That might fix it.
July 30, 2026 at 4:42 am #100597See: https://cgcookie.com/community/12388-human-course-hoodie-fuzz-bald-patches
The Images are ‘lost’, but still.
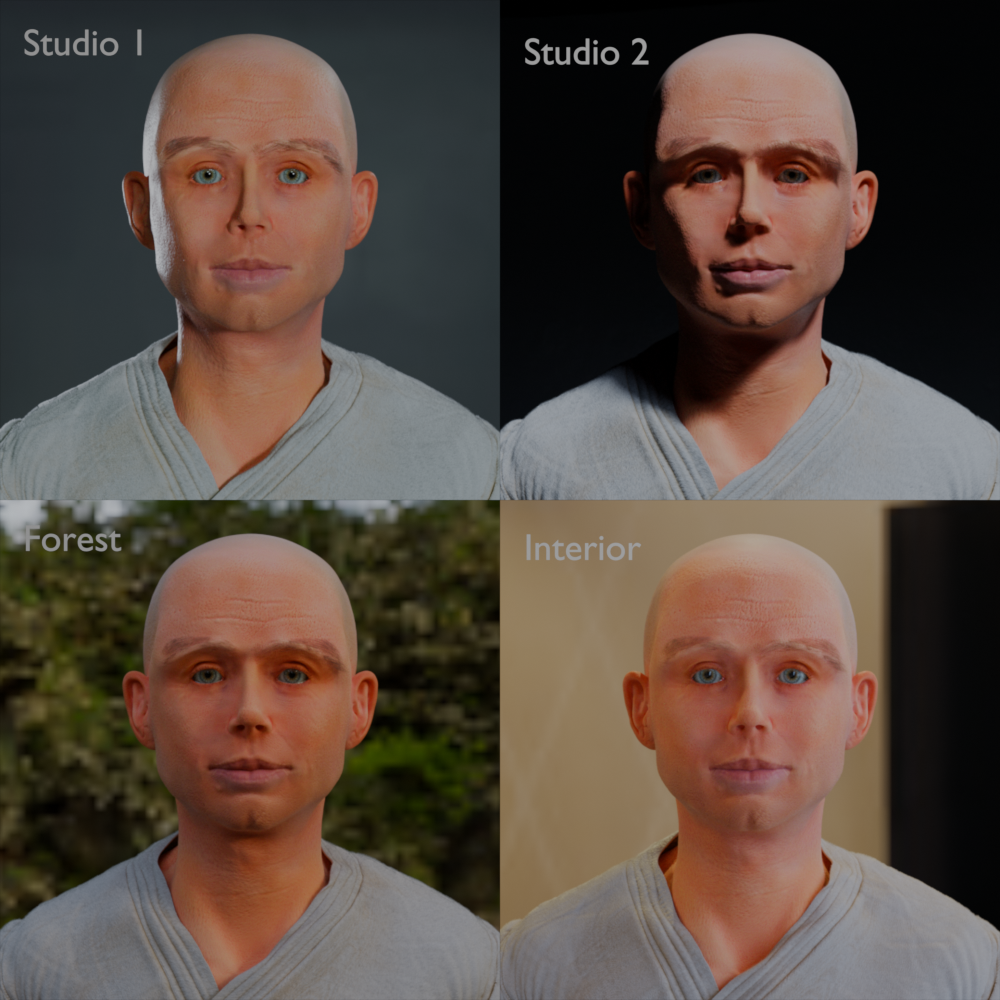
July 30, 2026 at 6:50 am #100598Not sure if how much of it is touching up the skin painting and how much of it is “reworking” the material, but for once, I’m feeling happy with how the skin is looking in different lighting. Eyebrows need work and not sure what’s causing the “pale” under the brow. Still need to finish the Zones of the Face and blemishes. I’ll probably touch on the eyebrows while working the hair. But coming along! (Overall, it feels less “pink” than my references, but doesn’t feel like “makeup” now.)
@spikeyxxx — turns out I did have the solidify turned off for render. I moved the particles back below it, and it rendered fine… so not sure what was going on earlier. Also, did rotate the UVs back to vertical and increased the scale value from the mapping node I was using for that.
 July 30, 2026 at 11:27 am #100599
Awesome!
Coming along nicely!
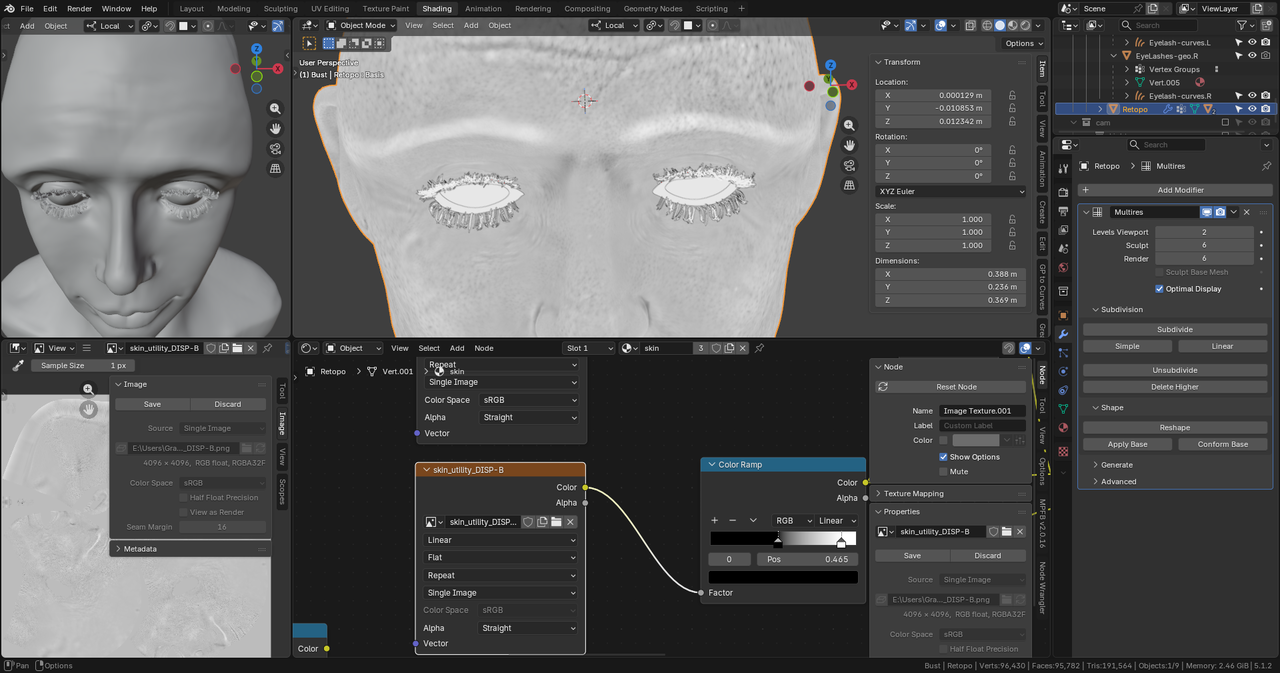
July 31, 2026 at 6:08 am #100600As I’m going through the HUMAN course and looking at my texture maps that we baked for displacement, I’m noticing that one of them has bright area over the brow. This is a map baked with render at full and viewport at 2 levels. (There’s also a bright area around the base, but that’s going to be under clothes and hidden.) One reason I’ve been trying to figure out what’s going on is that I’ve noticed particularly around the brow that the colors in the textures where we used the maps are off and this is the one thing that doesn’t quite seem like everything else.
When I looked at the difference in position at lvl 2 and lvl 6, I’m not seeing anything and there is pore detail there that’s picked up in other maps, but not sure why there’s bright area here. Any suggestions? Thanks!
 July 31, 2026 at 6:12 am #100601
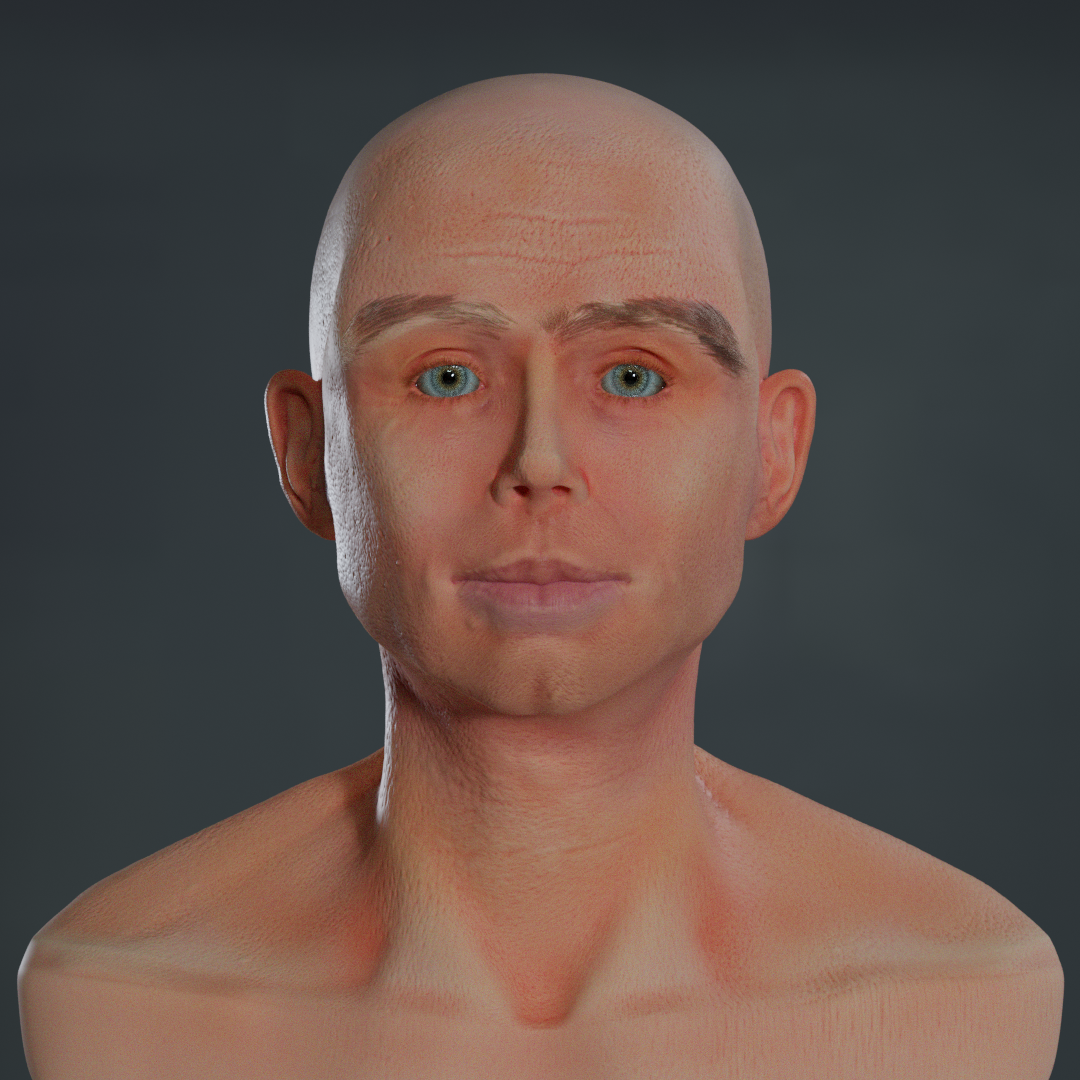
Also, tried playing around with the skin color map, playing around with desaturating the original and various mixes of both of those with a pink skin tone and landed on this, which feels more natural to me than the one from yesterday. (I was happy with that one, but felt it was still a little too saturated and not enough pink tones).
(In this , you can see under the eyebrows the discoloration I was talking about in the previous post.)
 July 31, 2026 at 6:46 am #100602
For those white areas, that means that the Sculpt is further away from the Viewport. At the moment, everything above, say 0.9 becomes 1 through your Colorramp. You could try lowering the Value at the right Flag. Or just moving it further to the right, but I guess, that might not be enough.
July 31, 2026 at 3:03 pm #100603Viewport is on flat lighting with object color in Texture mode, so I’m pretty sure this is in the bake itself, not as a result of the color ramp.
July 31, 2026 at 11:51 pm #100604It’s not a result of the Color Ramp, but something you can ‘fix’ with the Color Ramp; that’s what the Color Ramp is for here, to adjust the Bake result.
Don’t get me wrong, the Bake is correct. But shows more than you want.
July 31, 2026 at 11:59 pm #100605At least that’s as far as I can come up with, from screenshots alone.
August 1, 2026 at 12:47 am #100606Problem is that area is so much brighter than everything else that trying to fix it with the color ramp is really hard because you’re crushing the others so much or flattening out the overall color just to try to make that less bright.
I’m tempted to just paint on the mask in that area, but the biggest thing I was wondering is if I did something wrong with the bake that caused it in the first place.
-
AuthorPosts


- The topic ‘I WILL make it through the HUMAN course!’ is closed to new replies.