
[ENDED] BC3-1806 – June 2018 Class Homepage – Vehicle Modeling with Blender
Forum Archive › [ENDED] BC3-1806 – June 2018 Class Homepage – Vehicle Modeling with Blender
- This topic has 1,276 replies, 54 voices, and was last updated 7 years, 8 months ago by
Paul Haynes.
-
AuthorPosts
-
June 8, 2018 at 8:39 am #35311
@dostovel That’s been my experience so far as well. I’m currently on my third start-from-scratch iteration. Hope this one doesn’t fall apart as easily…
June 8, 2018 at 8:51 am #35312@csehz No pressure, huh? 🙂 (I’m Kate XP Monster and I’ve come to eat your delicious XPs, bwahaha!)
Now would be a good time to stop being terrible at car modelling…
June 8, 2018 at 8:52 am #35313@shiennar Yep, same here, I’m in my fourth one. Trying to get an optimum base mesh, trying to see which workflow gets it up the ground faster and better. I really like modeling, when I start extruding and moving vertices and things begin to take shape, is hard to get up the chair cuz you’re so hooked in having fun…. then you start to realize it’s not so healthy to be sitting all day and then eye fatigue starts and you also realize you haven’t eaten in a while.
June 8, 2018 at 11:53 am #35314HOMEWORK SUBMISSIONS WEEK 1
Here we go, Here’s my little airplane for today
https://sketchfab.com/models/424dd4b522be4c4580d7fd666e8a60d8
And My primitive kitchen
https://sketchfab.com/models/de7b32d359084d53ae2825e268e82a2c
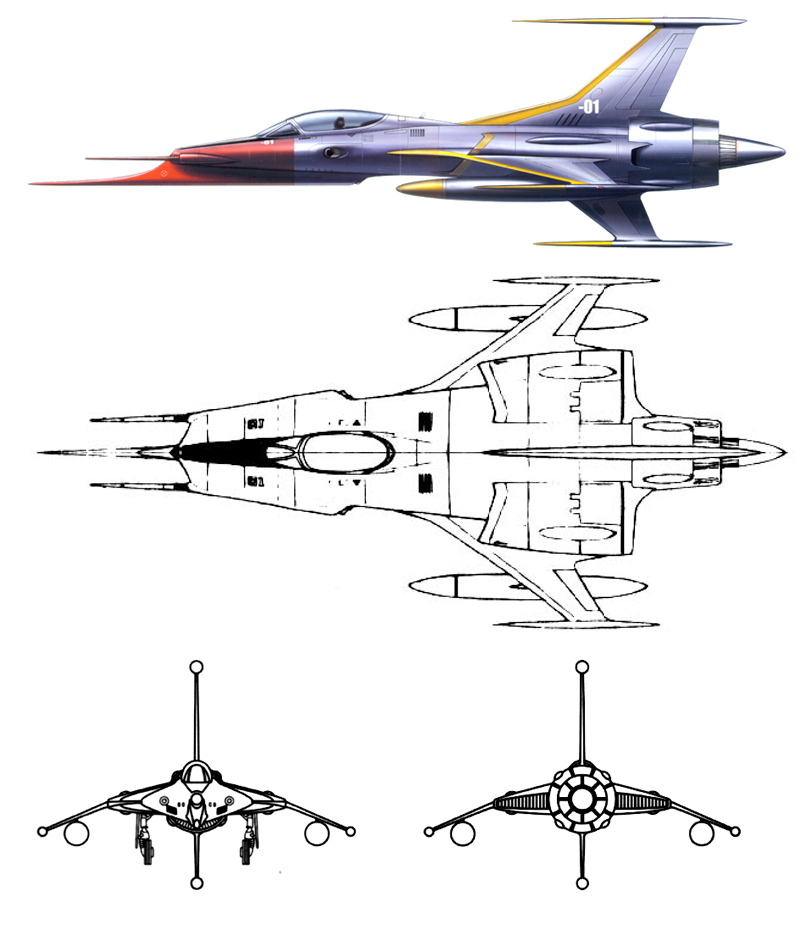
And of course most importantly the object i plan to model the Cosmo Type Zero
http://www.shipschematics.net/yamato/images/edf/fighter_cosmozero.jpg
 June 8, 2018 at 1:09 pm #35315
HOMEWORK FOR WEEK 1:
My airplane (with an interior): https://sketchfab.com/models/8fa99c66092f4402927d7ed8720f32d6
My primitives (It’s boring, I know, but at least it’s better than my last one!): https://sketchfab.com/models/013ad74537754b8890ed0ca871d5b5cf
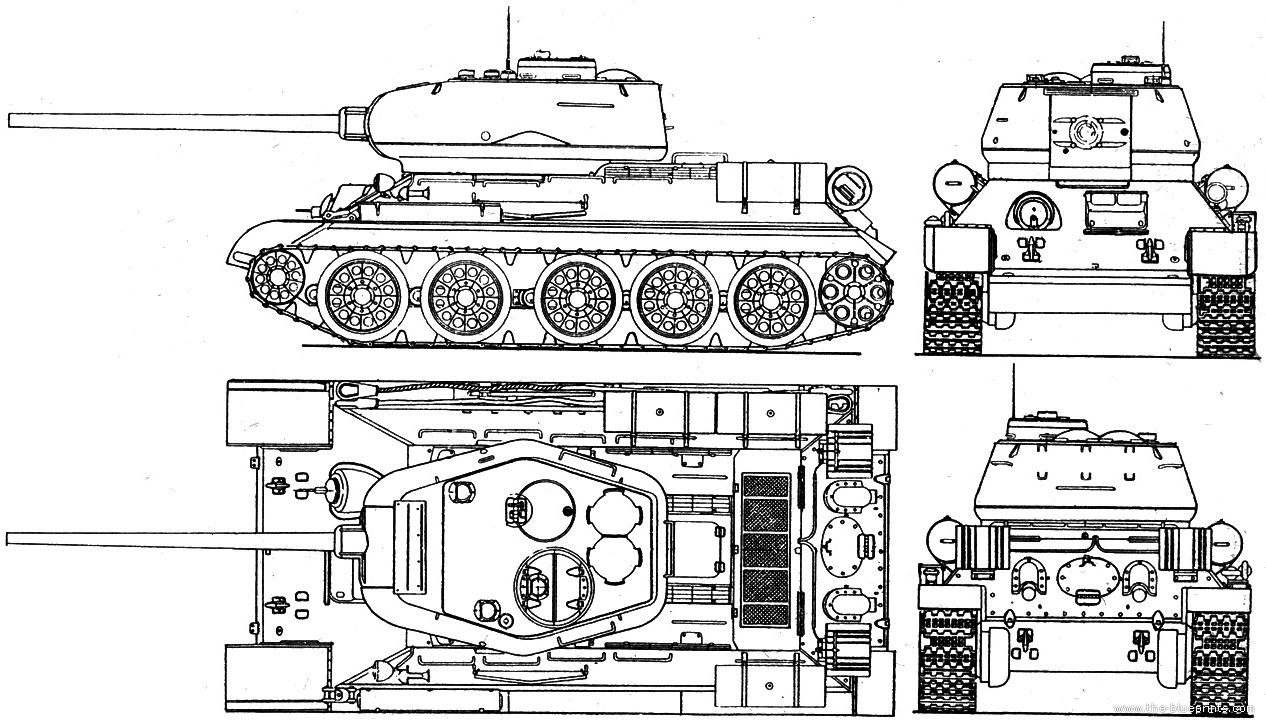
My blueprints (I will take artistic liberties, as I intent my tank to be futuristic):
My reference for the interior:
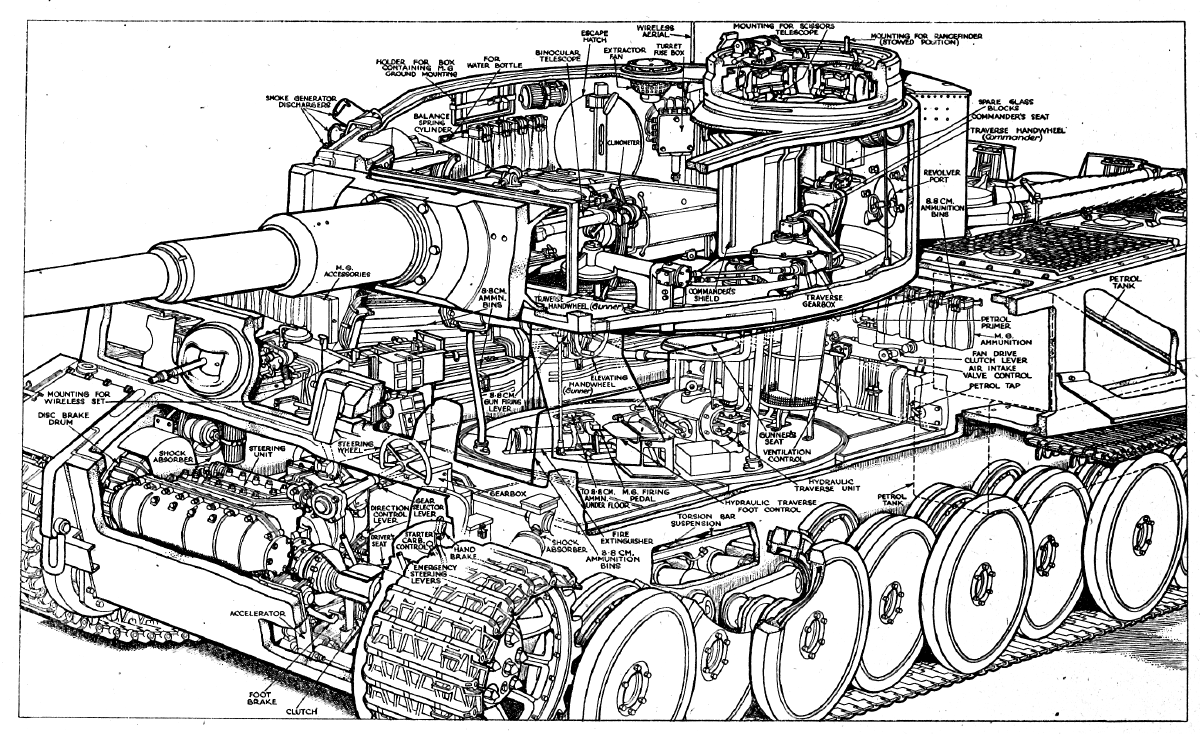
I will use other interior reference if I can find it. Do you know where I can find reference for the hover thrusters?
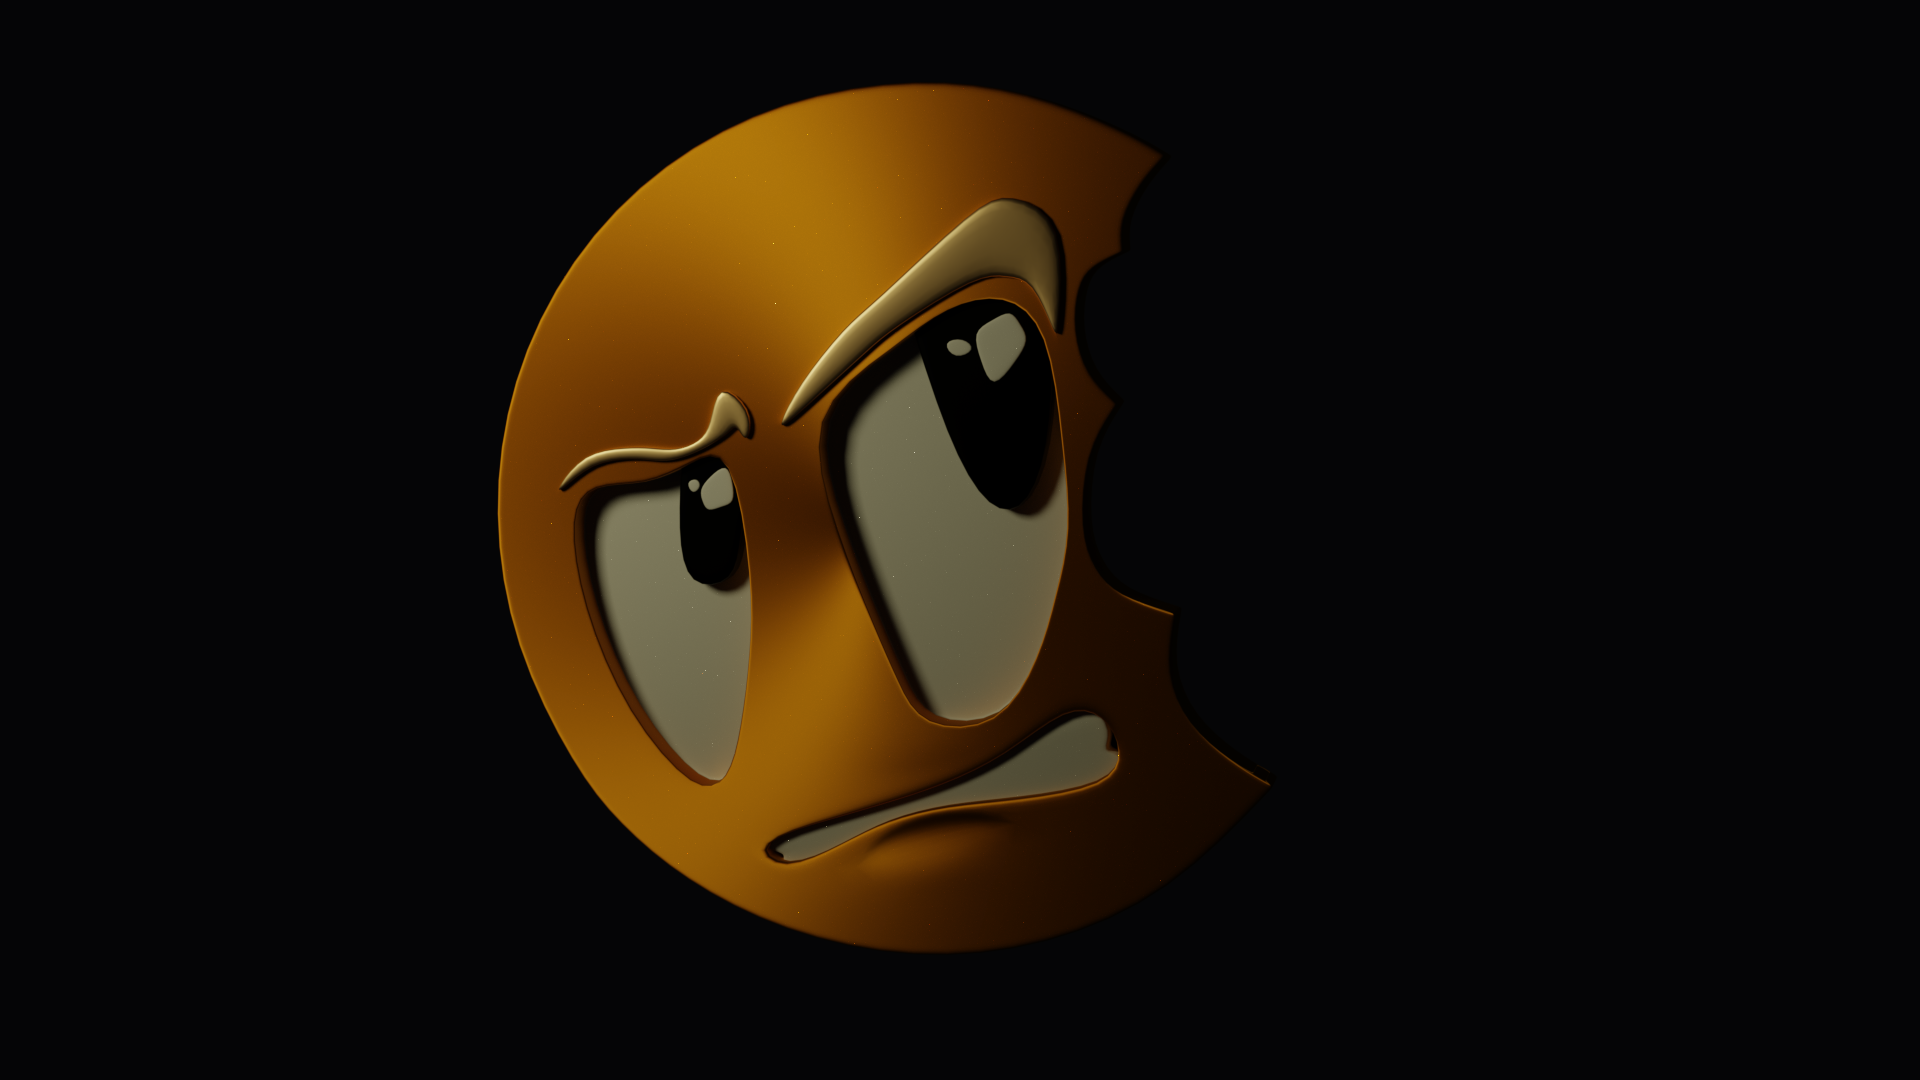
June 8, 2018 at 1:42 pm #35316Whilst not strictly homework I managed to finish the CG Cookie Logo too, which was a good way to practice some edge modeling (which @dostovel has pointed out to be incredibly useful when it comes to vehicles). If some of you haven’t tried edge modeling yet definitely give this a try, it could really help!
 June 8, 2018 at 1:58 pm #35317
[HOMEWORK SUBMISSION – WEEK 1]
really linking all the blueprints that ive seen so far, and the planes 🙂
going to be a really interesting month as everyones art progressesHeres my submissions for this week,
My plane
and heres my primitive Abomonation
My Primitive Wardrobe
https://sketchfab.com/models/5dc1f7b292544b7da9a998149307e0e6
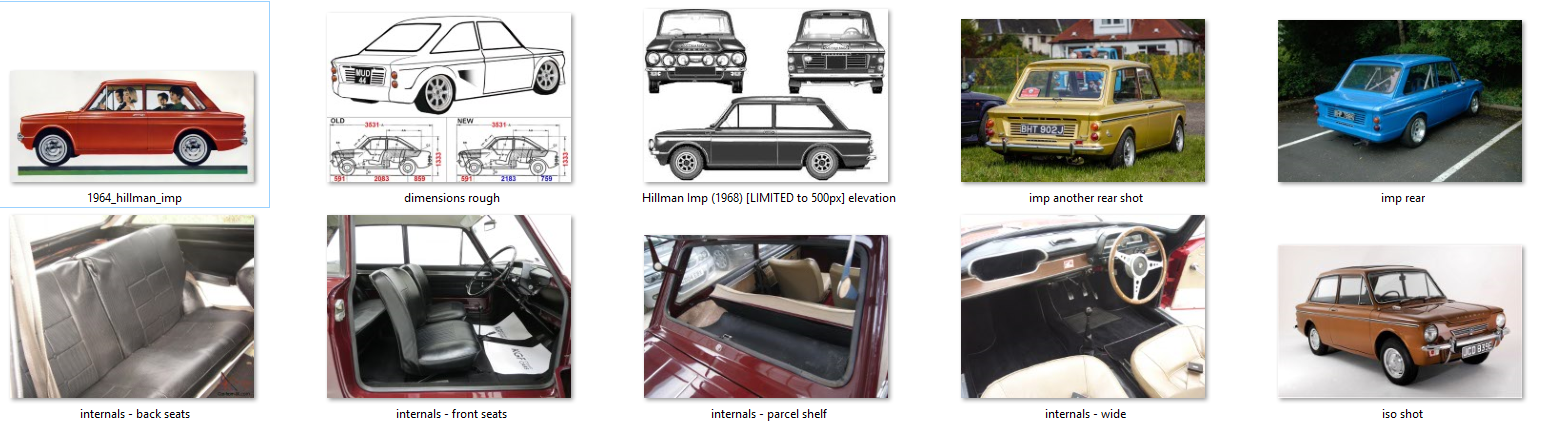
and for my project, ive gone for an old skool ‘Hillman Imp’ car. mainly as its the first car i learned to drive in during the 80s as thats what my old man had 🙂
 June 8, 2018 at 2:38 pm #35318
HOMEWORK SUBMISSIONS WEEK 1
Hello,
here my recent submissions.
https://cgcookie.com/u/lollito_larkham/projects/aeroplane-a59765b2-8ccb-42f8-9801-277d0326e683https://cgcookie.com/exercise_submissions/14015
I prepared my blueprints in photoshop, to align verticaly and horizontaly and export layer as images,
I prepared my scene in blender, at the right size.
I collected references also.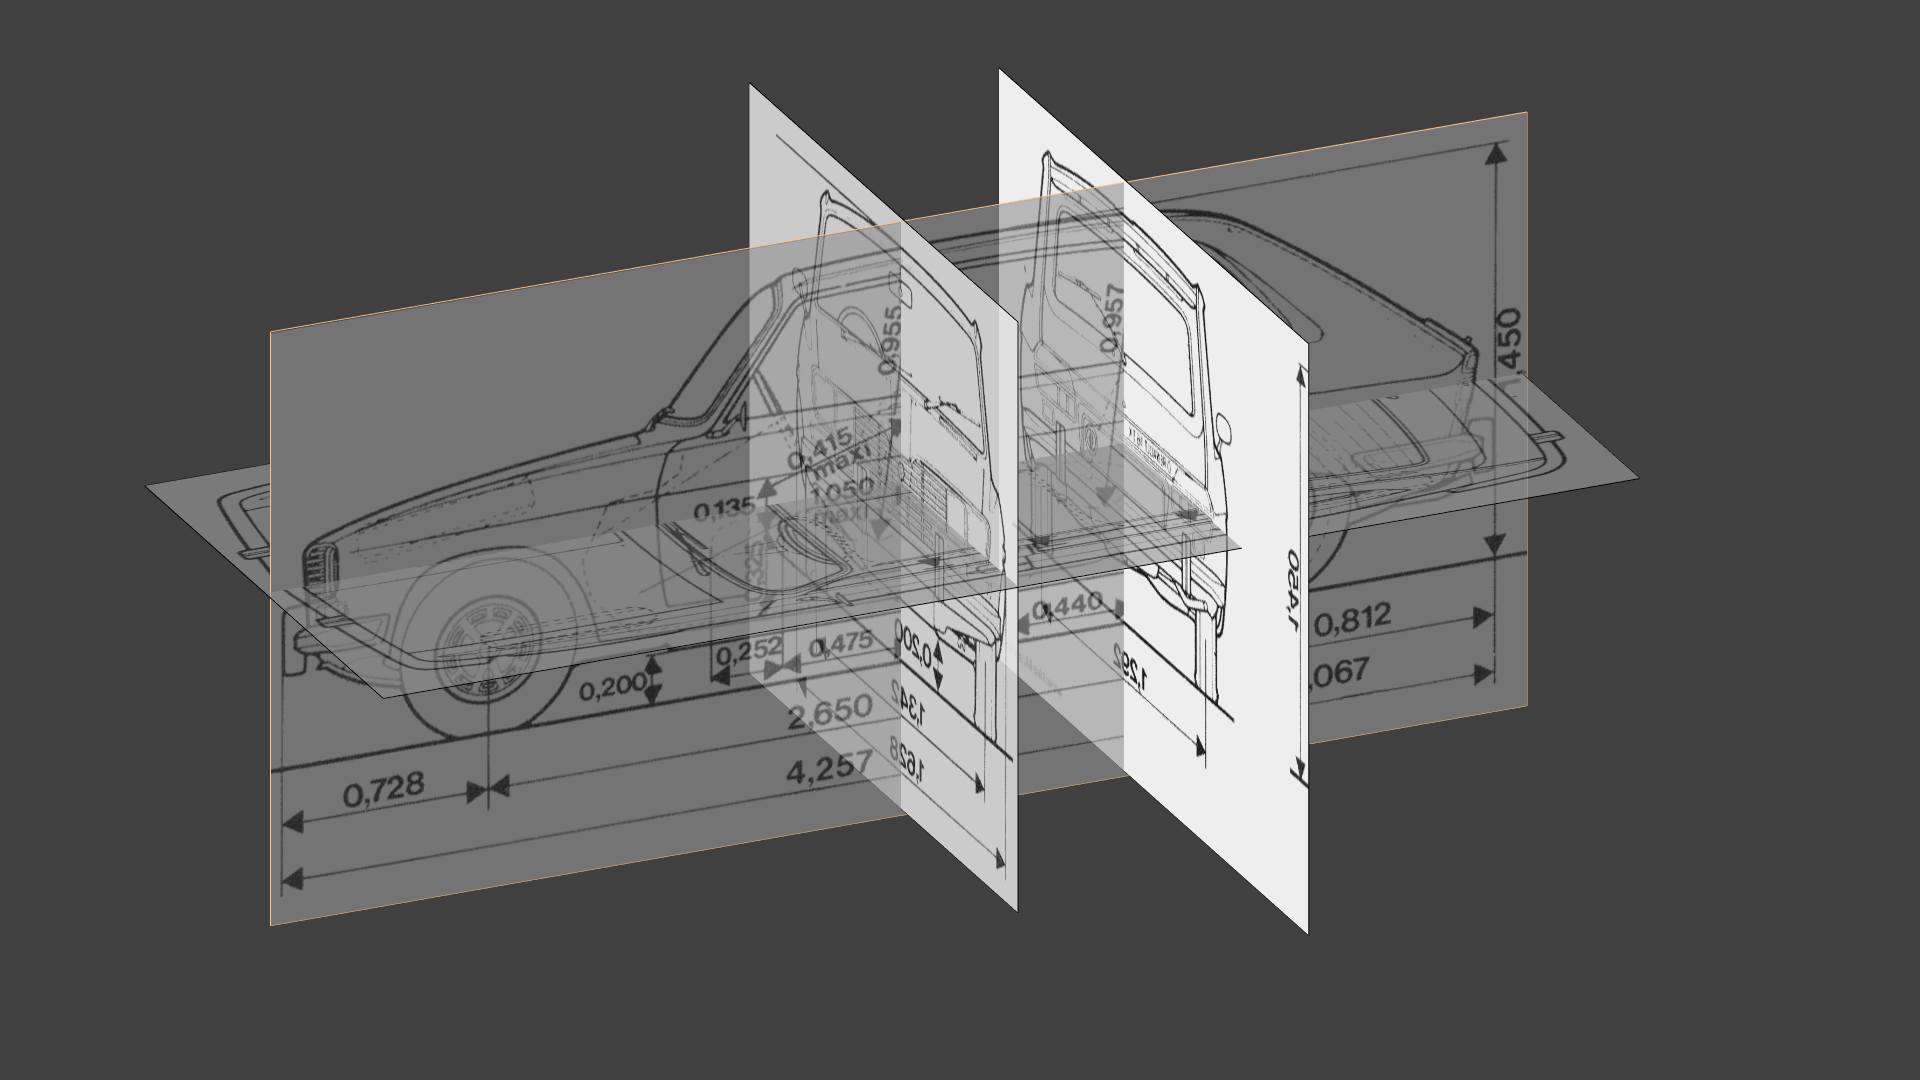

I will model the base by edge modeling, then add separate pieces, probably with nurbs modeling, or at least have a try.
I’m mostly an edge modeler instead of box modeler.
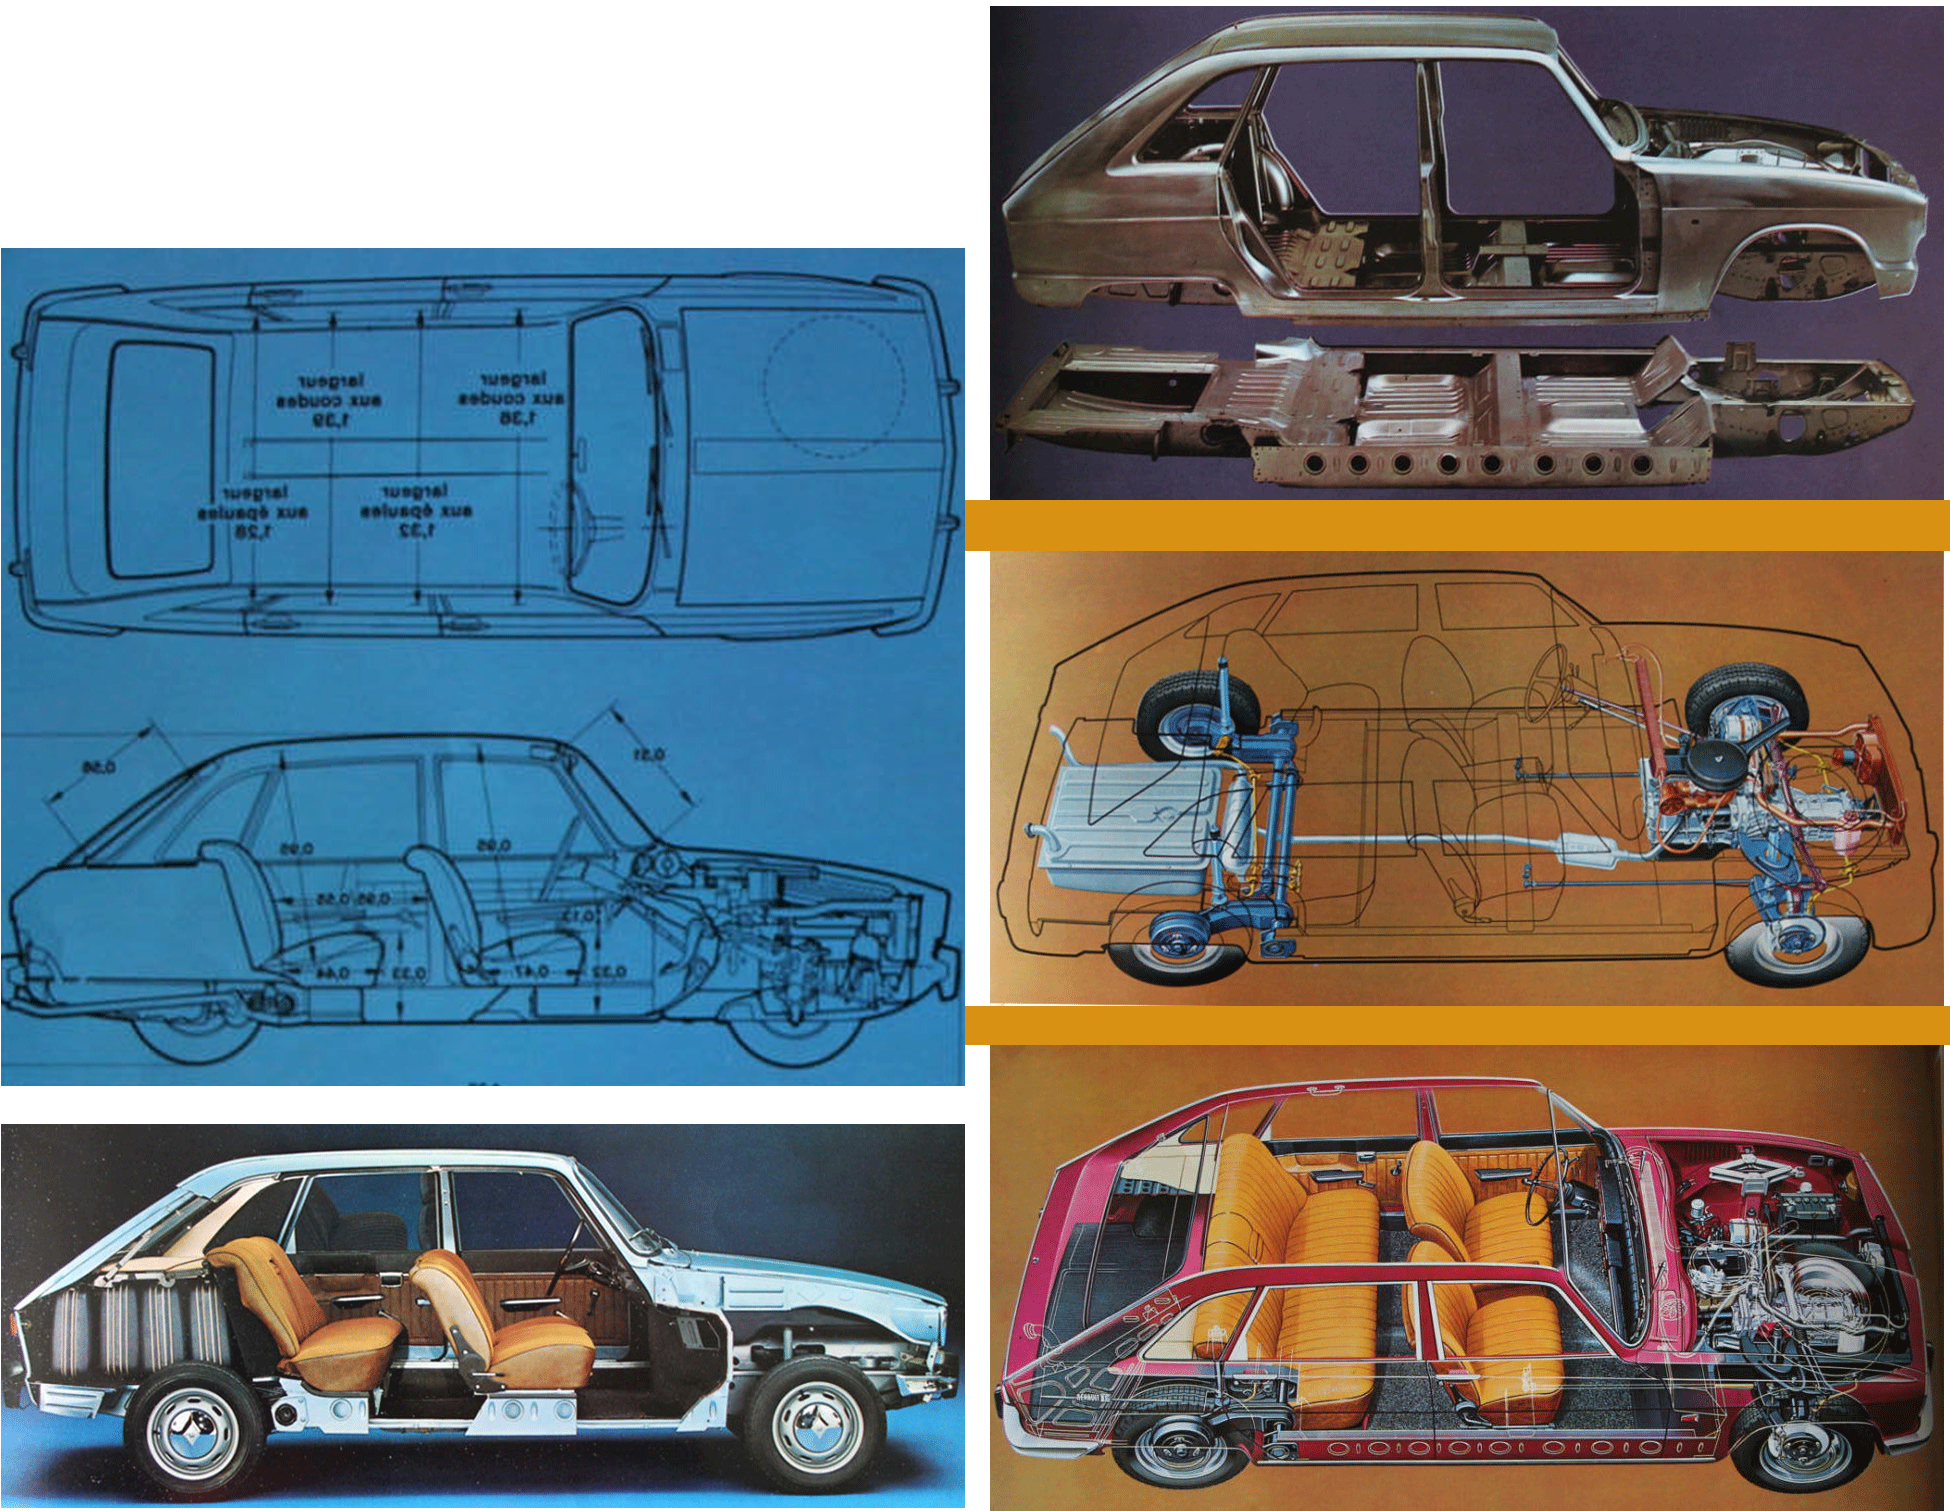
Before all, i like to have a first round of collect and watching references, before tweaking first vertices.The picture below shows the two parts assembled, and at the bottom it is the lower part alone (upper right image).
 June 8, 2018 at 3:23 pm #35319
Homework Submission Week 1
Simple airplane: https://skfb.ly/6zD6q
Model with Primitives: https://cgcookie.com/exercise_submissions/14440 (Model removed)
1991 Range Rover.
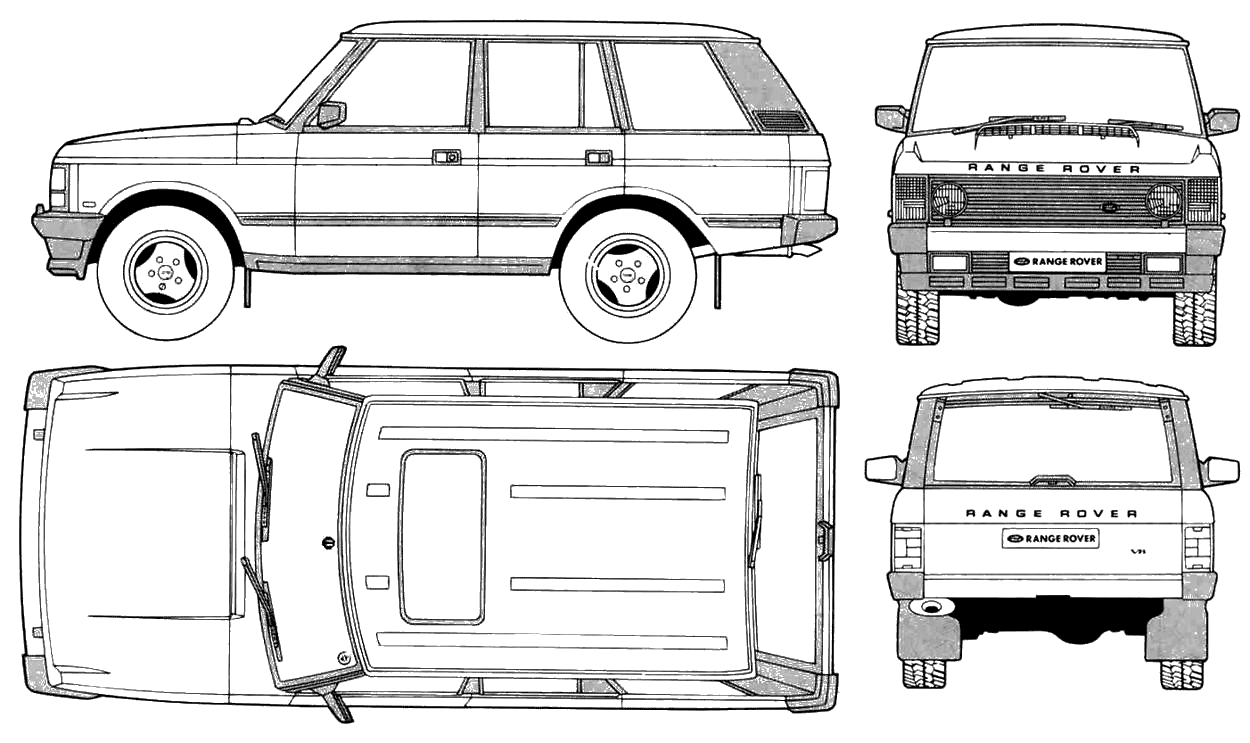
I just searched google not sure if I had to obtain it from the search results of CC.
June 8, 2018 at 3:44 pm #35320Think I need to practice quite a bit more before attempting to model the exterior because I’m getting stumped already, just on the bonnet/hood. Upon closer inspection my blueprints seem slightly skewed too but that’s possibly common and not a problem. Not quite sure where to go from here but I guess my best bet would be one of the vehicle tutorials.
Just to be certain though is a blueprint being crookedly drawn aka not perfectly symmetrical gonna be a problem? Or should I find another?
‘Cause I’ll be honest, I haven’t the faintest idea as to where I should start, which parts should be separate, how to deal with multiple angles of the blueprints. Maybe I bit off more than I can chew, but hopefully the next stream will give me an idea.
June 8, 2018 at 4:45 pm #35321@thecabbagedetective
Hello, if deformations are too much prononced in the blueprint, it can be problematic.
You can always taking acount of only one side (right or left) to establish your model, and ignoring the other side of mirror.
But sometimes it’s not enough if deformations are too big. You have to adapt, find references or change blueprint.
I always check my blueprints inside photoshop before importing in blender, and also make my own if needed and if i got lot of references. As you can see above; i took different references, sized them and aligned them in photoshop and assembled in illustrator into one image.
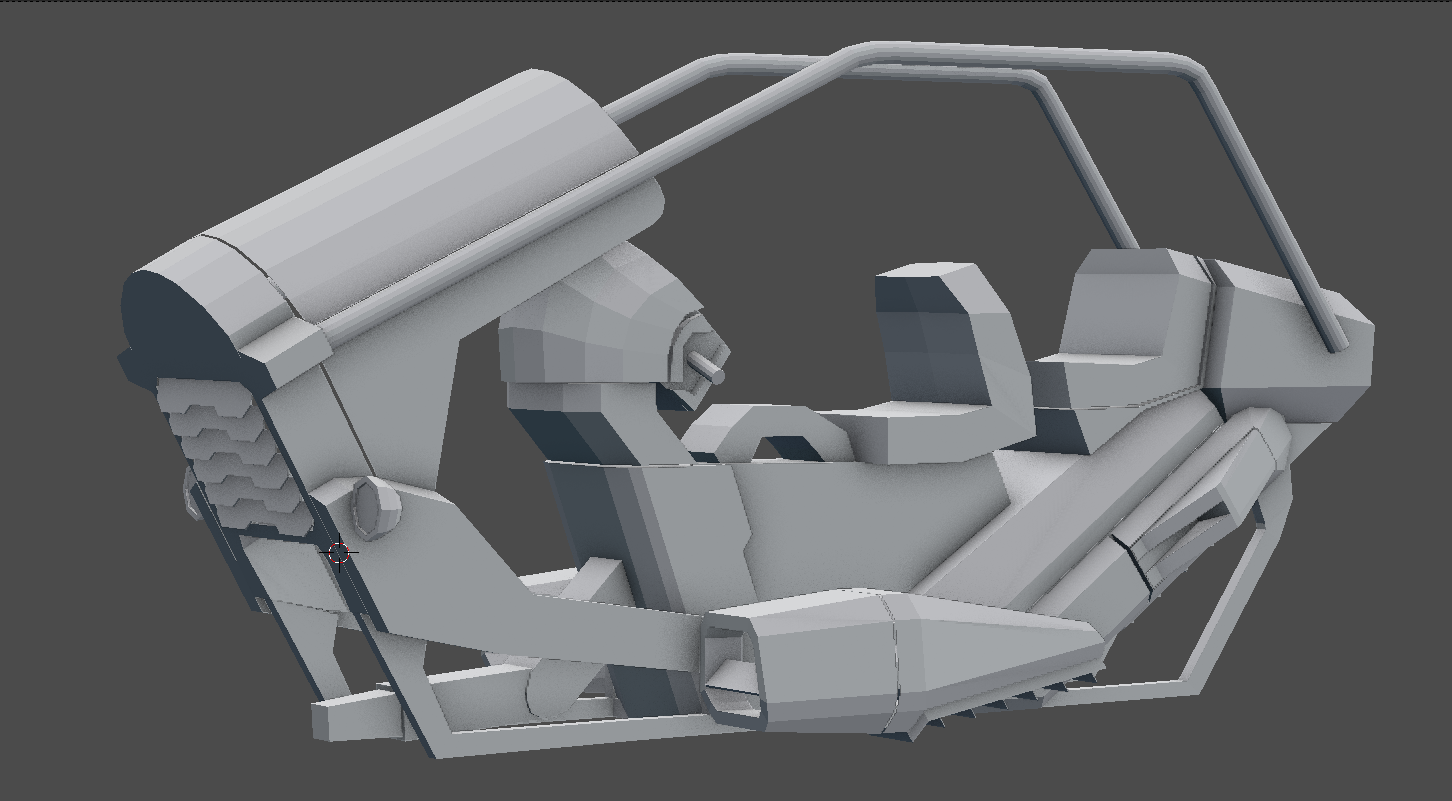
I used the deformation tool in photoshop to match the wireframe design reference with the one just under (éclaté), using layer transparency, because the scans deformed the images if you don’t take care.June 9, 2018 at 2:02 pm #35322Hey guys, just finished my rough blockout, which was very challenging. I’d like to know if you’ve got any ideas on how I could improve it, especially the “dashboard”area.
Sketchfab link: https://sketchfab.com/models/d1675c7356a540118ceadbc836785602
Concept art: https://www.artstation.com/artwork/JPeXv
 June 9, 2018 at 2:10 pm #35323
@baukepost I also find the blockout part to be the most difficult, especially finding the right balance between “not to detailled yet” and “too basic primitive”.
You did a really good work, it was worth the challenge! Few comments, feel free to take them into account or not 🙂 :
– add holding components to the rear part of the cover frame
– the “what-would-be-the-fuel-tank-if-this-was-a-motorcylcle” could be elaborated a just a tiny bit more: more curve perhaps ?
Aside from that (and I think I’m being a bit picky), you should be able to have a lot of fun detailling this from this blockout!
June 9, 2018 at 2:54 pm #35324@tbrbn I’m not completely sure what you ment with those two tips (my bad for not having enough English skills), would you mind explaining it a bit more?
June 9, 2018 at 3:12 pm #35325@baukepost My english is far from perfect as well, we got lost in translation 😀 So a picture is always worth a thousand word, I’ll try to make myself understood:
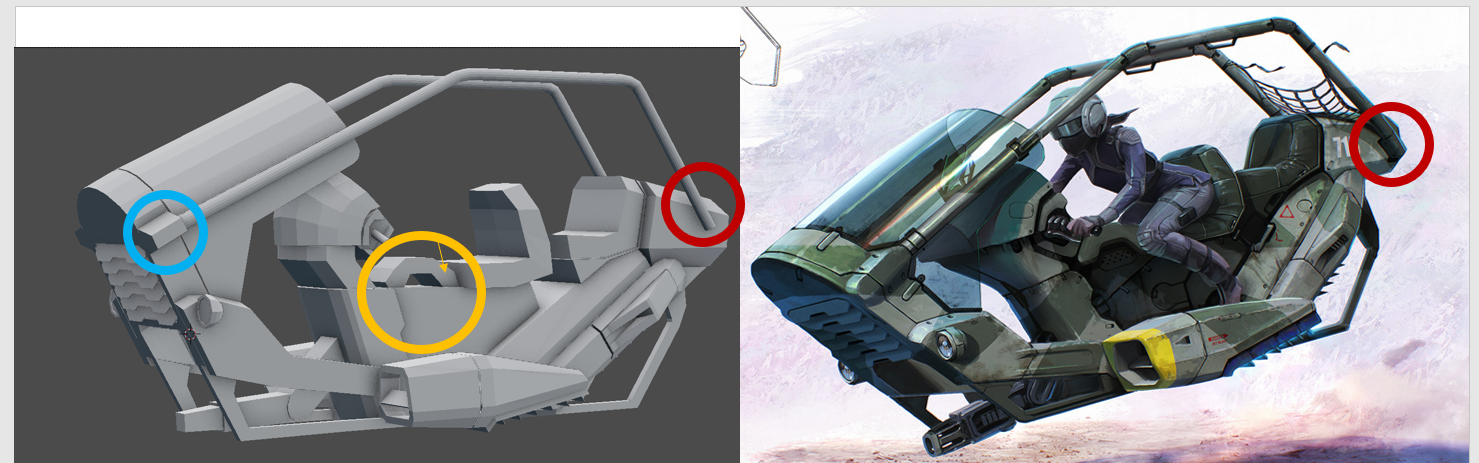
– “add holding components to the rear part of the cover frame” is the red circle: for the moment you have it floating, I thought you could already add connection to the rest of the vehicle body, as you did in the front (blue circle). That way all the components seems to blend in with each other, and your vehicle will have more flow.
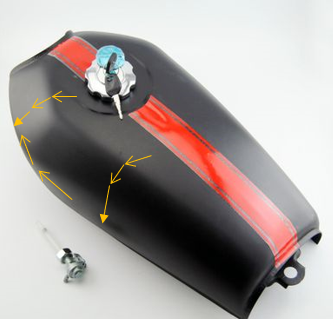
– “the “what-would-be-the-fuel-tank-if-this-was-a-motorcylcle” could be elaborated a just a tiny bit more: more curve perhaps ?” is the orange circle. The arrow points to a face that look very flat. I admit that in the reference it’s also kind of flat, but maybe think about giving it more curves. Below is an fuel tank of an “old-school” motorcycle, I tried to show you with the arrows what kind of curvature you can think about if you want to also give more flow to your vehicle.
-
AuthorPosts


- The topic ‘[ENDED] BC3-1806 – June 2018 Class Homepage – Vehicle Modeling with Blender’ is closed to new replies.