
[ENDED] BC2-1803 – March 2018 Class Homepage – Creating Stylized Characters with Blender
Forum Archive › [ENDED] BC2-1803 – March 2018 Class Homepage – Creating Stylized Characters with Blender
- This topic has 672 replies, 60 voices, and was last updated 6 years, 9 months ago by
Jon Wickerd.
-
AuthorPosts
-
April 5, 2018 at 12:00 pm #33899
How did I miss this one? Beautiful hand painted textures @swikni ! Easy a 9/10!!
Would you like to go even further BEYOND?!
There’s a few maps you can generate/make that would make your character look in Sketchfab more like in the render. If you don’t have access to an specialized software to generate them, you can easily-ish create them in blender too. The possible candidates are metallic, roughness and Ambient Occlusion. There’s a few more that could be useful. Here’s a helpful video that explains what each do.
For these maps you paint white where you want the effect to show up, black where you don’t, a shade of grey will soften the effect. You could generate them, but they are so simple I think you can do it faster by hand.
AO on the other hand has to be generated, in Blender you can bake it in the render tab. Use a small (512×512 or less) test texture first to be sure you are getting the desired effect, baking can sometimes take a long time to finish.
There’s also the thickness map, it’s used to make the subsurface scattering effect, but it’s a little tricky: You are supposed to invert the normals of the mesh and change the ambient occlusion distance setting from the “world” tab from 10 to around 1. Then you bake an AO map but the result is supposed to be the thickness map. Personally I wasn’t able to get a good thickness map in blender, I used Substance Painter to generate one and it was miles better and faster. Maybe someone knows a better way to do it.
Anyways, the other maps can be done in Blender and shouldn’t take more than an hour, and the end result will make your character pop out even more!
If you want to get an idea on how the maps affect the model, I went nuts for mine’s and filled all the map slots! It’s in page 38 and you can inspect the model by pressing ( I )!
One more thing, if you are going to do the extra maps, don’t use the viewport’s render mode, use it’s material mode instead. Also when you are going to bake a map, first move the object to an empty layer, and be sure it’s just that object in that layer. Have fun!
April 5, 2018 at 1:02 pm #33900Noooo ah man, that’s terrible. Hate to hear about the flooding. Thanks for joining us this month @silentheart00
April 5, 2018 at 4:04 pm #33901Beautifully painted. I love the contrast in the wood texture and the faux sheen on the blade.
April 5, 2018 at 7:27 pm #33902This will be my final entry for this class. I still don’t think this model is finished but I have to end this. This class was why I joint CGCookie and it was very good. I learned a lot. Now I will go and look for an other Course, there seems to be a lot of interesting topics on this website.
 April 5, 2018 at 10:31 pm #33903
BC2-1803 Homework Submission Week 3 (part 2):
robo orb done.
rob bor orb bro by procyonlotor on Sketchfab
April 6, 2018 at 5:29 am #33904Homework Submission Week 3.
Retopo took a loooot longer than I thought it would. It really took some time to get back into it, and also having the patience for it after mainly doing sculpting for a long time. I’m pretty happy with the result in the end though. The final result will have a subdivision surface modifier added, as well as particle hair, but I figured this would be better for reviewing the retopology. I’ve also added a link to the robo-orb exercise. Now on to painting, I’m excited to see this finished!
Silva Retopo by Valandrath on Sketchfab
https://cgcookie.com/exercise/completing-the-robo-orb-retopology/exercise_submissions/13208
April 6, 2018 at 12:36 pm #33905the high level of subsurf modifier makes it difficult to see the retopo work.
hope this helps… 😀
April 6, 2018 at 3:12 pm #33906Edit: Portrait Progress shot
Texturing Progress: I’m not really sure how much longer this forum is going to be open, so I thought I’d at least drop by and post what I’ve managed to get done. Trying to lean a bit more towards a hand painted style, and its getting there slowly but surely. Over the last week I made a second version of the model with around 15k tris, but opted to go with a slightly modded version of the original retopologized model, landing at 19.8k tris(down from 24k), and after several iterations of UV unwraps, I have created one that I think I’m comfortable with(until I find and obvious seam somewhere, anyway) and I am moving forward with it. Currently Adam has 5 different texture groups: Head and Eyes, Hair, Metals, Glow, and everything else. For the final iteration of the textures I plan to bake together the head, hair, metals, and glow onto one texture set. Here is a screencap of what I have right now.
Right now I think I’m almost done with the body, jacket, and gloves. I plan to add a bit more of my own personal touches over the generated belt texture and pants, and maybe a bit of wear and tear over the boots. The face has been completely untouched at this time, and the hair has a stylized/hand painted appearance(not so visible from this angle). I also might try to ease in the transition into the pockets using textures… or get rid of the actual mesh object and just paint it in.
Edit: Removed older image as to not let this post get too big. I’ve put a bit of work into the face at this point, and have come to the realization that I am missing eyelashes… Once again, not sure when the thread is locking, so here is a near complete portrait shot. The eyes need a bit of sharpening as well as a few other touch ups.
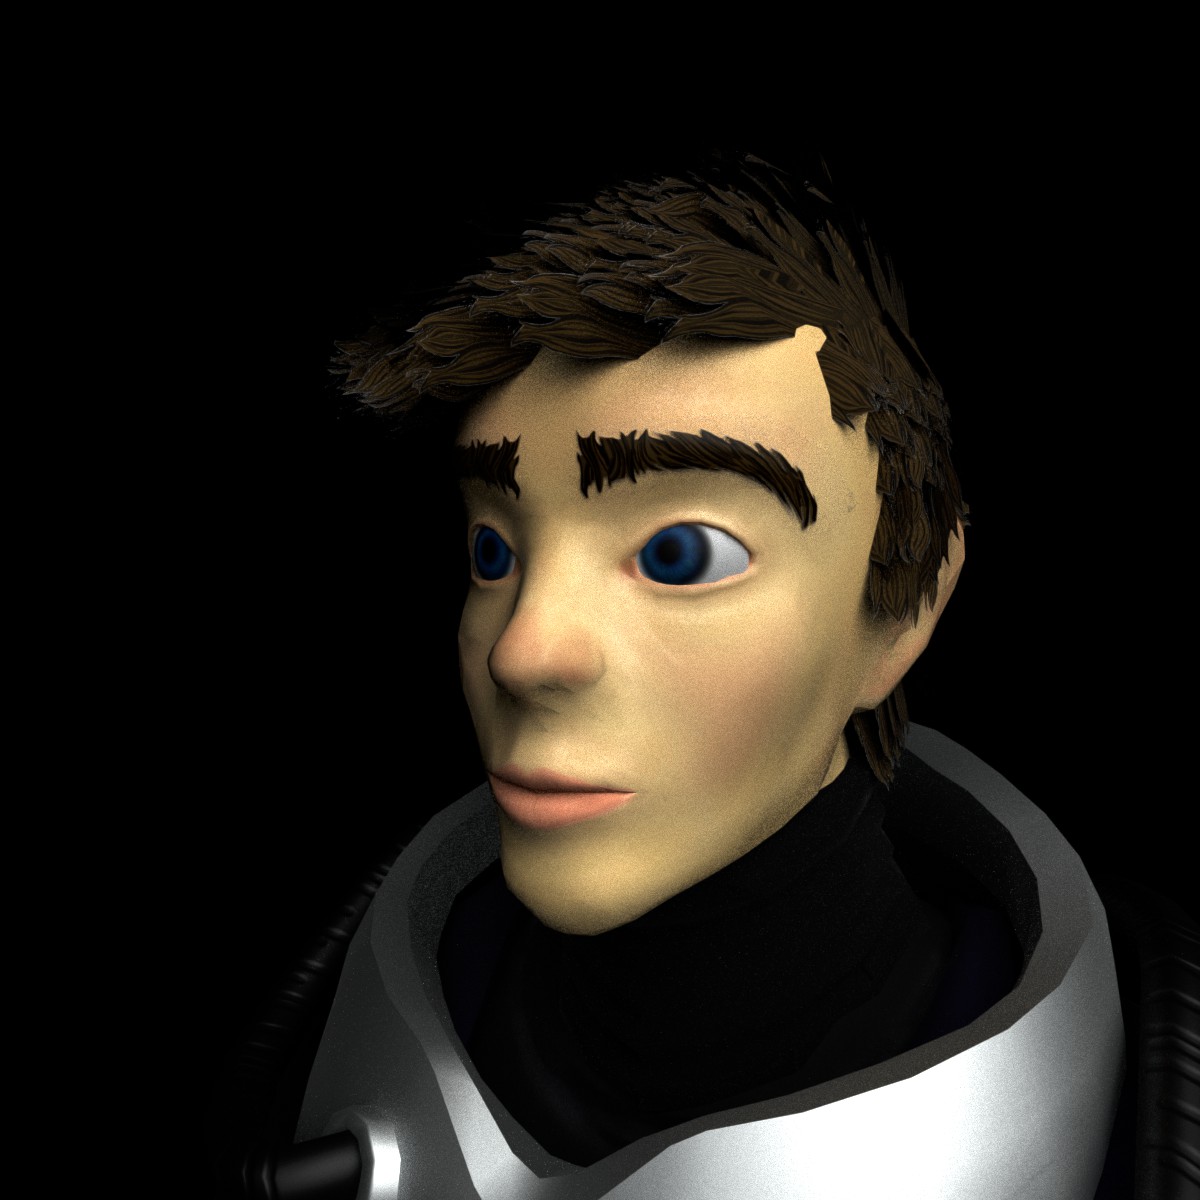

Any thoughts thus far?
April 7, 2018 at 1:22 pm #33907Homework Submission Week 4
Before of anything you guys are posting such a beautiful painted models, that I become really shy to show anything what did and have to admit to myself that this advanced class was higher than my abilities.
Inspite of that really learnt a lot this month, was not sure whether can sculpt a relatively simple giraffe on your level, then had a little practice and understanding how those re-topology and texture painting things are.
Next time would like to come back stronger, it was fun to participate with the big lesson to myself that just watching tutorials and the theory are totally different things than doing it
 April 7, 2018 at 10:45 pm #33908
BC2-1803 Homework submission week 4 pt 1:
Definitely still a work in progress, but closing things out for the class. Thanks again everyone!
April 8, 2018 at 2:12 am #33909No worries man. You finished the character and it looks great and ready. It’s more important that you chose to make something of your own skill level than struggle with too difficult model and eventually give up.
April 8, 2018 at 2:16 am #33910Wow nice maps you have baked
April 8, 2018 at 2:19 am #33911Looks pretty good. Would be nice to get study it via sketchfab
April 8, 2018 at 10:36 am #33912Cheers Jere @swikni thanks for the words, we will meet in the next class
April 8, 2018 at 10:44 am #33913so cute ! very lovely ! and really u have my respect on finishing the class even if u think it was advance for u !
ur little giraffe is well done and u did well with ur Jackie chan ! dont shy u did well and hopefully u learn a lot !
sharing this class with u was a pleasure for me !
-
AuthorPosts


- The topic ‘[ENDED] BC2-1803 – March 2018 Class Homepage – Creating Stylized Characters with Blender’ is closed to new replies.