
[ENDED] BC1-1808 – August 2018 Class Homepage – Getting Started with 3D Modeling & Blender 2.8
Forum Archive › [ENDED] BC1-1808 – August 2018 Class Homepage – Getting Started with 3D Modeling & Blender 2.8
- This topic has 540 replies, 35 voices, and was last updated 7 years, 12 months ago by
yukino hatake.
-
AuthorPosts
-
August 10, 2018 at 2:00 pm #37940
@thecabbagedetective You’re probably right, this one is getting filled up pretty quickly 😆
August 10, 2018 at 4:18 pm #37941@thecabbagedetective
It indeed worked 😀 Seems i fully understanded it 😀 Again thanx for the good explenation the images sure did helped to clarify everything
Could someone help me too with giving them easy collors ? I dont know how to add some collors and when i do a matcap it change all collors .August 10, 2018 at 5:28 pm #37942@yukinoh1989 Glad to hear it! To add a material to an object simply head over to the material panel on the right and you’ll be able to edit it there. If the object doesn’t have a material already (it appears only the default cube starts with one) there’ll be a big “New” button, so hit that.
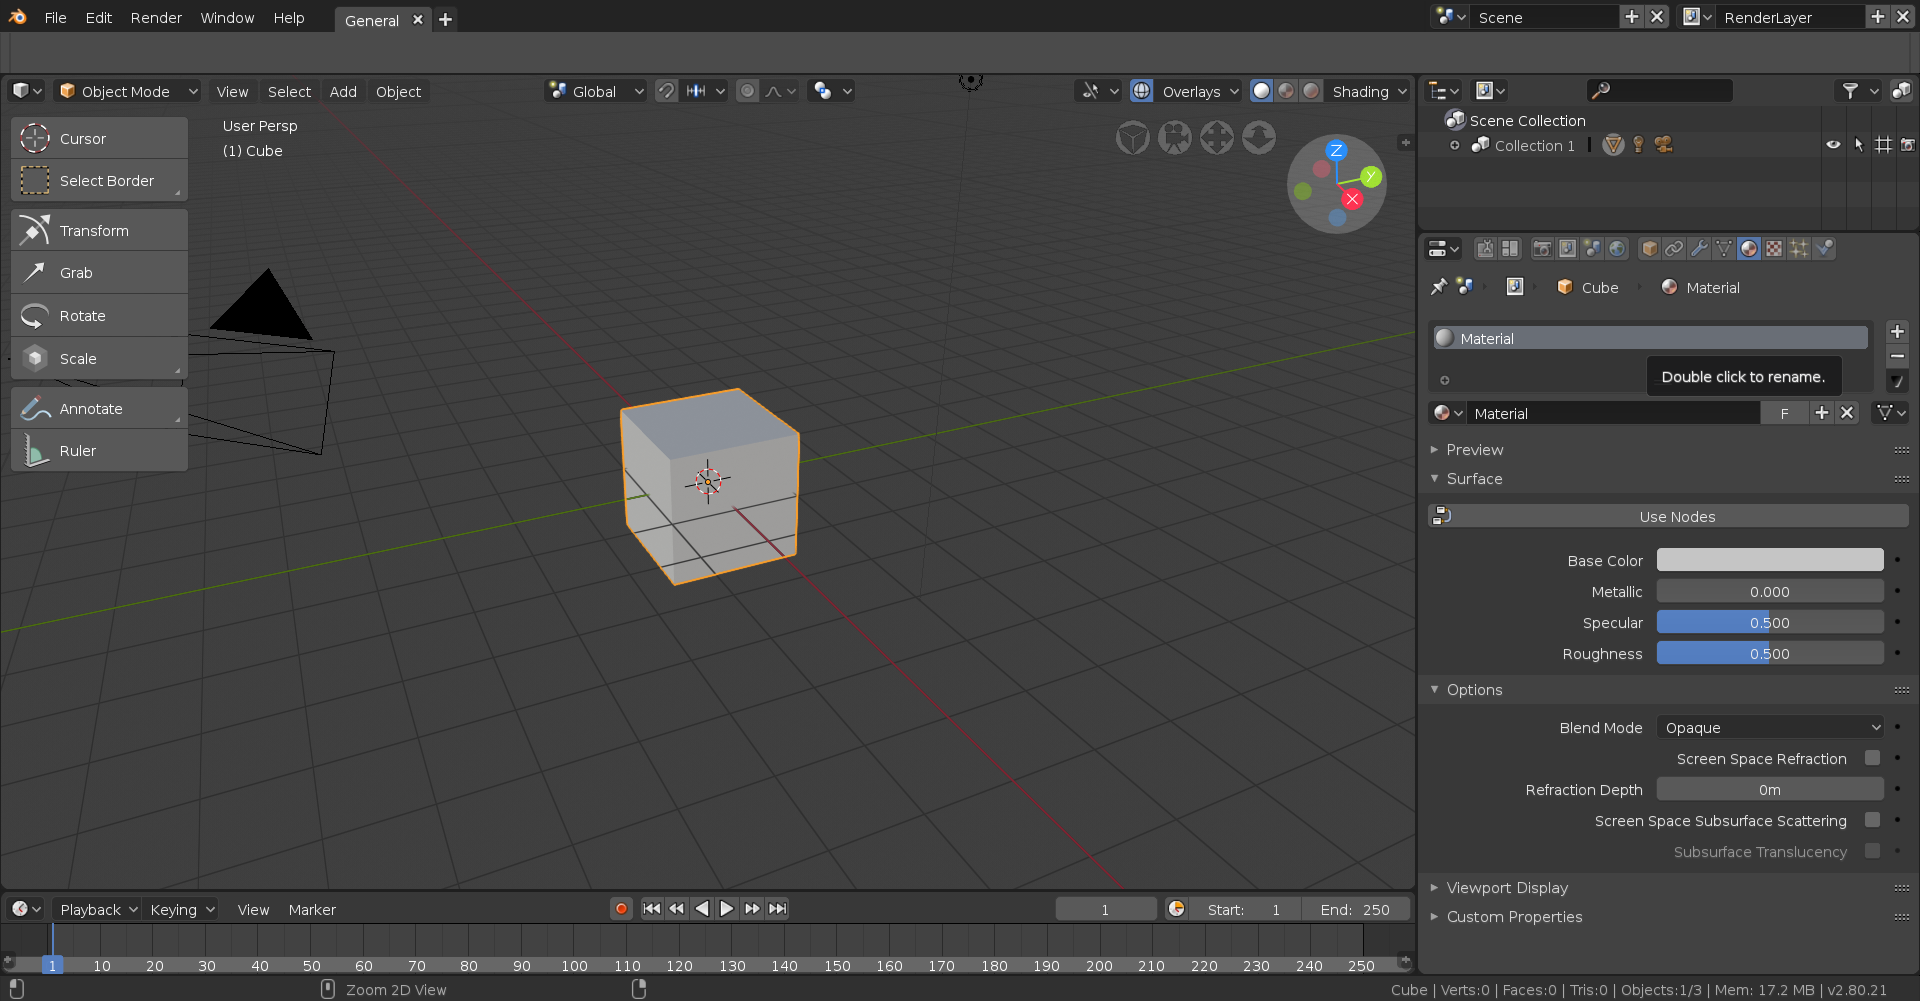
Now there is something called the Node Editor (renamed the Shader Editor in 2.8) but that’s quite advanced and for what we’re doing here unnecessary so lets look at what’s in front of us.
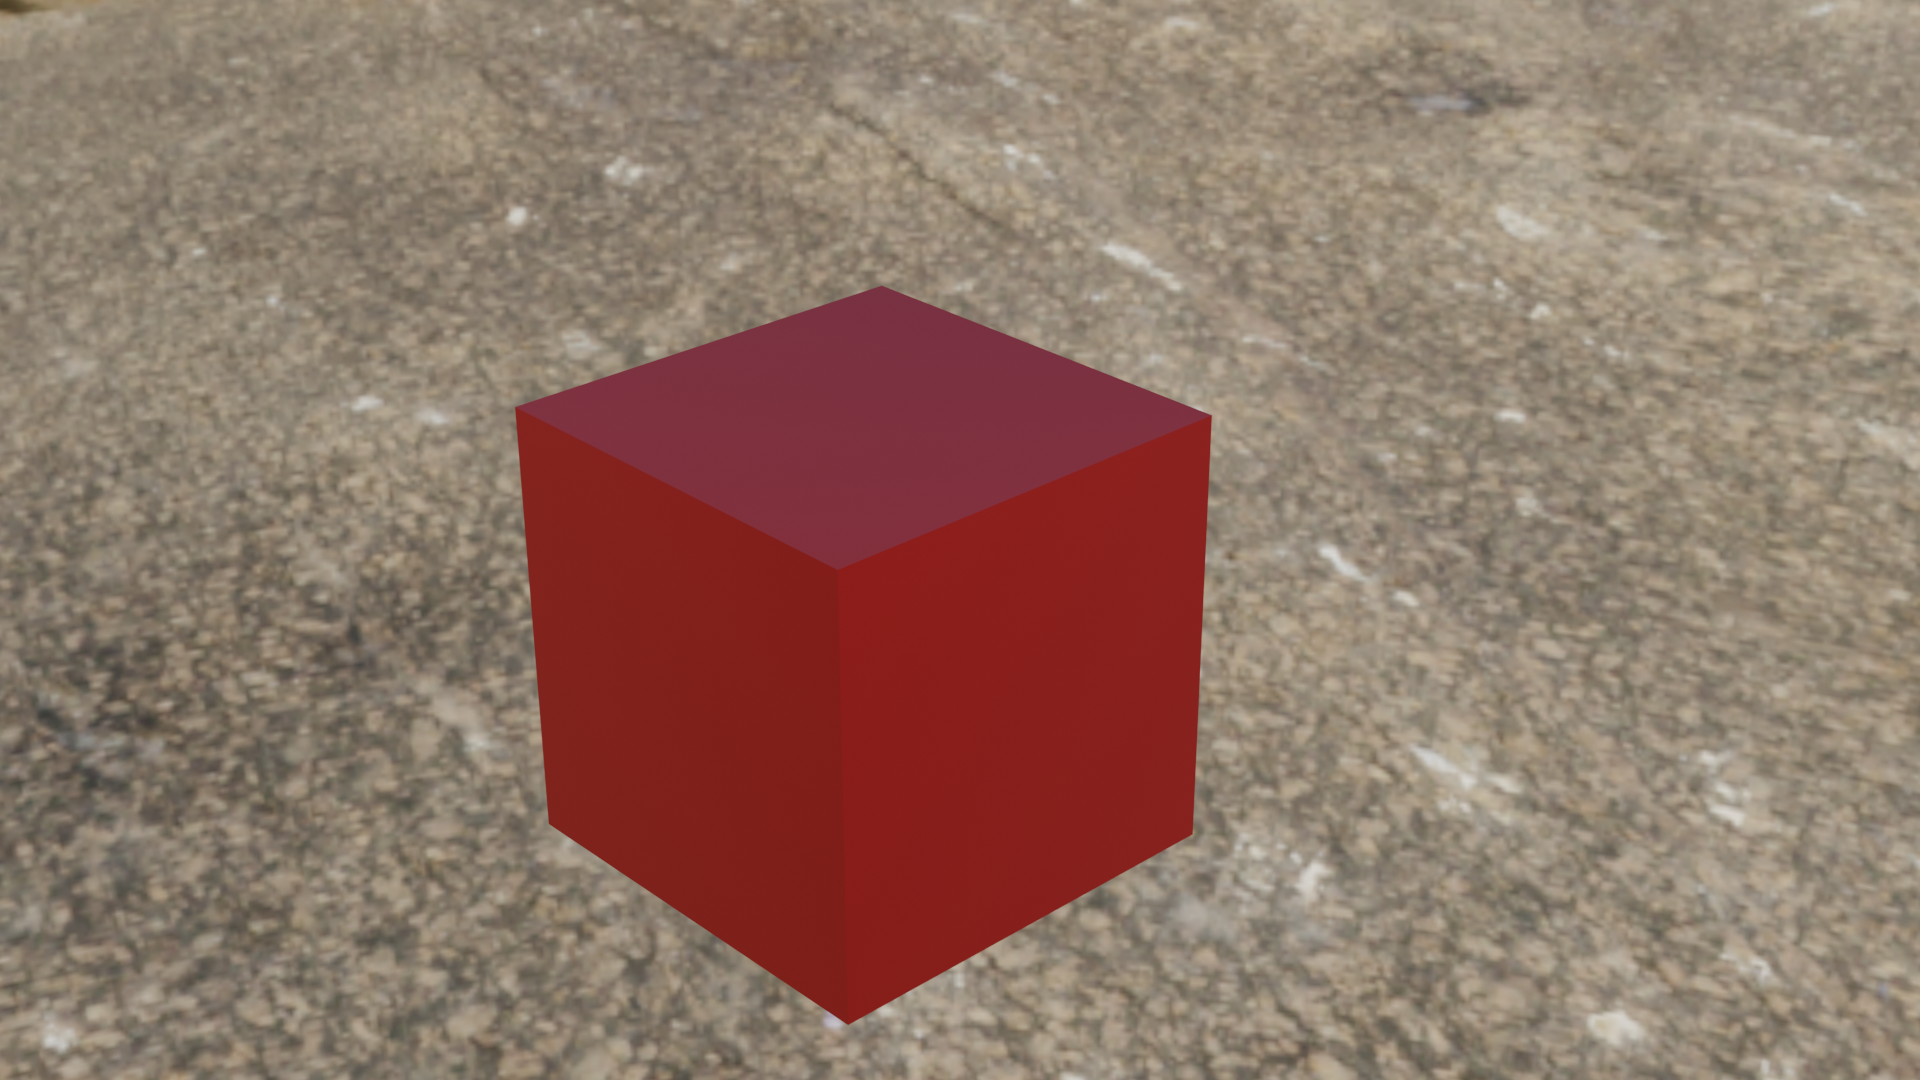
The only options we need to concern ourselves with now are under the Surface tab: Base Colour, Metallic and Roughness. Base Colour is fairly self explanatory, and determines the colour of the mesh. Metallic determines if the material is metal or not, you’re going to want to set this to either 1 for metal, or 0 for non-metal, inbetweens typically look rather funky and unrealistic.
Here’s a cube with Metallic at 1:
And here’s a cube with Metallic at 0:
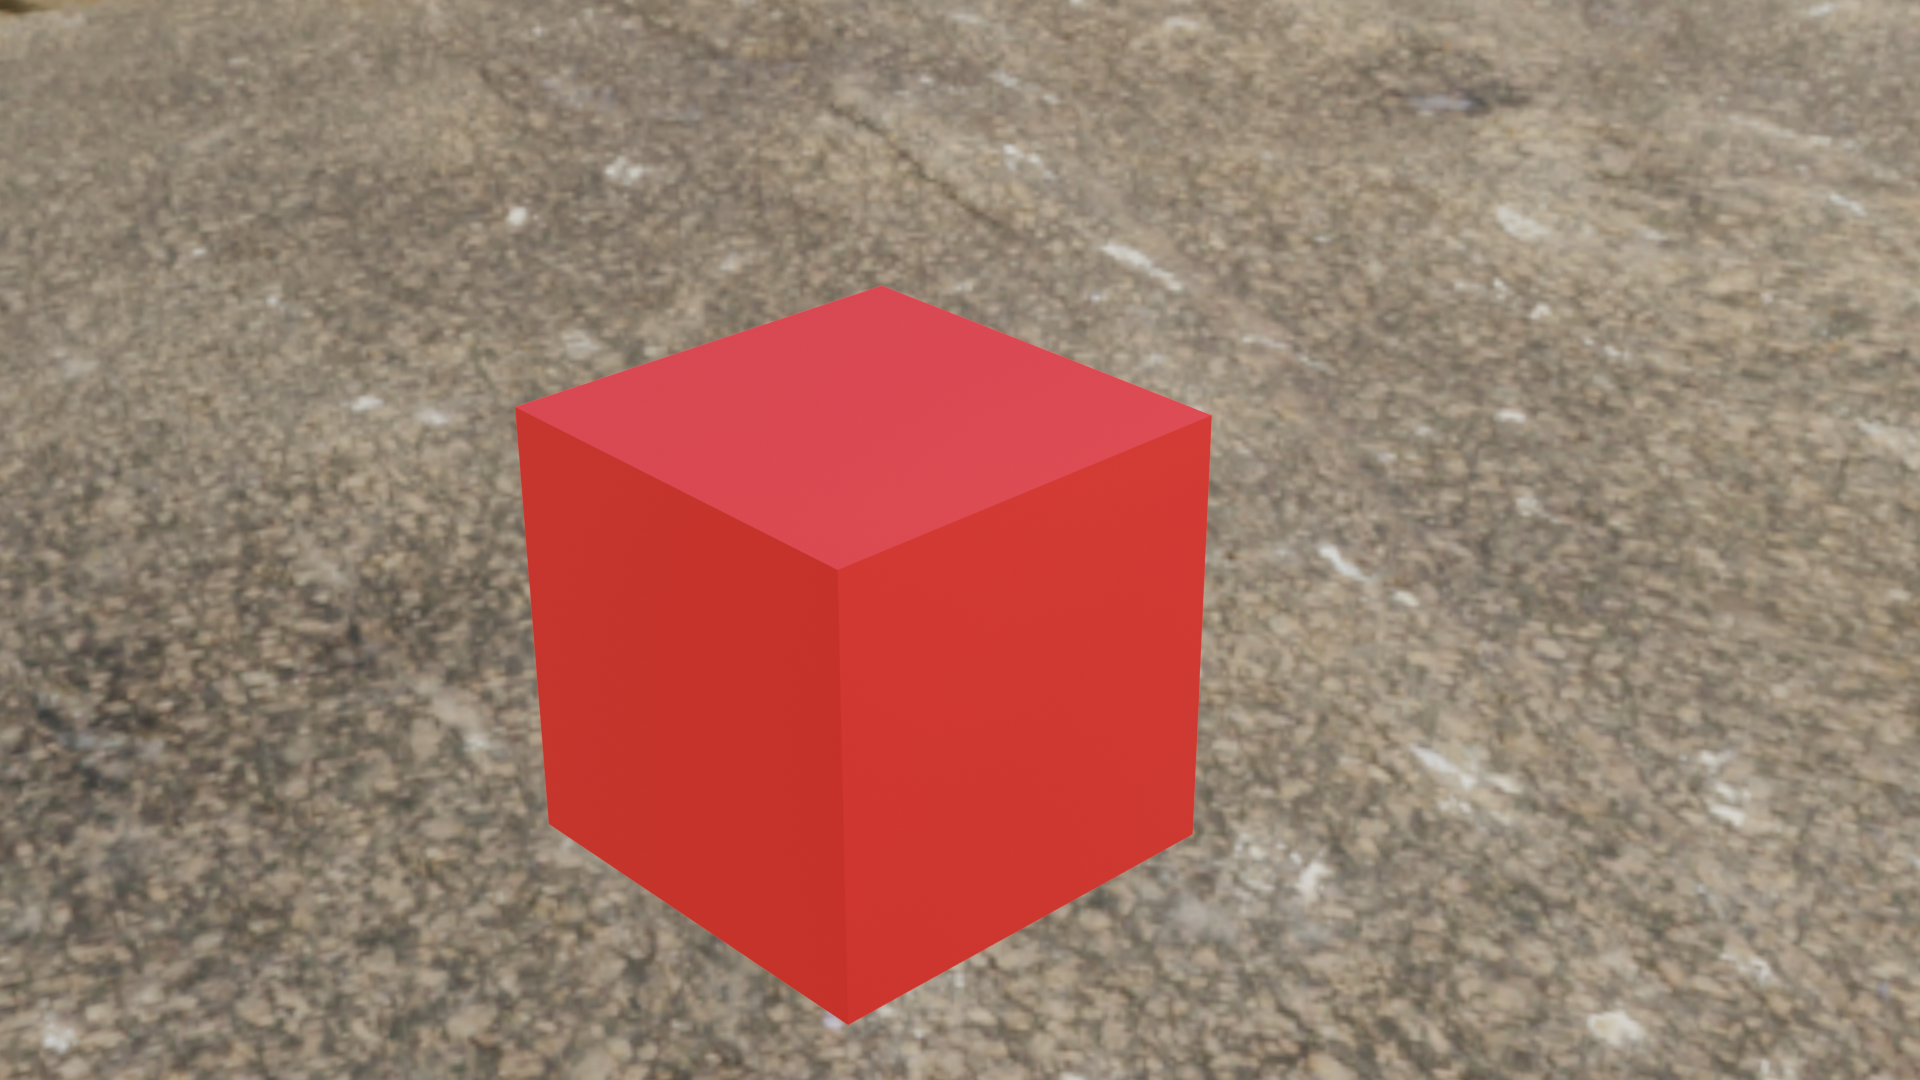
As you can see the difference is rather large. Obviously it’d be easier to showcase if I had a more complex/realistic mesh but this shall do. The final option you need to concern yourself with is Roughness, this determines how “shiny” the material is (both of these renders were at a roughness of 0.5). Unlike Metallic feel free to fiddle about with this.
Here’s a cube with Metallic at 1 and Roughness at 1:
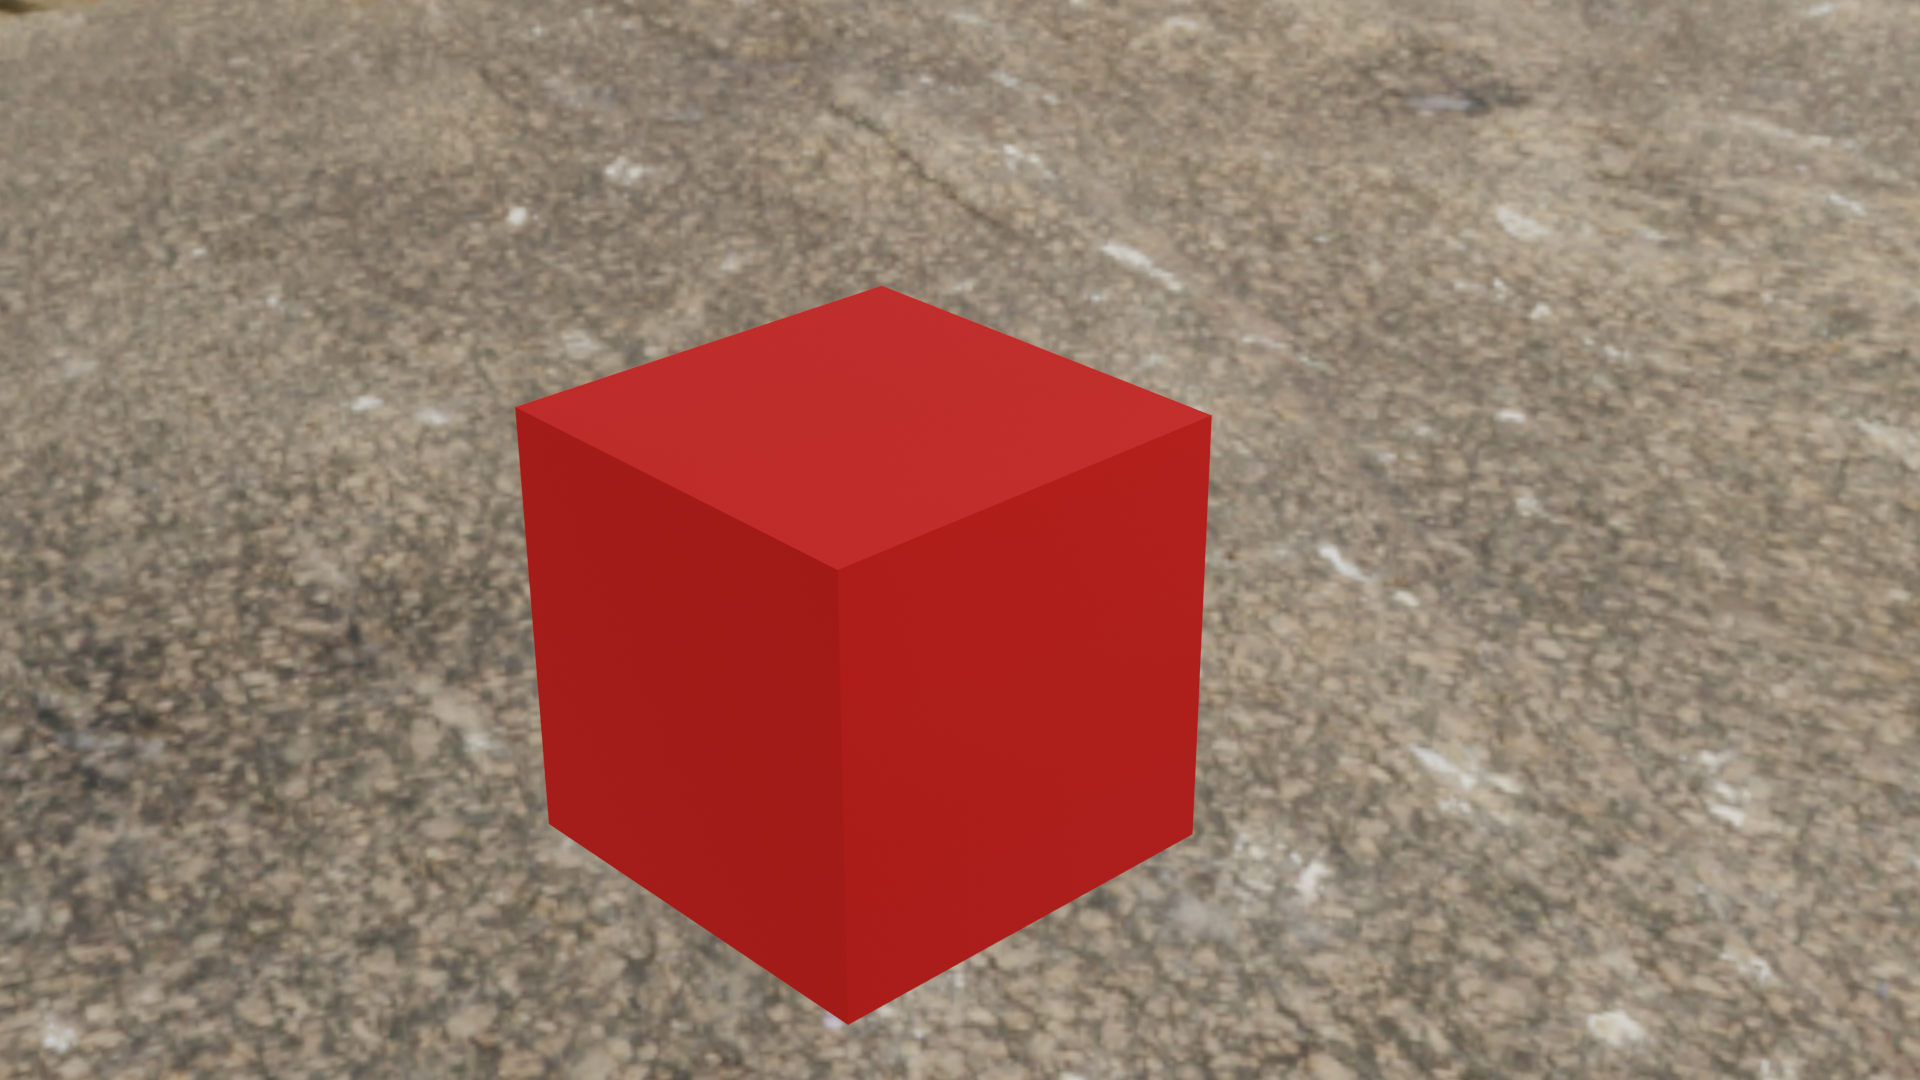
And here’s a cube with Metallic at 1 and Roughness at 0 (which makes it completely reflective, so I added more geometry to the cube and made it smoother to make it reflect better):
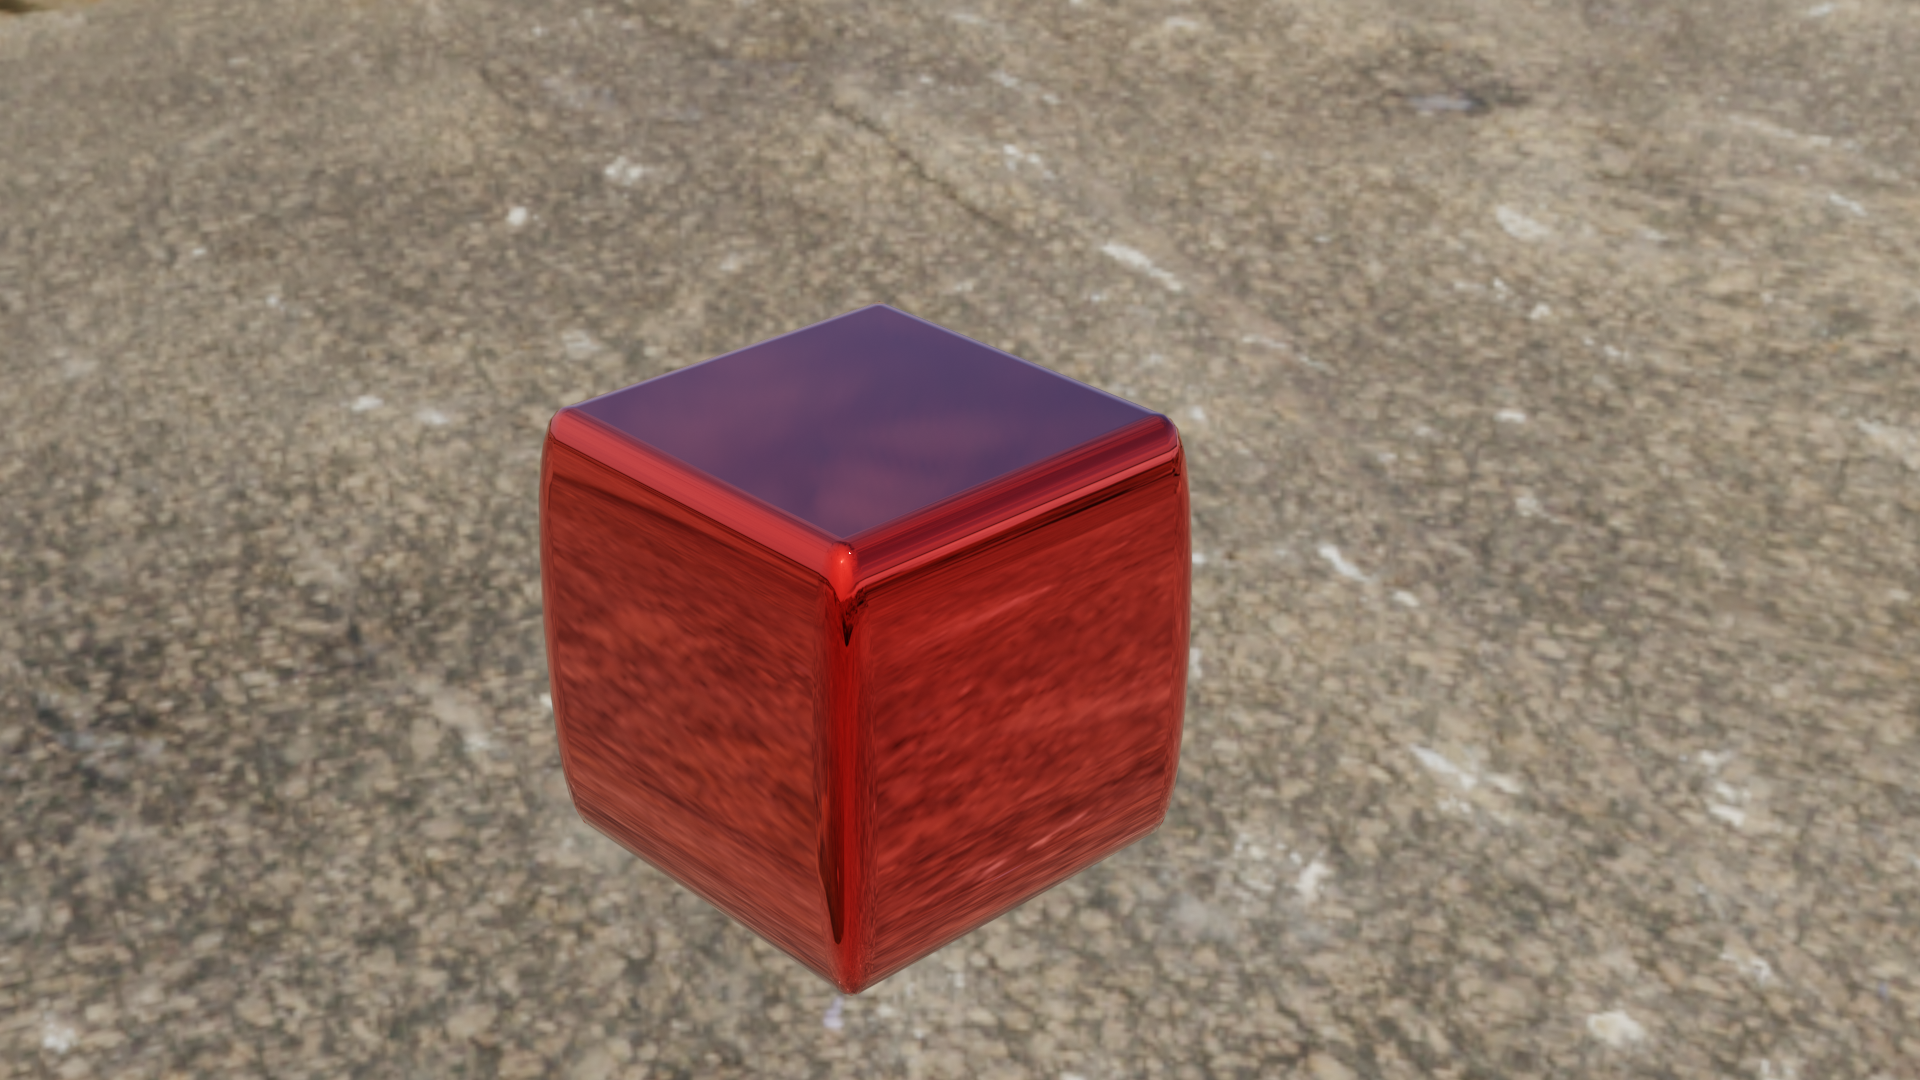
Hope this clears a bunch of things up!
August 10, 2018 at 5:42 pm #37943@thecabbagedetective
Wow those are already some pretty options and i think ill be able to work with this already . since you gave a lot of explenation and showed the diffrence too .
I also see there is someting specular . Does that also do someting or should i leave that ?
For in my scene on the pokeball i gonna use the metal and the rest just base collor without metal (exept if i have a magnemite) he too might get some metal touch if i can model him 🙂
Can i ask how you did that floor?(i also believe you have a sky if i look at the last metal example right? ) Is that done in the same way but another option or the advanced way you talked about at start ?August 10, 2018 at 6:05 pm #37944@yukinoh1989 With the Specular setting it’s best to leave it alone if you want realistic-looking materials. It essentially makes the reflections brighter or duller, but the roughness setting handles this much better so unless you’re going for something unrealistic and odd then just leave it at default.
I made the background with what’s know as an HDRI (which stands for High Dynamic Range Imaging), which is basically a 360 degrees picture that’s quite commonly used in renders, because not only do they look nice and give something to reflect, but more importantly they give off light values depending on the image (for example if you had an HDRI that had two bright, red bulbs then the brightness in the image would affect you scene) to give realistic lighting. They’re admittedly a pretty advanced option so I wouldn’t worry about them for now but I’ll go over the basics of getting one set up.
First, download an HDRI. HDRI Haven is a great place for free, high quality HDRIs, it’s where I get all of mine from.
Once you’ve picked one you like, go to the World tab and hit “Use Nodes”.
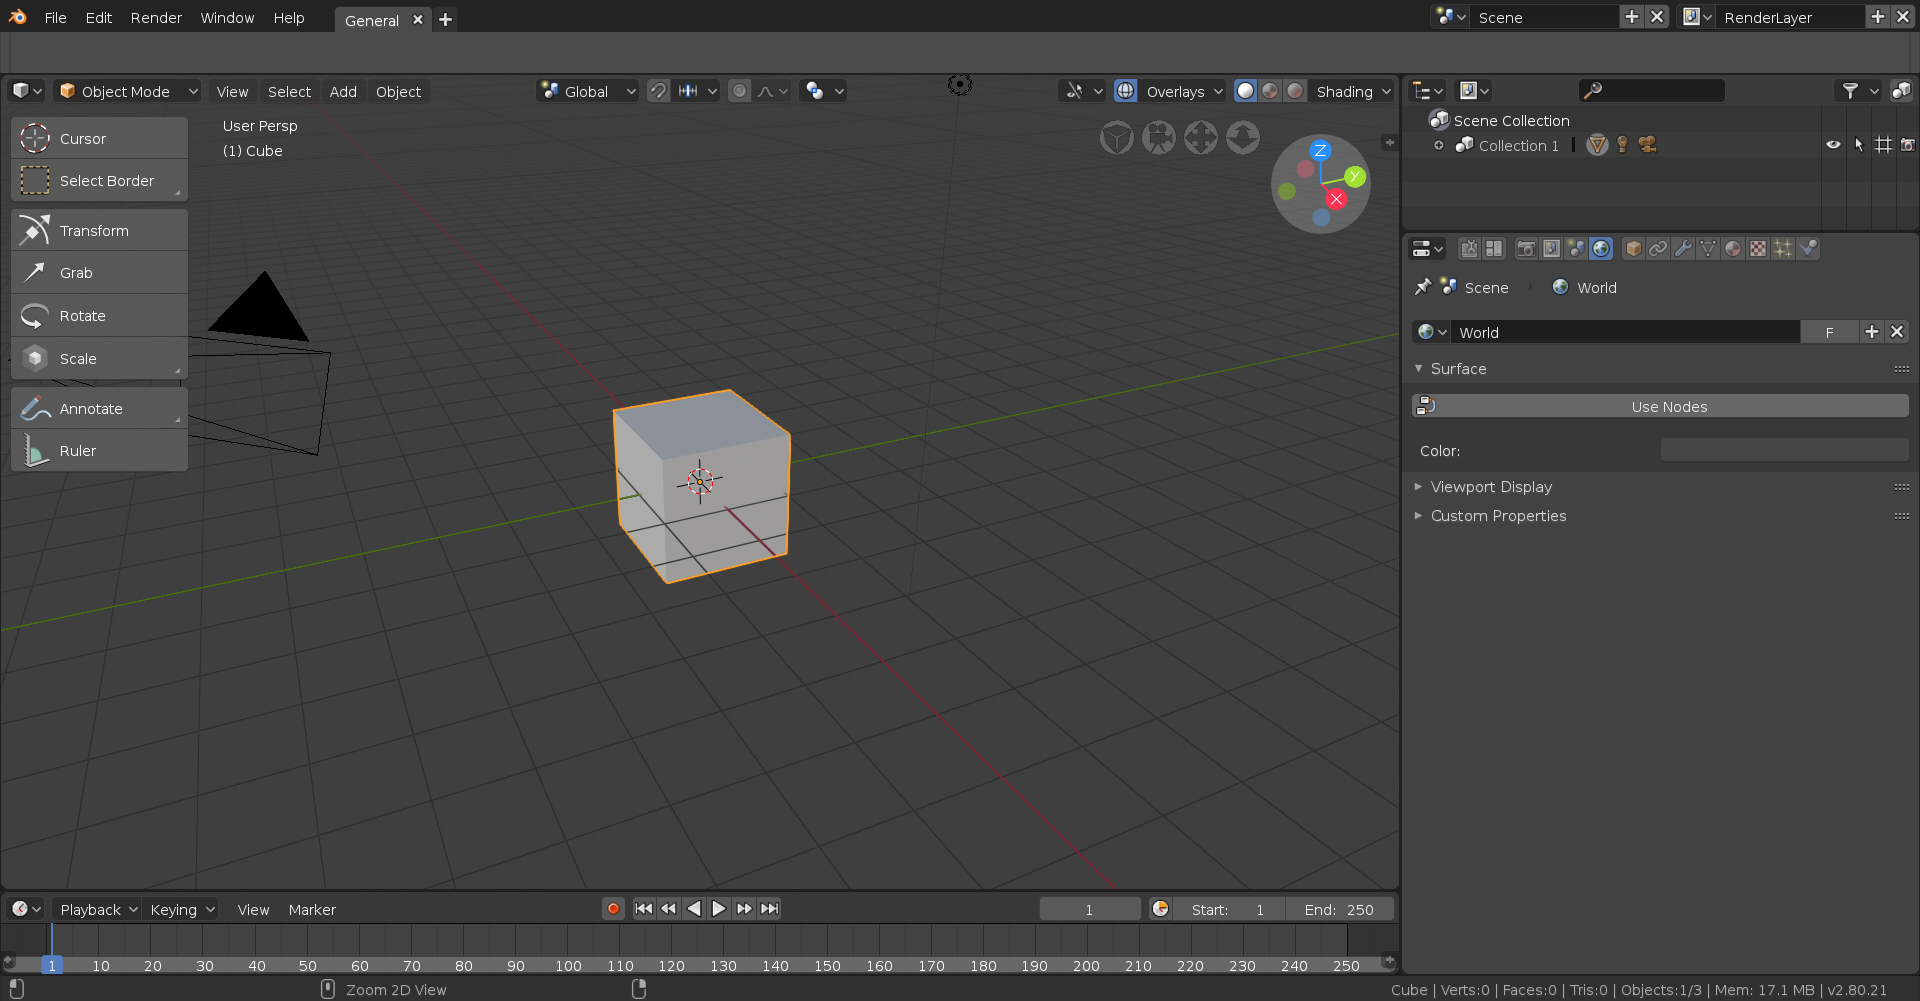
After that, next to the Colour option is a dot, click that and you’ll get a drop-down, then select “Environment Texture”.
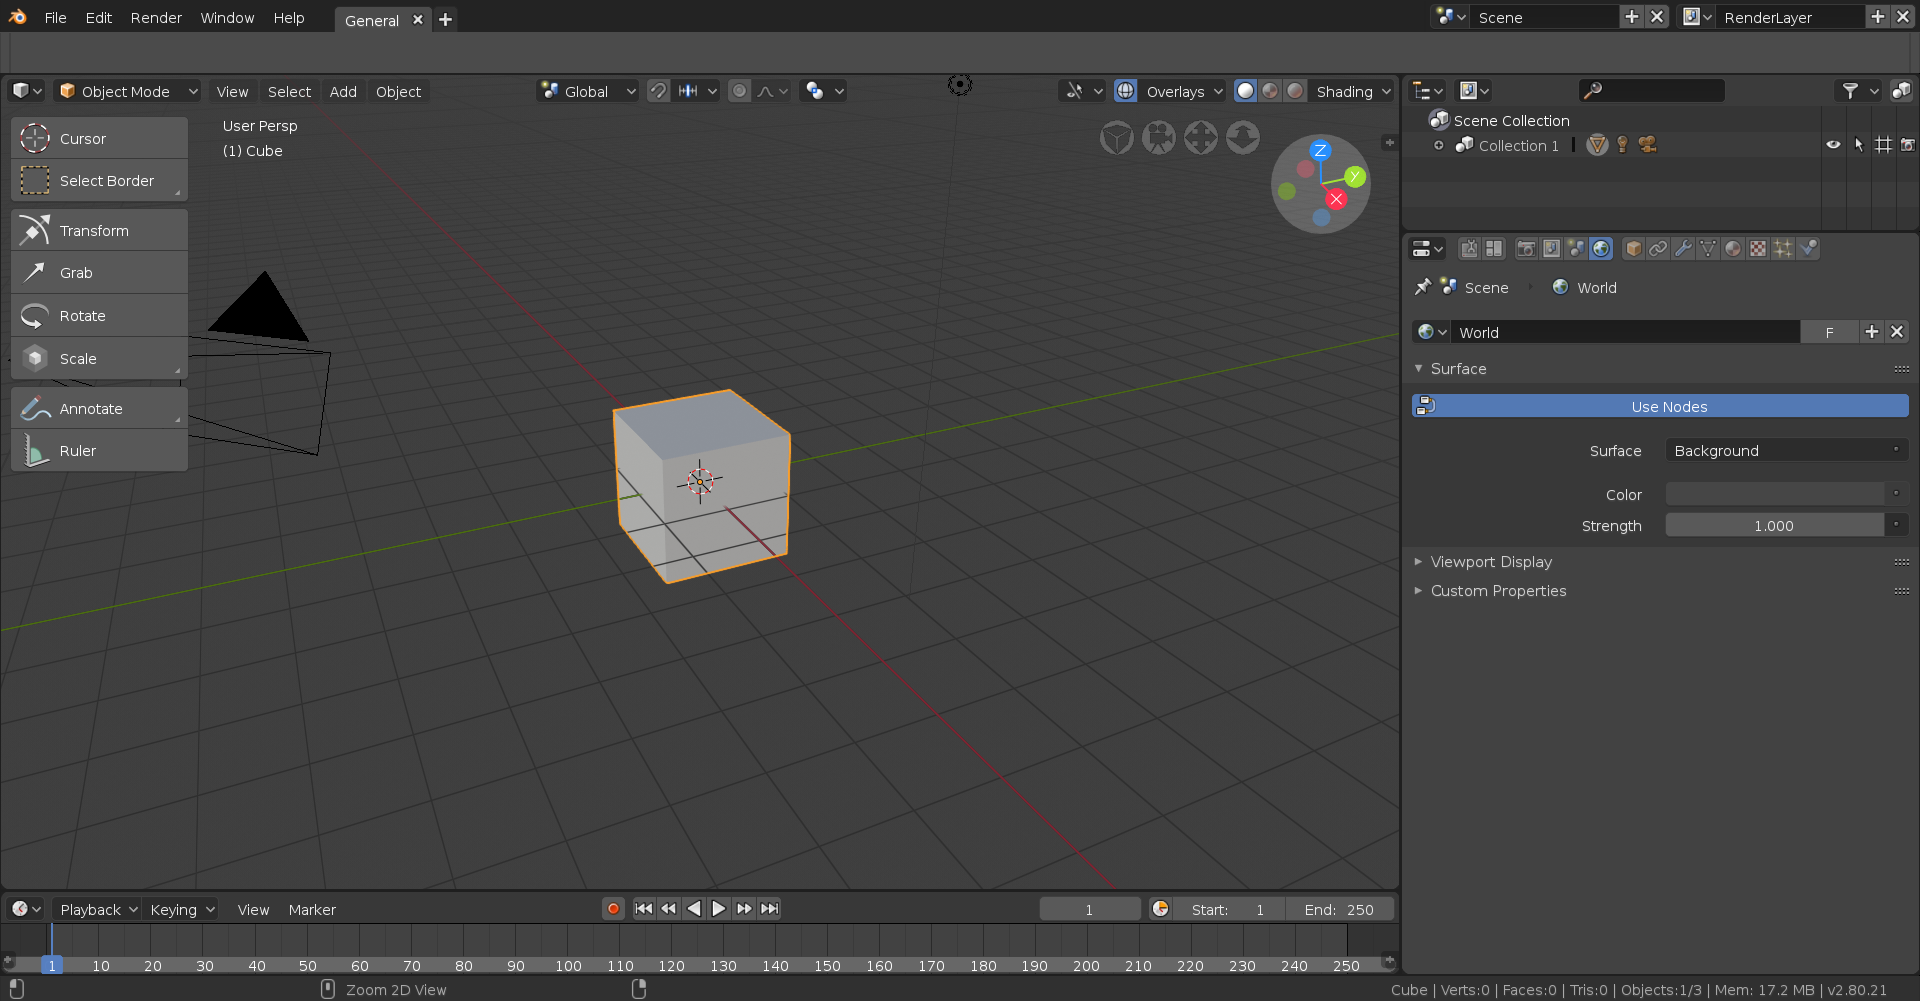
Finally click the “Open” button and select your HDRI (do note though that they can be a bit memory intensive and can really increase your render times but they’re almost always worth it):
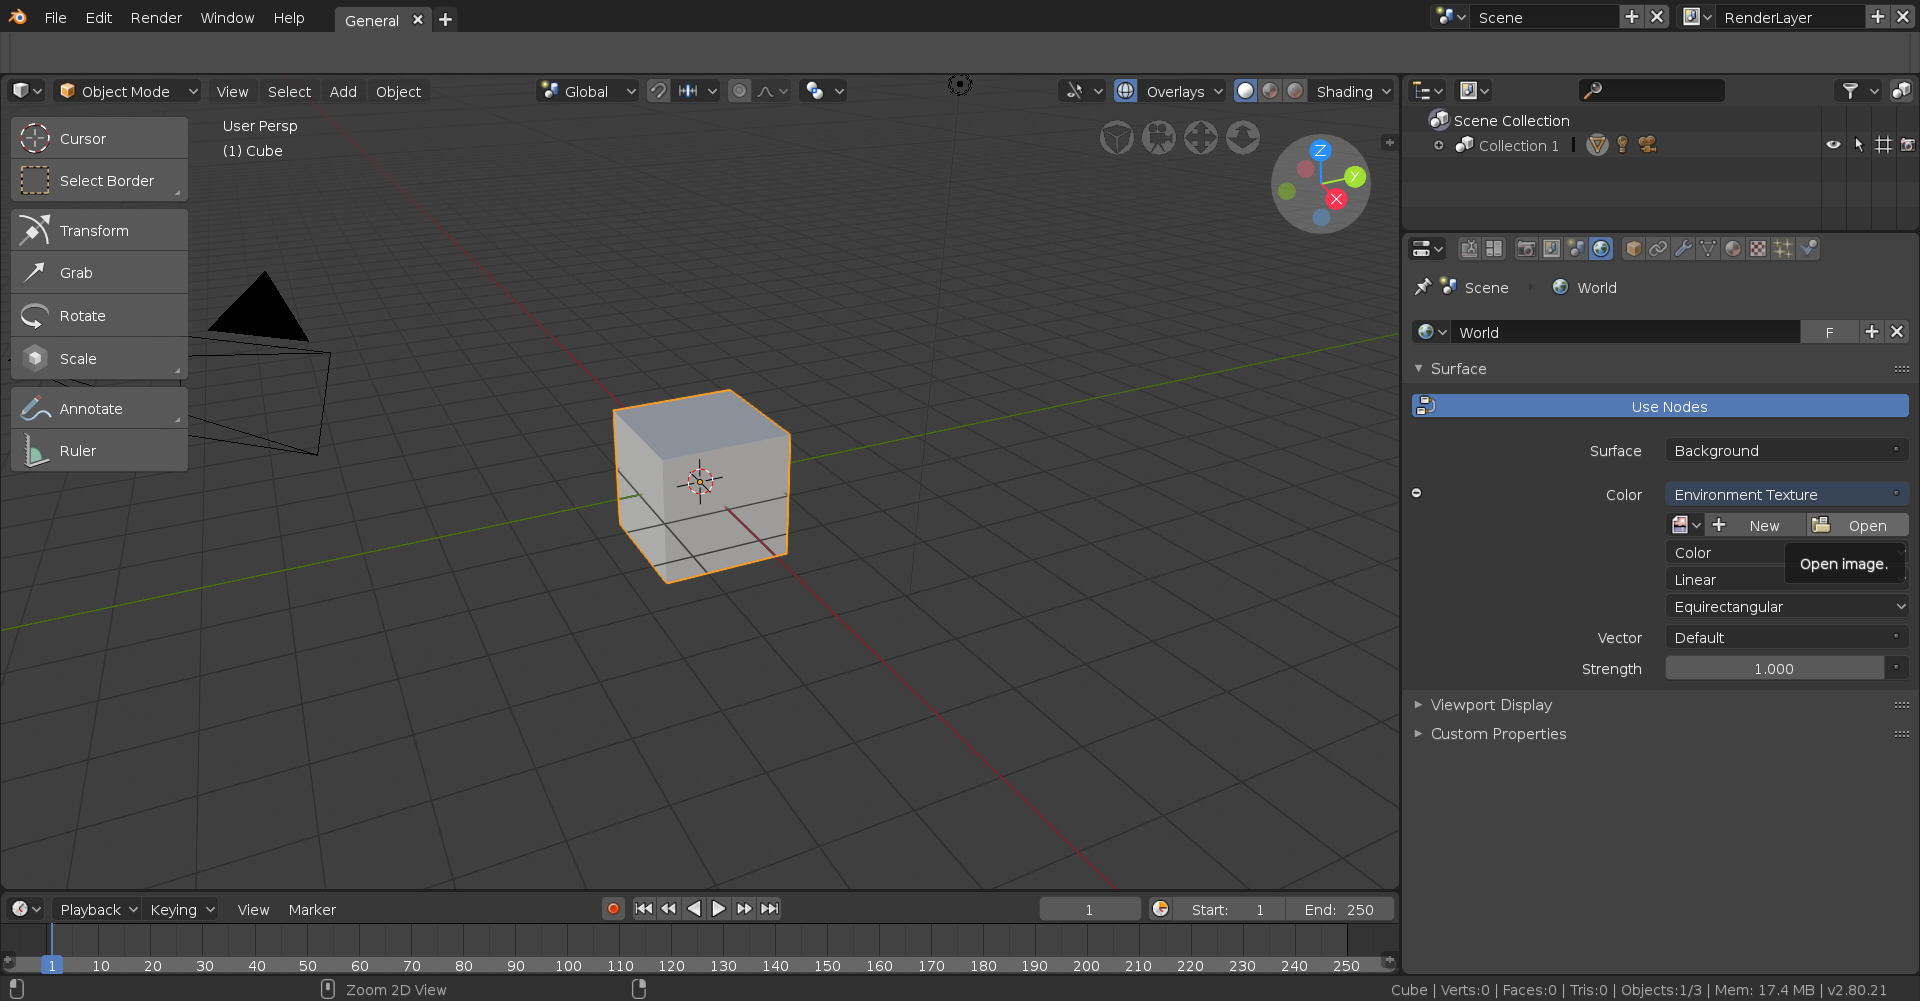
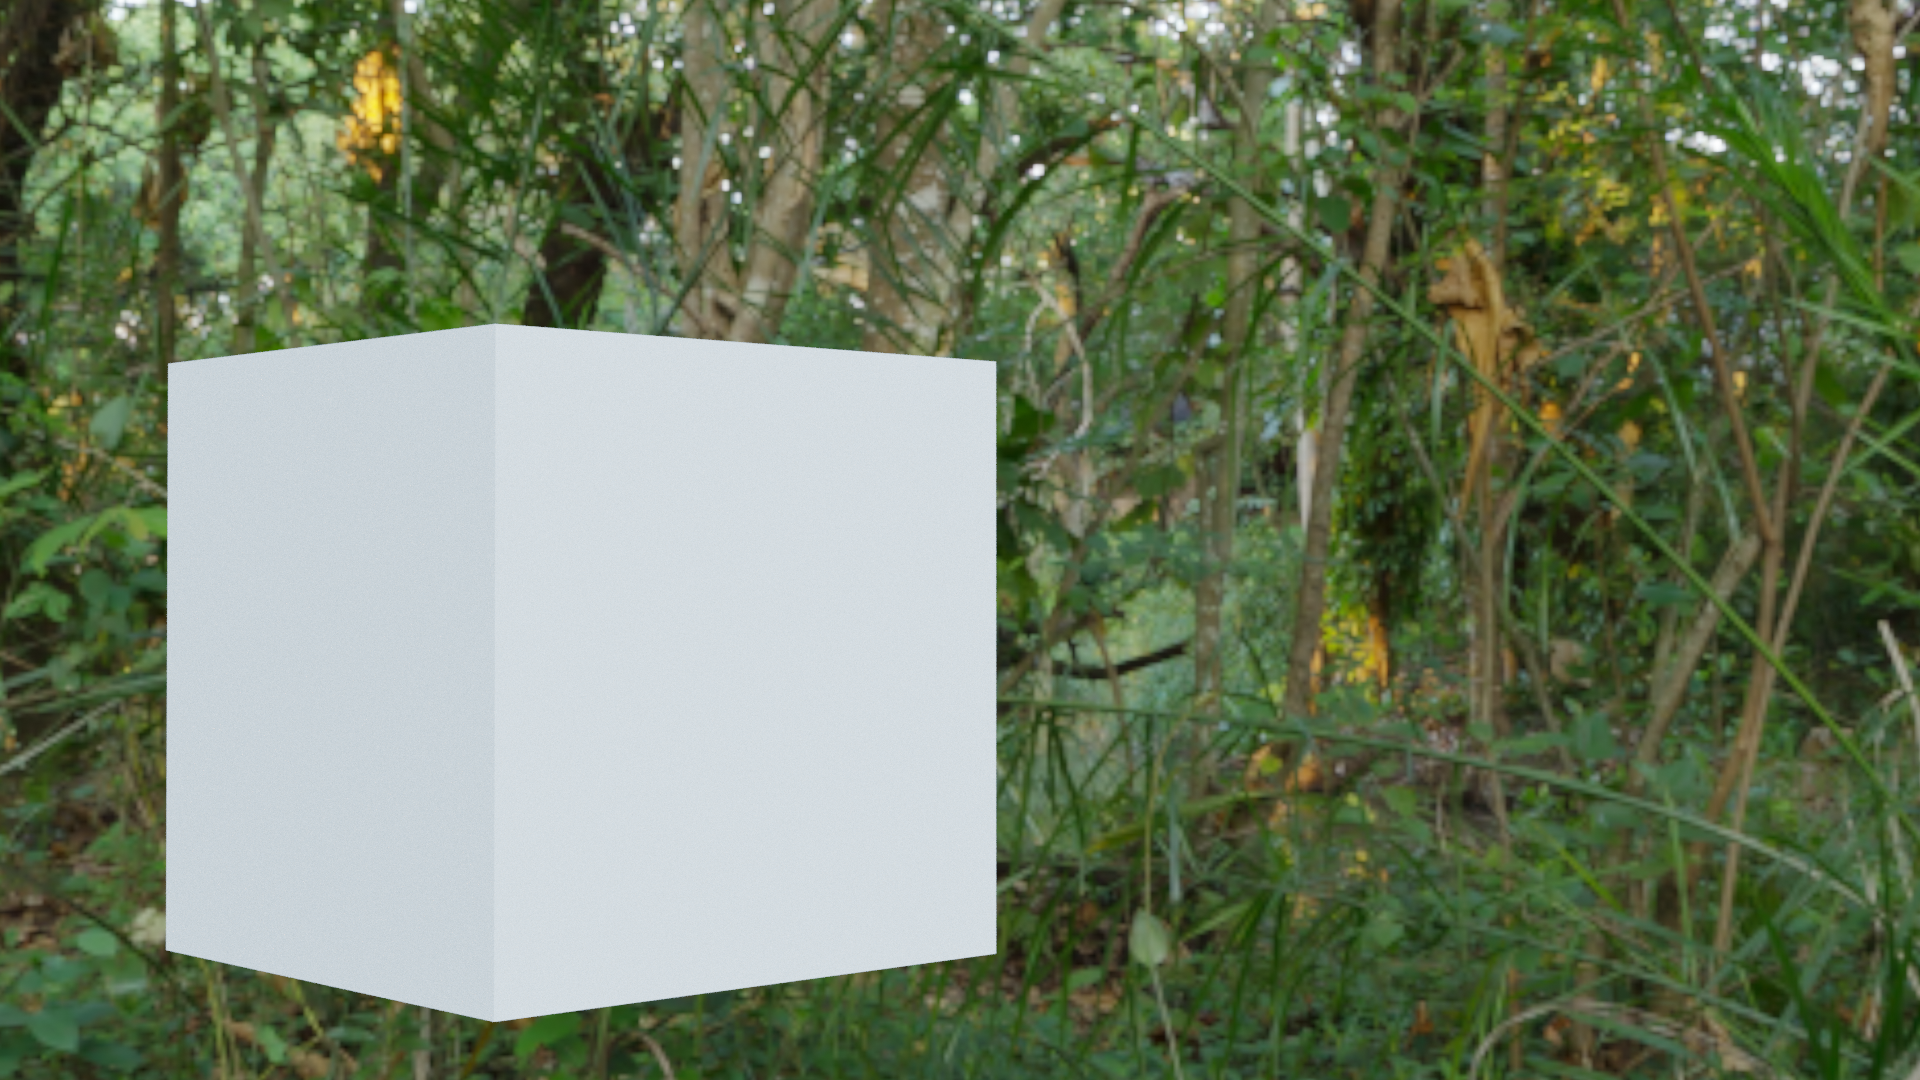
Boom, you now have an HDRI in your scene (though keep in mind it doesn’t appear in the default “Solid” mode)!
 August 10, 2018 at 7:55 pm #37945
Did you know that the s in specular is silent?
August 10, 2018 at 8:04 pm #37946@williamatics Well if so I one day I hope to become “pecular”, just gotta keep hitting them weights haha. Also William, are you partaking in the class? I haven’t seen you make a thread yet. I remember earlier in the thread you said you weren’t taking part because of a fear of belittling newer users but after more experienced users being encouraged to help out I was wondering if you changed your mind? Obviously no problem if you haven’t, I’m just a bit nosy, much to my fault.
August 10, 2018 at 8:23 pm #37947I did say I wasn’t taking part, but that wasn’t the reason I gave. I just don’t think I’d learn as much from this class as I would from following my own plans. I do watch the live streams for the purpose of getting comfortable with Blender 2.8.
August 10, 2018 at 8:24 pm #37948@thecabbagedetective Oops, I forgot to @ you.
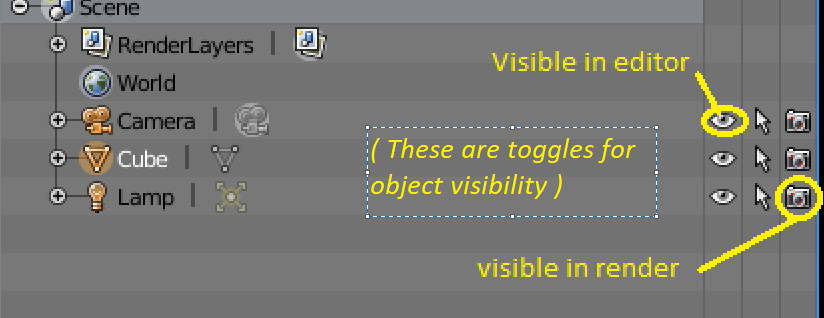
August 11, 2018 at 12:52 am #37949How do I render a project without having the hidden objects come back in the final render?
August 11, 2018 at 3:32 am #37950@nathangarduno There is several ways. You can move them to a diferent layer, or turn rendering of for those objects in the outliner.
August 11, 2018 at 6:09 am #37951just a little screenshot to compliment what @arev was saying about the outliner and how you can toggle their visibility
 August 11, 2018 at 6:15 am #37952
the camera what is that for? if i go turn the eye off the objects dissapear but i dont see anything special change with the camera .
August 11, 2018 at 6:17 am #37953thats a shame would be fun to see some Works of you too. so many people already inspired and teached me so much in just one week already.
August 11, 2018 at 6:22 am #37954is there a way to paint like with a Brush or not? i have a problem to collor the pokeball. its white with red but i can now only take white or red but not combine it
-
AuthorPosts


- The topic ‘[ENDED] BC1-1808 – August 2018 Class Homepage – Getting Started with 3D Modeling & Blender 2.8’ is closed to new replies.