
Blanchsb’s Blender Nuggets
Forum Archive › Blanchsb’s Blender Nuggets
- This topic has 46 replies, 10 voices, and was last updated 3 years, 10 months ago by
Keith.
-
AuthorPosts
-
December 12, 2020 at 12:33 am #61248
Gold Nugget #8: Think Smarter, Work Less
I have been using Fluent and Box Cutter a lot over the past month and been thinking about how to improve my speed on certain areas.
Blender modifiers were made to make life easier but they were also meant, if used properly, to make our work non-destructive (also called non-permanent) and able to change on the fly with extremely little effort. This modeling nugget is just something I have been trying with different daily exercises. I wanted a quick sample sheet to show the power of the message.Todays example: Cutting holes into cylinders has bugged me for a while. So my exercise was to find a way to make it more dynamic.
The up front work pays dividends because everything is adjustable.
Step 1: Make Your Design Pattern. Orient the pattern to have a plane on the X-Z direction and set the origin to the lower left side.
Step 2: Add in an Array Modifier on the Relative Offset X-Axis and turn on Merge threshold. The count will define the adjustable length.Step 3: Add in an Array Modifier on the Relative Offset Z-Axis and turn on Merge threshold. The count will define the adjustable diameter of the cylinder.
Step 4: Add in a Simple Deform Modifier and set to Bend and adjust Angle to 360° on the X-Axis
Step 5: Add a Weld Modifier to clean up the stray verts
Step 6 (Optional): add in a Solidify, Bevel, Sub-Division Surface Modifier as desired.
Step 7: Select object and turn on smooth shading.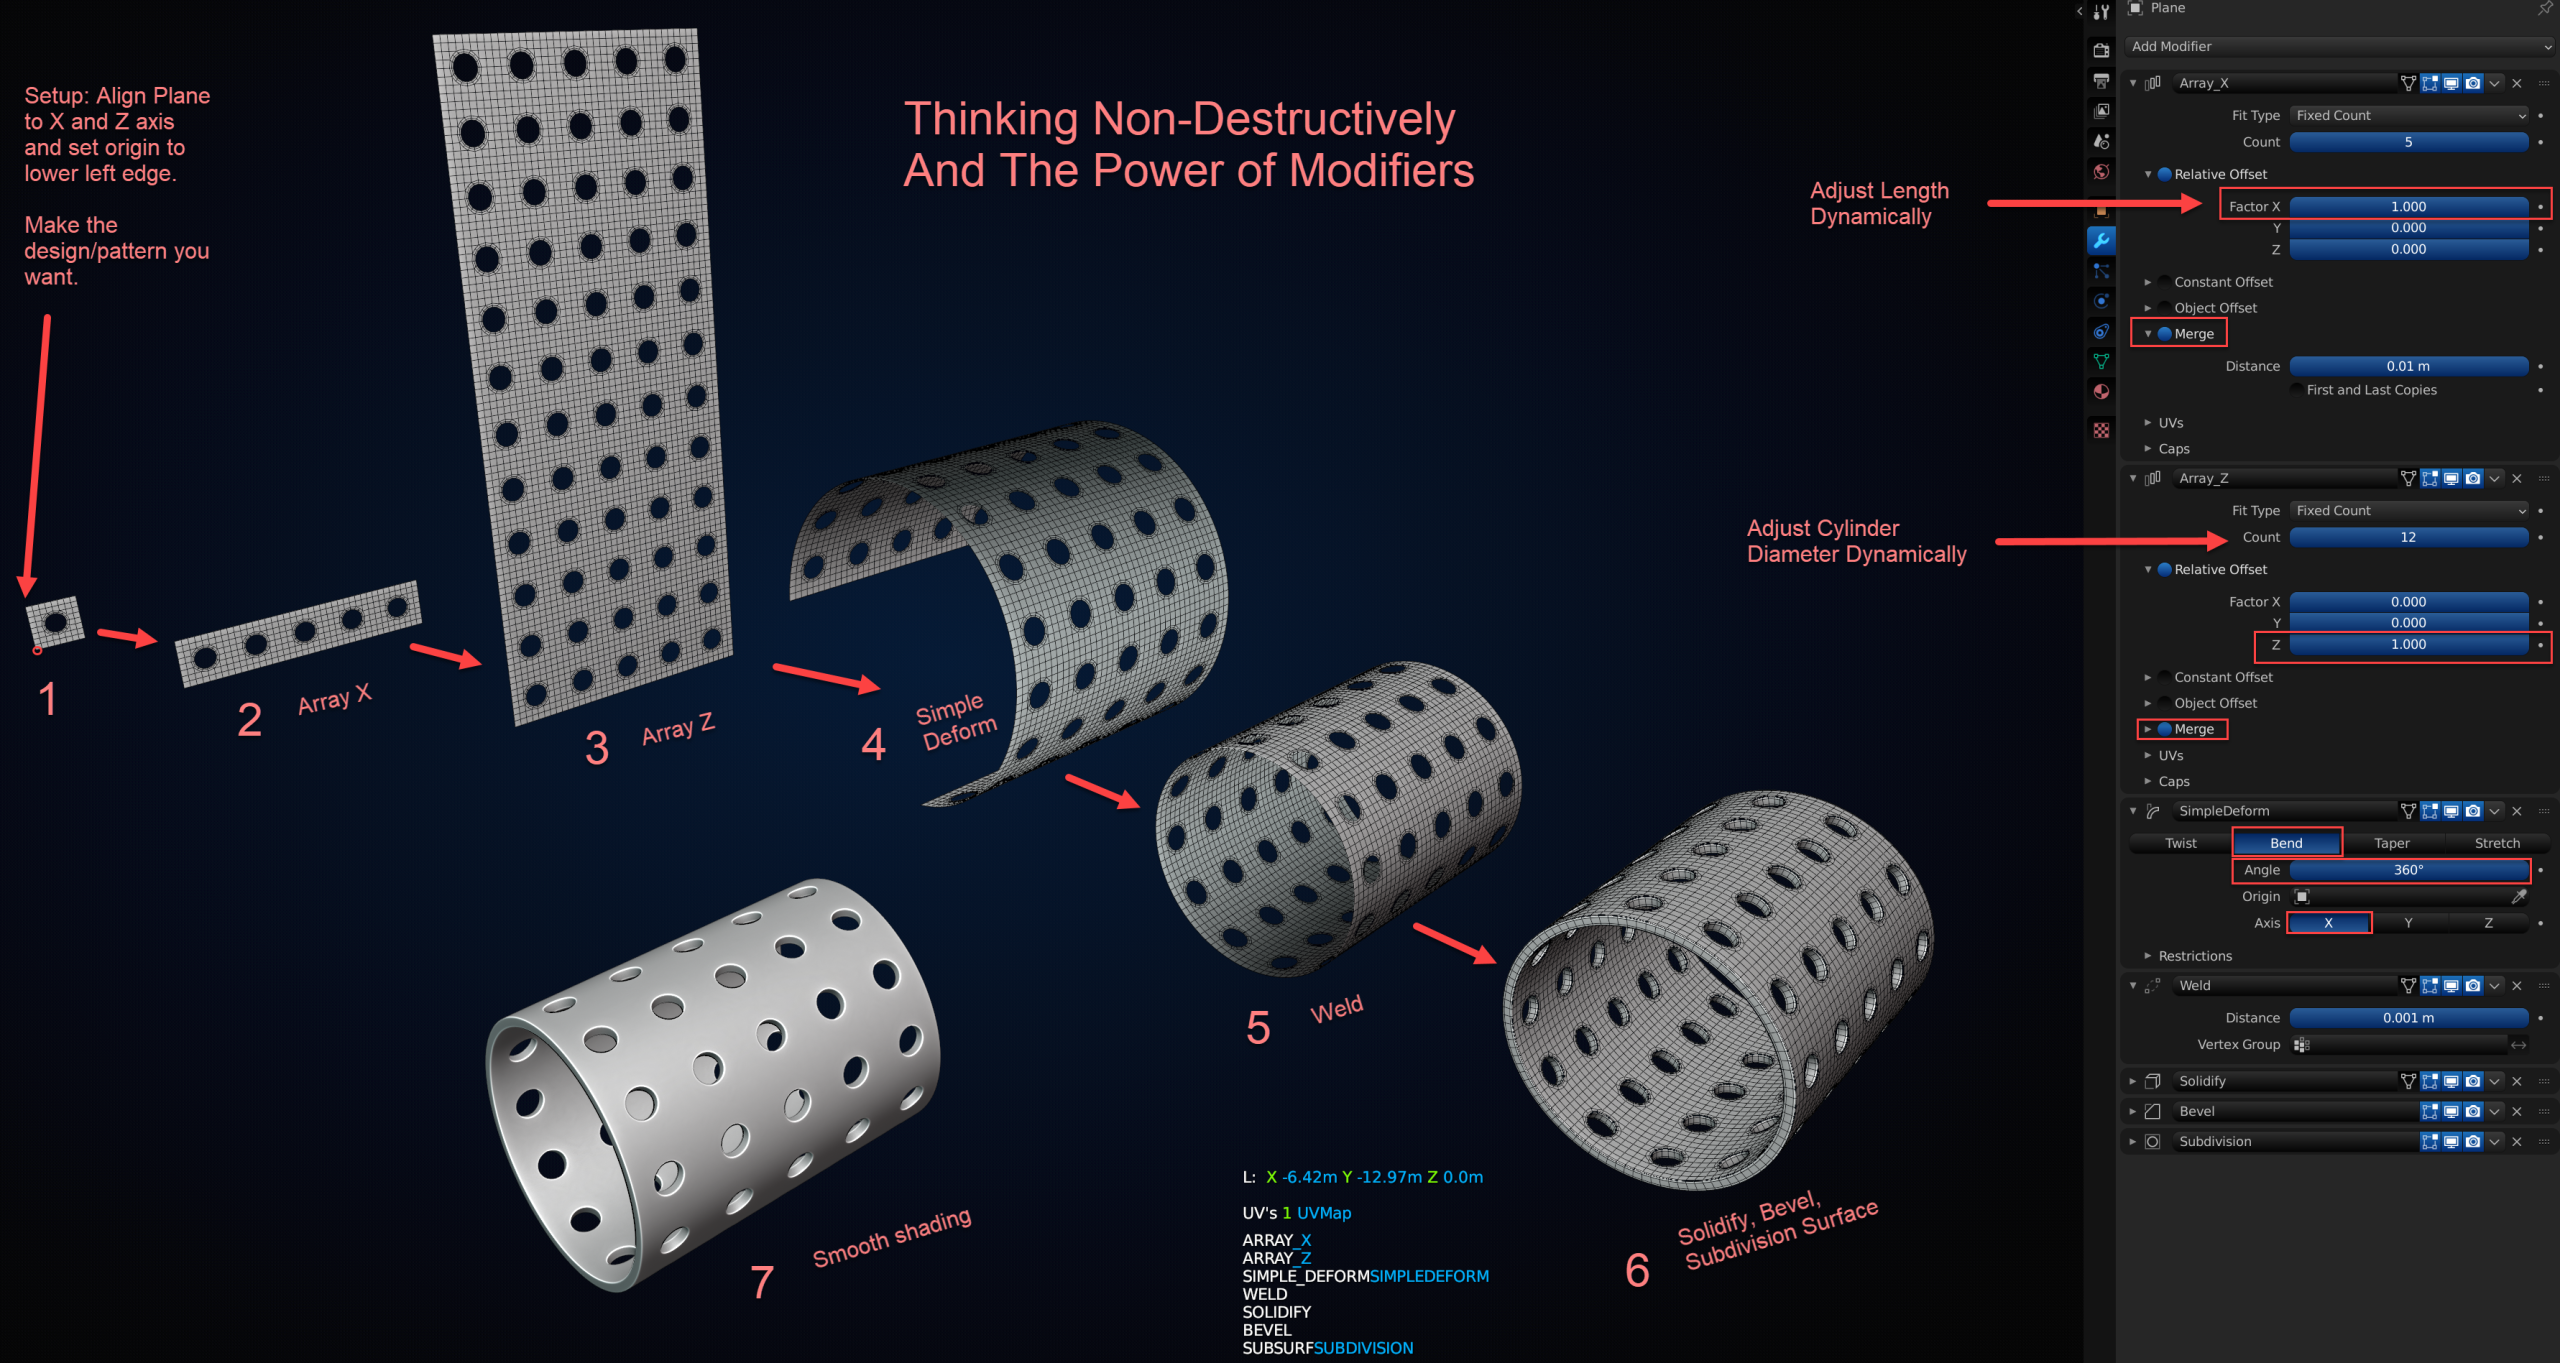
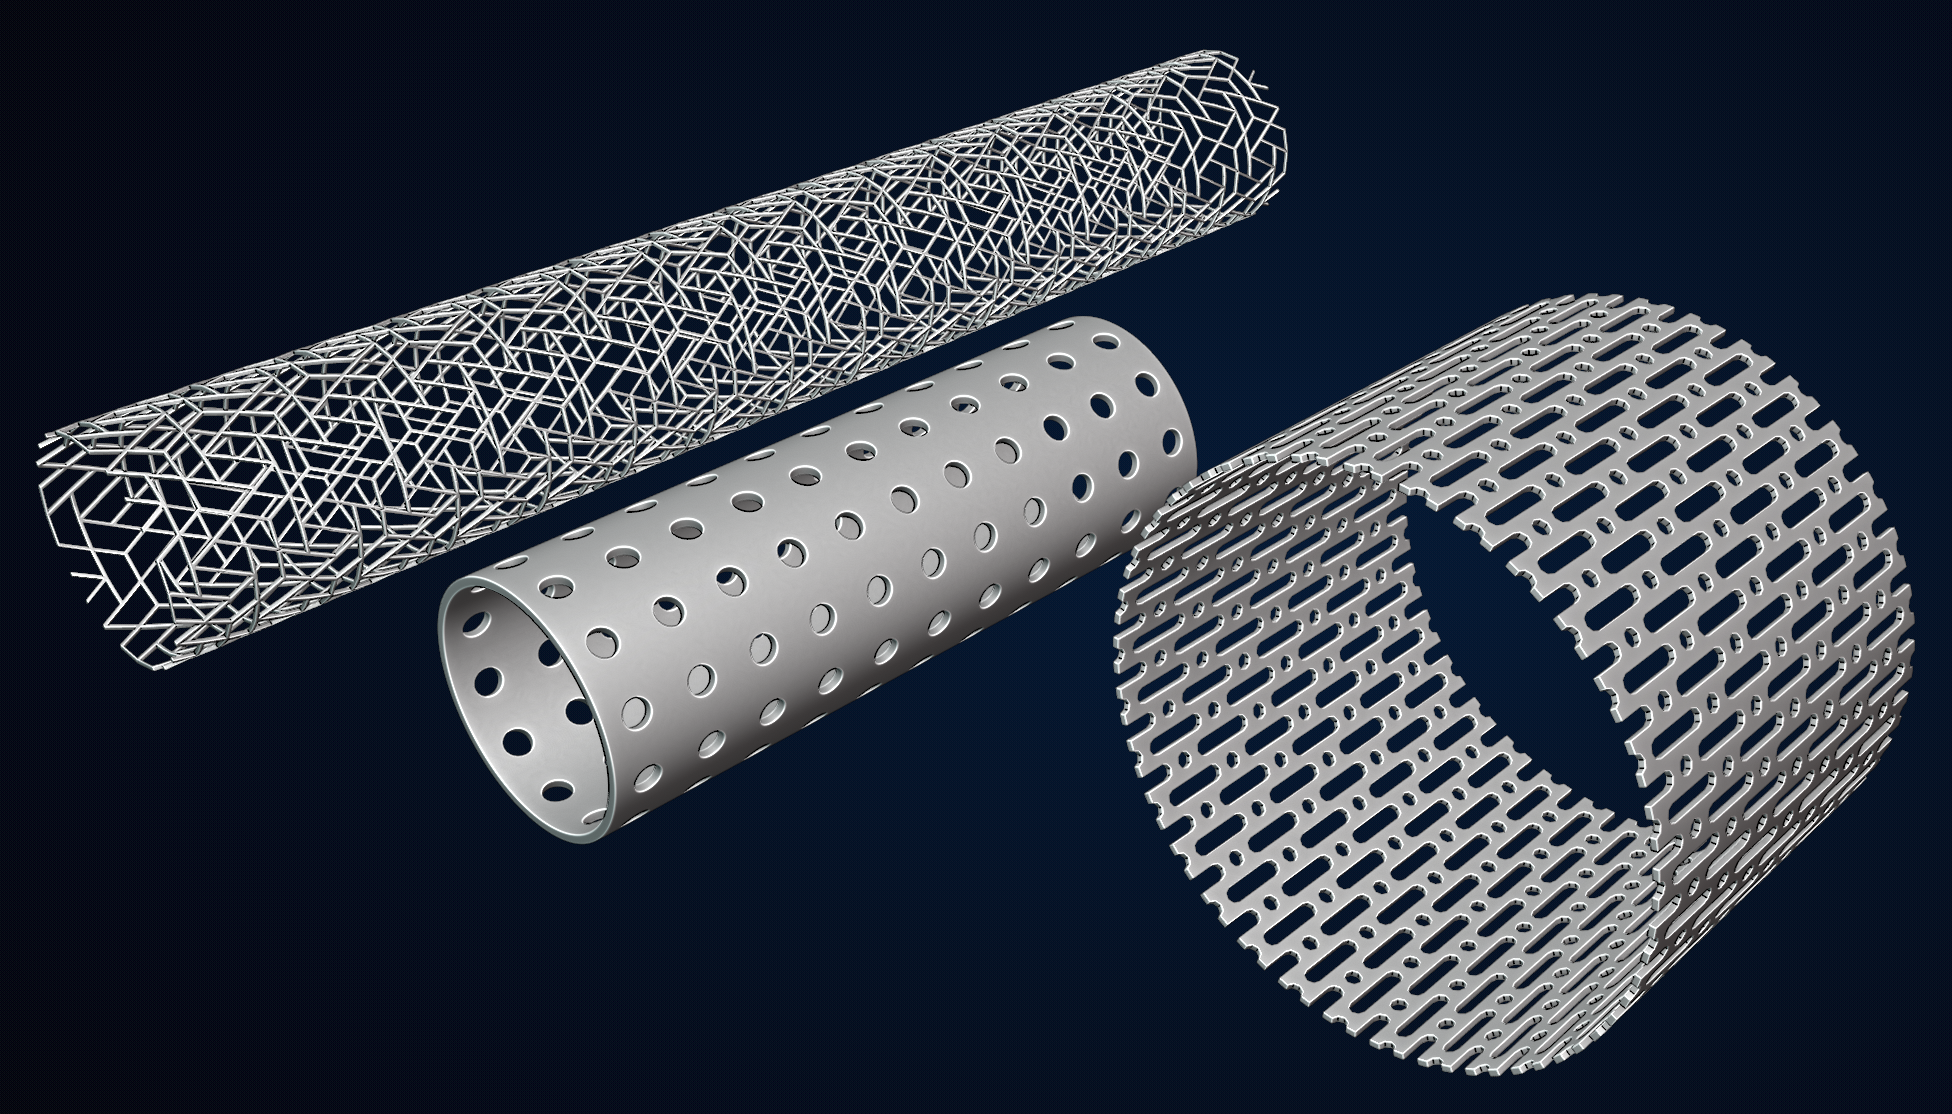
Changing the design at Step 1 opens up lots of possibilities. But adjusting Step 2 and 3 also has it’s benefits.
 December 12, 2020 at 5:17 am #61249
Looks great 👍! This is also possible with spheres:

Just the distortions towards the poles can be a problem (if this is not intended for artistic purposes 😉). File is here.
December 12, 2020 at 7:14 am #61250I’ve tried something which definitively needs some further tweaking:
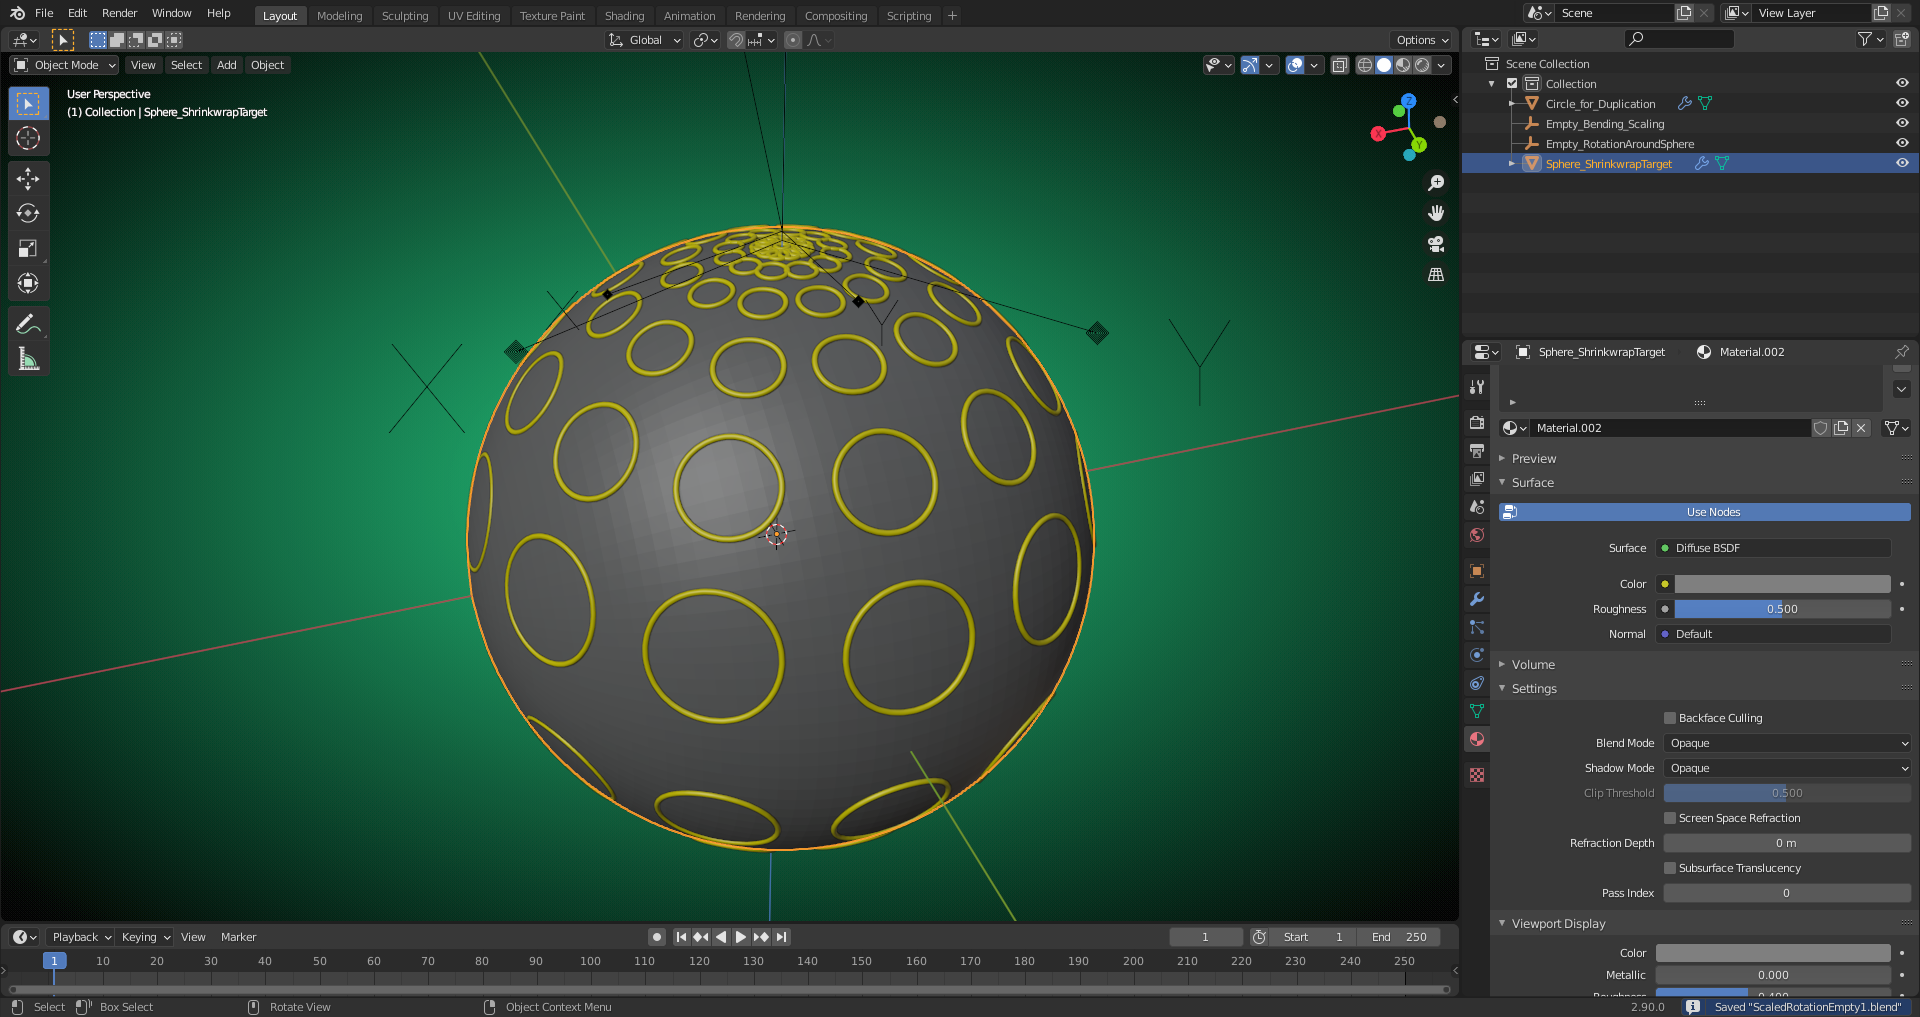
File is here. Suggestions for improvements or smarter solutions from scratch are welcome.
December 12, 2020 at 12:08 pm #61251I think you are on to something @duerer
The circles deform though so maybe incorporating my nugget methodology from my post here would solve that issue?
https://blog.cgcookie.com/forums/topic/a-notion-about-collections-rather/I’ll have to take a look at it after my son’s karate practice.
December 12, 2020 at 1:05 pm #61252I’ve found a solution and it works essentially the way as you described it on your linked page above by using a “Face” as “Instancer” which has been duplicated with an “Array Modifier” (set to “Fit Curve”) and a “Curve Modifier”:

And animated (Warning: Don’t get hypnotized 🤪😉):

Play with the “Distance X” value in the “Instancing Plane’s” first “Array Modifier”:
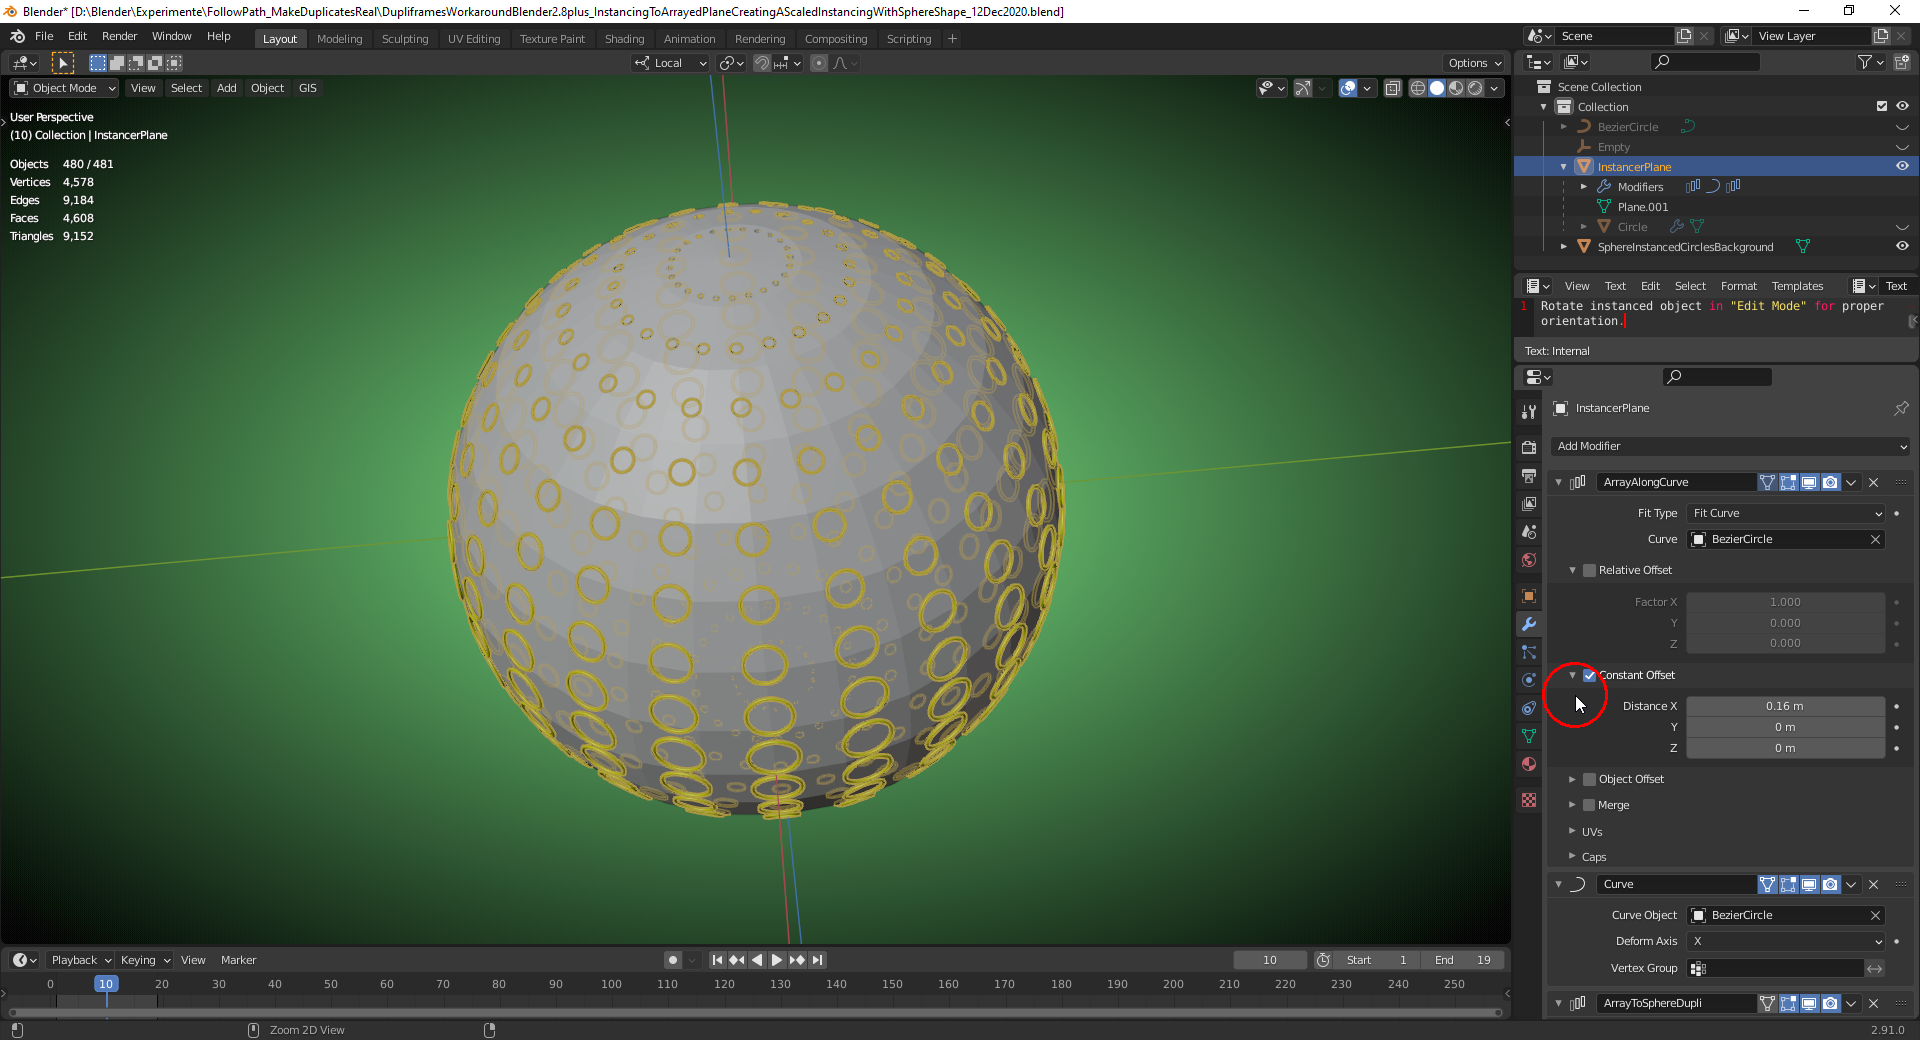
It’s important to check “Scale by Face Size” on the “Instancer” (the “Plane”) and to make use of “Curve Radius Smoothing”:
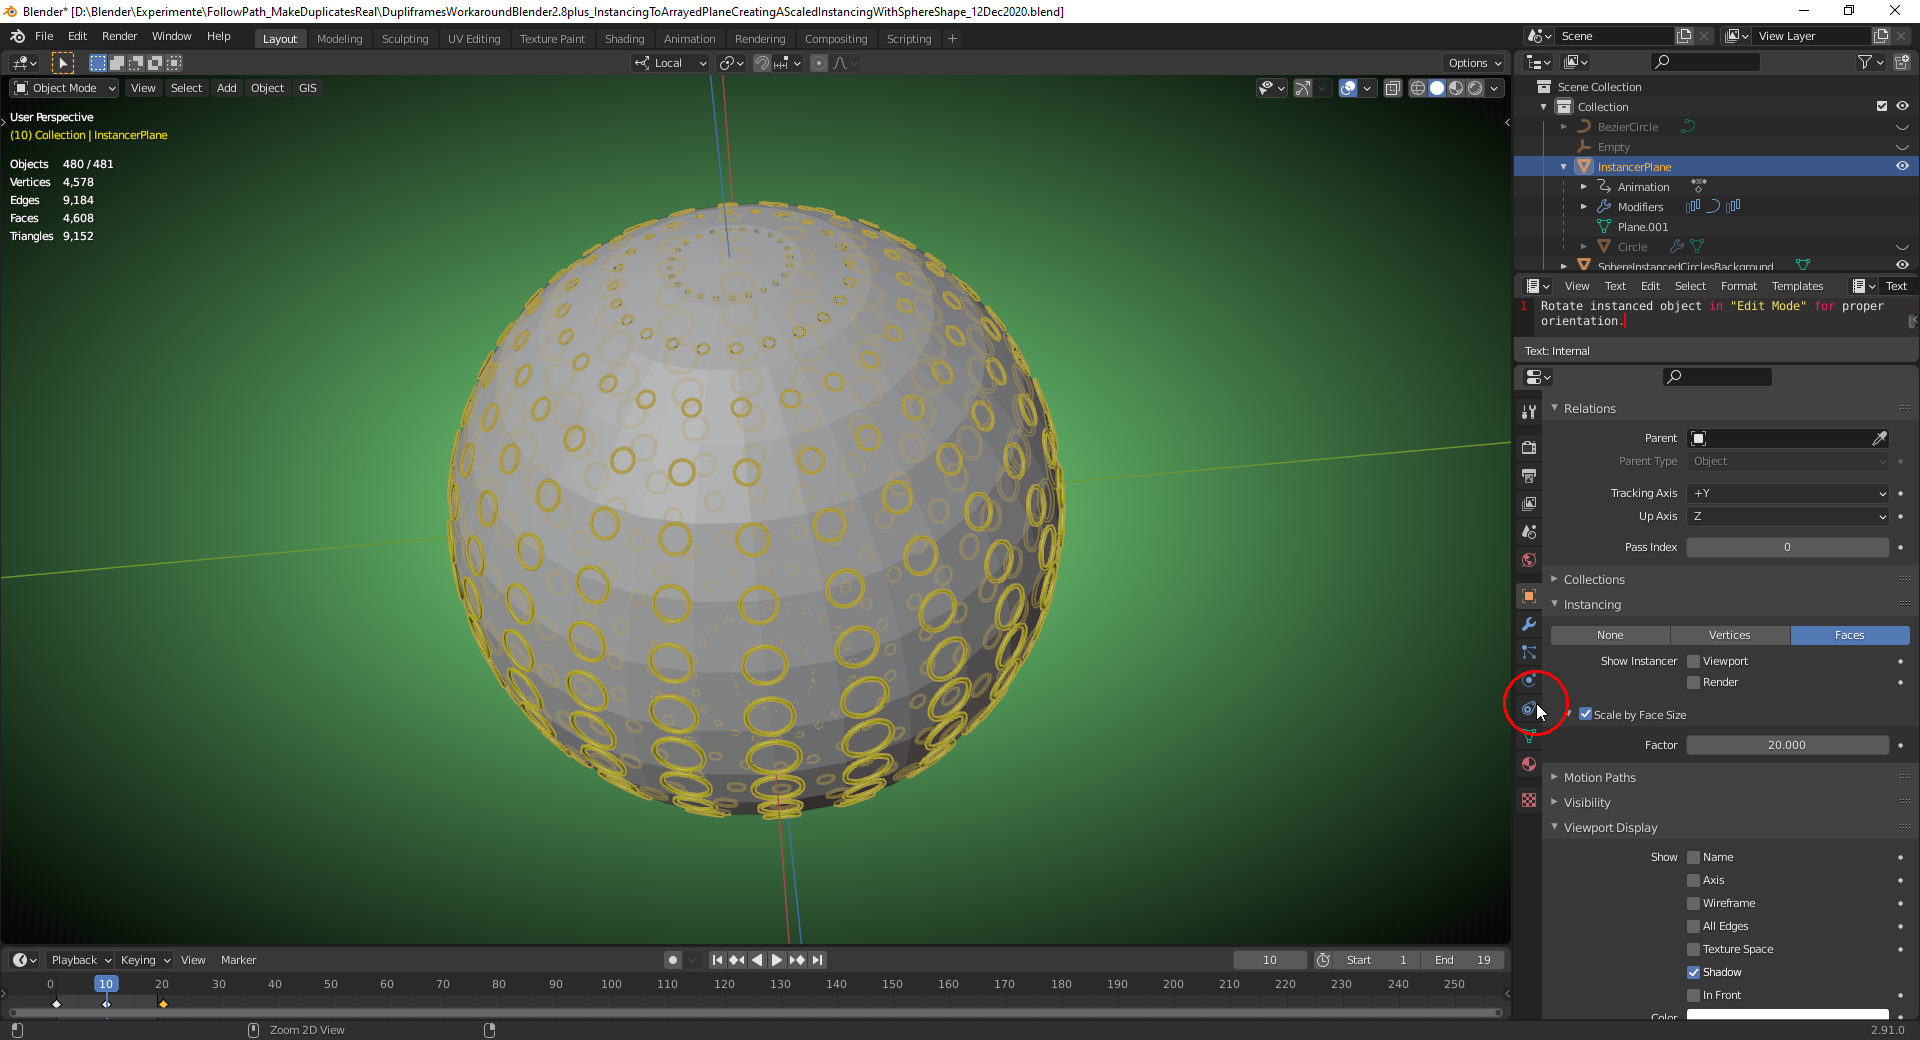
File is here.
December 12, 2020 at 4:16 pm #61253Yes! That’s exactly as I envisioned it! Super cool implementation. Saving this file to my modeling nuggets folder. Thanks for sharing @duerer.
December 12, 2020 at 4:55 pm #61254This can be used for a “Boolean Cut”:
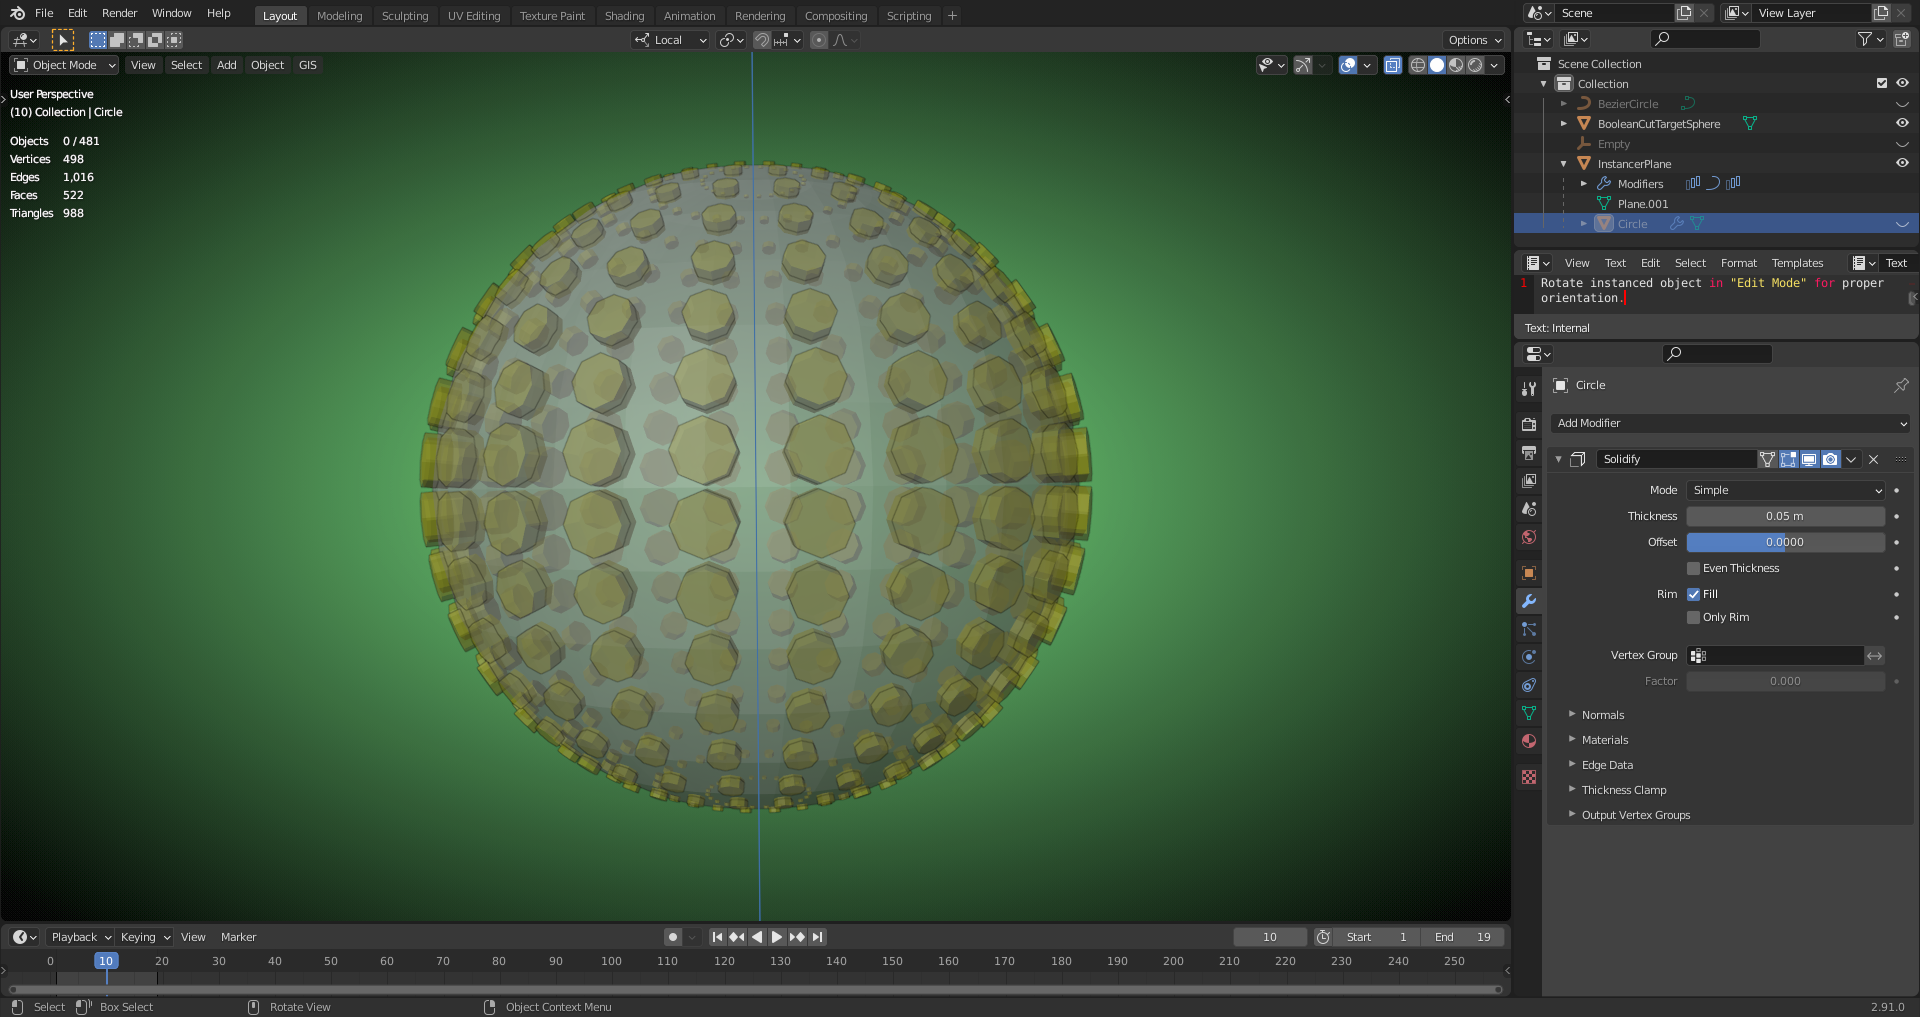
After “Make Instances Real”:
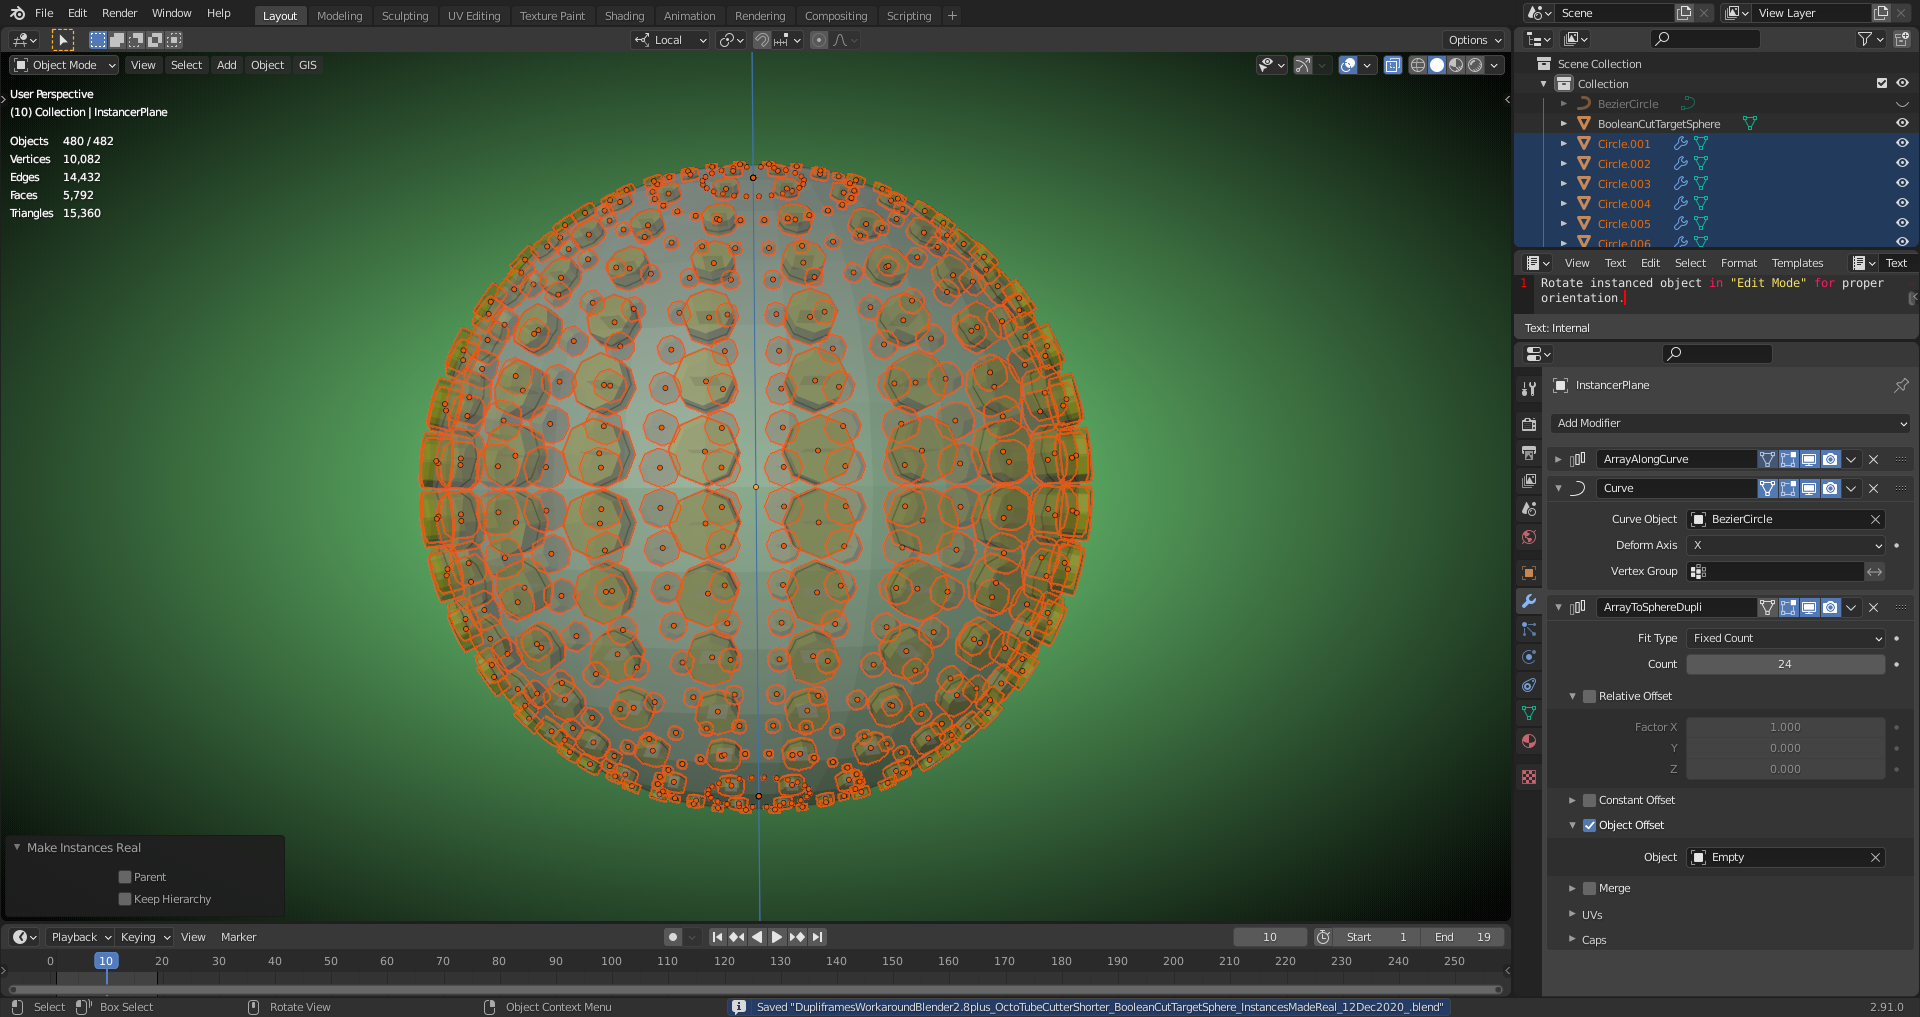
These individual cylinders have to be joined to one single cutting object for the “Boolean Modifier”.
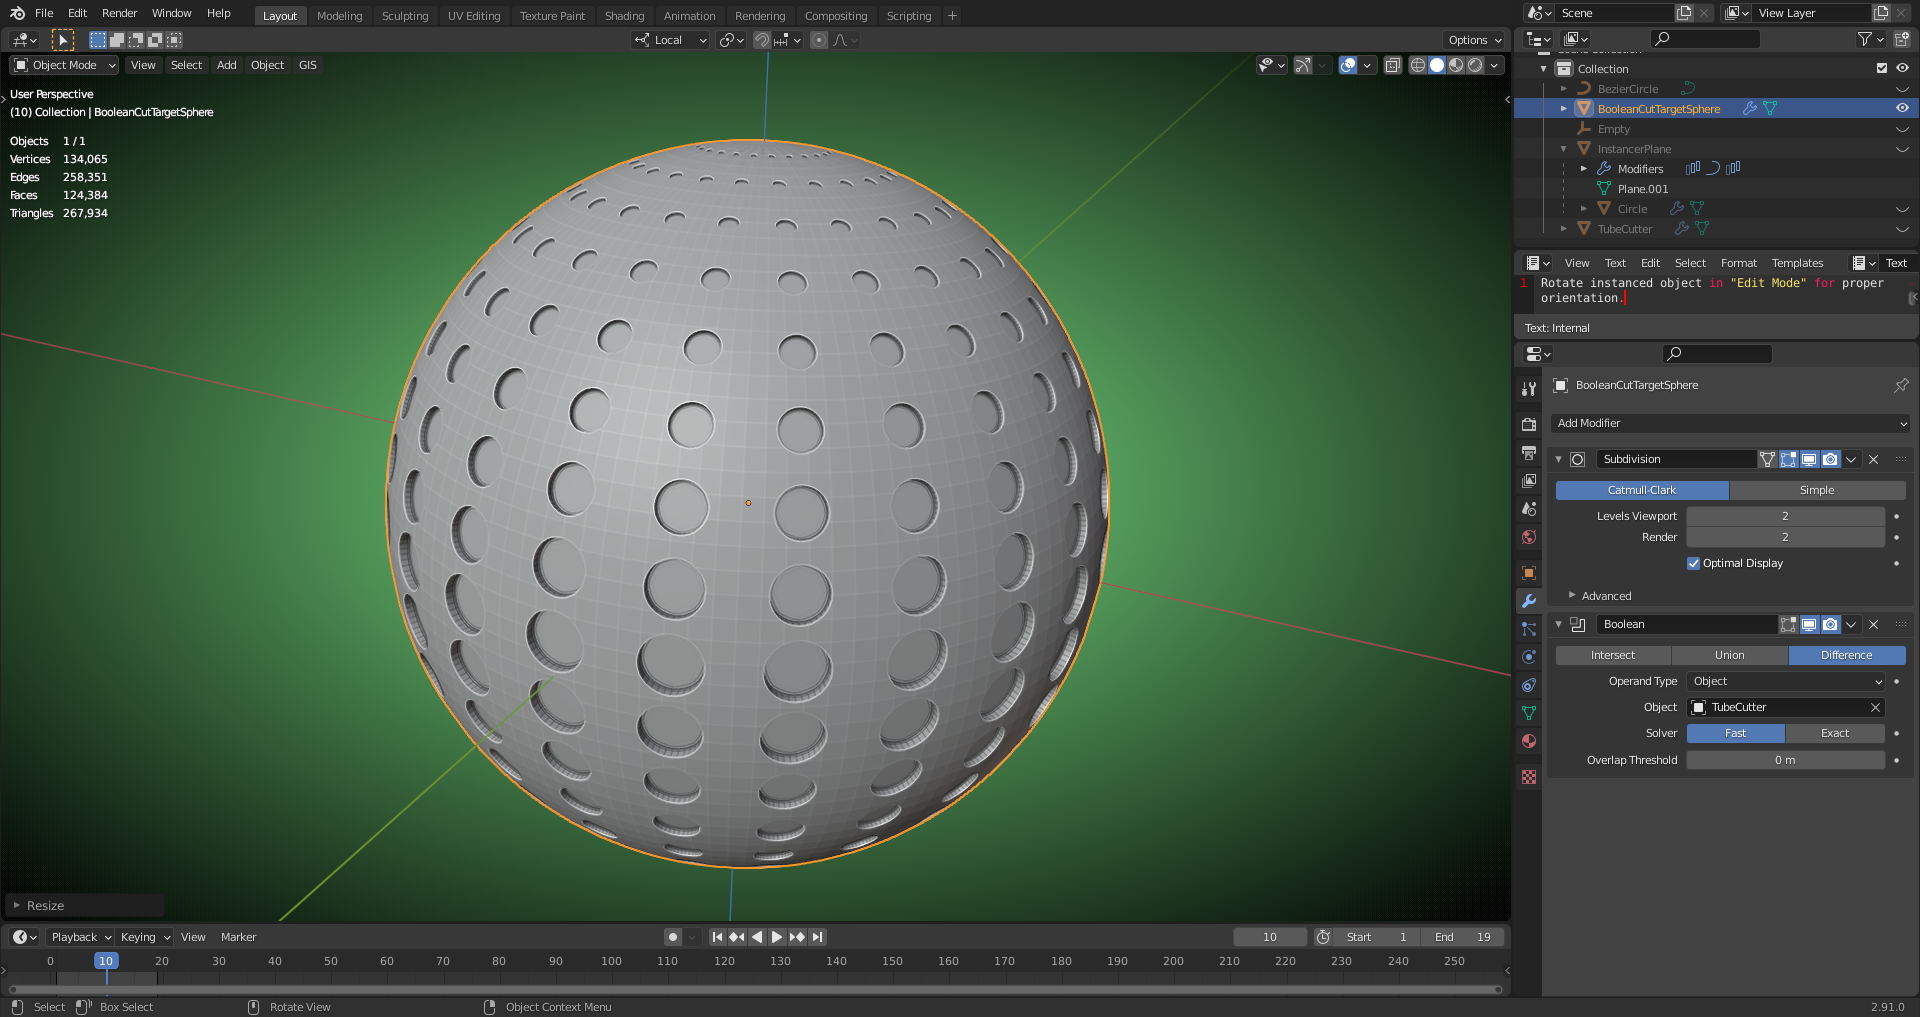
“Boolean Modifier” with “Fast Solver” and “Overlap Threshold 0”:
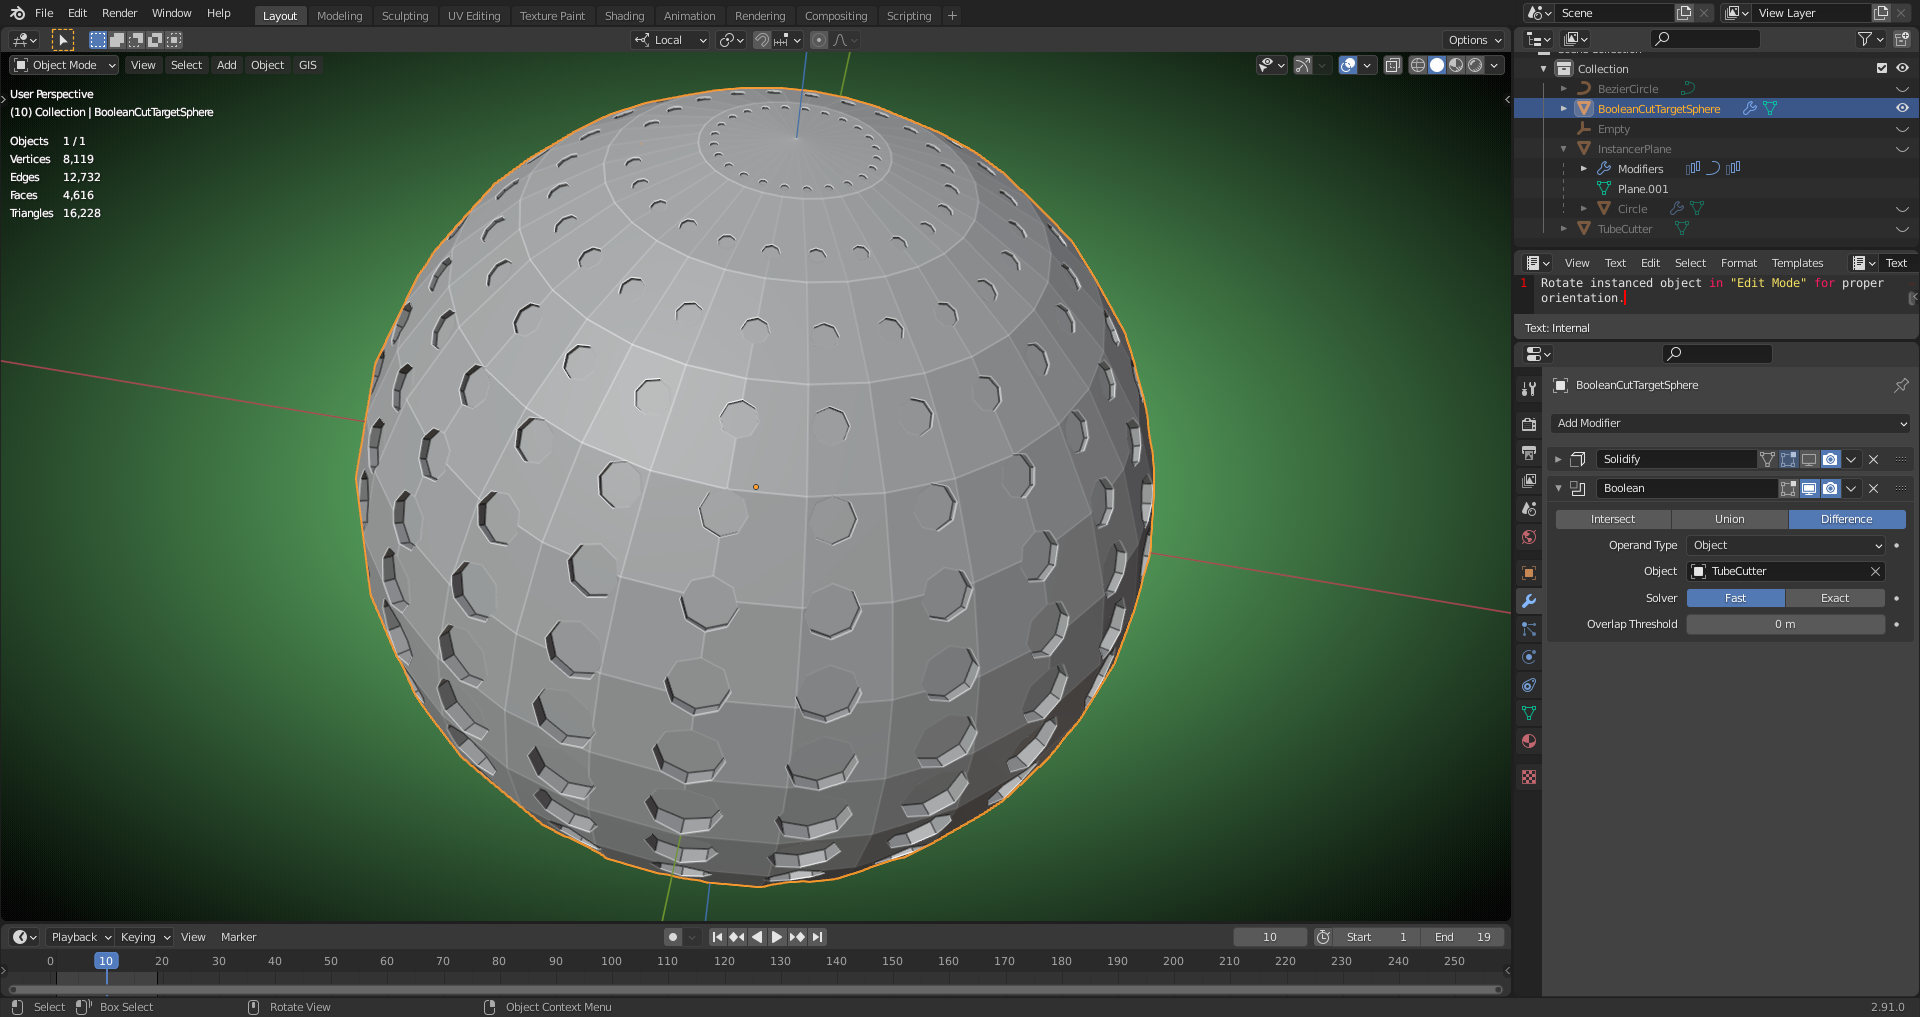
And with the “Target Sphere” smoothed (“Subsurf Modifier”):
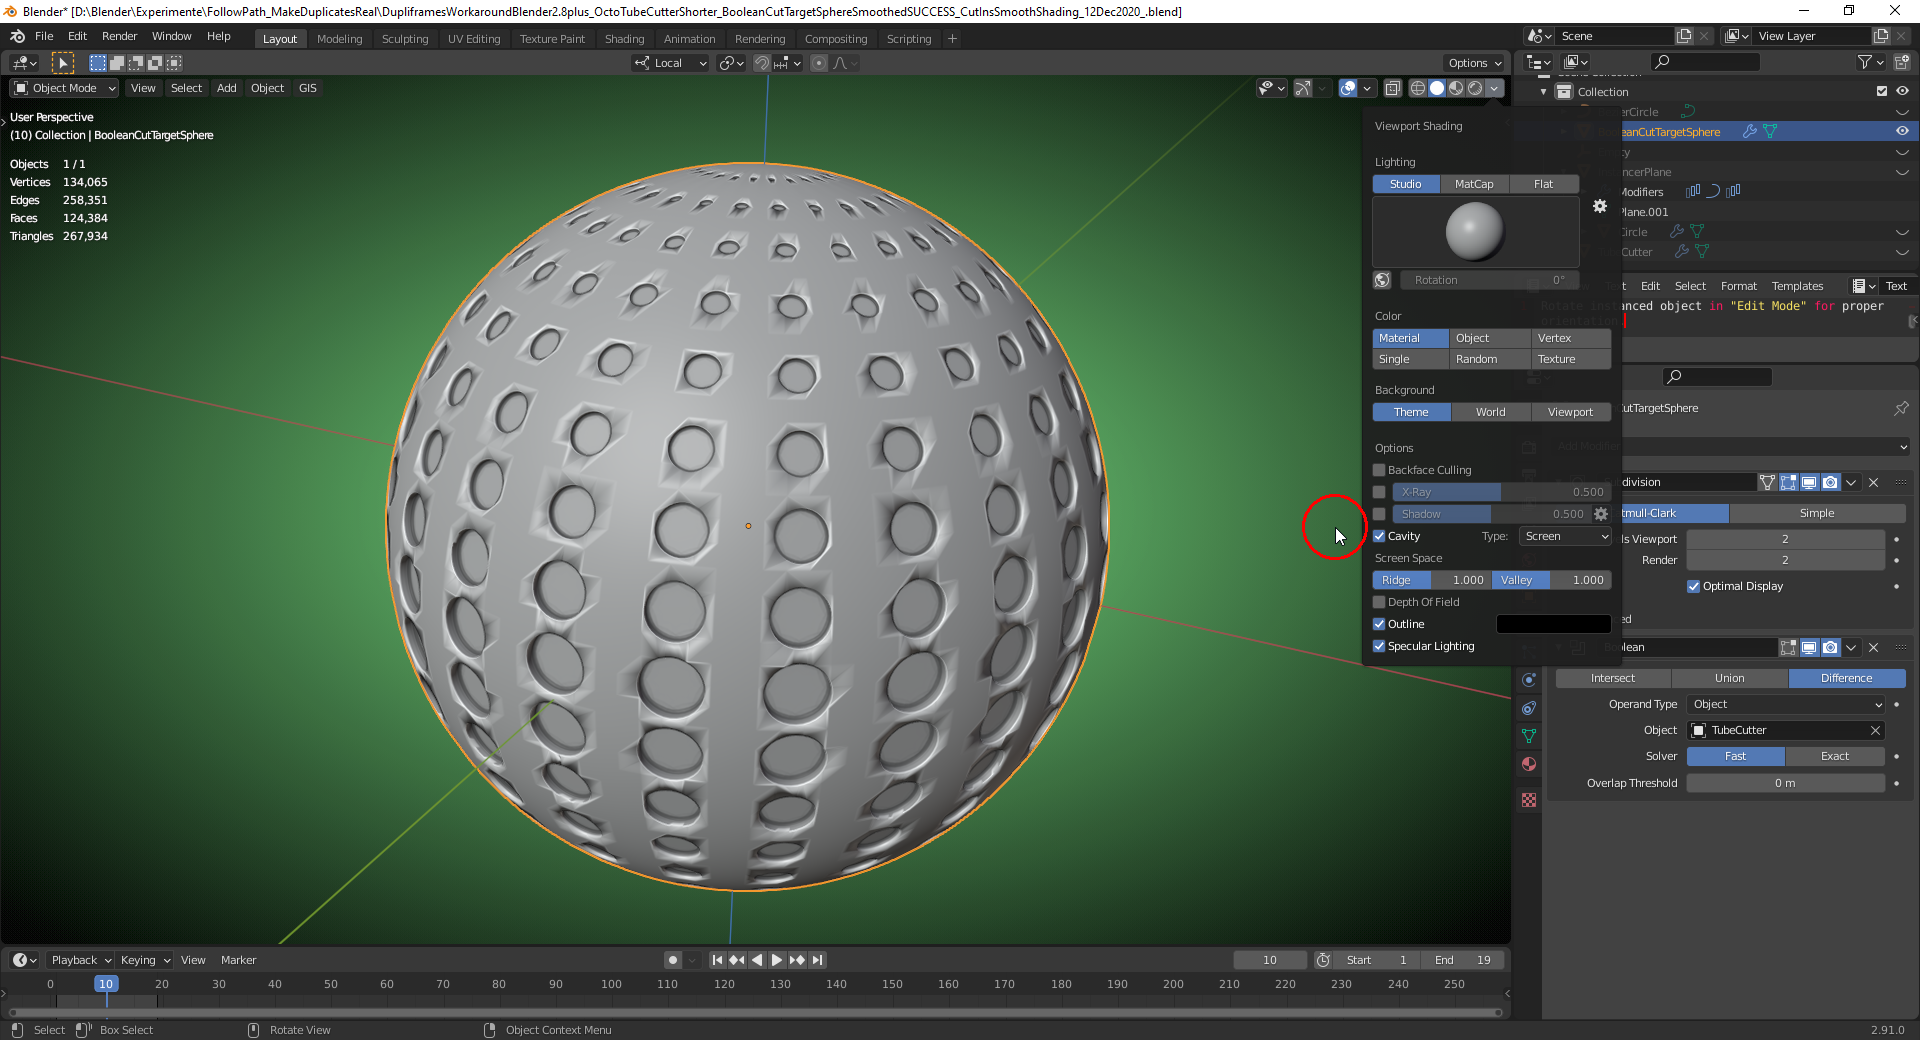
With “Smooth Shading” and “Cavity” turned on:
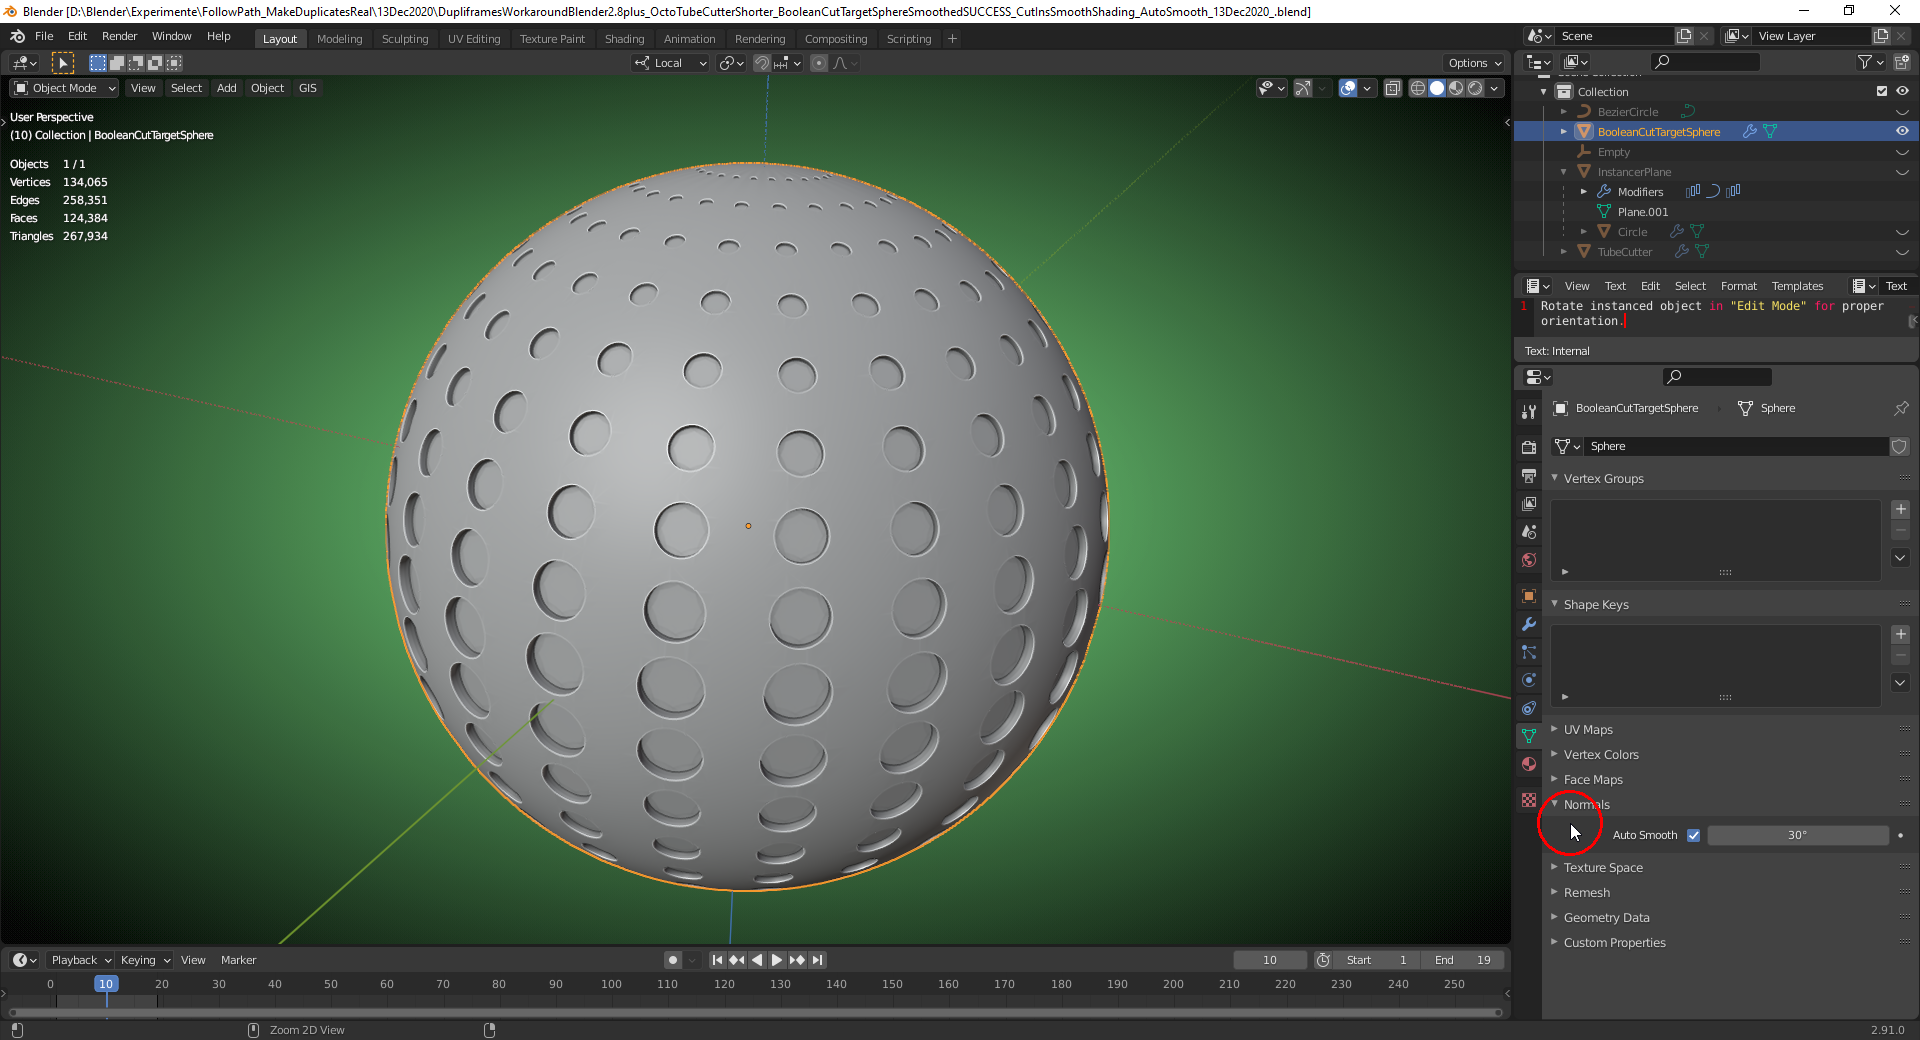
And without “Shading Artifacts” if “Auto Smooth” is checked (using the default setting of 30°):
File is here.
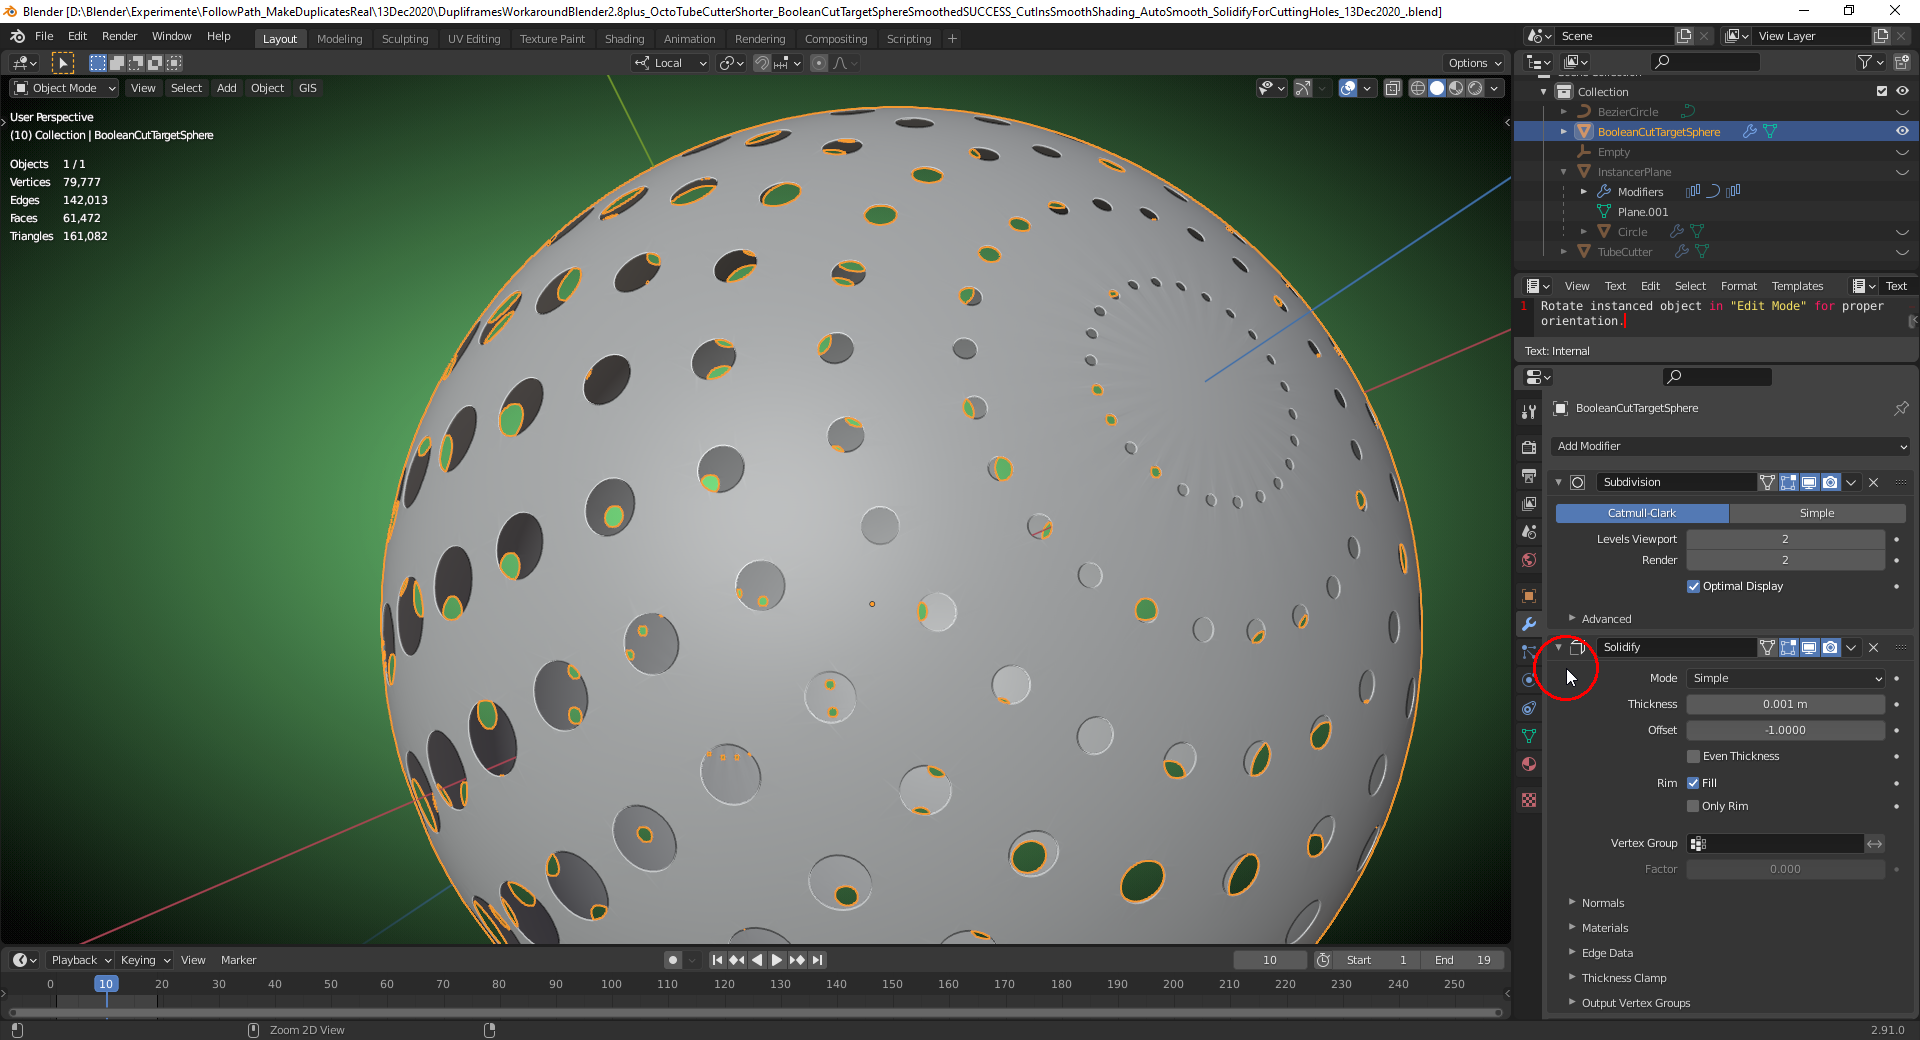
If you wish to cut out holes from your sphere, then add a “Solidify Modifier” to the sphere and choose a thickness that is thin enough so that your cutting object goes completely through that shell:
 December 12, 2020 at 4:57 pm #61255
Yes that is a great example.
December 13, 2020 at 5:36 pm #61256Gold Nugget #9: Smarter Collections and Selections
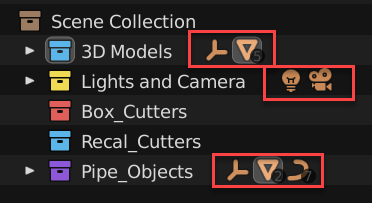
I stumbled on this and not sure what version it became available but the ability to click on icons to select objects quickly is really nice when you want a minimal view of the outliner. What’s even better is that it activates the Object’s more important properties by default when you select the objects this way. For example: clicking on the lamp will instantly show the lamp properties menu automagically highlighted. There is also a search bar for those of us who name our objects for easier narrowing.
You can click on the light and camera quickly too which means I don’t have to open collections to find certain objects.
Here’s a quick gif showing easy selections from the outliner.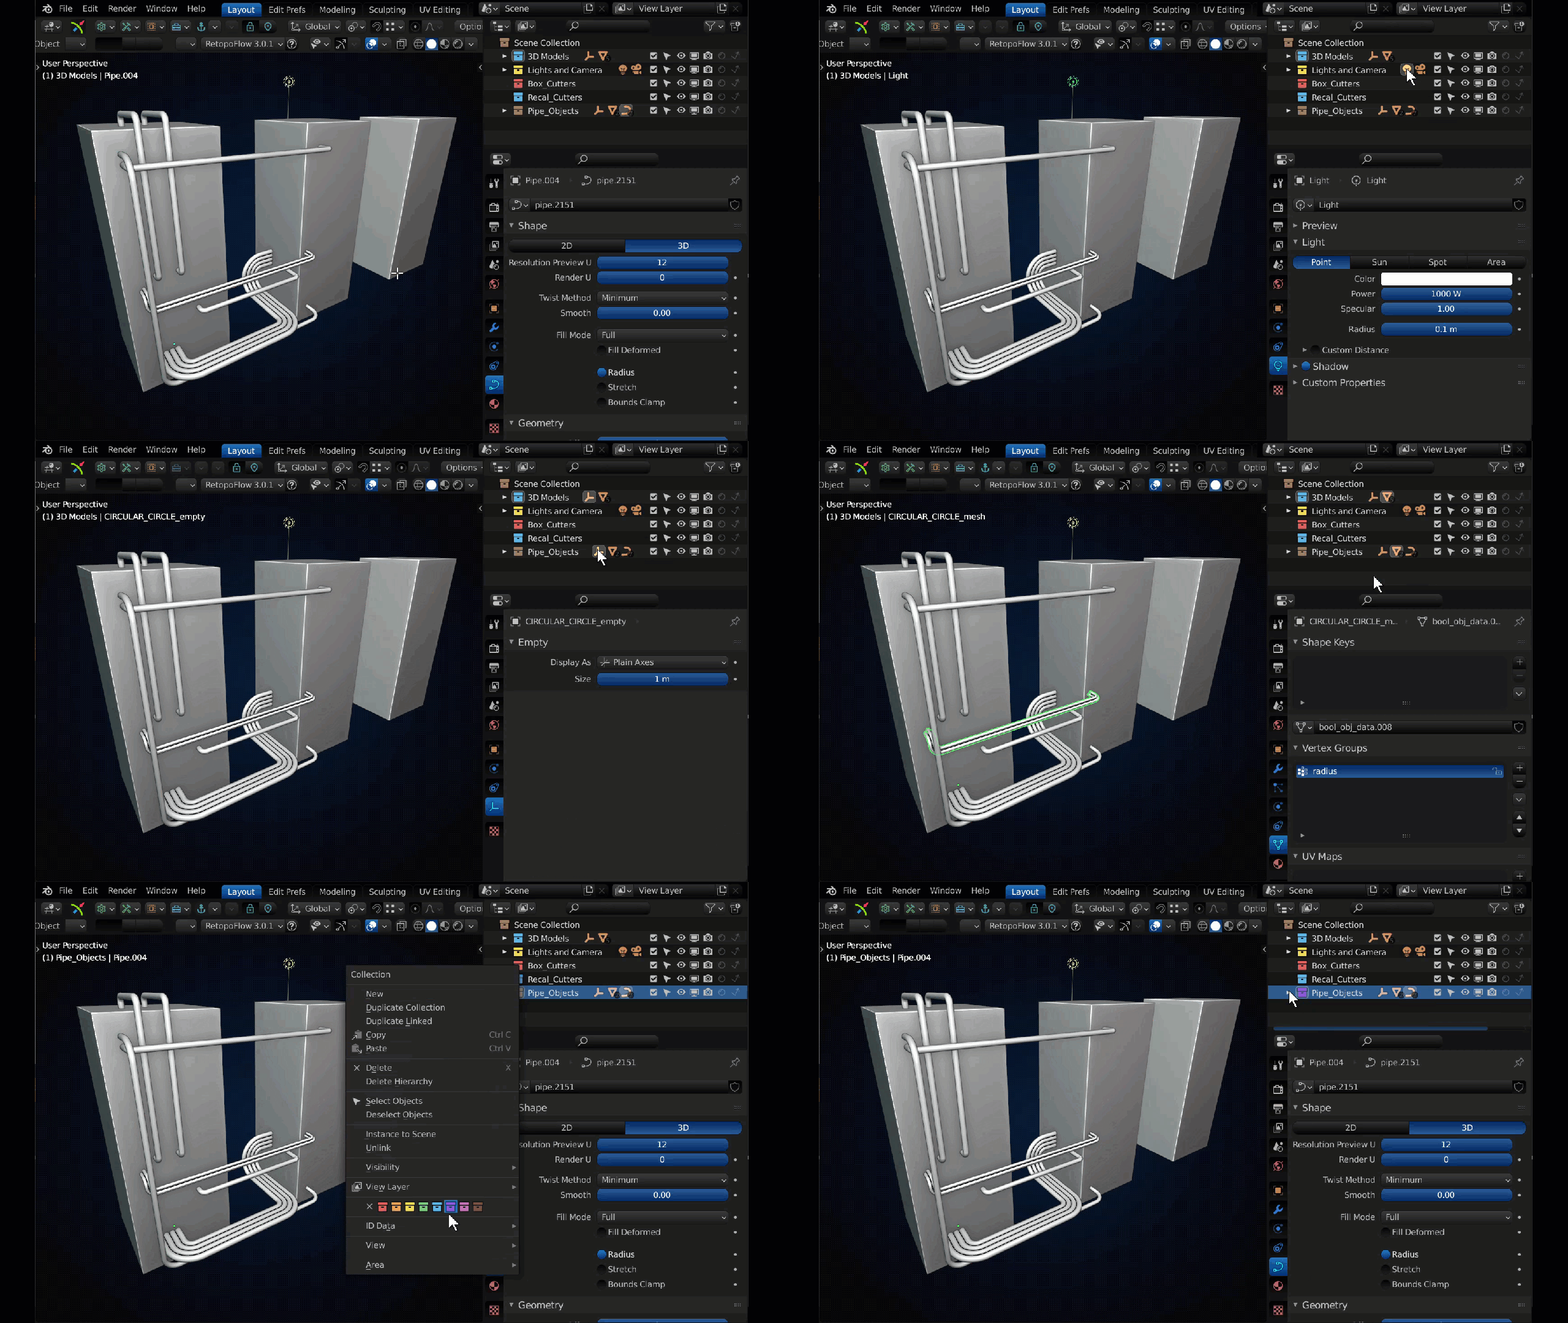
Remember to give your beloved collections some nice new colors to activate your right brain for better memory book-keeping. When your outliner is open and becomes infinitely long the color is displayed on a line all the way down the collection and is there to remind you which collection you are in even if you don’t see it’s name.Also don’t forget to move items easily between collections using drag and drop in the outliner (along with some additional key operations like holding Shift while using drag and drop to make quick parents) OR in the 3D viewport you can select your object and it the M key for quick movement.
December 14, 2020 at 3:34 am #61257Your really ‘knockin out the nuggets’ lately @blanchsb , some great tips and tricks.
Thanks for sharing your wealth.
December 15, 2020 at 5:02 am #61258Your Blender Nuggets are really usefull! Thank you Blanch 🙂
December 16, 2020 at 8:35 pm #61259That’s totally why I started this thread. If you find something super helpful then feel free to contribute.
December 16, 2020 at 8:35 pm #61260Thanks Adrian!
February 3, 2021 at 11:02 am #61261Really cool new avatar, @blanchsb 😊👍!
February 3, 2021 at 11:09 pm #61262Thanks @duerer it has been on my to-do list ever since I made it for my assembly on our Dog. I finally got around to rendering it out. I hope it doesn’t look too mean lol.
-
AuthorPosts


- The topic ‘Blanchsb’s Blender Nuggets’ is closed to new replies.