
Katerina Novakova

Forum Replies Created
-
AuthorPosts
-
You are right, Omar, I rewatched the video and he does mention it. But I misunderstood him and I thought he started talking about animation, which I dismissed as not relevant for me. So the real lesson from this is to pay closer attention to sources I do find before I spend a whole day on a wild goose chase. 🙂
@dillenbata3 Dwayne, you are a genius! If I add a keyframe on the overridden exposed parameter, the value doesn’t revert when I save and reopen the file. Thank you so much, you have saved my sanity!
Yes, that’s exactly what I’m trying to achieve but without the material override I don’t know how else to change the exposed parameters on linked materials.
Huh, now that you mention it I do remember hearing him say it in the video but I must’ve dismissed it as “his version of Blender is a bit older and things must have changed since then”. Well, I guess they haven’t and I have to go back to the drawing board on how to design my library.
Thank you, Omar, for bravely staying on the case. 🙂
I’ve disabled all of my third party plugins and I’ve tried in 4.1.1 and 4.3.0 Alpha, with the same result. I just find it hard to believe that something this significant would be a bug and unreported at that, so I think I must be doing something wrong. Especially since I don’t have much experience with linking and libraries.
I’ve created a mockup library and scene to match my description above so that other people can try to reproduce it. I’ve also recorded myself linking and overriding the materials.
Thank you, Omar. It is a great video – when I watched it earlier today it helped me figure out how to override materials more easily and reliably. But then I got stuck on this reverting to default thing, which is stopping me from developing my library – I feel I need to figure out how to set it up from the beginning to avoid major rework later.
As for it being a bug, I could only find a few older reports that are mostly related to armatures and then one person with the same problem but no answer from 2 years ago. So if it is a bug it seems it’s been around for a while. I don’t know who else I could ask for confirmation since I feel quite intimidated by the bug reporting. But I will try the latest version, that can never hurt anything.
Hi Vue, the rest of the vertices is moving because they are inside of the sphere of influence of the proportional editing tool. You should see a circle around the selected vertex – if you don’t, the circle is probably too large. You can see its size in the upper left corner of the viewport. Scroll your mouse wheel until you see that the size is decreasing and the circle should eventually be visible.
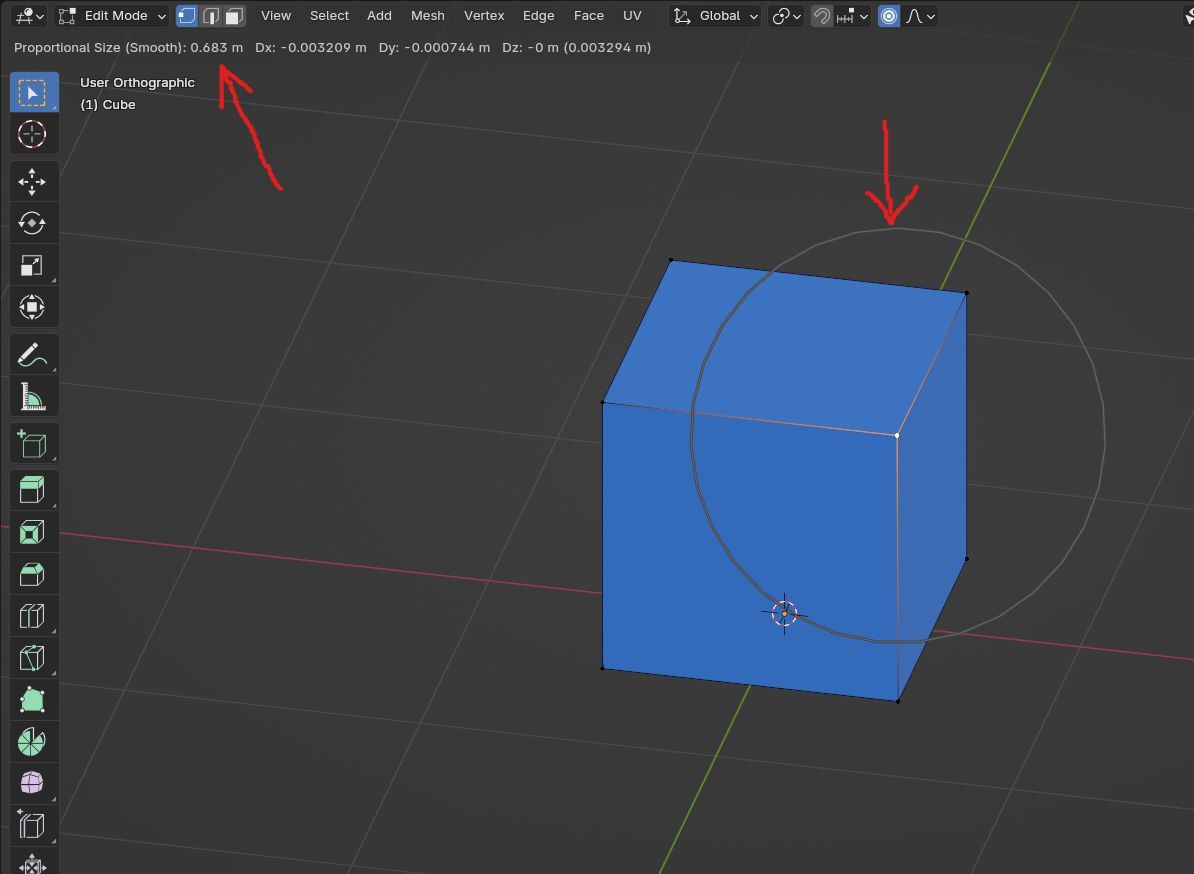 July 31, 2024 at 1:44 am in reply to: Drawing preview of a box shape is white (in version 4.2.0) #87761
Hi Paul, thank you for reporting it – and for finding the workaround with the pencil tool, it works for me.
@smurfmier1985 @dostovel You are both right, of course. 🙂 I even think I like the Eevee version better. But I definitely need a refresher on how to set up the indirect lighting, it’s been a while since I played with probes.
Homework submission – Week 3
Many environmental maps later (honestly, I spend way too much time fiddling with those), I finally have two renders, one for Eevee, the other for cycles. Can you guess which is which? 🙂
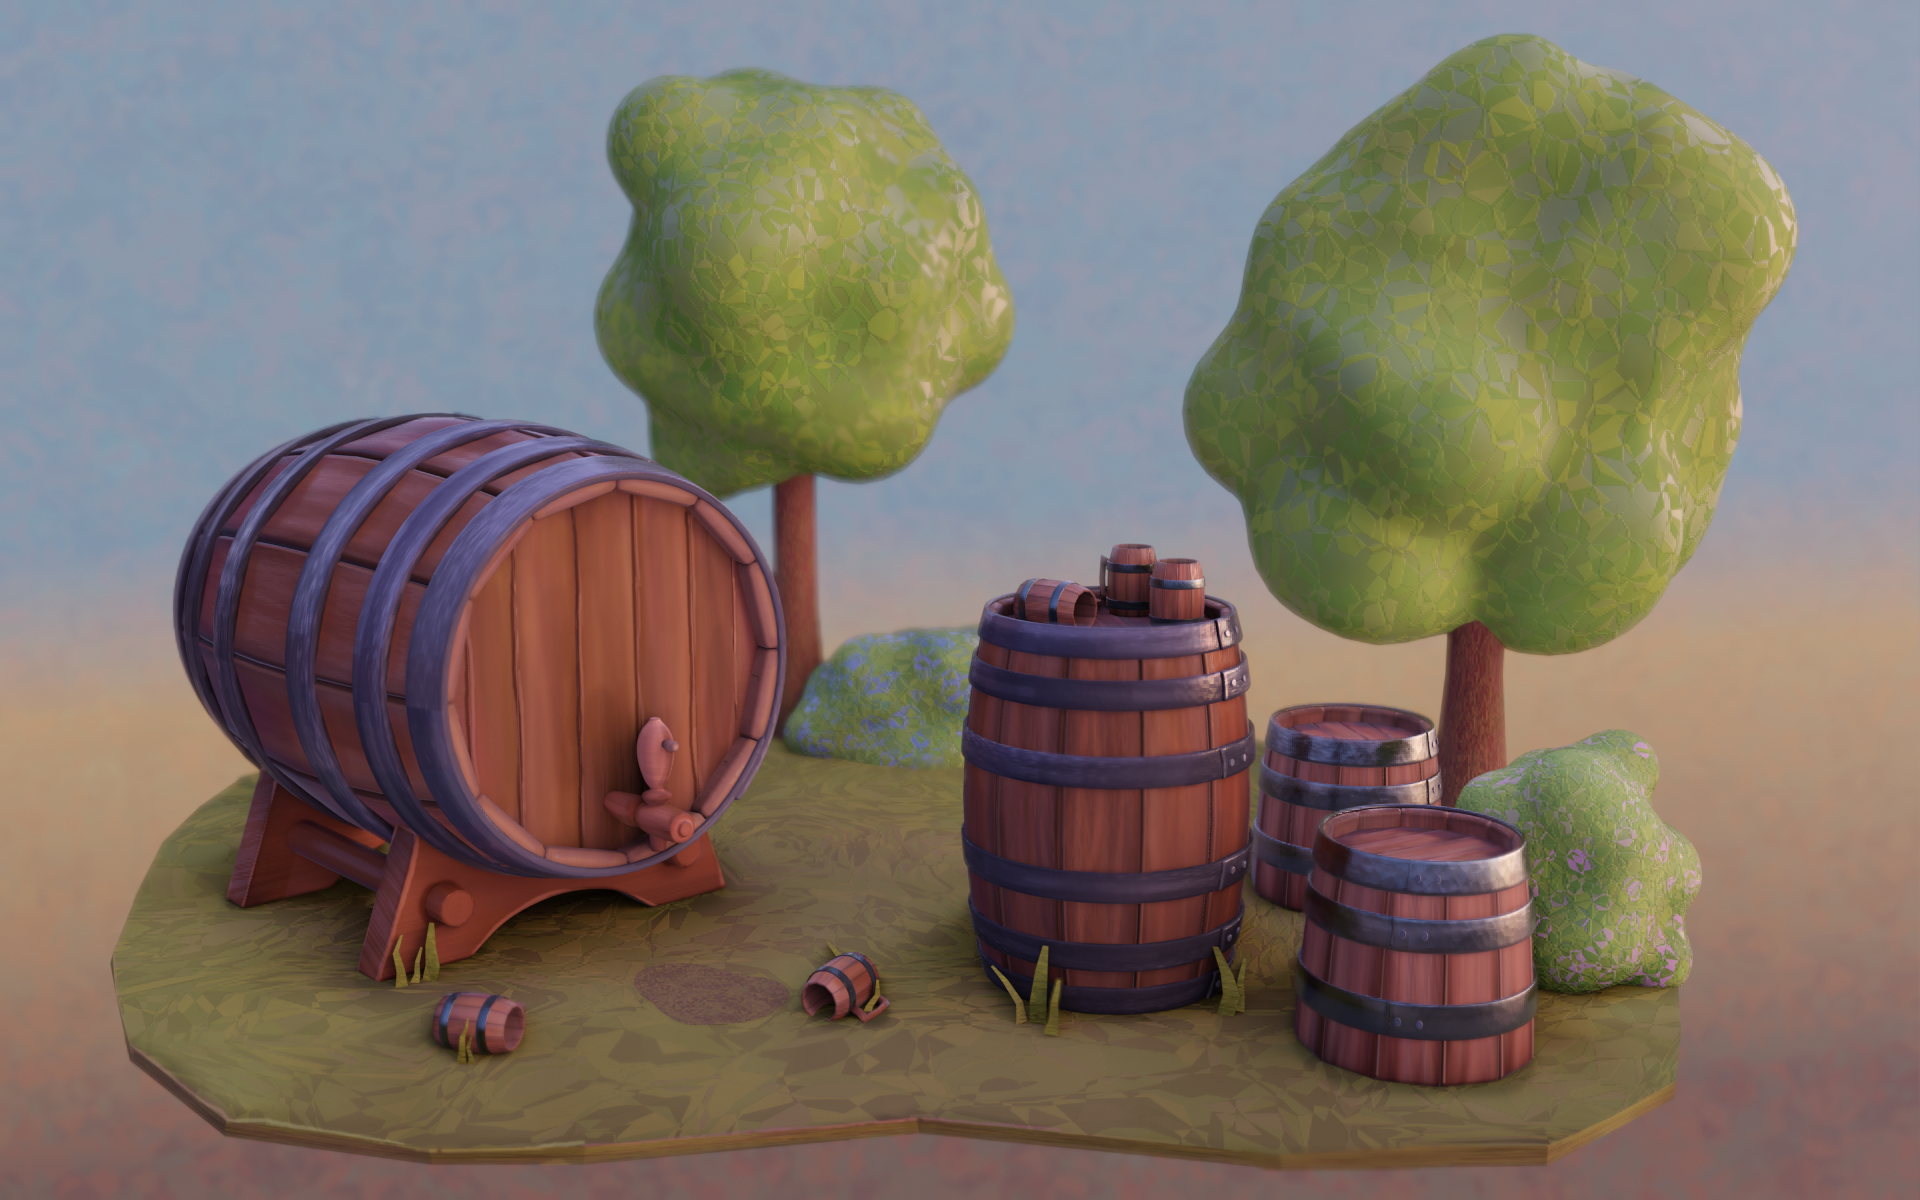
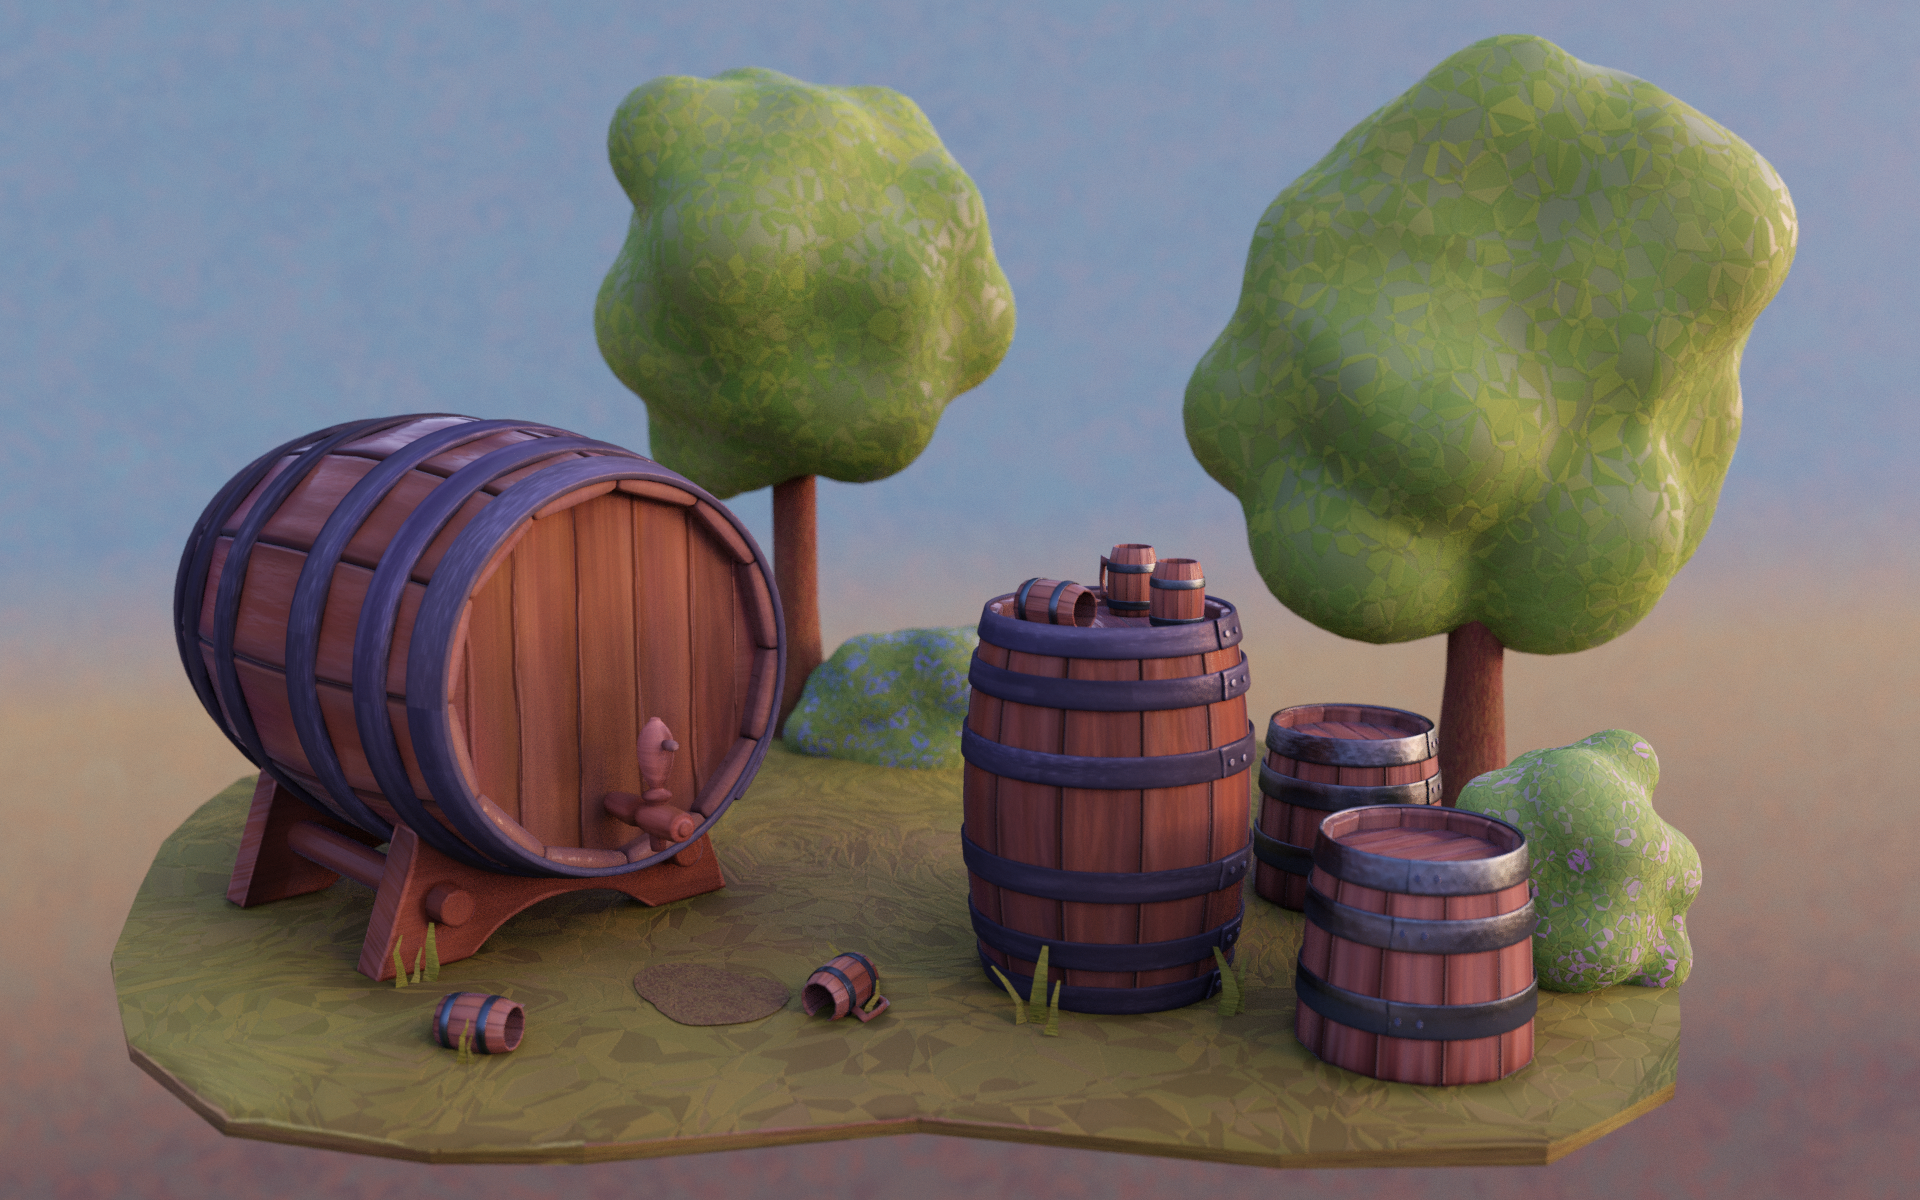
As a side note on the post-processing, I originally had a vignette set up, but I removed it because I didn’t like how it interacted with the background. Instead I dodged the highlights in Krita (one of my tried and trusted post-processing hacks – it nicely brightens the scene).
WIP 14: Environment details
I was lucky enough to find an effect I like. It looks a bit painterly and geometrical at the same time, and (at least for now) I think it fits the mood I’m after.
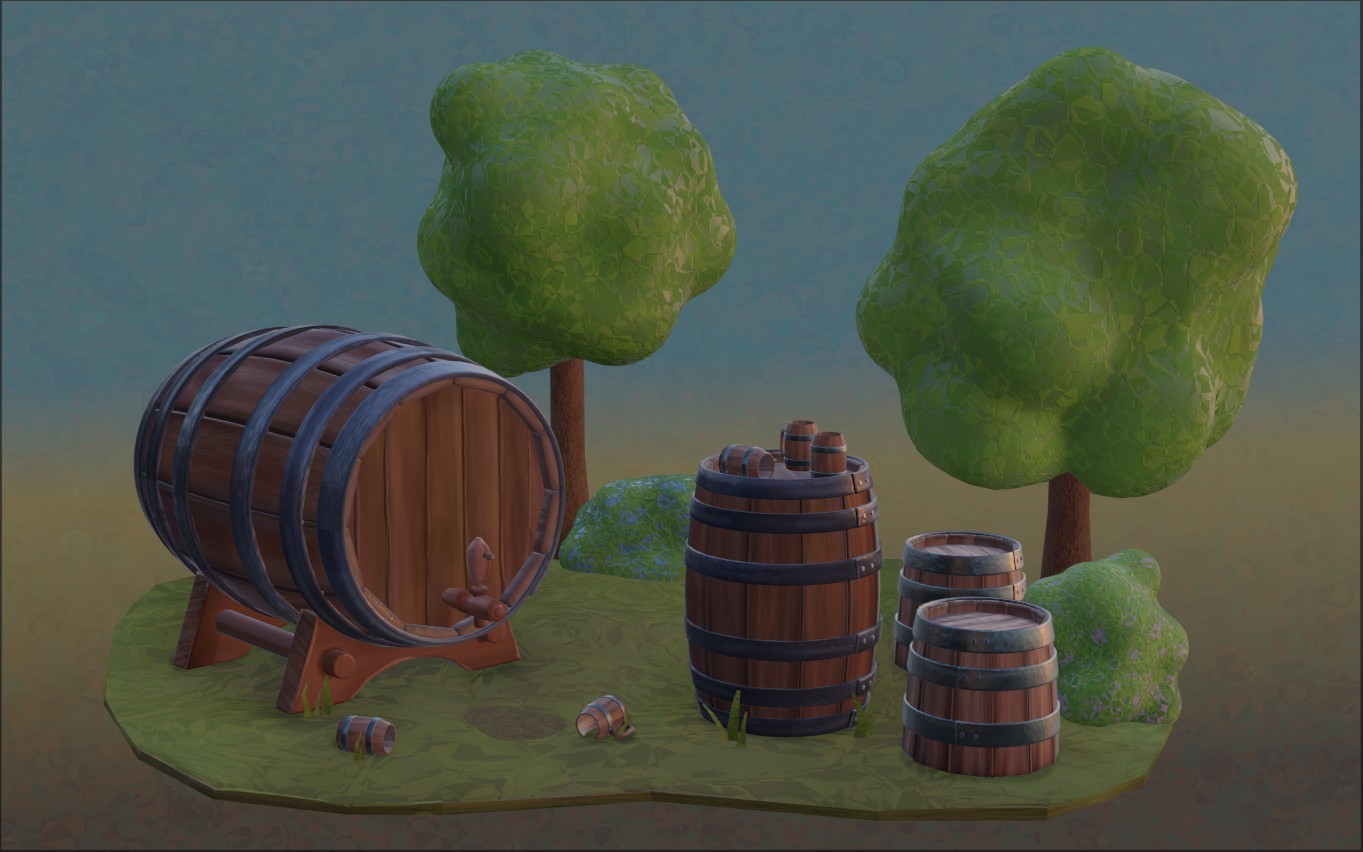
Here is a node tree for one of the bushes. I’m almost ashamed to admit that the whole look is driven by one colour ramp:
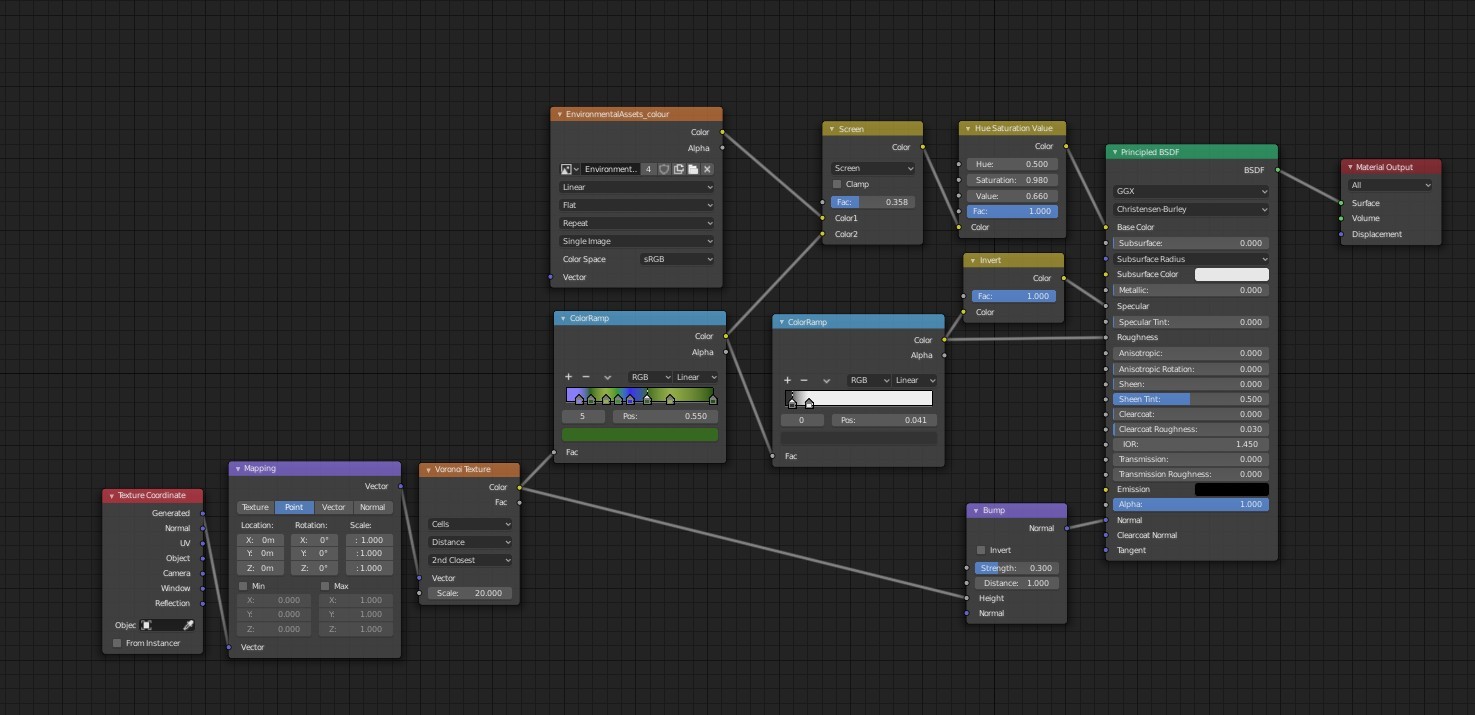
I found out that the third parameter in Voronoi Texture (currently set to 2nd Closest) can produce interesting results, so I just ran with it. (I don’t pretend to know how the procedurals work exactly. I just push and pull until it looks like… something.) And I was so happy that it did something that I applied it everywhere. Even in the background. I might need to re-think that in the final render, but it can stay for now.
WIP 13: Scene progression
This is what the materials currently look like in the scene (in LookDev). I’m going to try and add more detail to the environment.
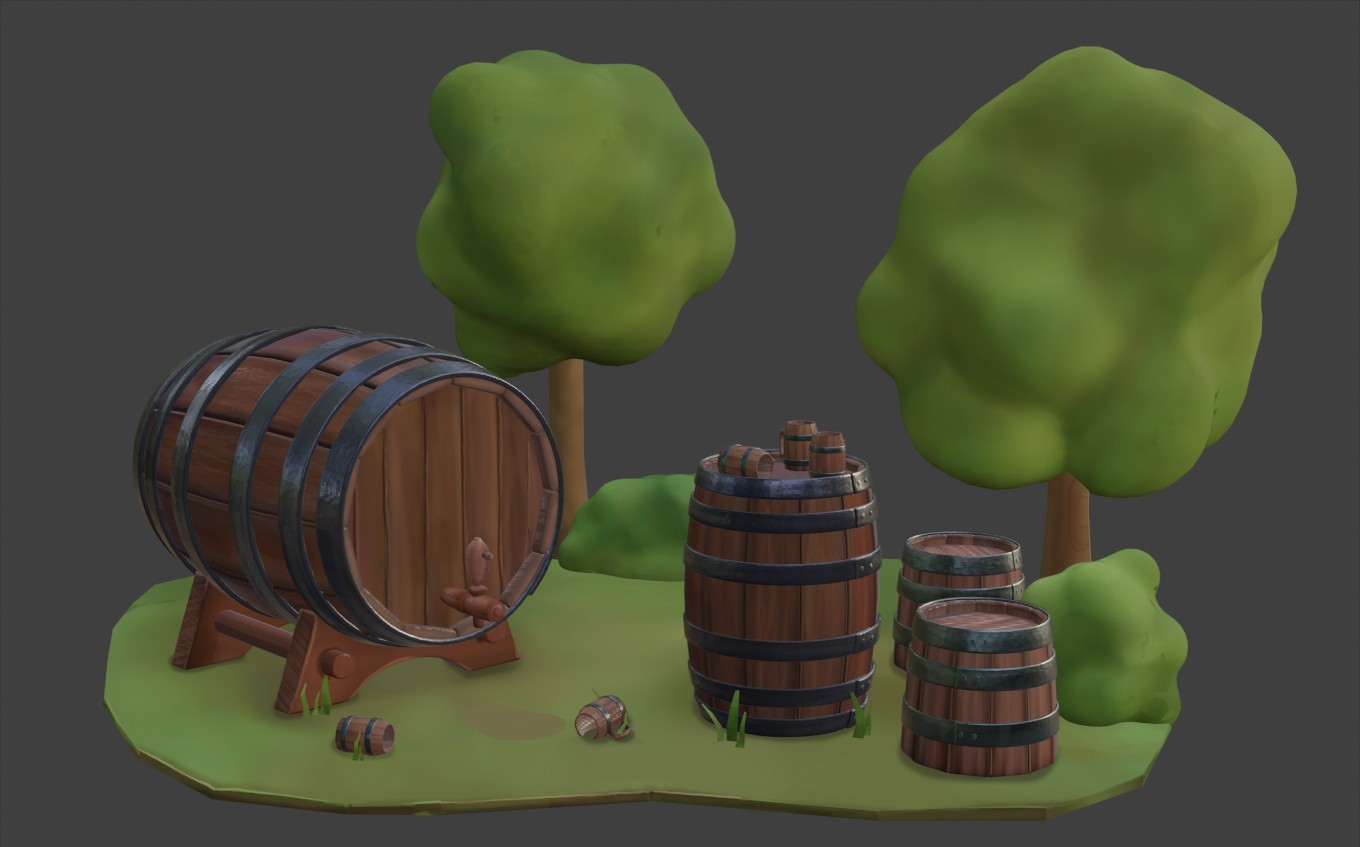
WIP 12: Wood and metal materials
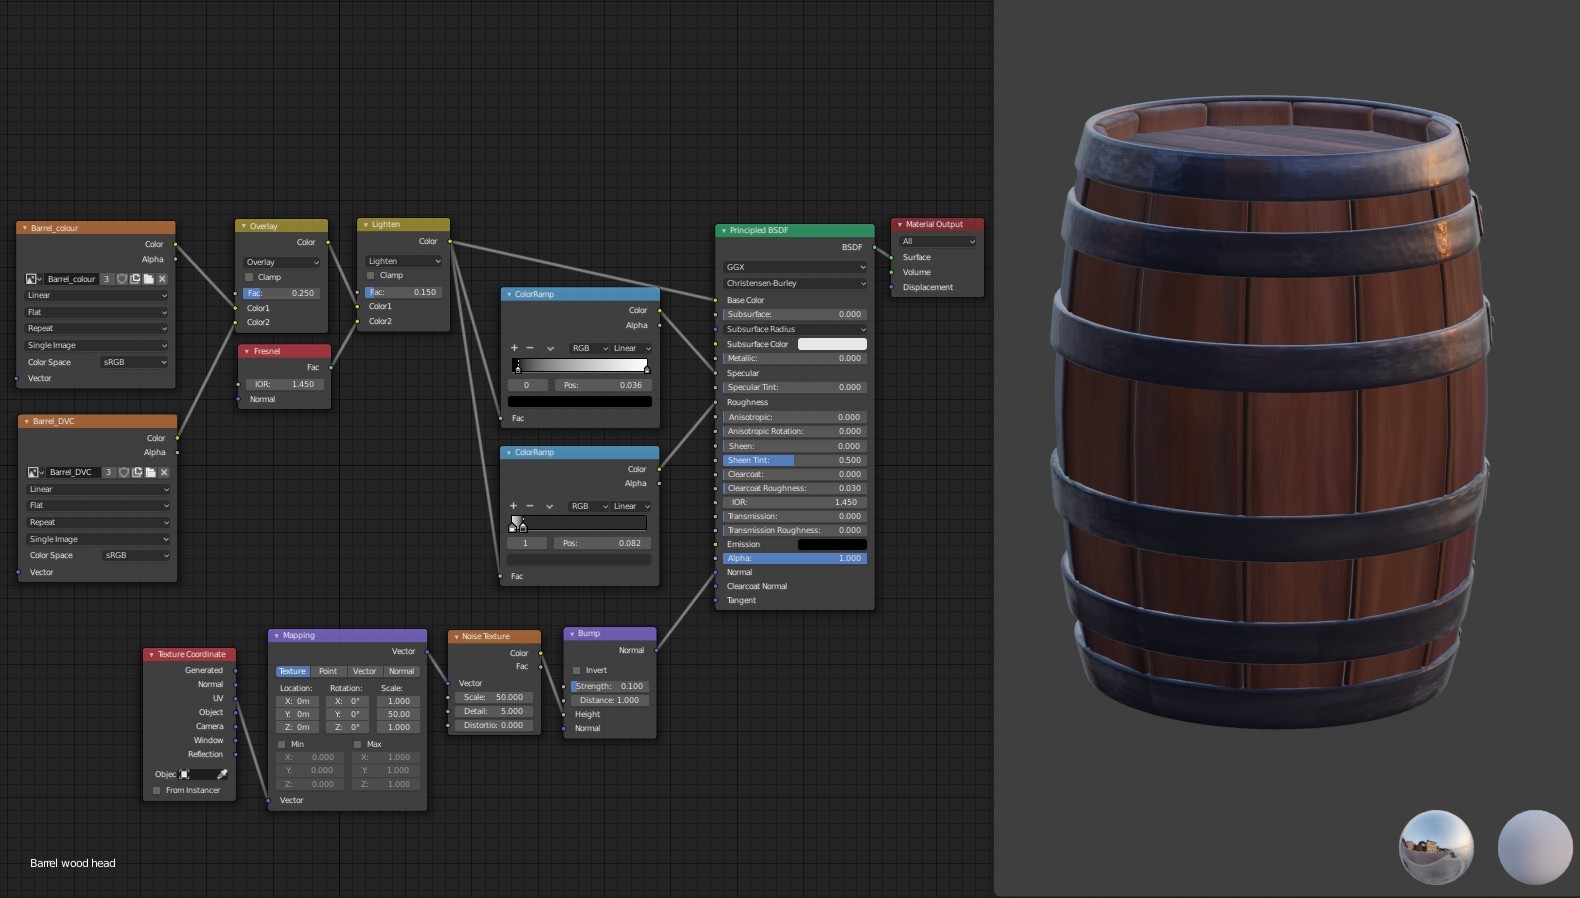
Not too much to mention in this update, because I mostly followed the techniques demonstrated in chapter 2 and 3. I did invert my dirty vertex information and I used a few more procedural effects, but that’s about it. I ended up with more materials than I anticipated because the UVs weren’t rotated consistently. So the stretched noise that worked well on the stave was cutting across the boards on top. That’s definitely something I should keep an eye on in the future.
@theluthier Thank you. 🙂 Yes, you are right, the trees definitely need more detail. I’ll see what I can do in the final render…
Homework submission – Week 2
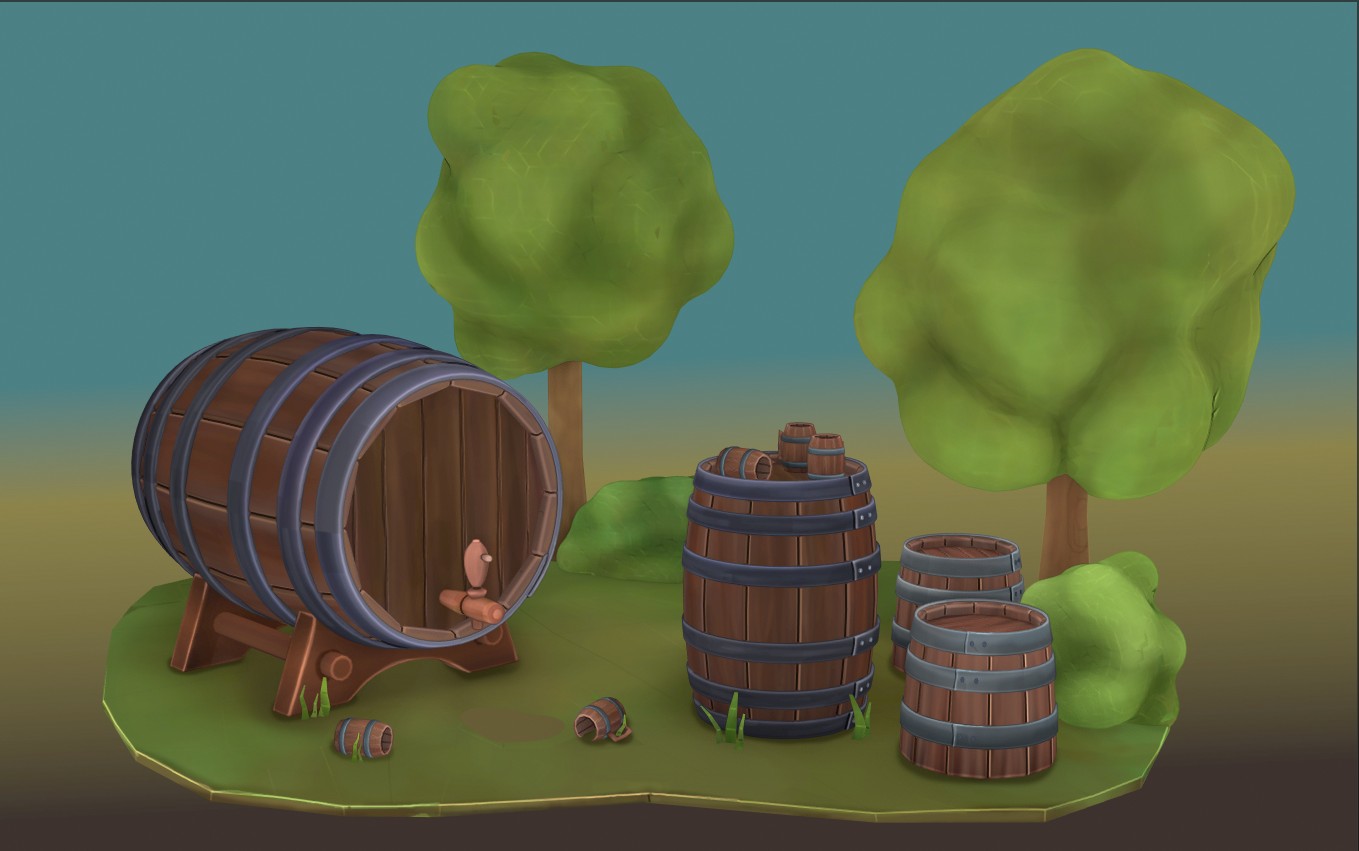
The time is up and this is what I was able to come up with. I created two versions: one rendered, with the colour information only, and the other in Look dev with Matcap (texture) and cavities highlighted. To make the background show up in Look dev I had to bake it into a texture. It was originally created as a quick gradient texture. I plugged the nodes into the Principled shader, added a new node for an image texture, and with it selected and Baking option set to Diffuse (influence only Colour), I baked the information into a proper texture, which then showed up in Look Dev mode.

-
AuthorPosts
