
BC1-1908 Homework – Katerina Novakova
Forum Archive › BC1-1908 Homework – Katerina Novakova
- This topic has 50 replies, 12 voices, and was last updated 7 years ago by
Paul Haynes.
-
AuthorPosts
-
August 10, 2019 at 2:09 pm #49706
@shiennar One of the great things about collections is, that you can ‘nest’ them!
So, inside your Barrel Collection, you can have a Planks and a Rings Collection, and so on…
August 10, 2019 at 2:16 pm #49707WIP 8: Reworks (cause I’m a lazy UV unwrapper)
My first victim was the barrel stave. If you remember, I originally created it mirrored on Z, with the individual parts separated and thickness added with the Solidify modifier. Both of the modifiers had to be applied if I wanted to achieve any reasonable texturing later, so I ended up with 12 pieces that all needed the same seam treatment. But I’m lazy (and I had to fix some mesh artifacts anyway), so I marked the seams on one piece, deleted the rest, added an empty object to the stave origin location and added an array with 12 copies and object offset.
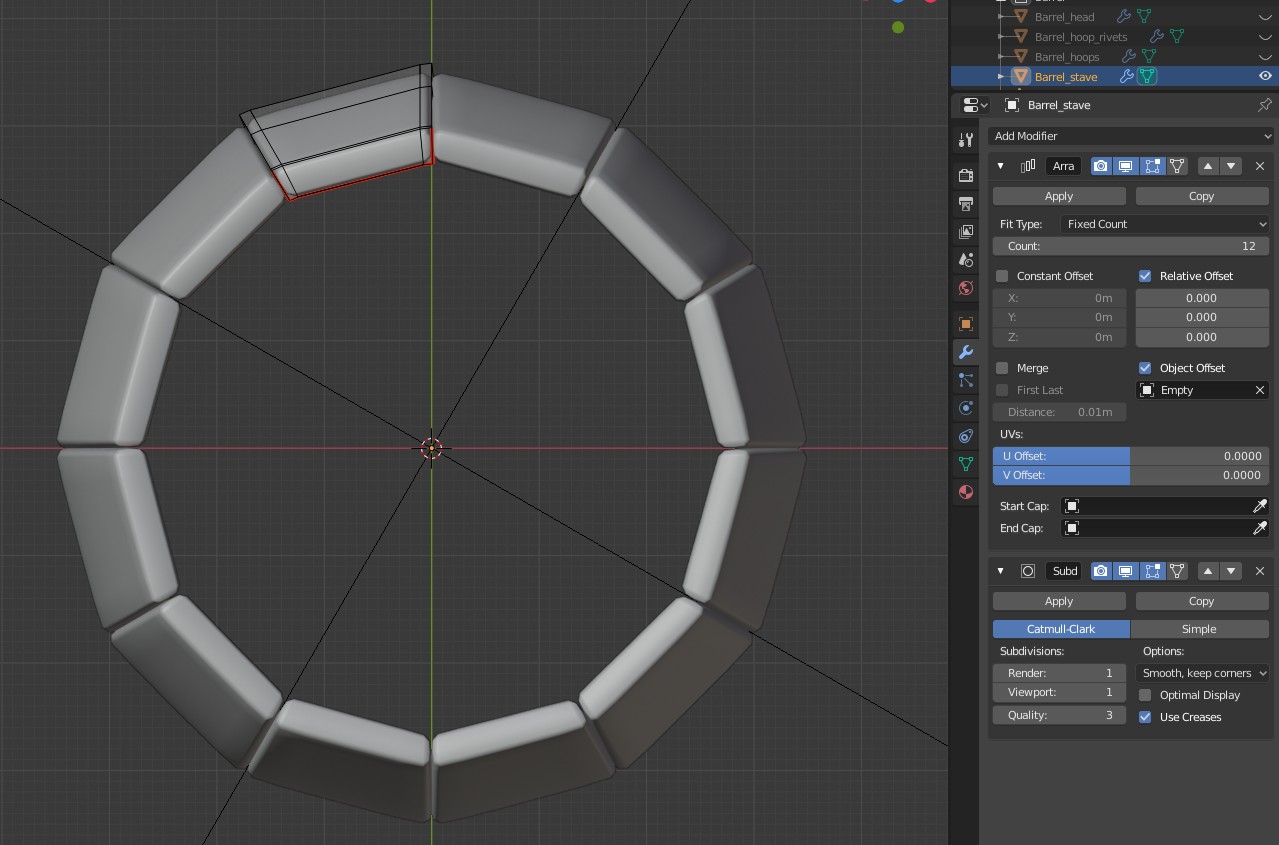
One apply later and all the pieces have the same seams and fairly nice UV map.
Next part was the hoops. With Solidify applied, I ended up with the welded parts overlapping visually. That doesn’t make for an easy edge selection, so I used a little trick. In vertex mode, I hid (with H) one vertical loop. I selected the rest of the hoop and hid it as well, leaving me with just the end I needed to seam-ify. Not the fastest way to work, but slightly less stressful 🙂
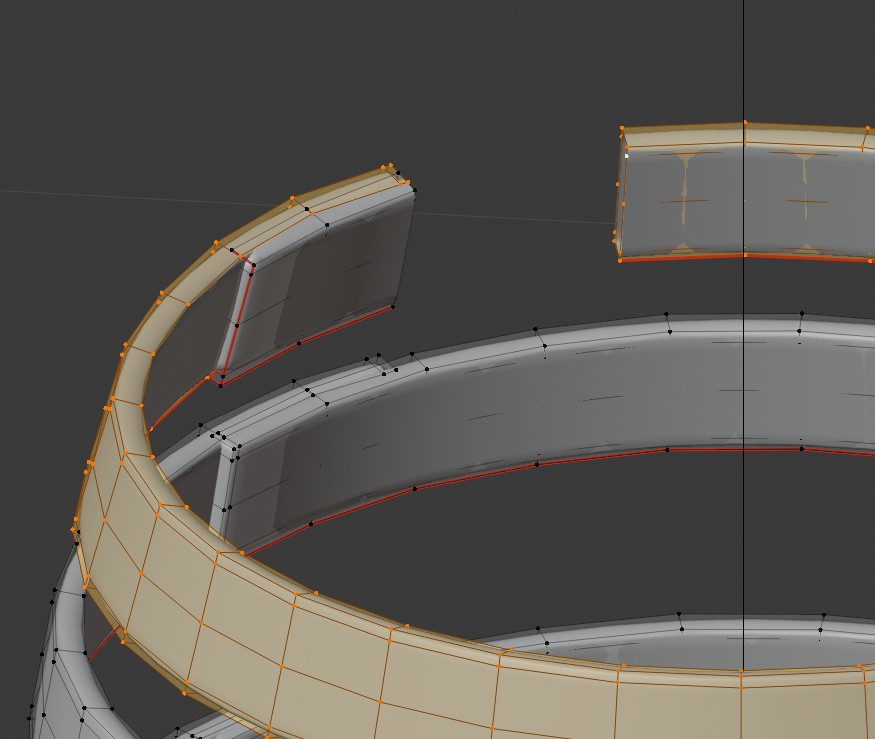
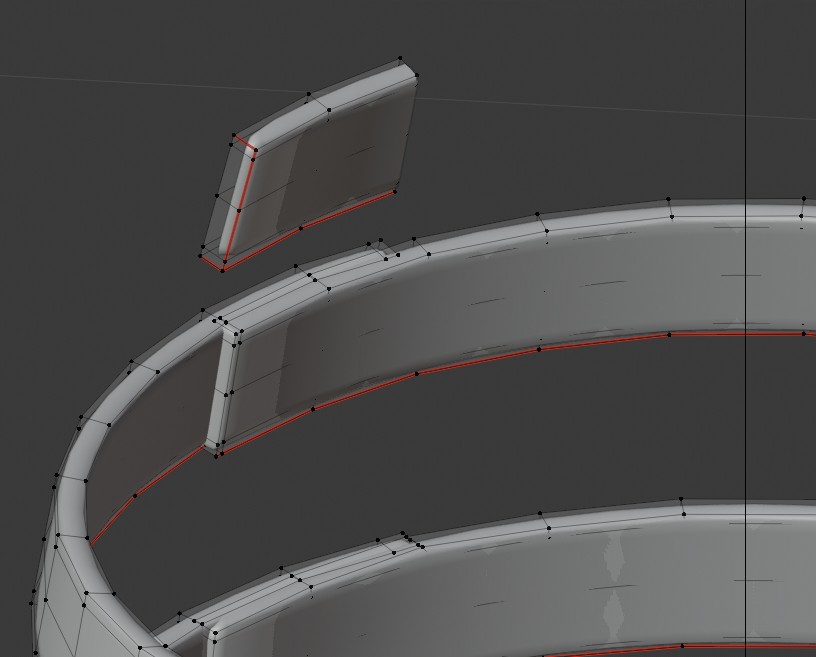 August 10, 2019 at 3:02 pm #49708
WIP 9: Barrel UVs
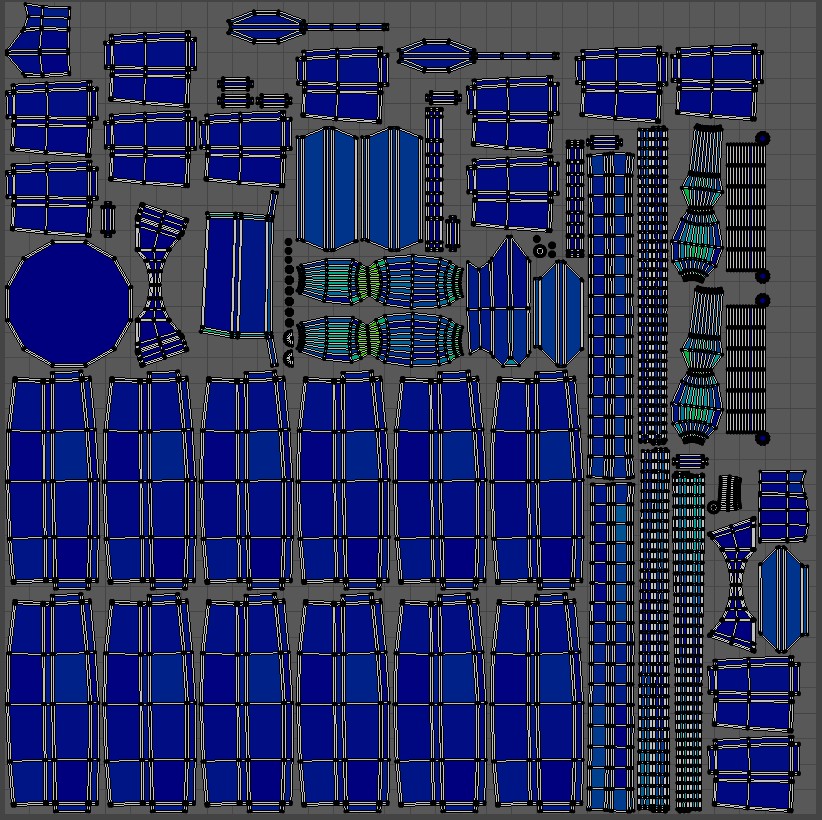
A few manual adjustments were needed, but I managed to lay out all the barrel parts in one UV space. I wanted to have this one separately, so I could add the most detail (which is why I tried to use all the available space). I’ll create another texture set for the remaining instanced assets, and another one for the environment filler.
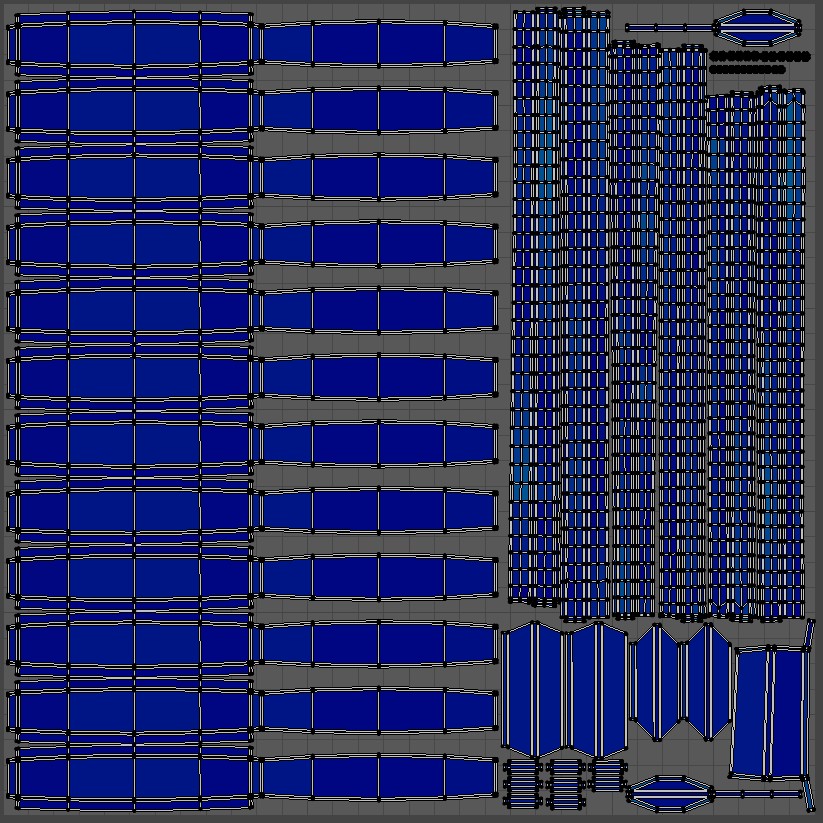 August 10, 2019 at 3:58 pm #49709
WIP 10: Remaining UVs
I created the remaining 2 sets, one for instanced objects and one for the environmental assets. With the instanced objects it was mainly repeating the steps from the barrel UVS, with the notable exception of the seats. Those were parented to an empty, which had active transformations. When I tried to do the array trick, it didn’t work properly, because the parent transformations kicked in. I tried to apply rotation/scale, but it didn’t propagate to the children, so I ended up separating the seats’ stave, working the array magic and then re-parenting the stave.
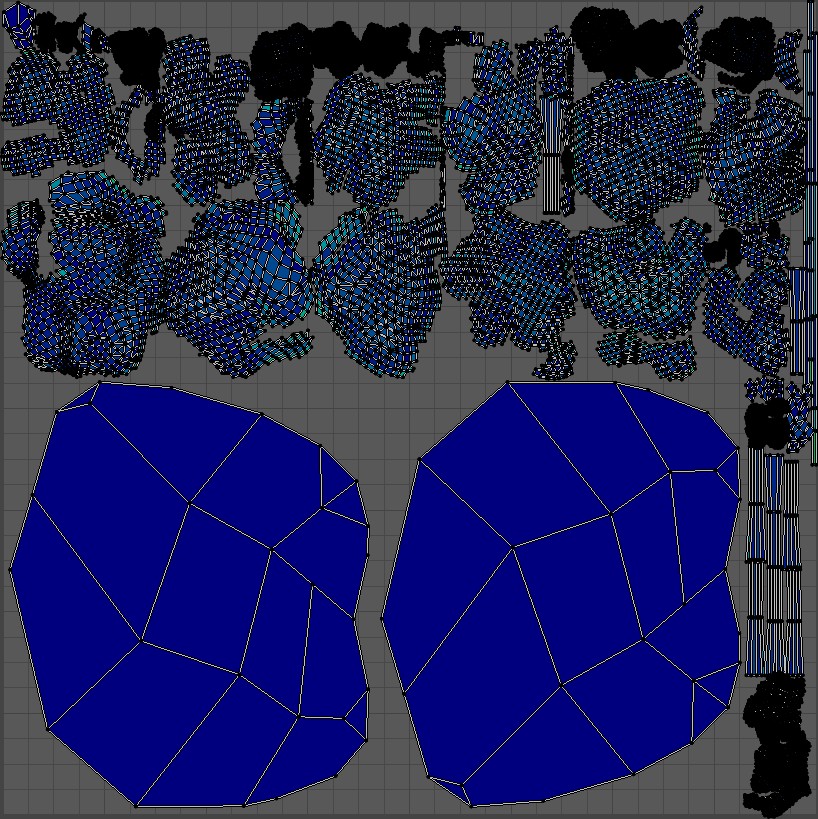
With the environmental assets I had to go for the Smart UVs option, because the generated meshes were far from seam-friendly. I prefer not to use this UV option, because I had some troubles with it in the past, but it seemed to be the only option here.
Tomorrow I’ll move on to the texturing part.
August 11, 2019 at 3:30 am #49710WIP 11: Early colours
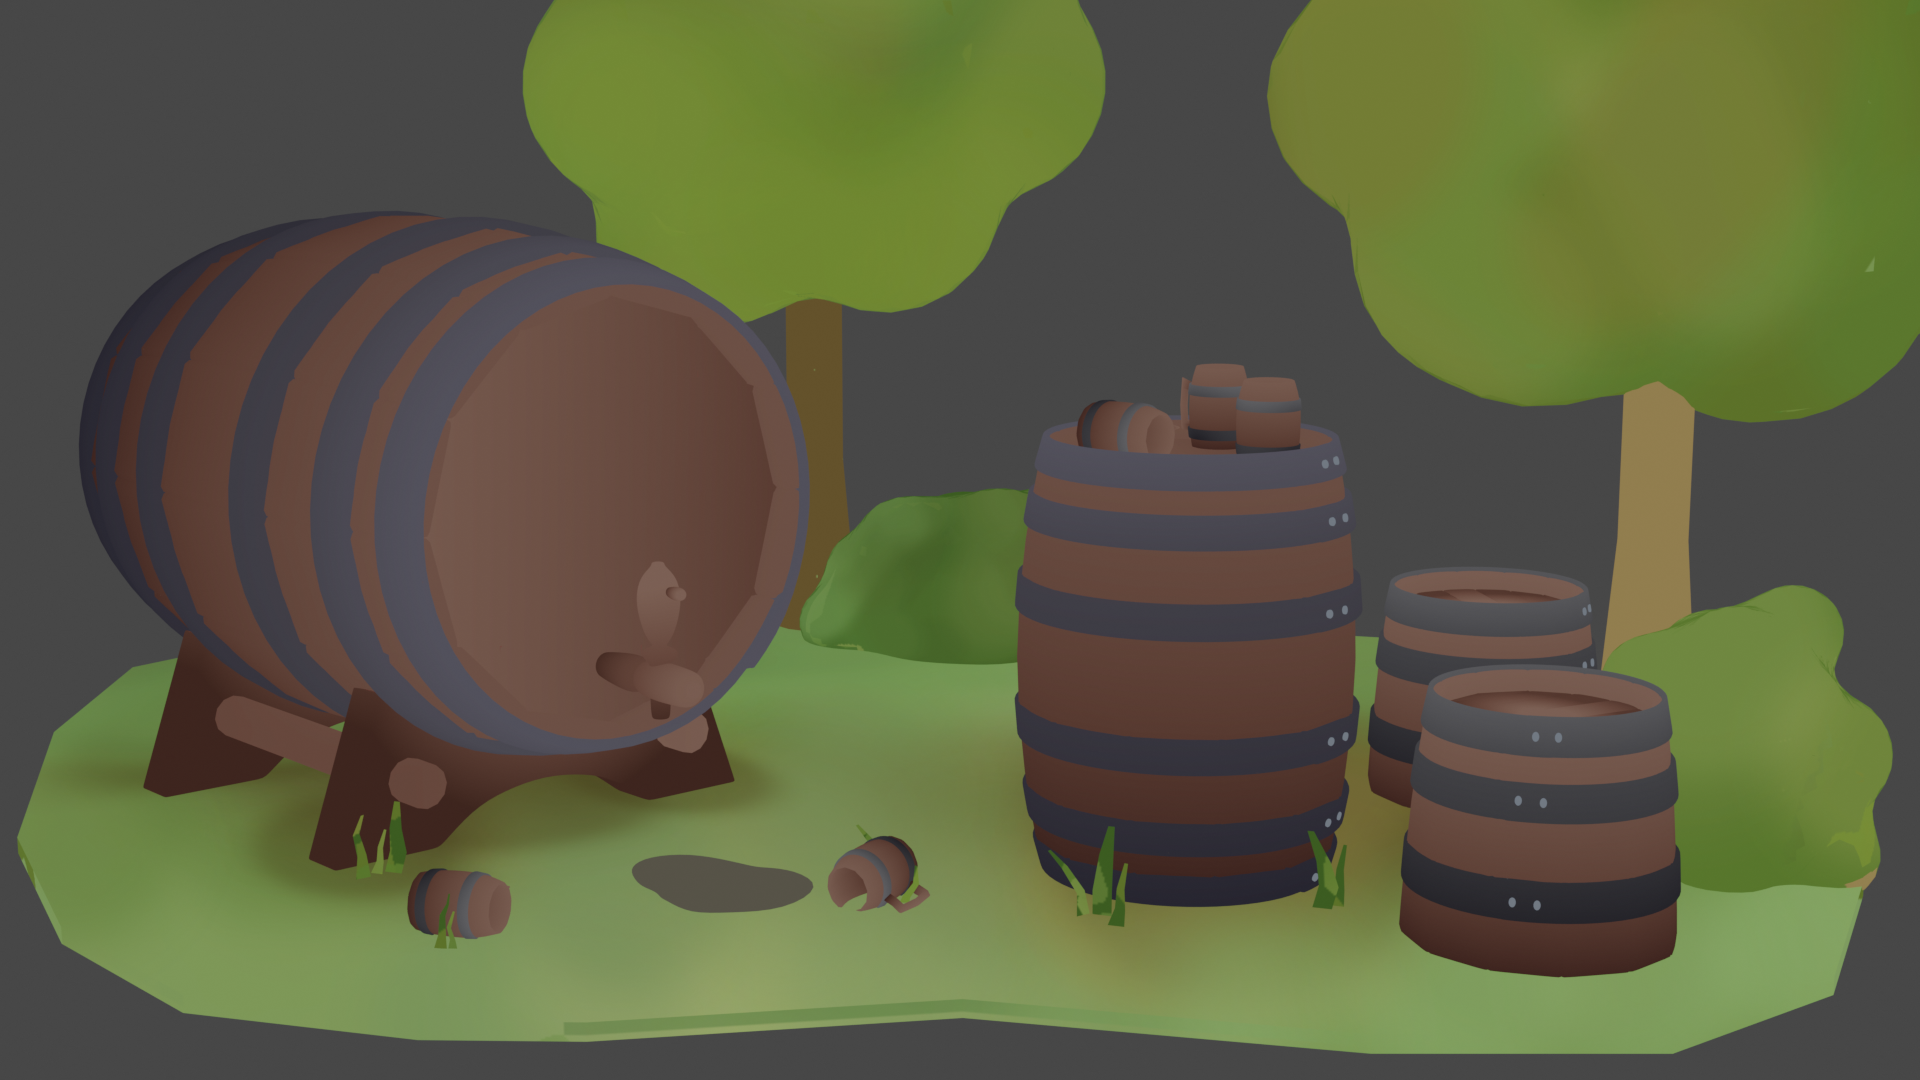
I like to start with colour blocking to get a better idea of which colours work best in the scene. But I found out that solid colour blocks throw me off a bit, because they are too far from the final look, so I tend to use gradients. Here I went for a simple dark-middle-light colour scheme, mostly linear (with the exception of the top parts of the seats, where the radial type made more sense). I also quickly painted the environment, to get a more natural look. Now onto the details. (I don’t have much time left, so the next post will probably have to be my final.)
 August 11, 2019 at 6:31 am #49711
Homework submission – Week 2
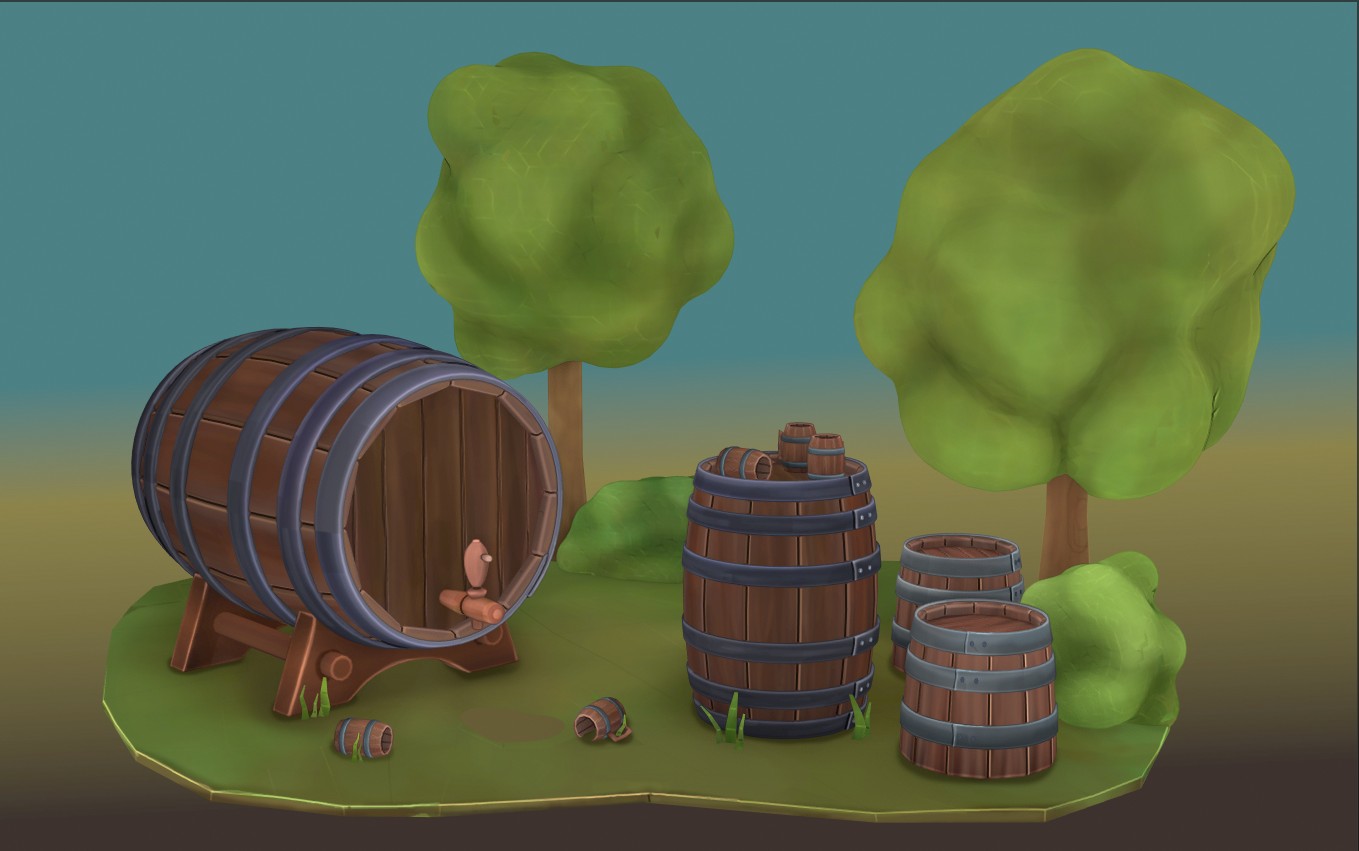
The time is up and this is what I was able to come up with. I created two versions: one rendered, with the colour information only, and the other in Look dev with Matcap (texture) and cavities highlighted. To make the background show up in Look dev I had to bake it into a texture. It was originally created as a quick gradient texture. I plugged the nodes into the Principled shader, added a new node for an image texture, and with it selected and Baking option set to Diffuse (influence only Colour), I baked the information into a proper texture, which then showed up in Look Dev mode.

 August 12, 2019 at 1:37 pm #49712
@shiennar Ooo yes, excellent texture work here, Kate. All of a sudden I get a distinct *feel* and style for this scene. I like seeing your first-pass at the texture that highlights the broad gradients. You probably know I’m a big believer in gradients like that 😊
The only note I want to offer regards the trees and bushes To me there’s a pretty big difference between the detail level of the buckets and barrels compared to the trees/bushes. I’m wishing there was something to better establish that the blobby shapes are leafy. To sell the shapes more that way perhaps you could add to a splotchy pattern to suggest leaves like this:
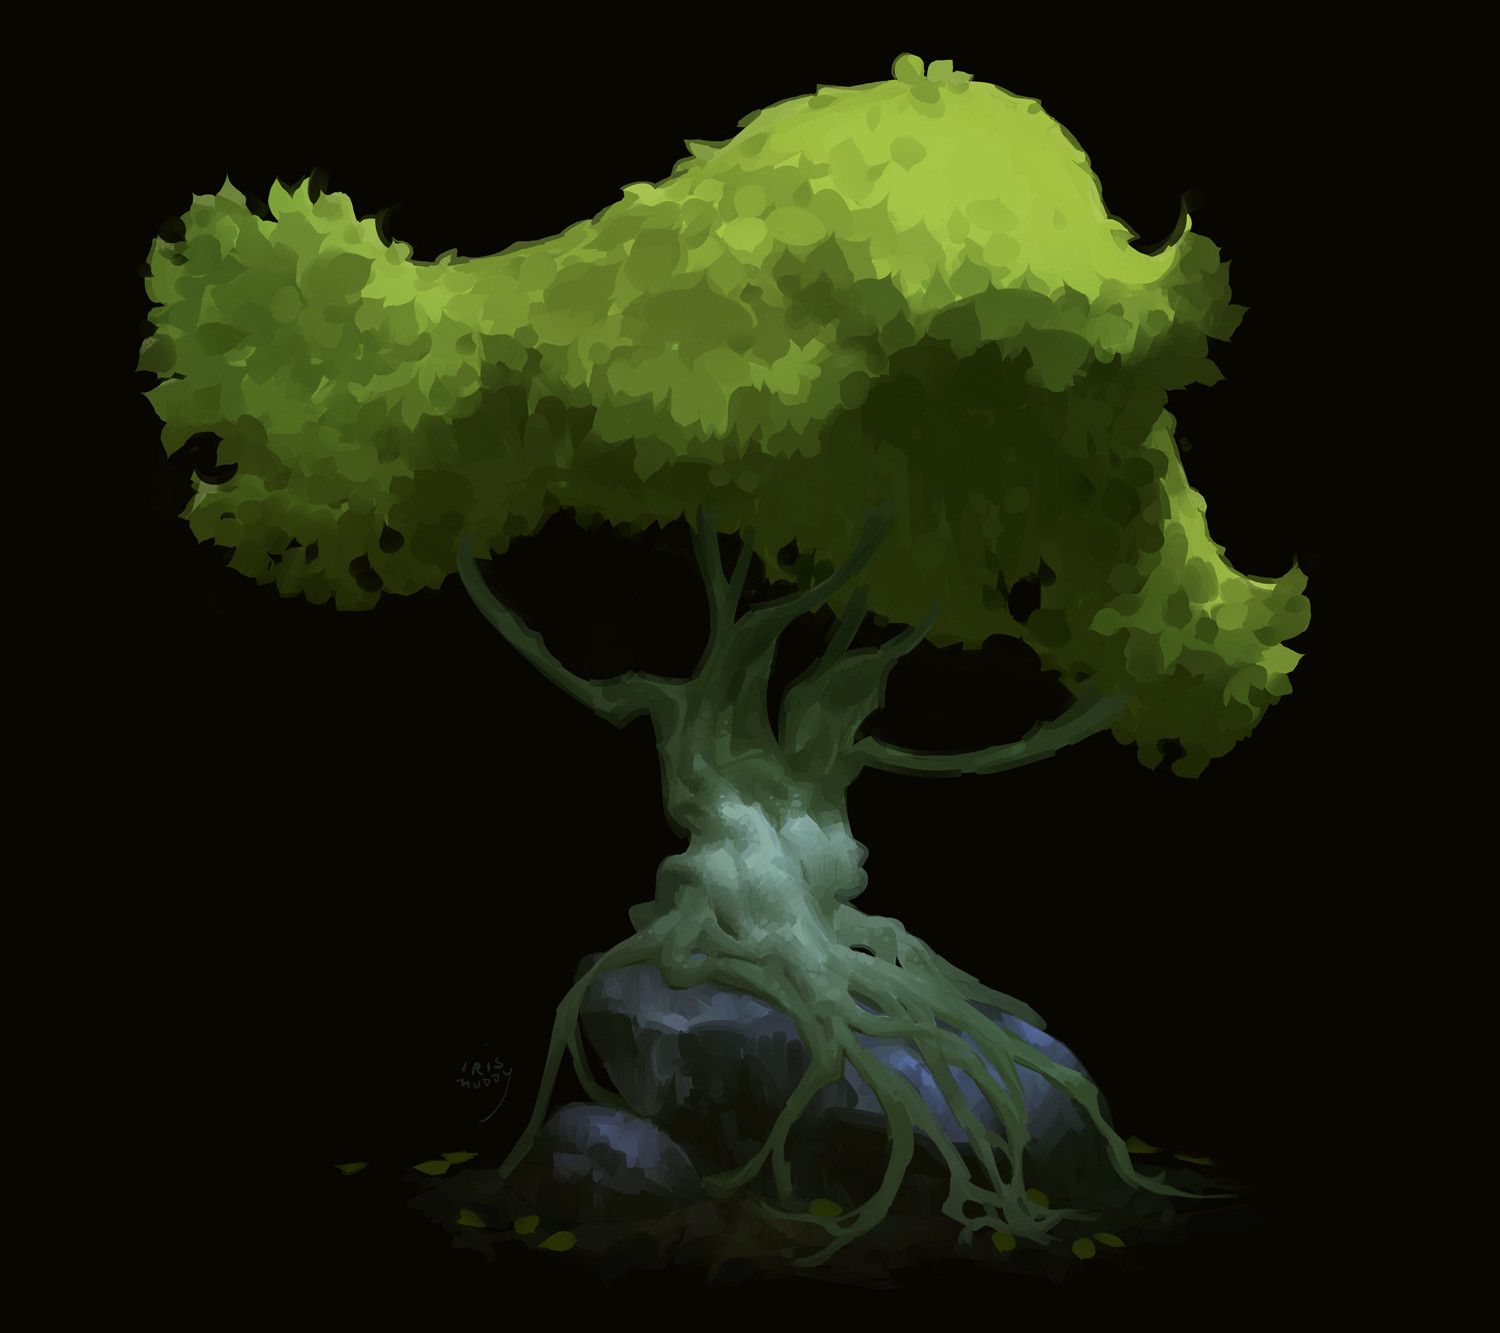
I know the trees are extra and supplemental, but I think some kind of detail to feel more leafy would help unite the scene together as a whole.
Anyway, you’ve definitely earned an A+ this week! You always do good work 👍
August 12, 2019 at 2:01 pm #49713@theluthier Thank you. 🙂 Yes, you are right, the trees definitely need more detail. I’ll see what I can do in the final render…
August 13, 2019 at 12:13 pm #49714@shiennar Need some mythological creatures and Bacchus prancing about.
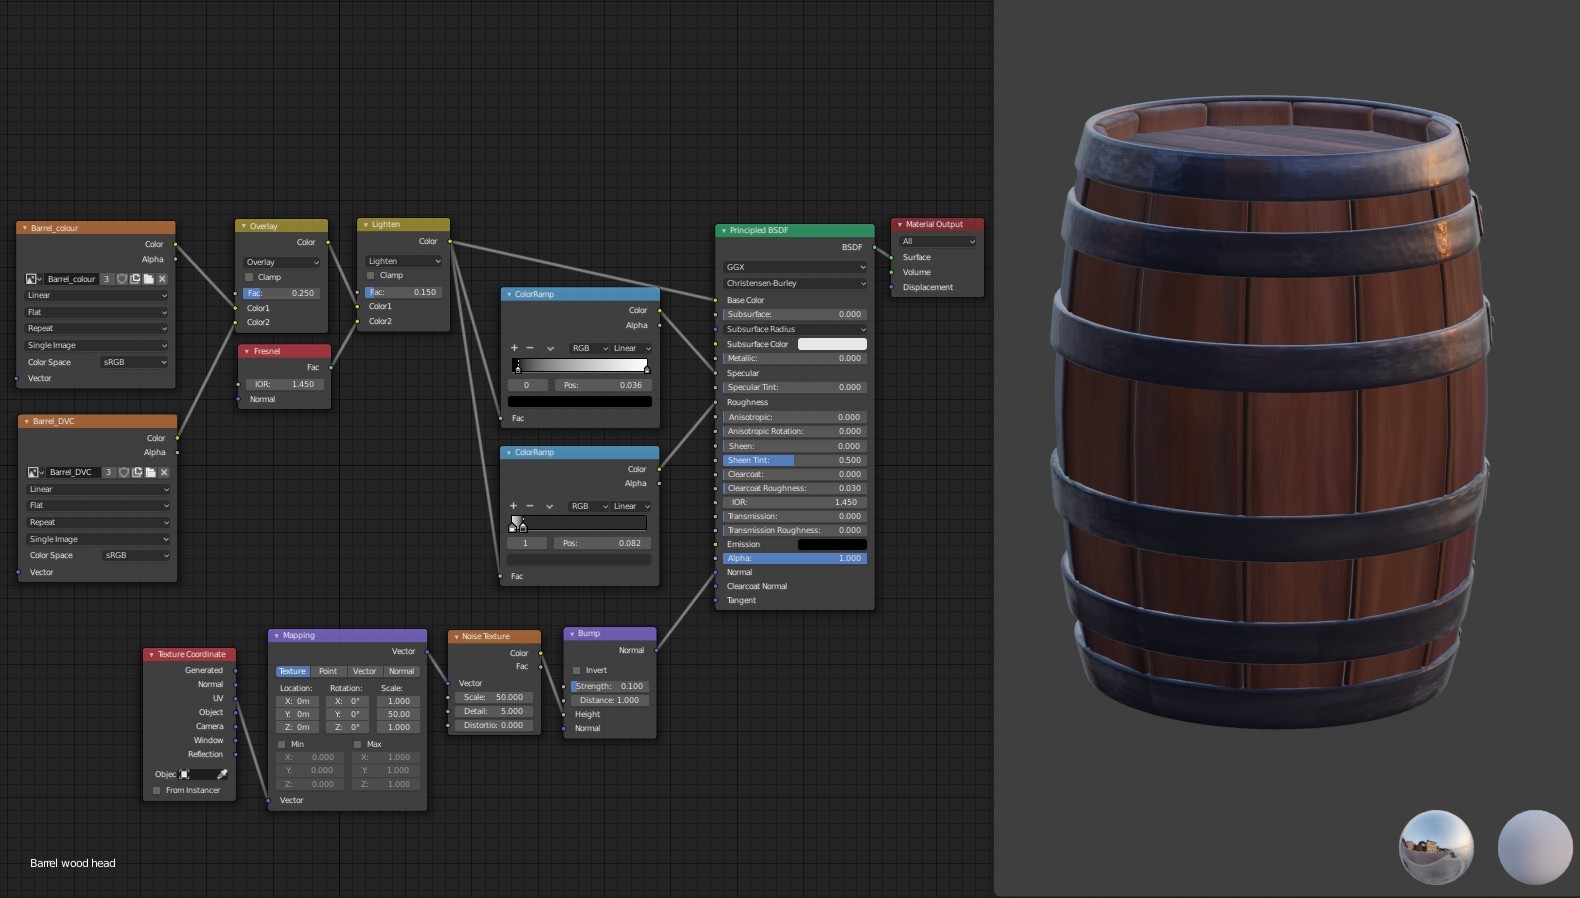
August 17, 2019 at 2:13 pm #49715WIP 12: Wood and metal materials
Not too much to mention in this update, because I mostly followed the techniques demonstrated in chapter 2 and 3. I did invert my dirty vertex information and I used a few more procedural effects, but that’s about it. I ended up with more materials than I anticipated because the UVs weren’t rotated consistently. So the stretched noise that worked well on the stave was cutting across the boards on top. That’s definitely something I should keep an eye on in the future.
 August 17, 2019 at 2:16 pm #49716
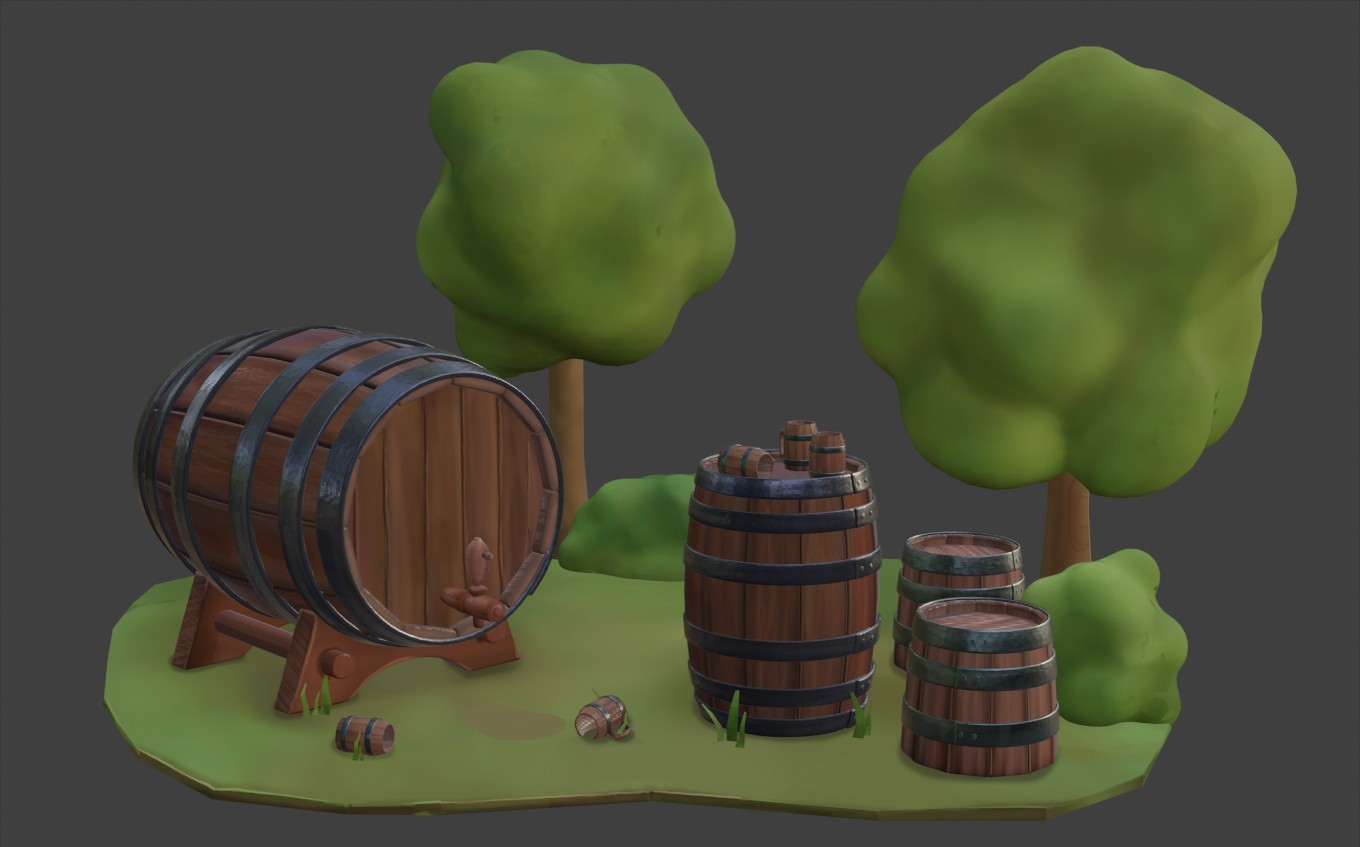
WIP 13: Scene progression
This is what the materials currently look like in the scene (in LookDev). I’m going to try and add more detail to the environment.
 August 17, 2019 at 2:54 pm #49717
WIP 14: Environment details
I was lucky enough to find an effect I like. It looks a bit painterly and geometrical at the same time, and (at least for now) I think it fits the mood I’m after.
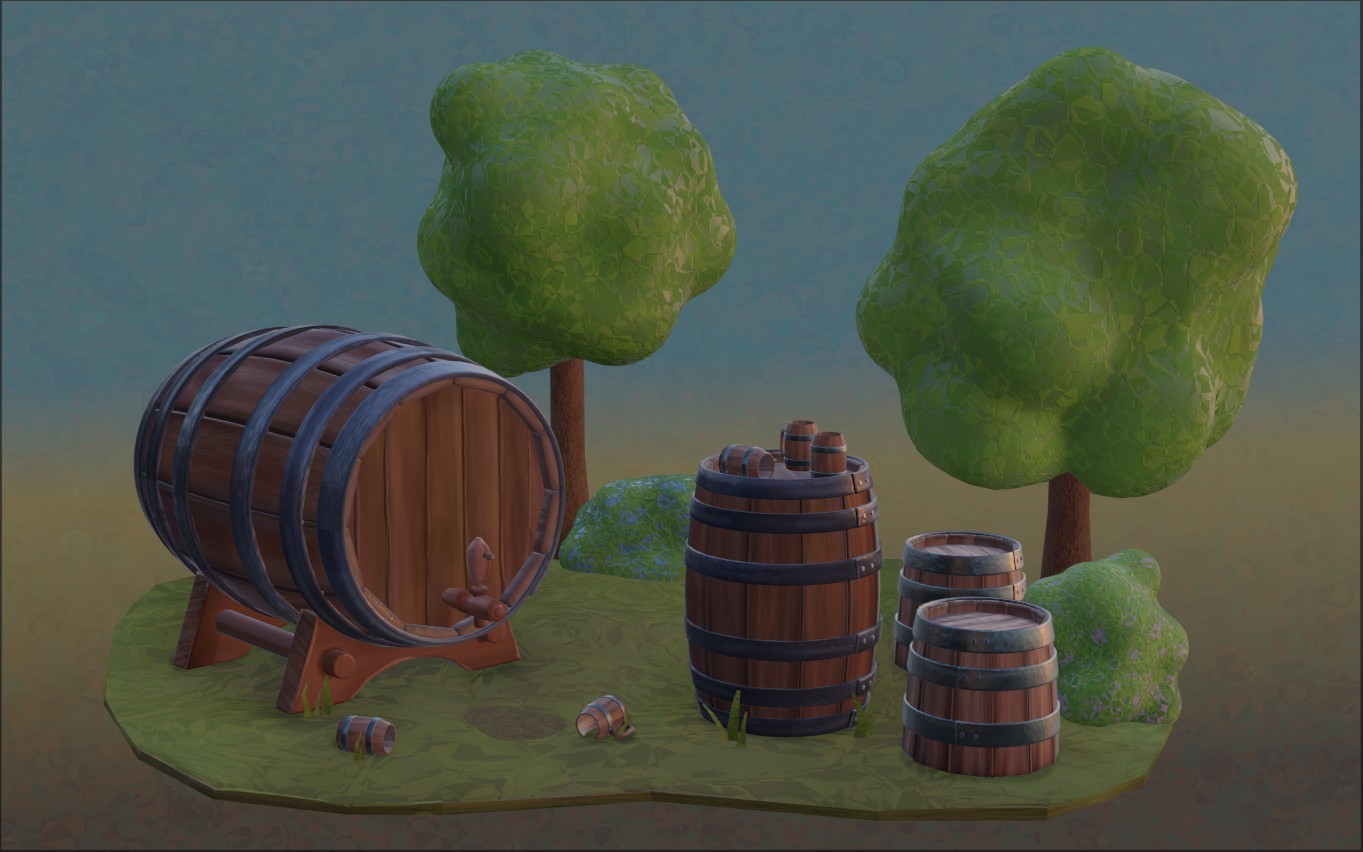
Here is a node tree for one of the bushes. I’m almost ashamed to admit that the whole look is driven by one colour ramp:
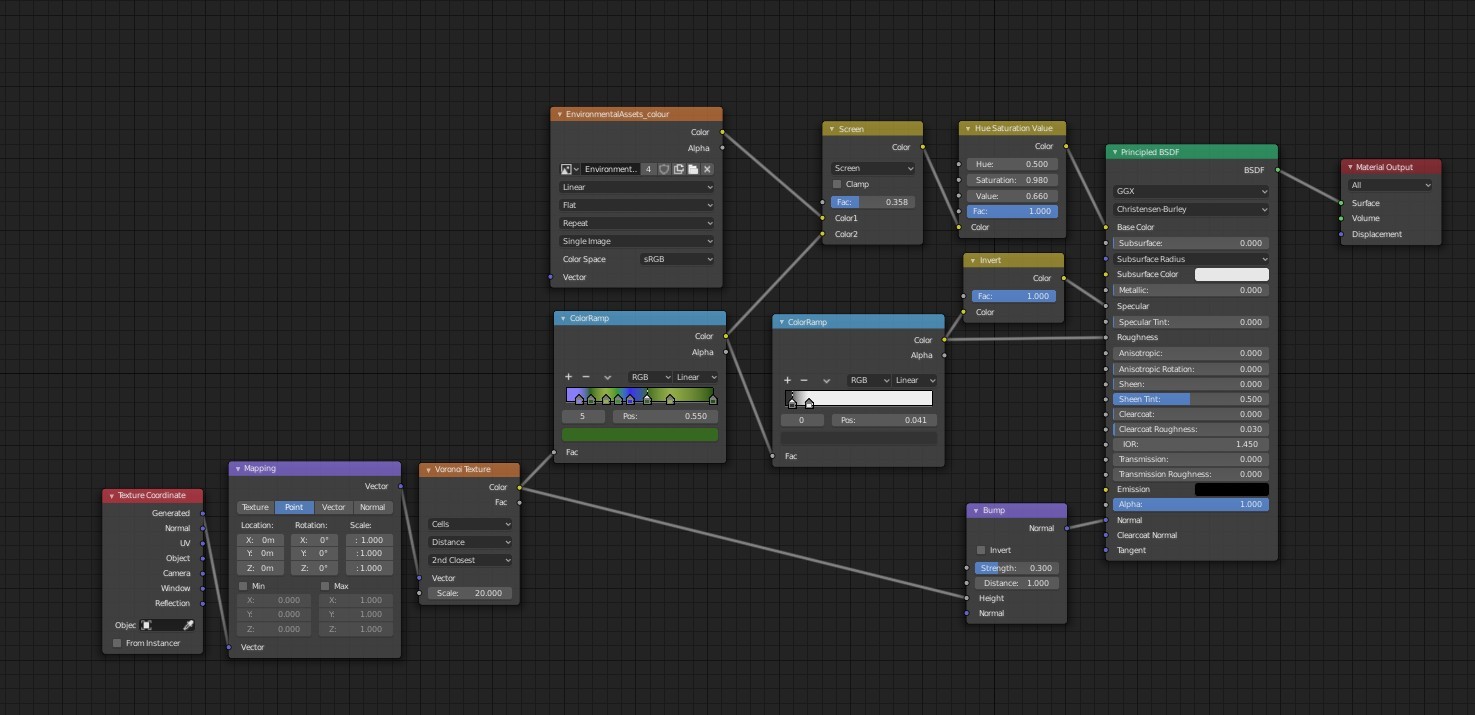
I found out that the third parameter in Voronoi Texture (currently set to 2nd Closest) can produce interesting results, so I just ran with it. (I don’t pretend to know how the procedurals work exactly. I just push and pull until it looks like… something.) And I was so happy that it did something that I applied it everywhere. Even in the background. I might need to re-think that in the final render, but it can stay for now.
August 17, 2019 at 3:06 pm #49718@shiennar Very nice Kat… it’s time, let it begin
 August 17, 2019 at 4:32 pm #49719
Homework submission – Week 3
Many environmental maps later (honestly, I spend way too much time fiddling with those), I finally have two renders, one for Eevee, the other for cycles. Can you guess which is which? 🙂
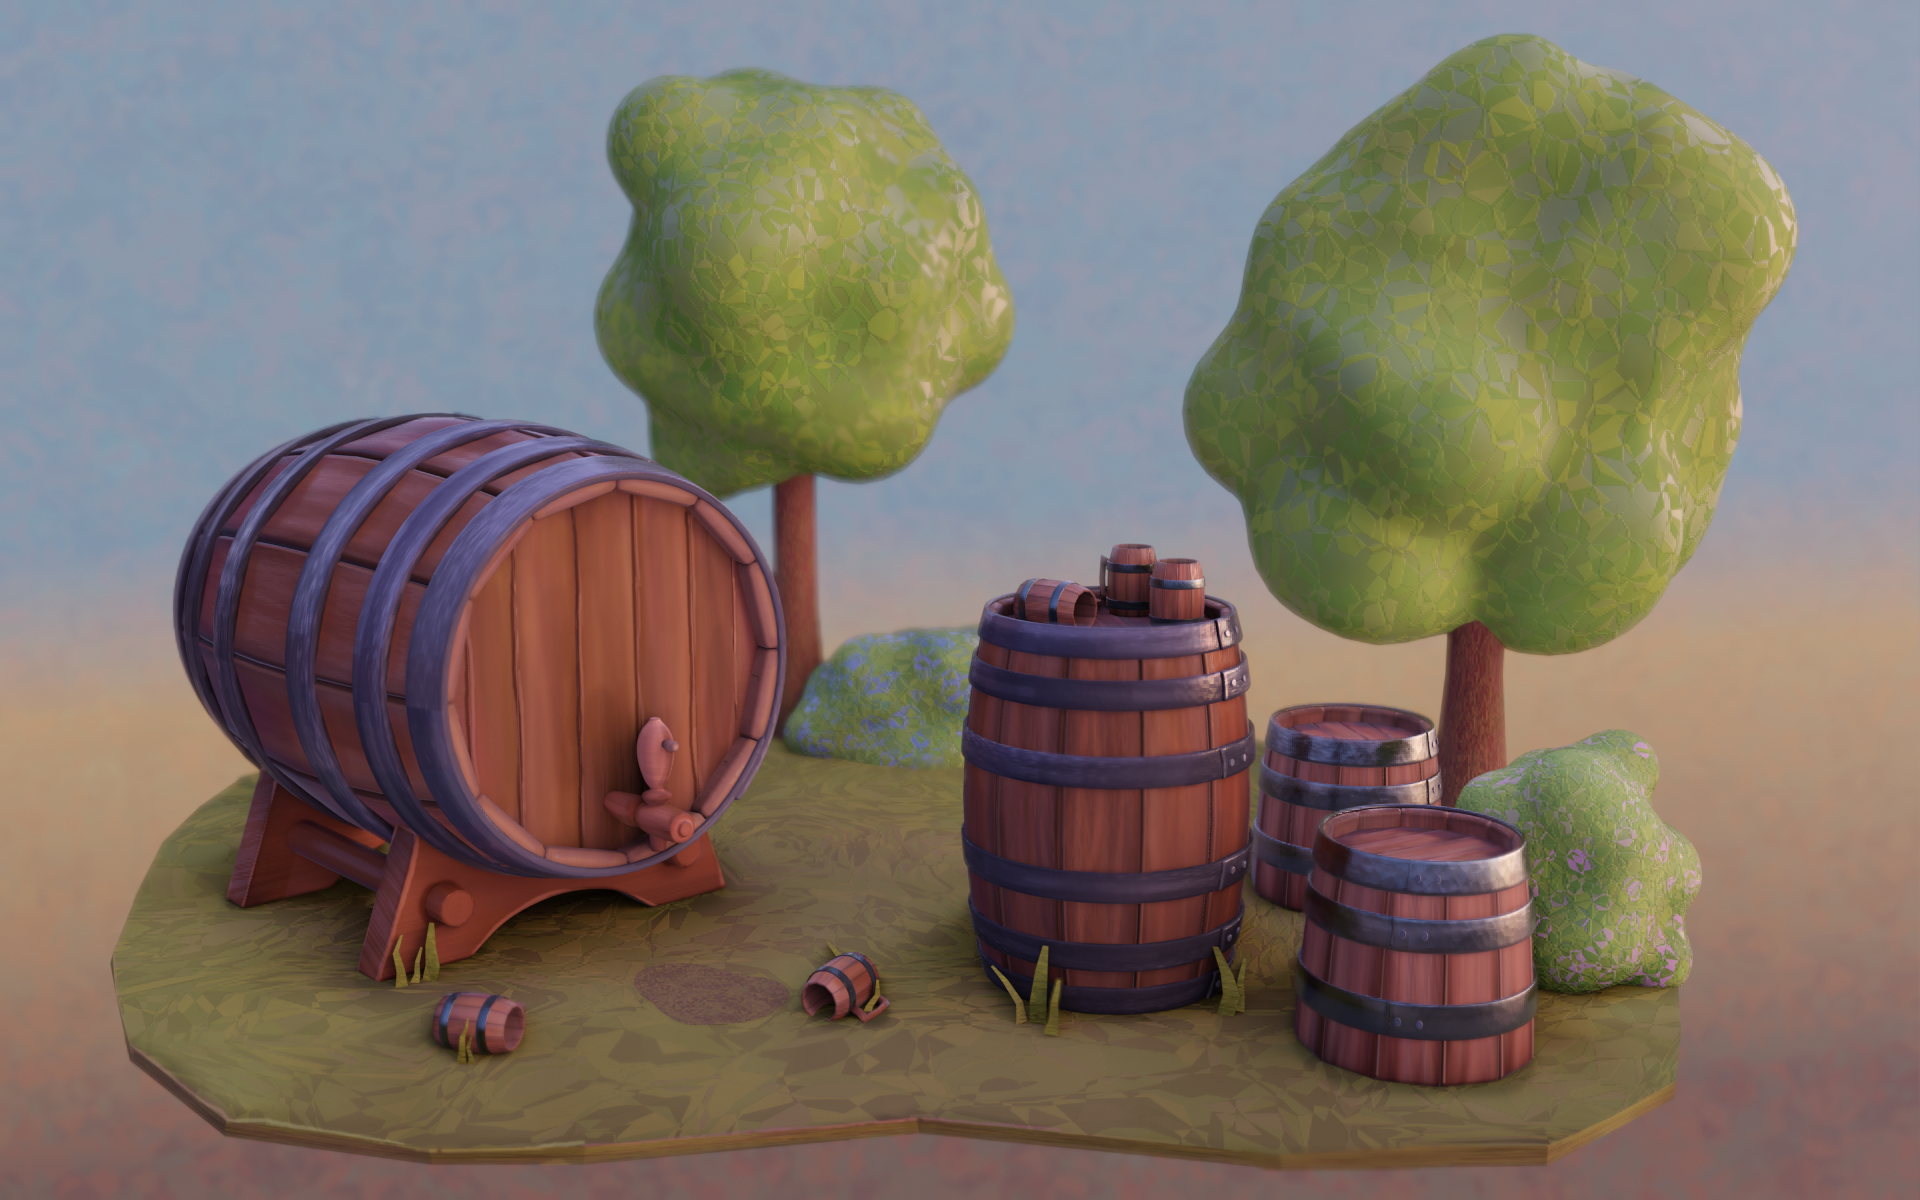
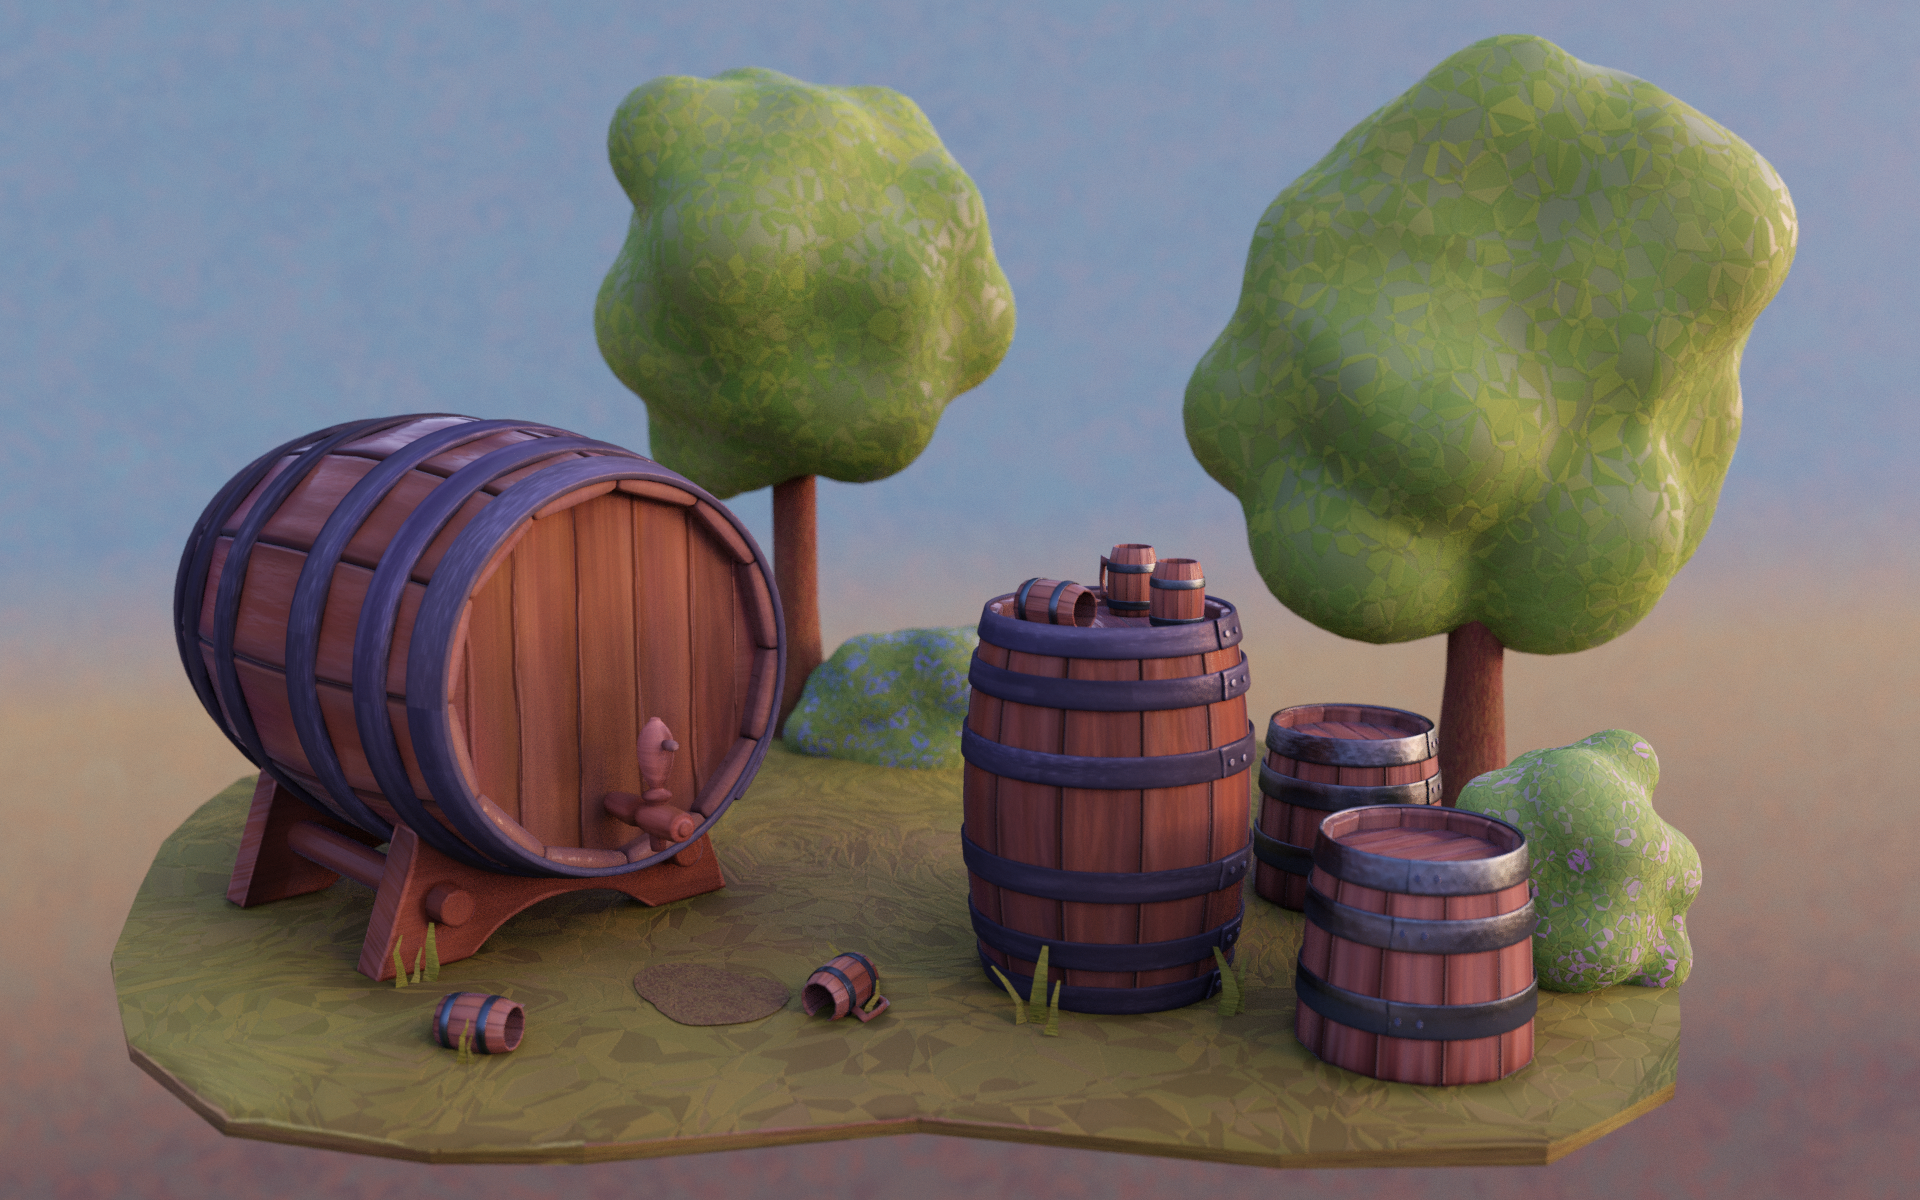
As a side note on the post-processing, I originally had a vignette set up, but I removed it because I didn’t like how it interacted with the background. Instead I dodged the highlights in Krita (one of my tried and trusted post-processing hacks – it nicely brightens the scene).
August 17, 2019 at 4:36 pm #49720@shiennar this looks awesome! I think the first one is Eevee. Great job Kate as always 🙂
-
AuthorPosts


- The topic ‘BC1-1908 Homework – Katerina Novakova’ is closed to new replies.