
scottfassett

Forum Replies Created
-
AuthorPosts
-
Hi Dwayne – The armature is connected to some objects inside of a collection, which is then linked to another scene. I make a rookie mistake – forgot to go to pose mode after selecting the objects, then selecting the bone. Thanks for reminding me! It all works now!
Cheers!
Hi Martin – thanks very much for your in-depth explanation on this. I’m beginning to understand the concepts. And I’m sure applying one or more of the transformations has gotten me into trouble lately. But not applying a transform (location, scale, rotation) has also caused problems, so you need to know when and where to use this function.
At least with Blender you don’t have object history to deal with like in Maya. That can cause a whole different series of issues, but I think it’s similar to this transformation thing in Blender.
I’m sure I’ll have more questions come up with this, but thanks for your expertise!
-Scott
Dwayne – you were right originally – Geometry to Origin worked. I first did Origin to Geometry and that maintained the offset. And Alt G doesn’t fix the problem.
Martin – Why shouldn’t I ever use “Apply Location”? There must be some situations where this is used?
Hi Dwayne,
Ok, I followed your directions, but this is the result – still offset, with the addition of a blue line.
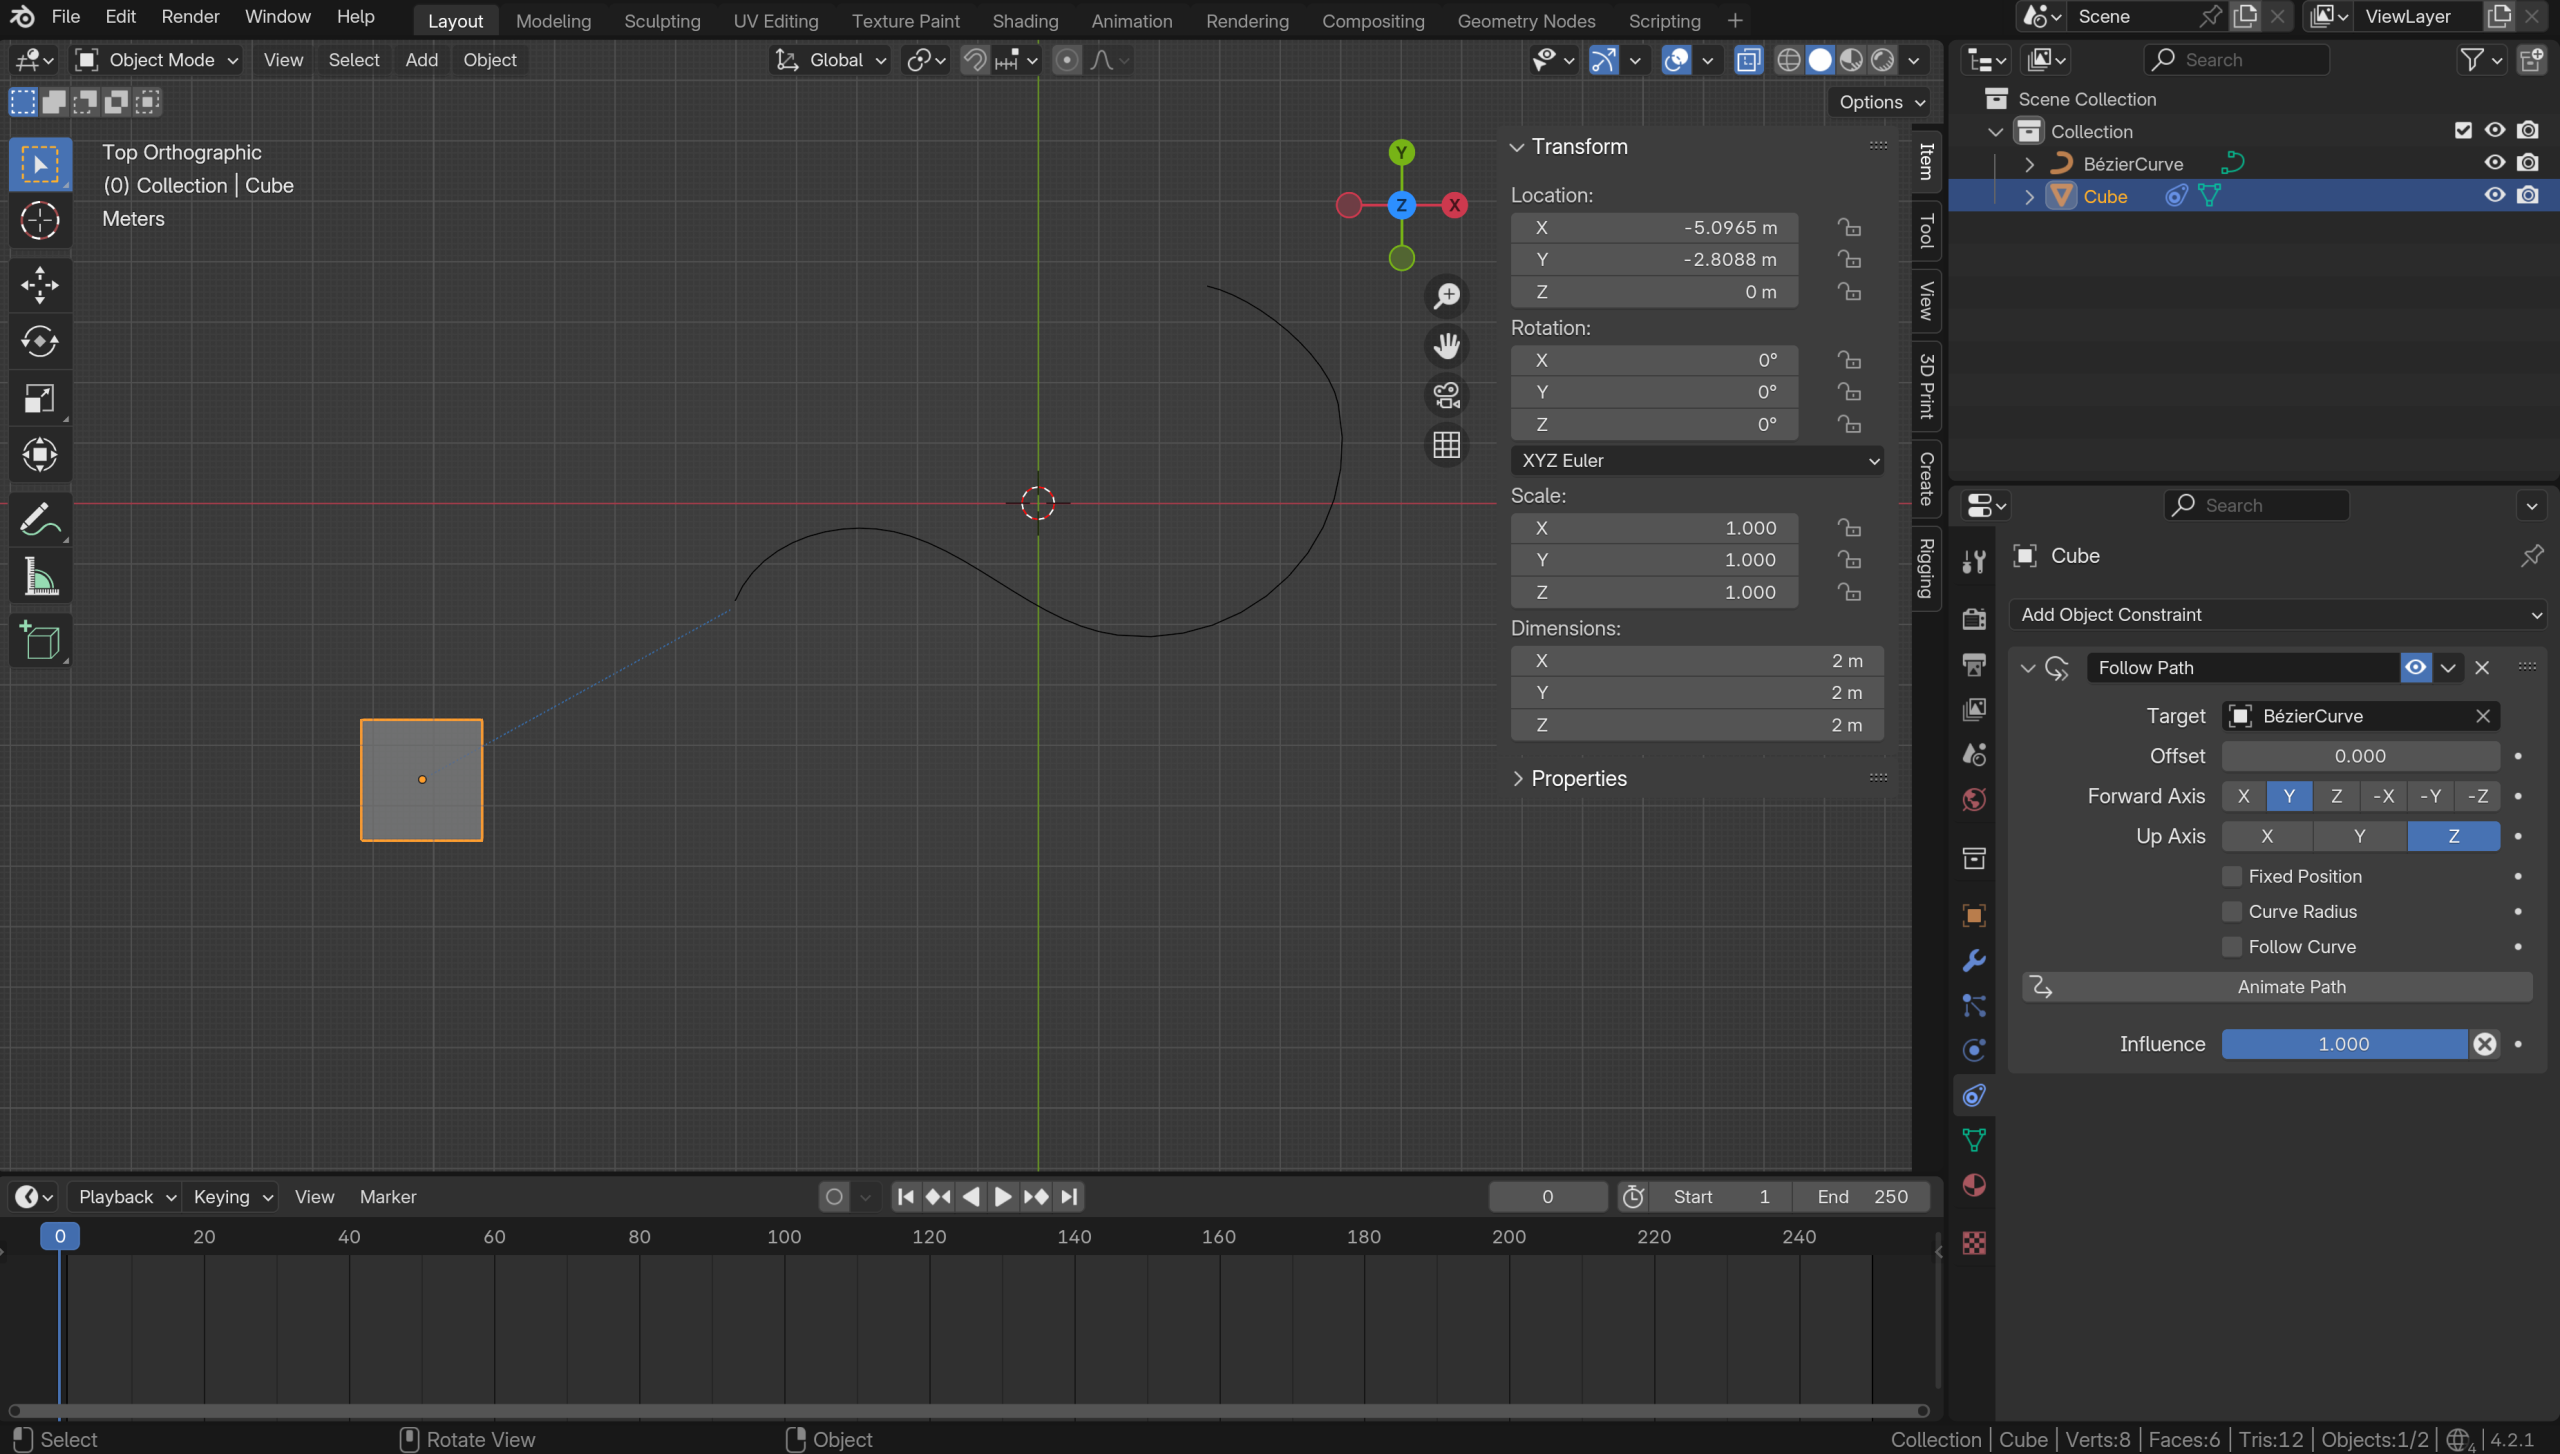
Thanks Martin. I figured out the bevel problem. But here’s a new question:
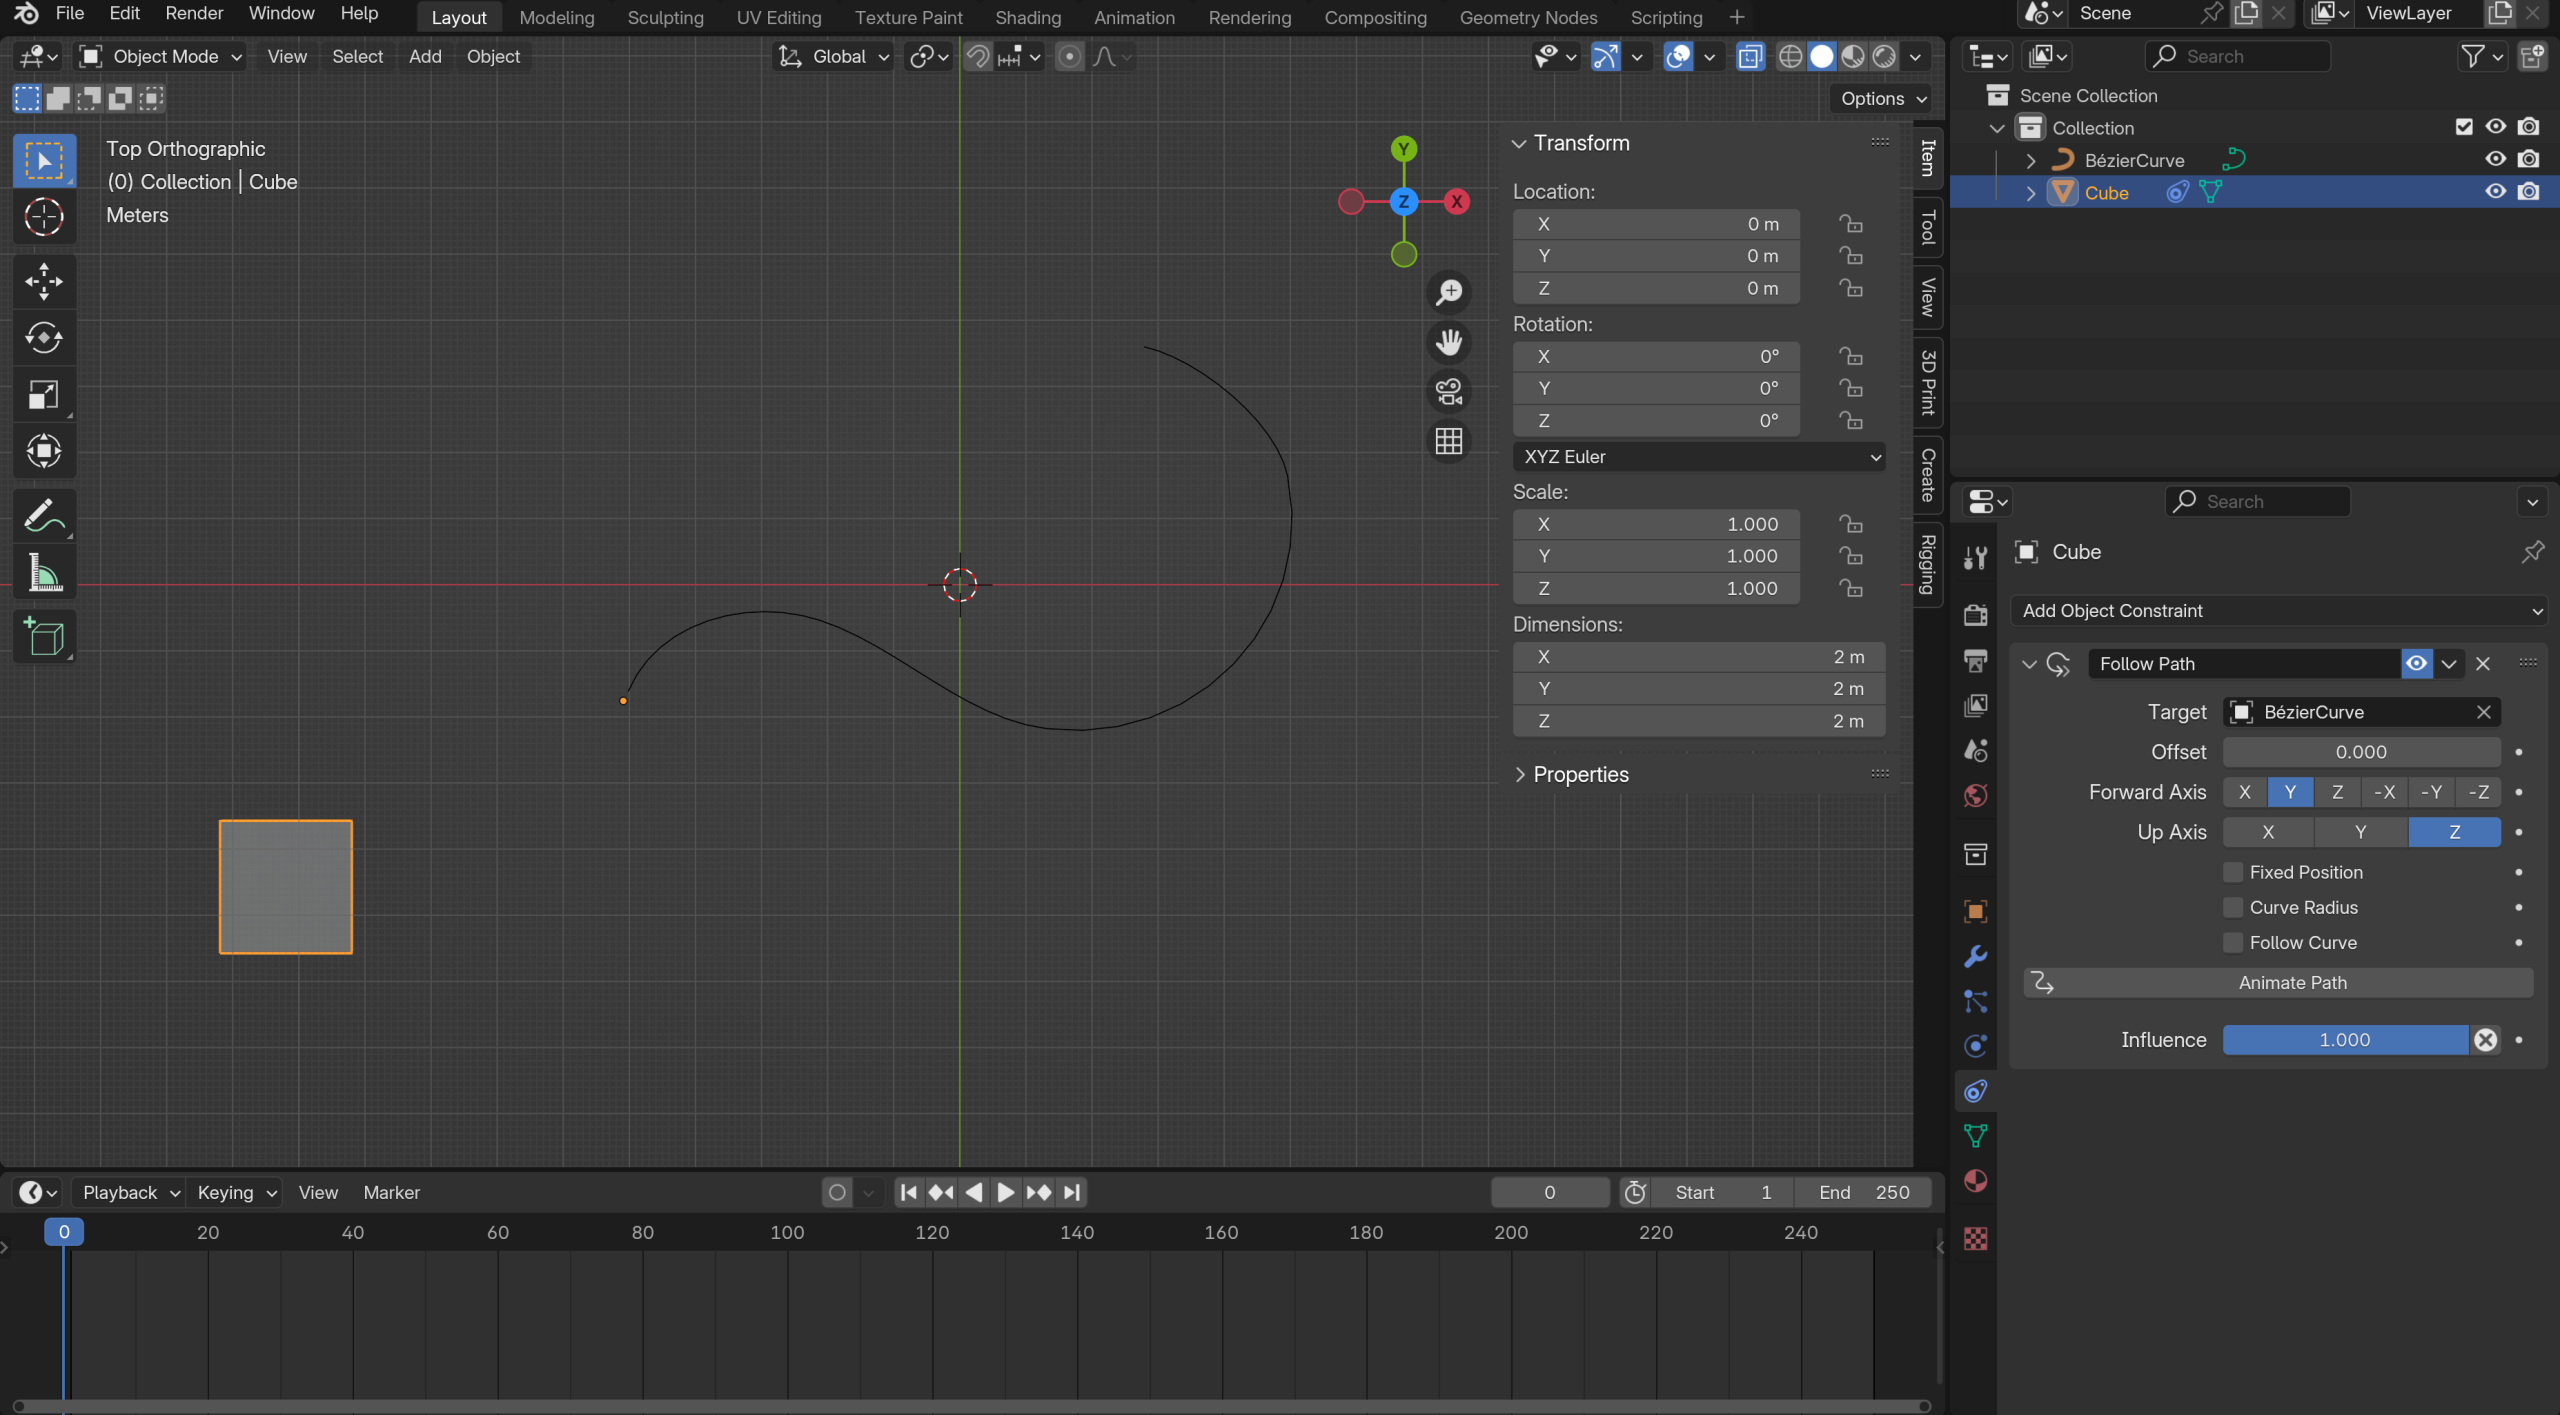
I’m trying to attach a cube to a path with a follow path constraint. For some reason when I choose the Target object (a Bezier Curve) the cube jumps in the -X and -Y. It animates along the path, but it’s offset in those negative axes for some reason. I applied all transforms before adding the constraint, just to rule that out.
I can’t figure out how to attach a blend file, but here’s a jpeg before adding the target object (Bezier Curve):
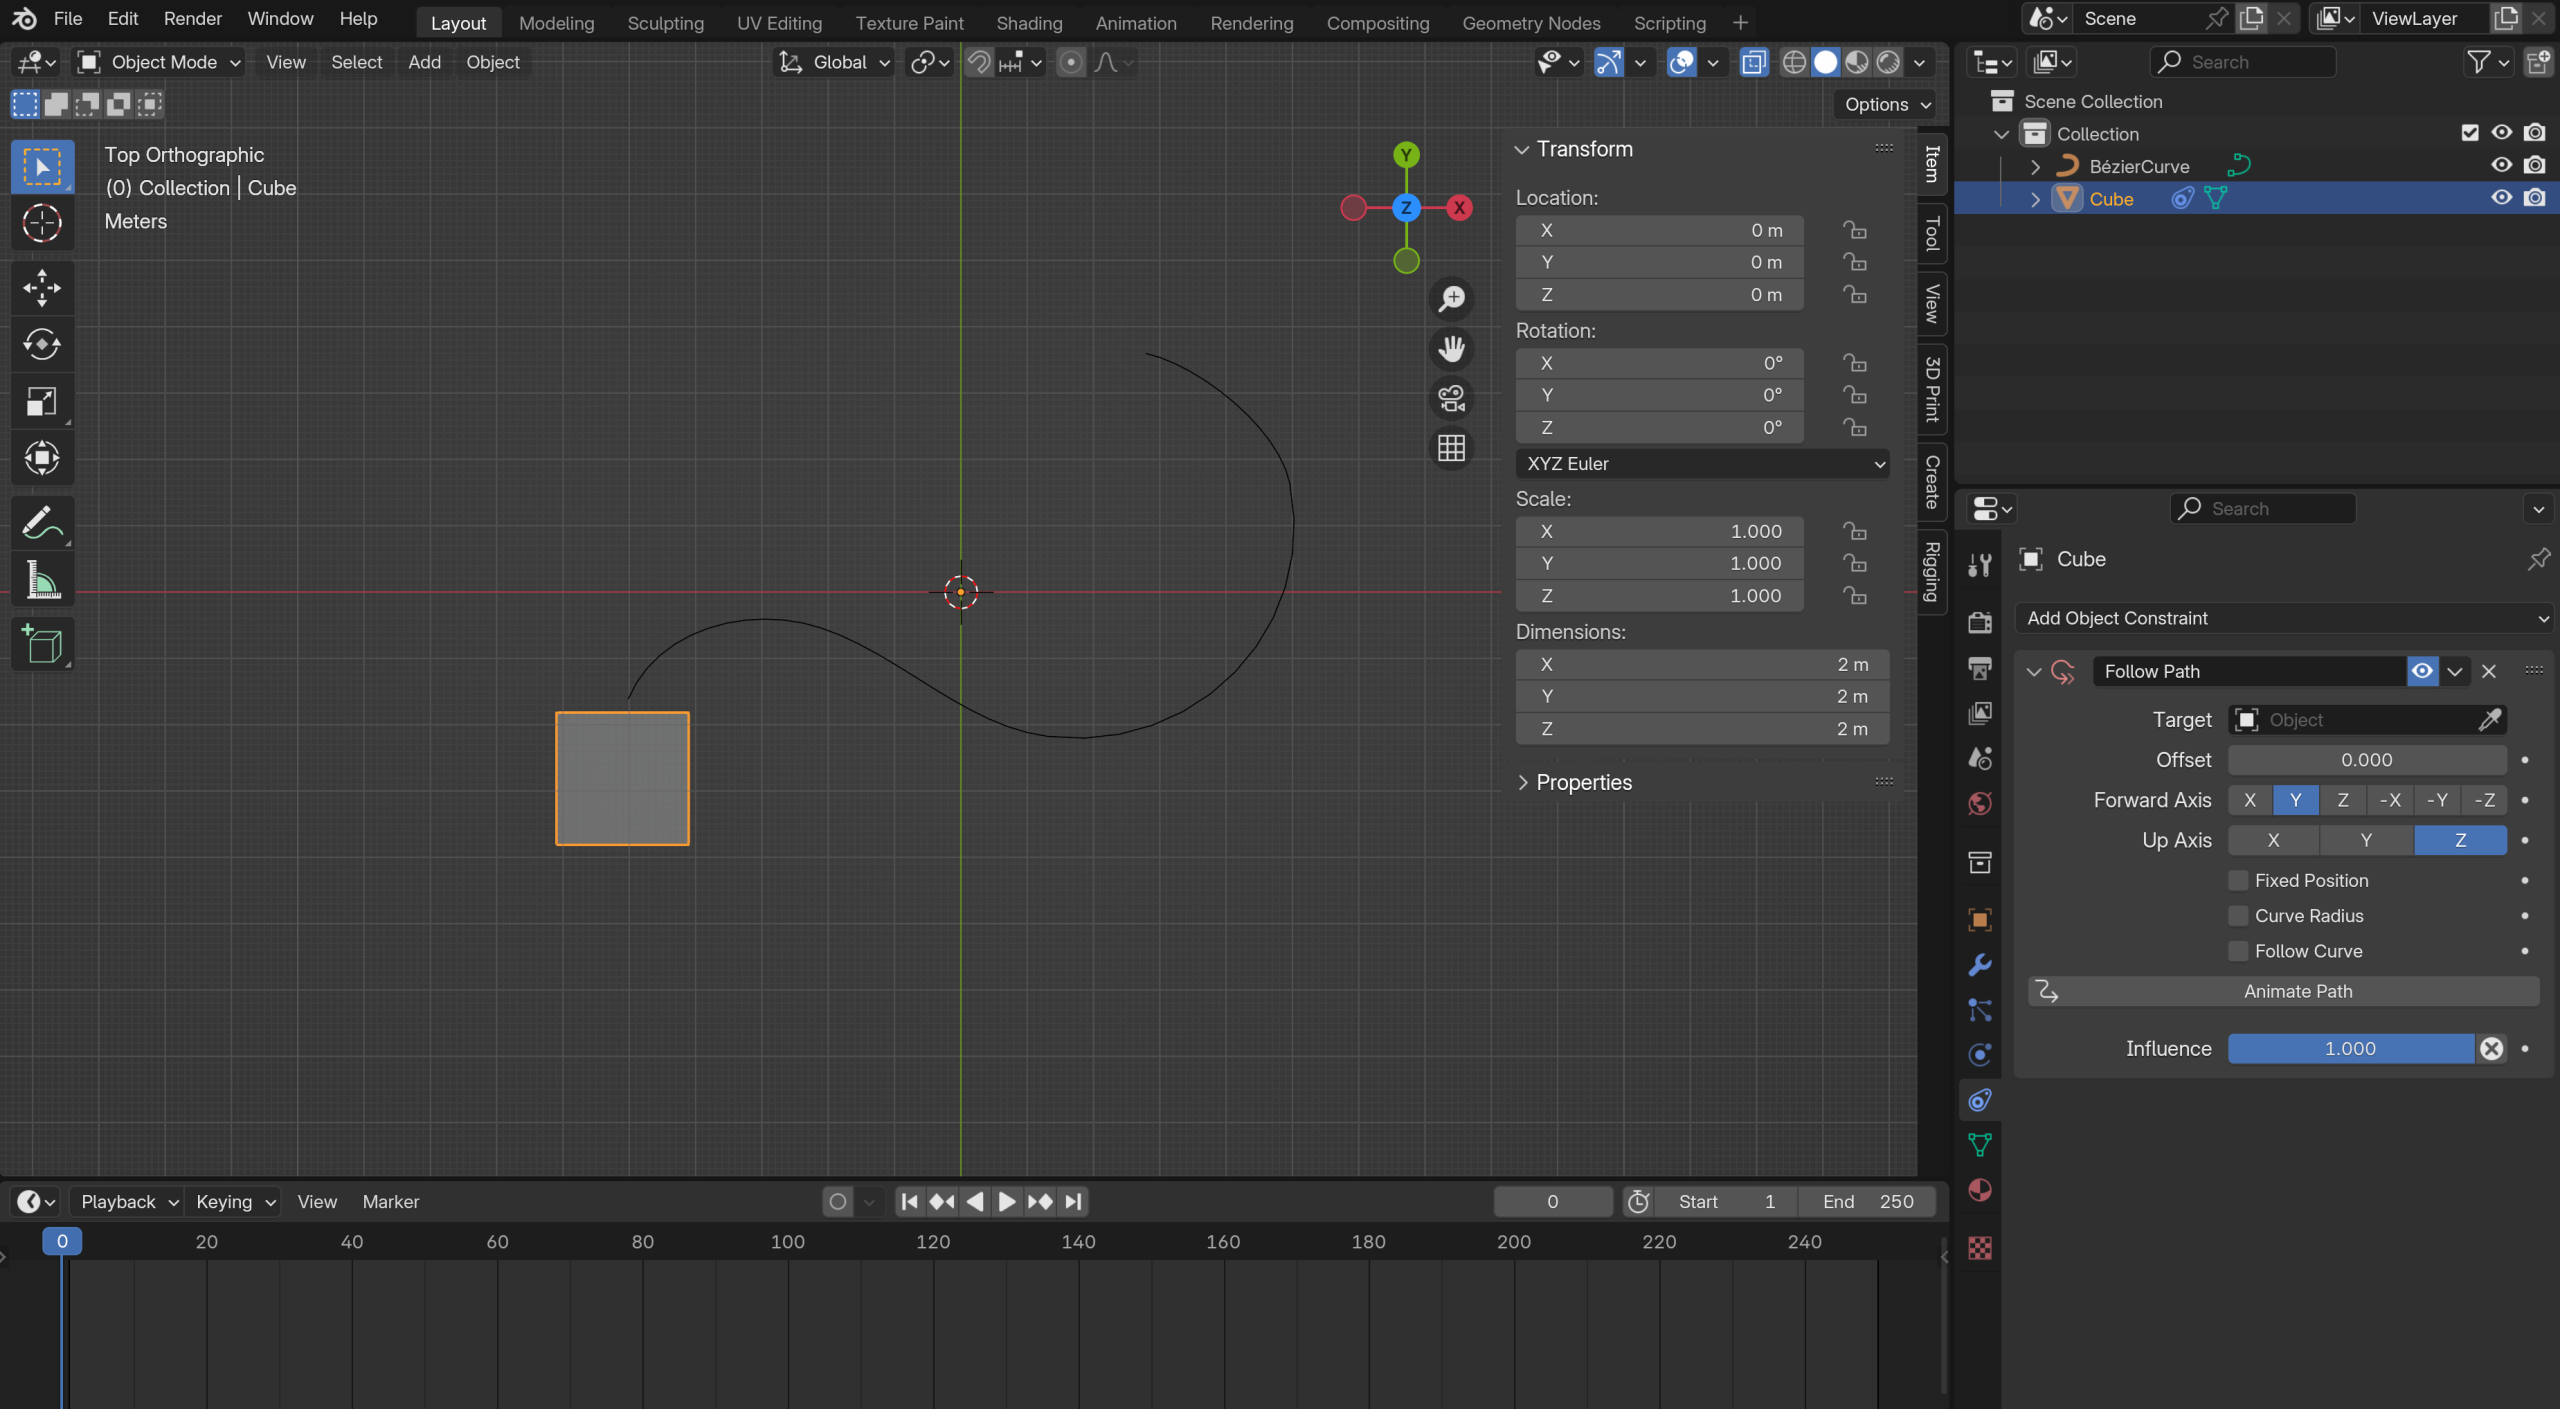
And after adding the Target Object:
Hi Dwayne,
I checked all that stuff – still no luck. But I found a couple curves from an older file that worked. I don’t know what was going on with the newer curves, because I tried everything. Oh well – problem solved. Thanks for helping out!
-Scott
Hey Dwayne and Omar,
Dwayne’s latest suggestion worked perfectly! (But Omar, thanks for your suggestions as well. Looks like it’s a team effort with this.) So far the materials are saving fine when I save the file and reopen it again. Thanks so much. It’s strange with all the internet searching I’ve done, I never found a video explaining how to do these things. Probably didn’t have the exact search terms.
Also, I’m able to just duplicate the Linked Collection and the new duplicate retains all the options for offsetting the animation in the NLA, plus the door color. So I don’t have to go through the linking process every time I create a new linked collection.
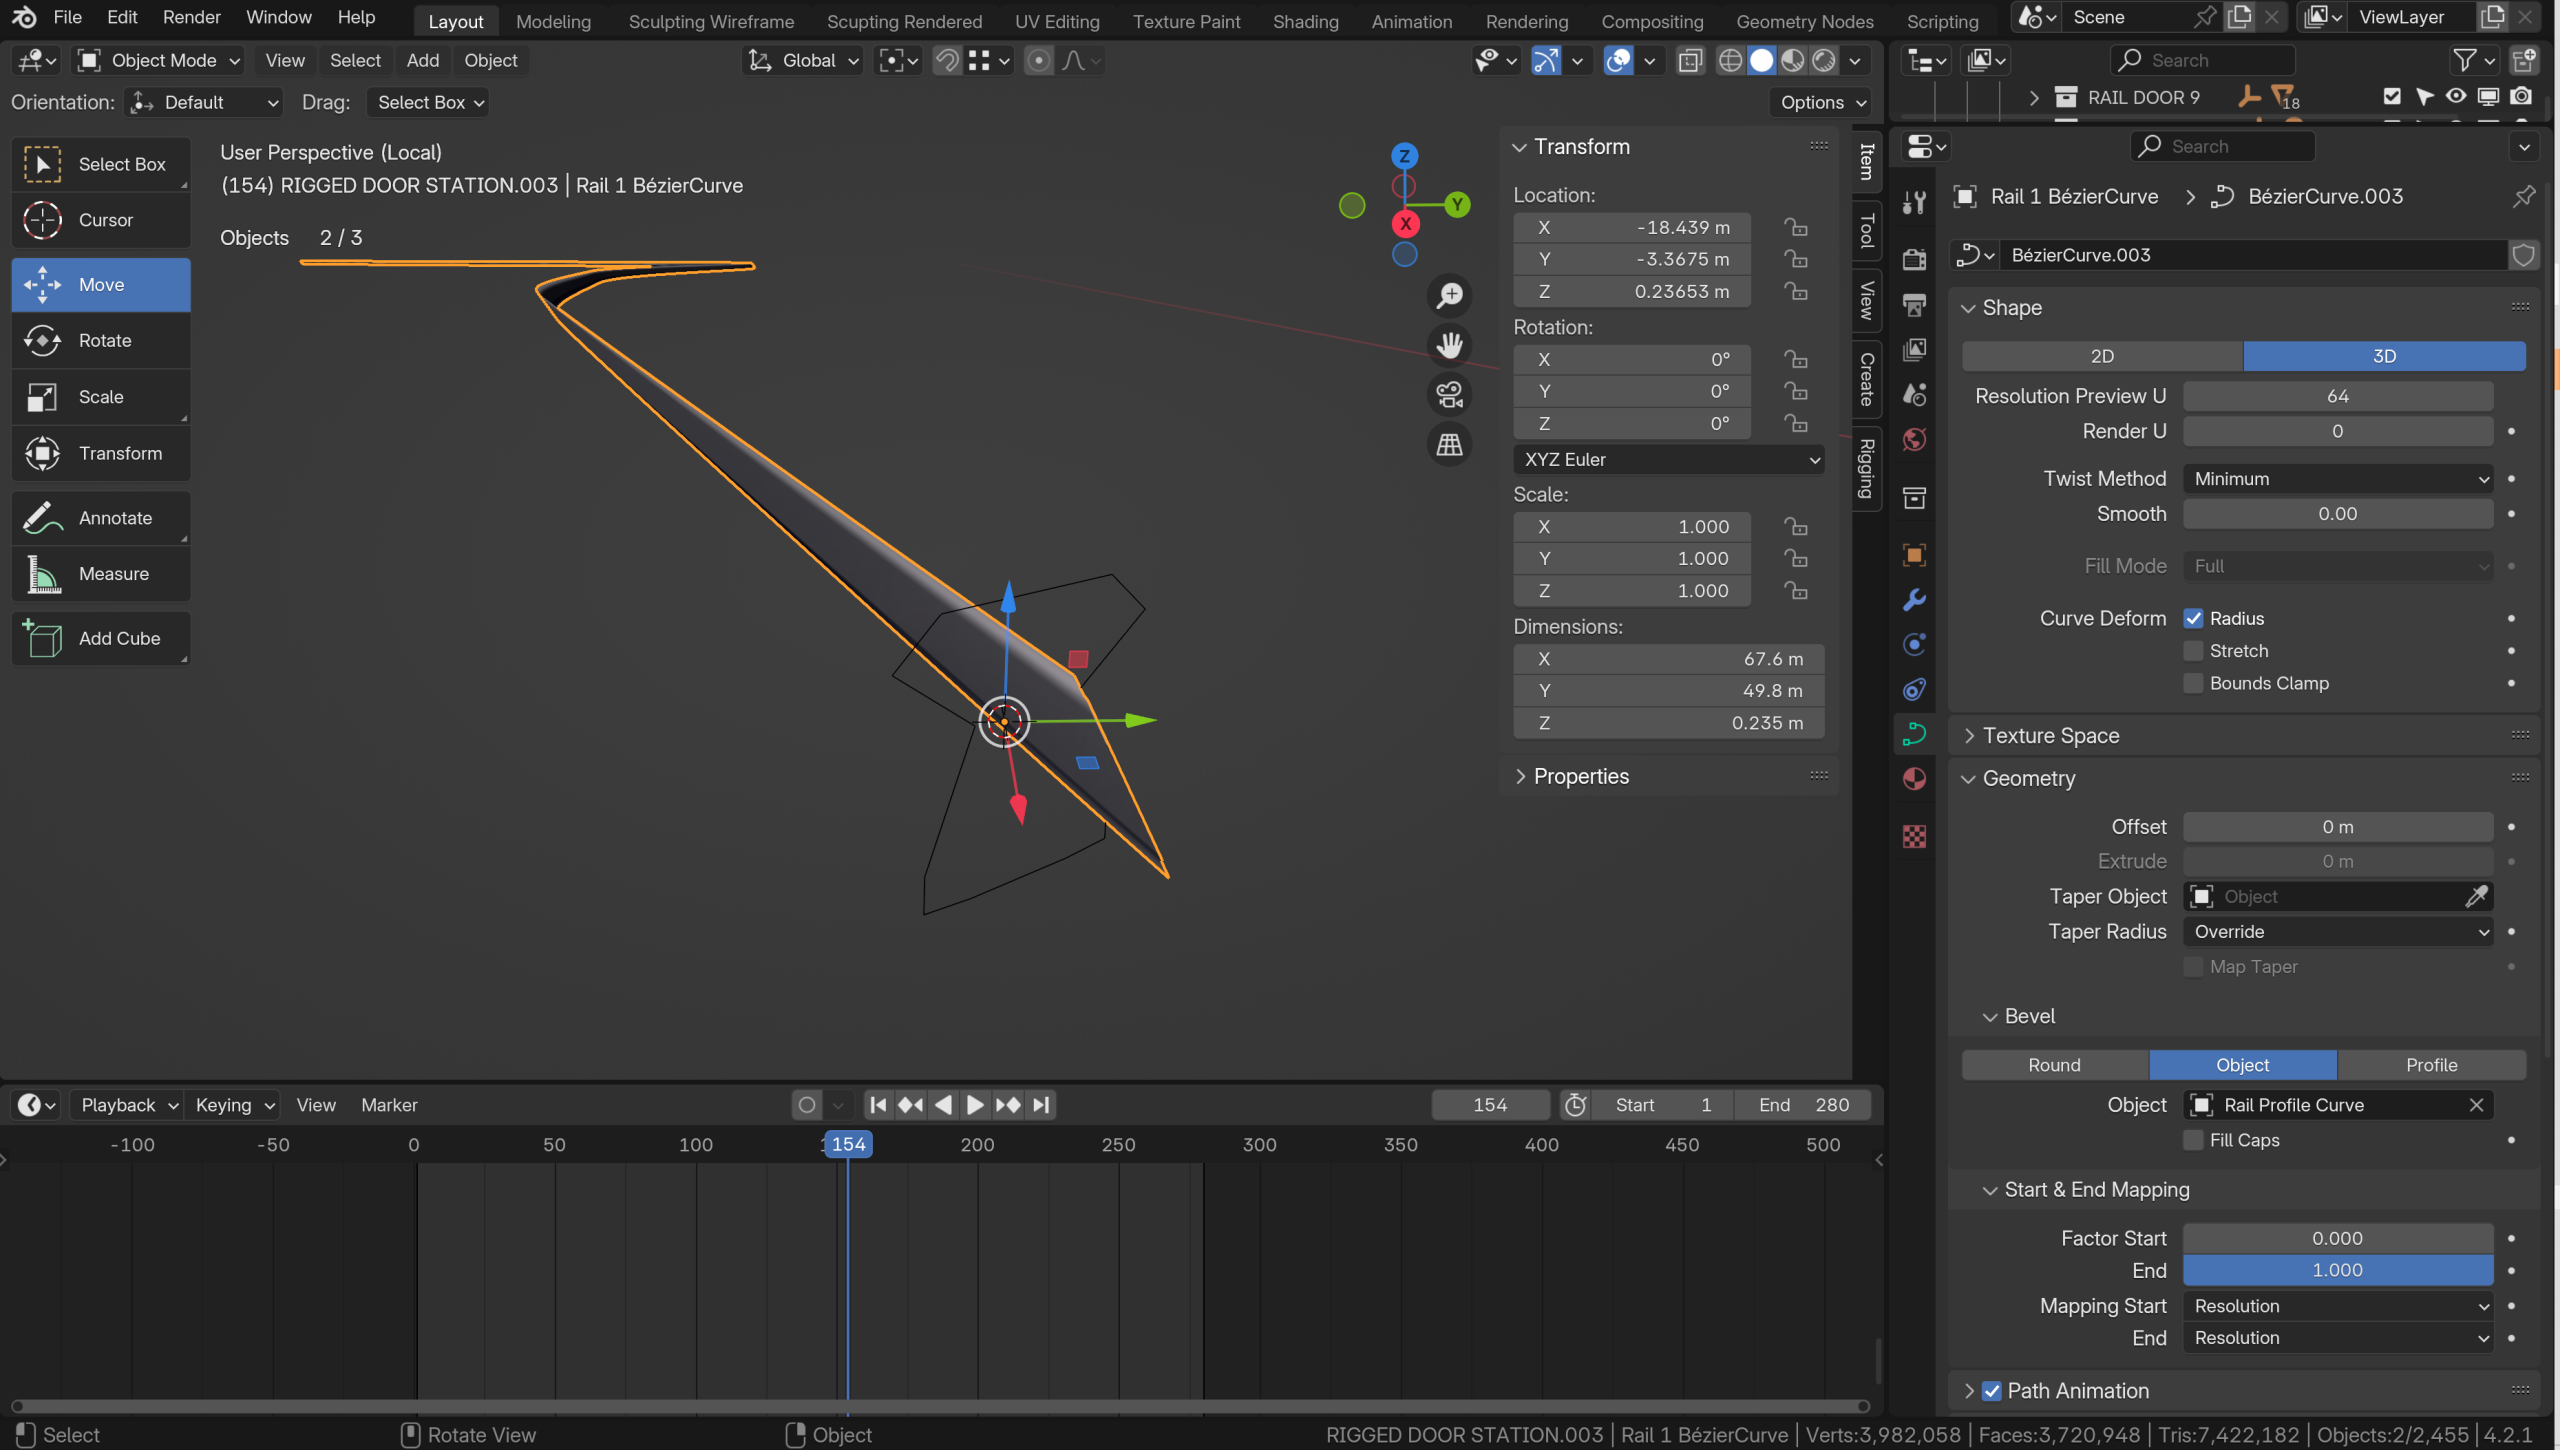
I have one more question for you that’s not related at all. I’m trying to do a simple Bevel extrusion using a Bezier curve and a profile curve to create a curving rail. The result is a flattened extrusion – not reflecting the shape of the profile. I’ve tried rotating the profile curve, which has worked in the past, but no luck today. See the attached image. Hopefully you can see the profile curve next to the axis gizmo.
One last thing: I tried to get onto Discord but couldn’t find “Buddy hangout 1” in the contacts area. Also, it said I don’t have permission to send a message in this channel. Sorry – kind of dumb when it comes to Discord!
-Scott
Hi Omar and Dwayne,
Thanks for your suggestions. I tried Omar’s approach, but couldn’t figure out how to change the color, other than sliding the Color Ramp sliders around, but then there are only three options there. I imagine I could create more color ramp slots, but is that the way it’s supposed to work?
Also, once I link the contraption file to the scene file, and the updated object has the new shader, the shader is not editable in the linked collection, even after I create the Library Override.
Obviously I’m missing something here!
Thanks for the help.
-Scott
Hi Dwayne,
I followed your directions for the NLA workflow and it seems to be working great! Thanks so much for that information. I guess the NLA is used extensively in character animation, right? I’m also hoping that the performance will be better than straight duplicates, even though with the linked file I’m seeing the entire object hierarchy in the outliner, compared to only one object when it’s instanced.
One more question: I’d like to have one element of my animated contraption be a different color in each of the linked duplicates. It’s just a simple Principled BSDF shader – nothing complicated. Is this possible with Library Override? Or Node Groups?
Finally, I joined the CG Cookie Discord if that would be more efficient communication.
Thanks!
-Scott
Hi Dwayne – sorry I didn’t respond until now. I was out figure painting the whole day yesterday and wiped out when I got home. I’ll hit you up on Discord if I have any issues with the NLA. Thanks for your expertise and suggestions with this! -Scott
Hi Dwayne,
Thanks for your response! I’ve never tried using the NLA editor, and barely know what it can do. But I will try your suggestion. The animated contraption has an armature with a bone hierarchy bound to the geometry. Most of it is keyframed, but a small part of it uses constraints. Does the fact that I’m using an armature affect your NLA workflow on this?
Thanks,
-Scott
Hi Martin,
Thanks for responding! I have an animated contraption in a collection that I need to duplicate around an environment. They are all identical contraptions, but I want to offset the animation so they appear to be different in that respect. I could duplicate them, but they are a bit heavy and I can’t afford to spend days rendering each frame. So it’s mainly a performance thing. I also tried to export Alembic files and re-import them, but soon discovered that they don’t save material information. Though I could reassign the materials after import, but that’s a lot of work. Other file options either don’t support animation or materials. This appears to be a highly requested Blender feature that hasn’t happened yet – the ability to enable an animation offset for multiple collection instances. Again, Alembic can do the offset, but it doesn’t support materials. My only thought at this point is to duplicate a few of the contraptions (maybe 5) and then instance the rest, (13 in total) so it gives the impression that each one is unique. Any ideas?
Thanks!
-Scott
Hi Wayne!
Thanks so much for your response. I see what happened now. In my opinion, Blender has a display problem when two bones are exactly on top of each other. When one of the two bones is selected, it’s not really visible as a highlighted yellow line. There is a VERY subtle highlight over the whole bone, but it is barely visible.
So I misread what you were selecting. I thought the CTRL bone was still selected in blue-green when you added the widget shape, when in fact you had selected the Clamp_01.L bone. I had to watch the video a few times, and noticed the name of the selected object in the Text Info area, rather than rely on the highlighted object. I think I’m good to go.
I sent you another way more complicated question regarding a personal project, but it sounds like you are very busy answering other student’s questions. I’m glad you hear you have lots of students taking your class!
This rigging thing has my head spinning, but whenever you get the chance to reply to that other message is fine.
Cheers,
-Scott
Hi Omar,
Maybe I didn’t explain things that well after all! I’m at the part of the lesson where Wayne is creating widgets for the bones. If you look at the attached image, it is the blue rectangular widget that I’ve successfully created on the screen right side, but can’t symmetrize it to the left after pressing the Symmetrize Shape button in the Bone Widget Add-On Menu.
-Scott
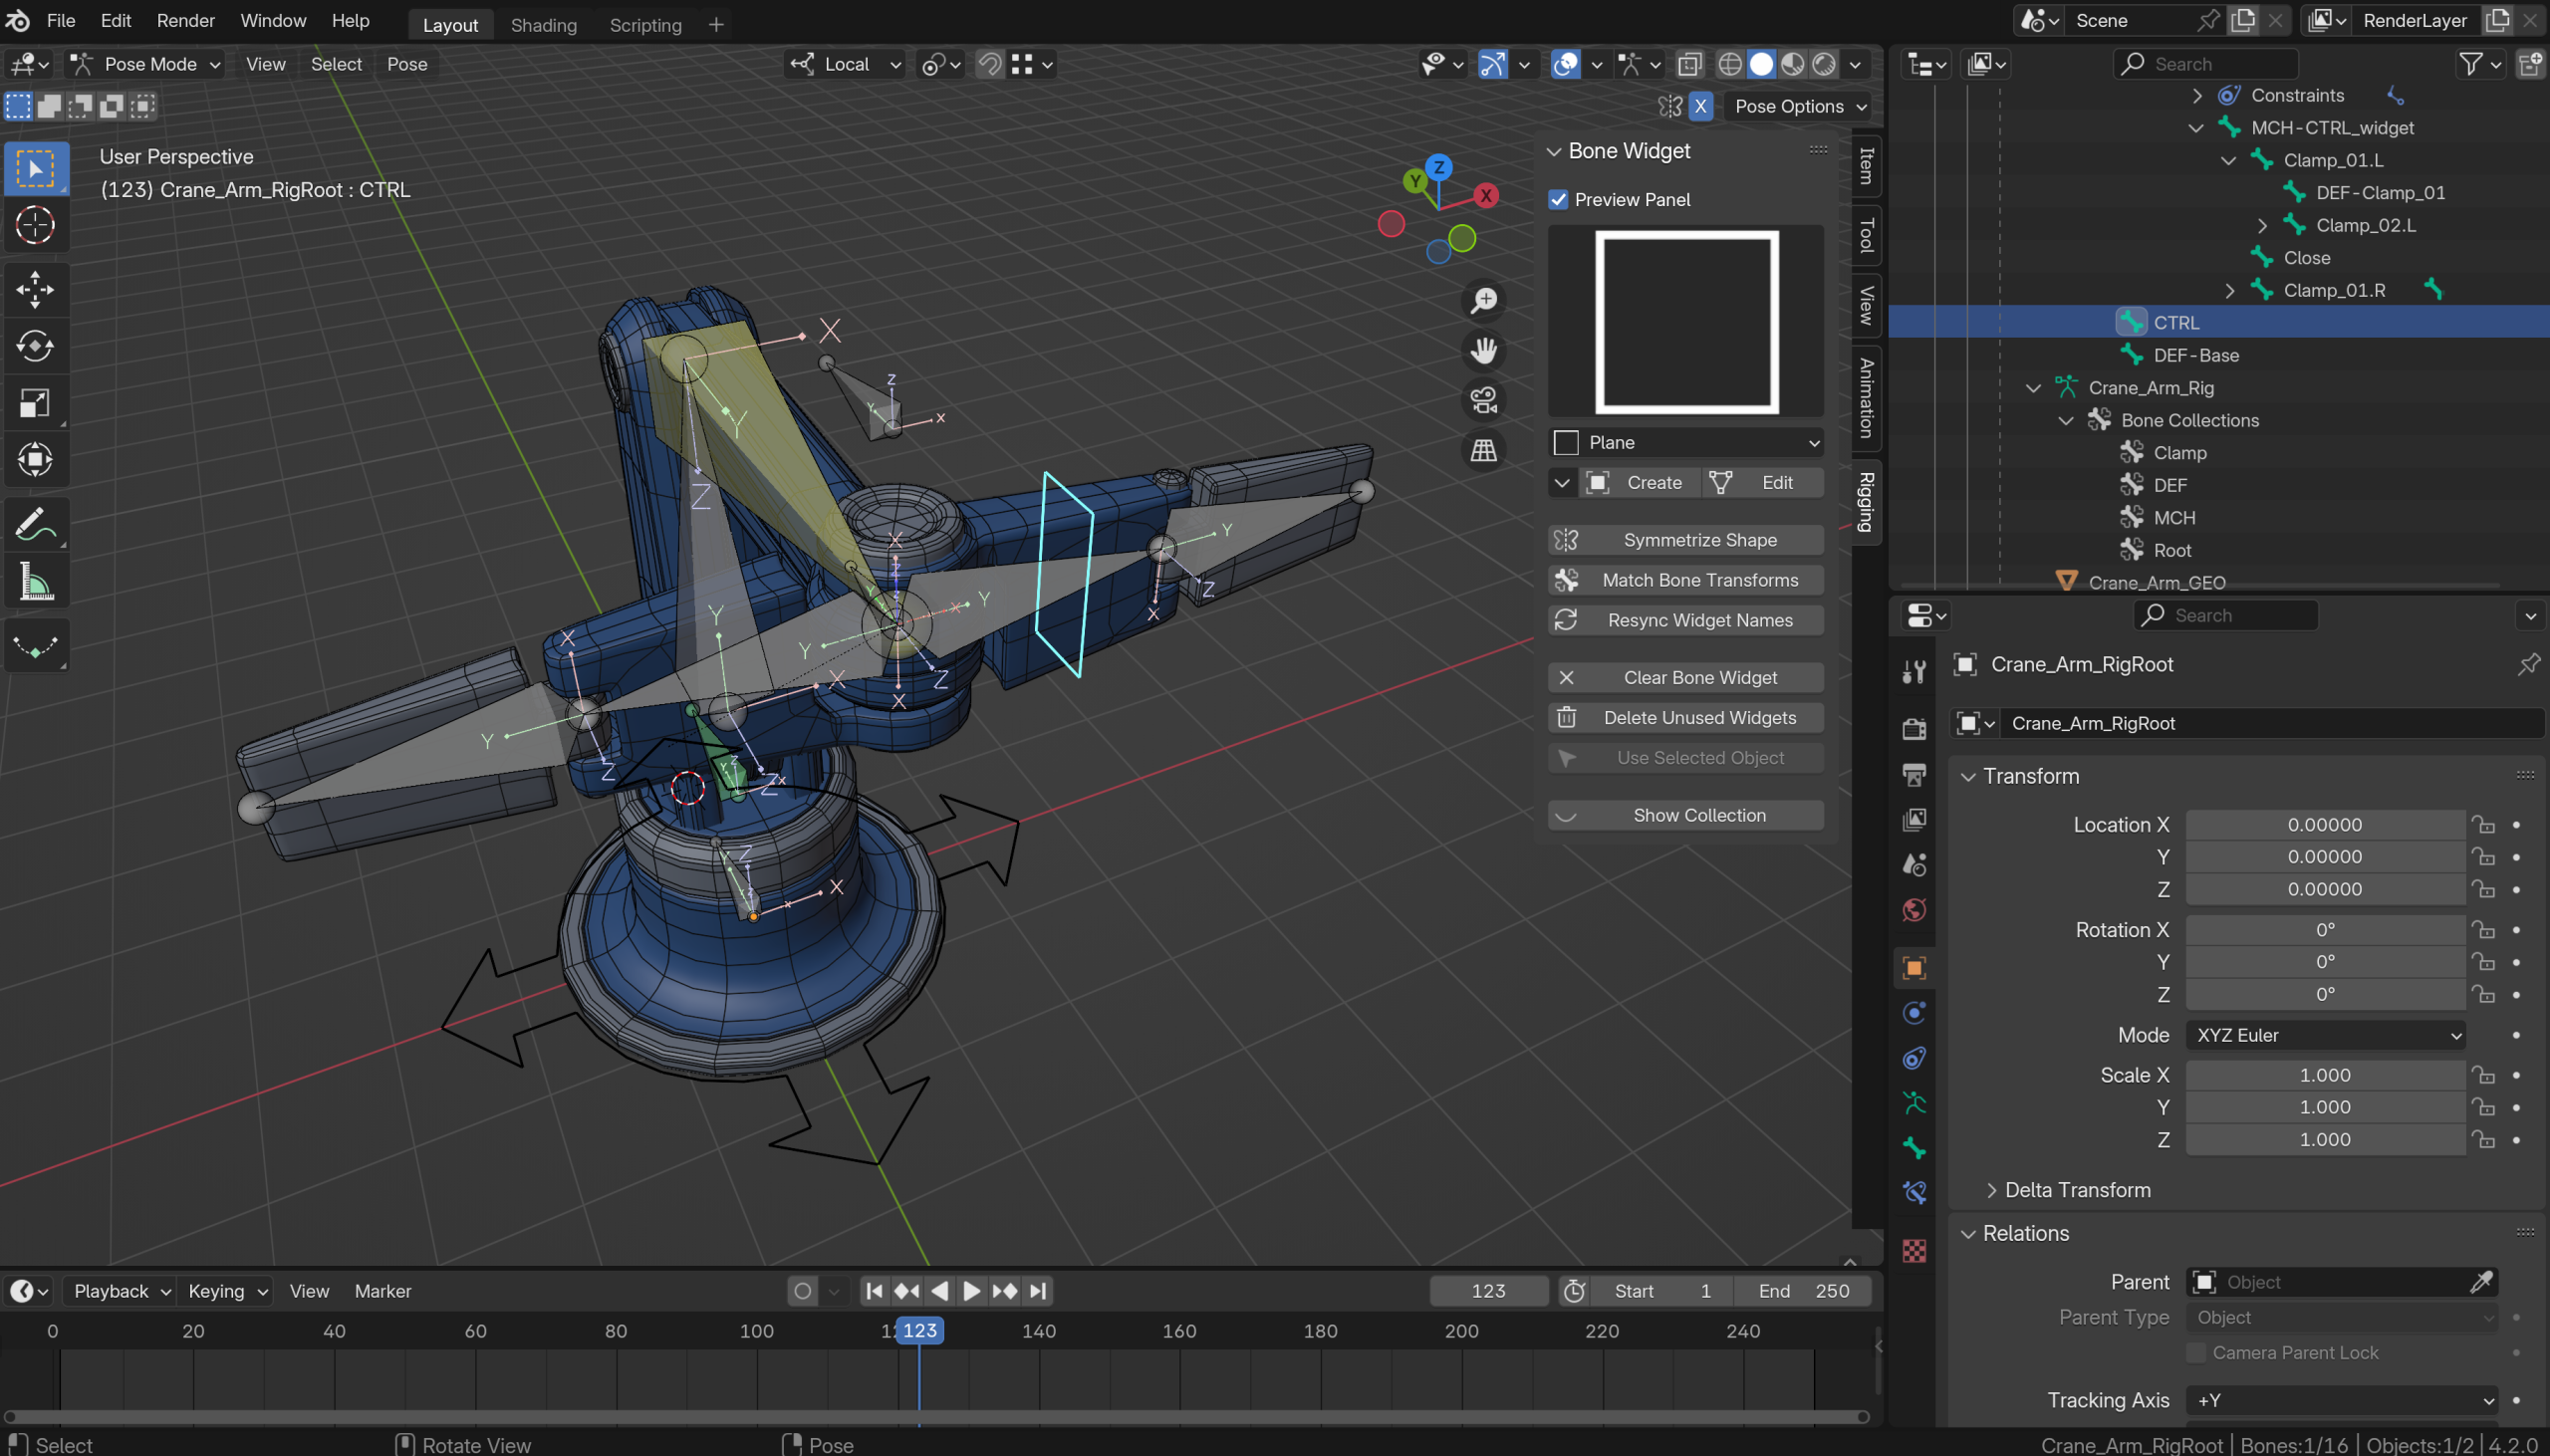
Hi Omar,
Thanks for responding! I uploaded a Blender file on the same page as the lesson video. I’m not sure how to provide a link to that in this message. Forgive me, I’m still learning the ropes on how to navigate your website.
I tried some screenshots along with a message to Wayne a couple days ago, but got locked out. Amber said that there were some issues attaching images the way I did it, but I could submit images through the community forum – which is what this is, correct?
Are you able to read messages that I send to Wayne on the lesson page? I fully explained the situation there.
-Scott
-
AuthorPosts
