
Raphaëlle Joffray

Forum Replies Created
-
AuthorPosts
-
August 26, 2026 at 1:03 pm in reply to: Migrating to our new platform update – September 1st #133691
Can’t blame you on the delays. We were supposed to update our LIS (laboratory information system) at work March the 15th, and almost six months later… *sighs in French…*.
I am curious to see what it will look like 🙂August 5, 2026 at 7:21 am in reply to: CGCookie Website Migration – Action required by August 4 #100897Did the migration actually take place ?
I came this morning (in France – that is to say, when all you guys in the US were still sleeping) take a look, and found that my progress in various courses was actually still there 😀
🚨 Correction : 😄
I am watching Jonathan’s video about the new features in 5.1 right now, and he says at this point :
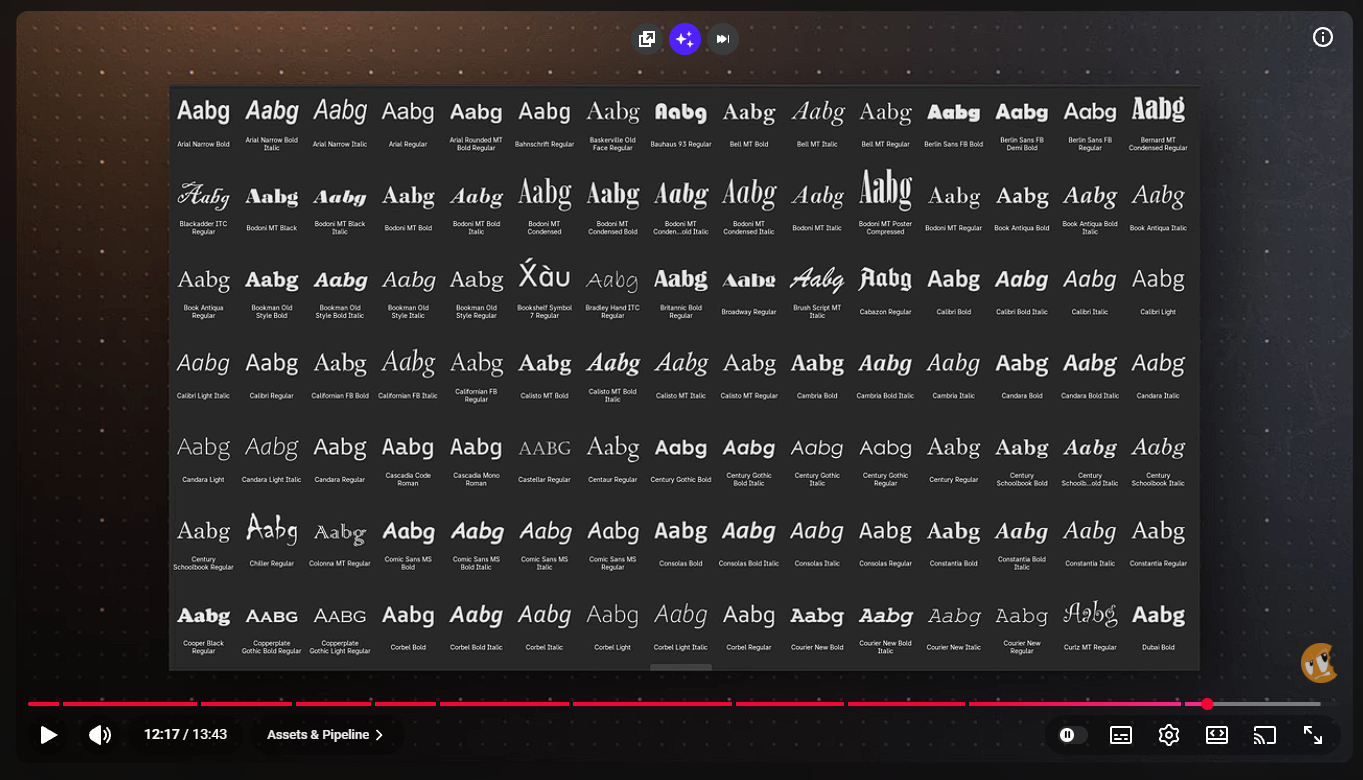
“User fonts are now supported alongside system fonts”.
I have not tested it yet, but i suppose my previous message is now obsolete, and fonts installed for only 1 user should be displayed when you pick a font.
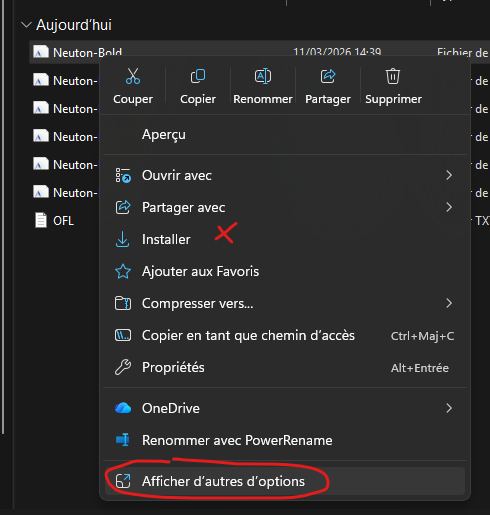
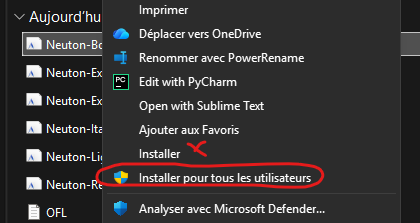
⚠️ If you want Blender to see the custom fonts you install, you need to choose “Install for all users” (it requires admin privileges) rather than simply “Install”.
Here is how to do it (my windows is in french but you get the idea) :
Do not click Install but instead choose “Show other options” (or something like that in english), at the bottom of the menu when you right click.
Choose “Install for all users”, with the little admin shield in front of it.
So my “Geo Nodes Procedural Resistor” personal project is almost done, and i finally found in which circumstances some input variables are hidden / revealed, as demonstrated in these two screen captures :
1) Custom Body Color is hidden
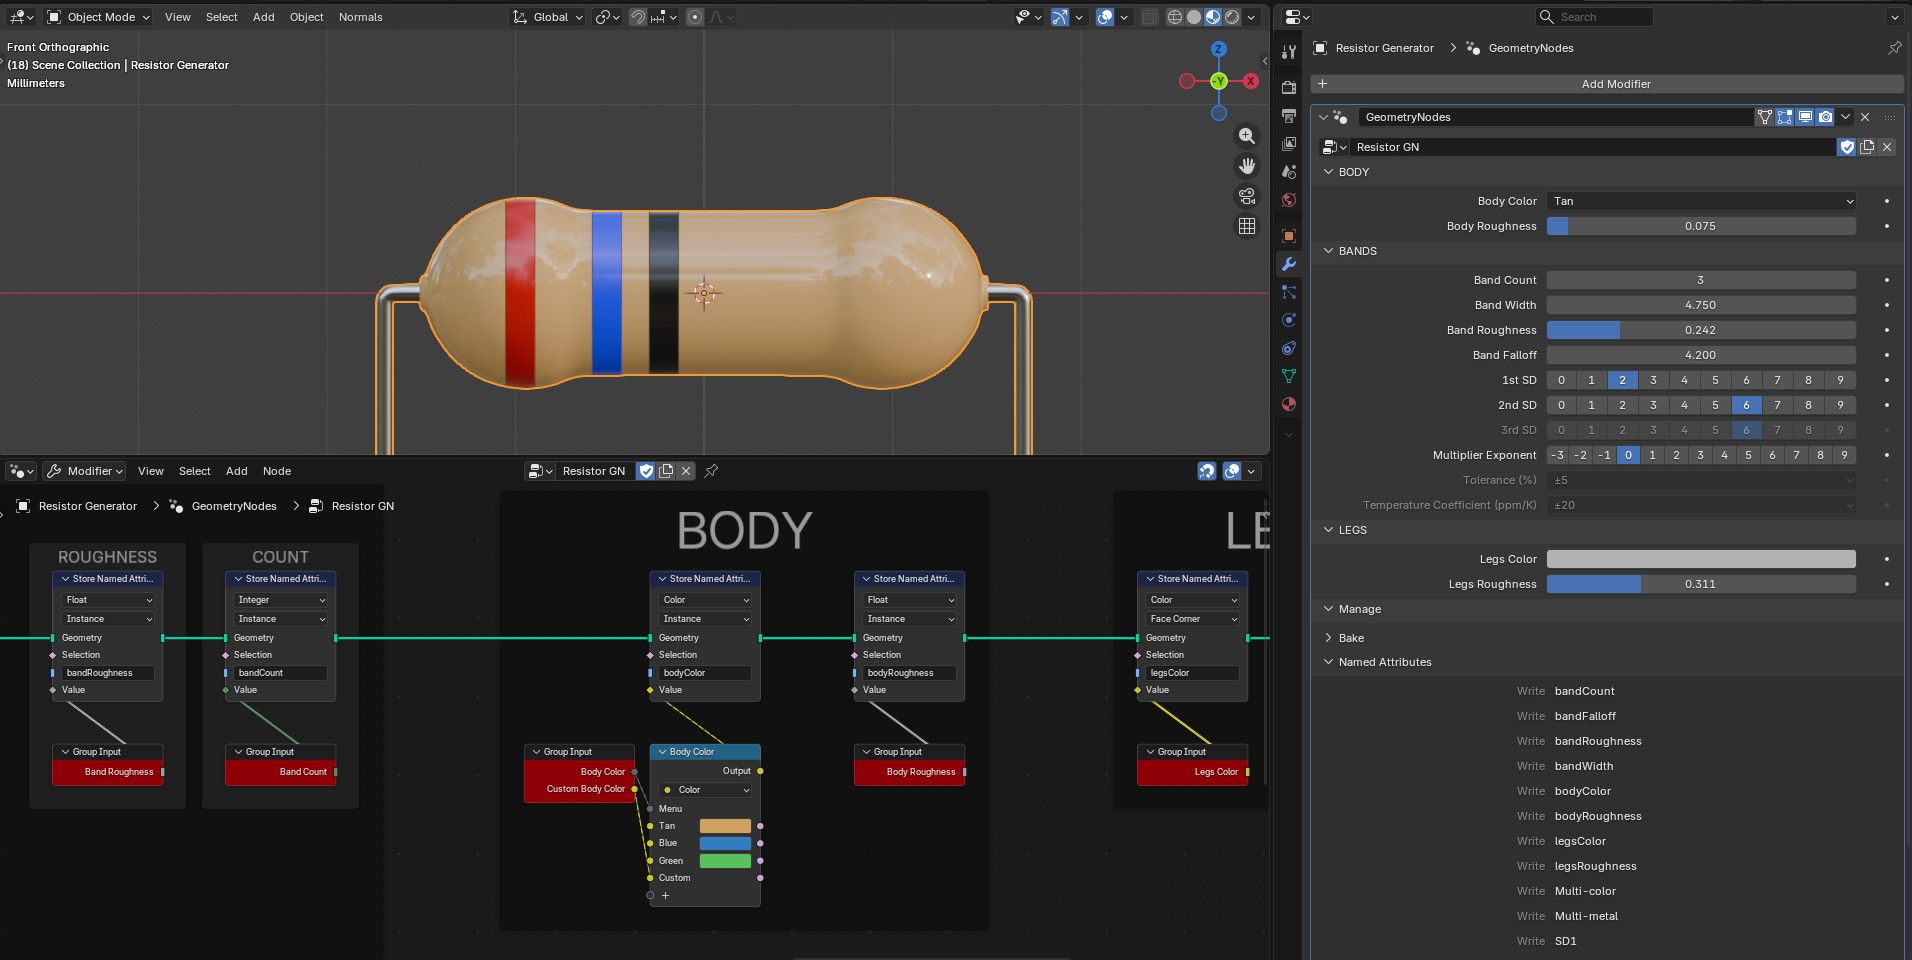
As you can see in the Geo Nodes modifier, the input variable “Body Color” is set on tan, one of the possibilities of the Body Color Menu Switch node.
2) Custom body color is revealed
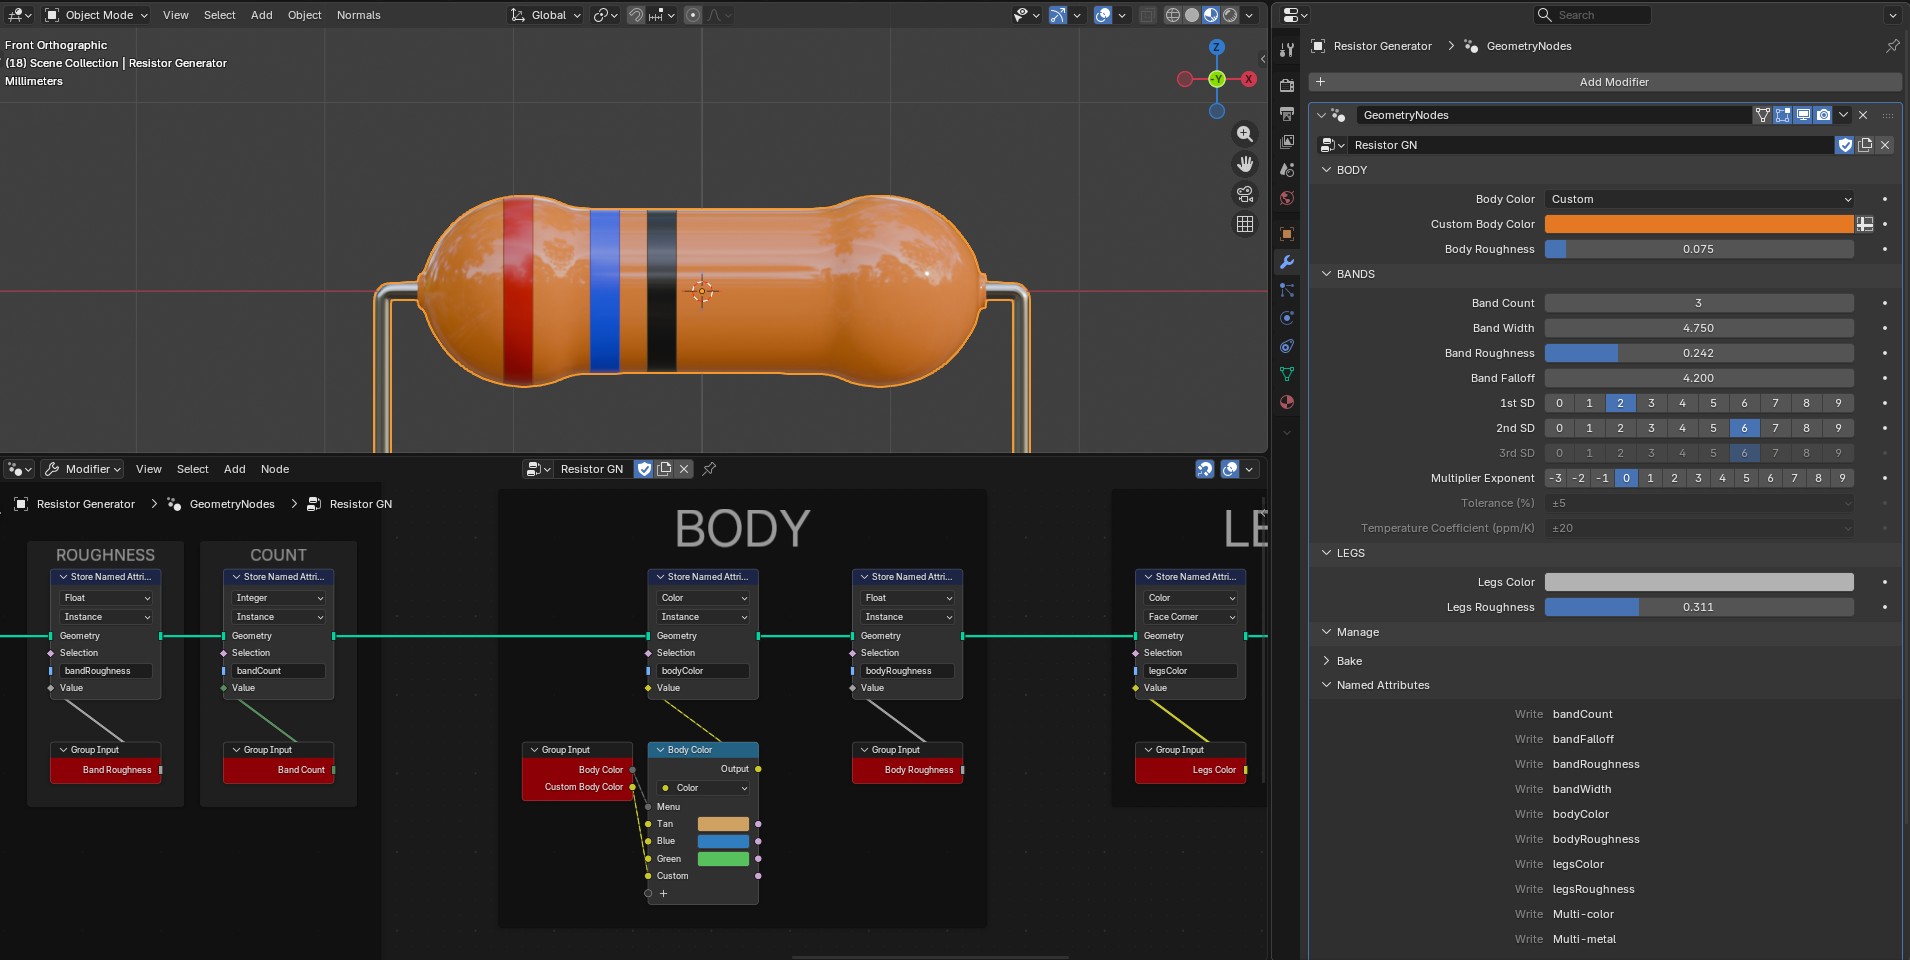
As soon as i pick “Custom” in the Menu, this implies to choose… well, a custom body color. The variable is revealed in the modifier, under “Body Color”.
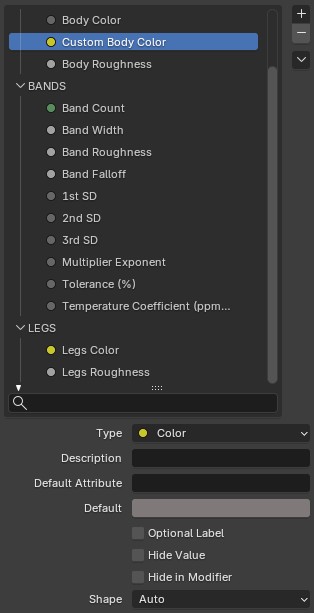
And i didn’t need to modify the default settings, which are all untoggled as you can see.
As you can also see in the first two images, some variables (3rd SD, Tolerance and Temperature Coefficient) are greyed out, because they are not used here since this is a “cheap” resistor with only 3 bands.
Here is how i achieved this result with the 3rd SD for instance :
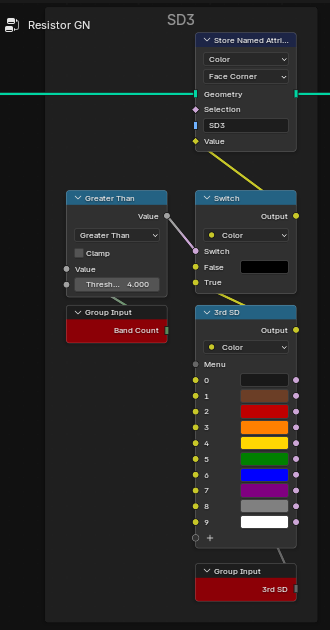
The input variable 3rd SD (SD = significant digit) is plugged into a menu switch, which in turn is plugged into the “True” socket of a switch.
The said switch is governed by a comparison between the Band Count (integer, geo nodes modifier input) and the Threshold of 4.
I.E. : the band for the 3rd SD will be displayed only if there are more than 4 bands on the resistor.
For 3 or 4 bands, the 3rd SD input will not be used, and thus it will be greyed out.I hope it helps other Geo Nodes nerds out there 😅.
After some blender file archeology (i spent some time digging in my blender file from this summer), i realize that i was mistaken :
– Panel toggles are not for greying out or hiding subpanels.
– I don’t know what they are for 😅
– To grey out a panel you have indeed to use a switch menu, like this :
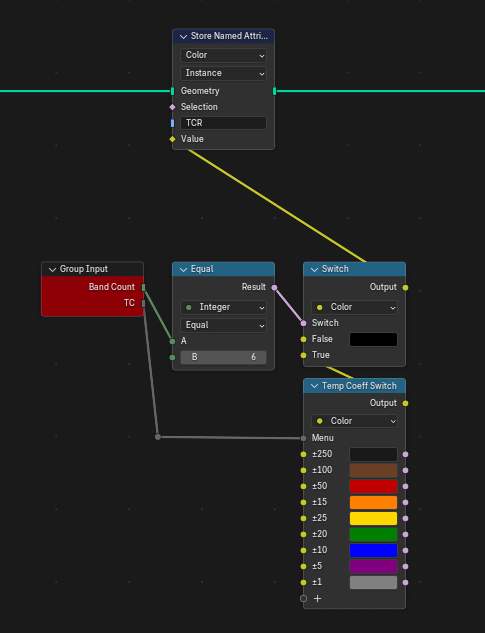
If Band count == 6, then use the Color value from the switch menu, else color == Black
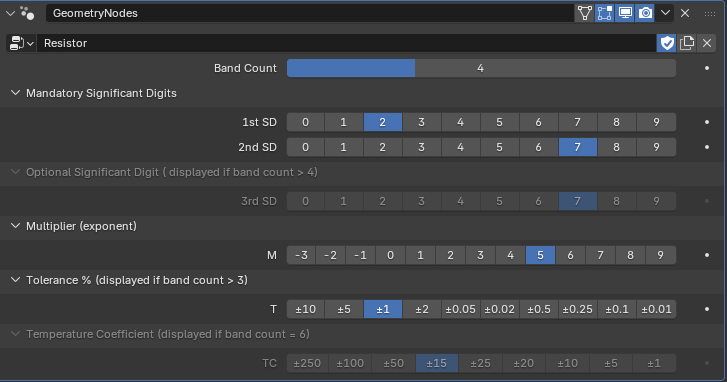
And here indeed, band count == 4, the Temperature Coefficient panel (and TC variable) are greyed out. Not hidden though, i still have not figured that out, but that’s already better, you can see the input is “useless” in this context.
Strangely, there is no way to use a driver on the “Hide in Modifier” toggle, which would then completely hide the panel :
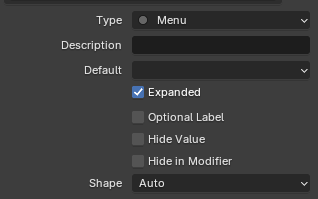
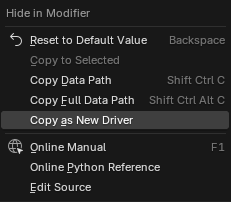
Add driver is missing here.
If i find the solution i’ll post it here.
Correction to my previous message : there a 2 provided solutions in another thread under this video 🙂
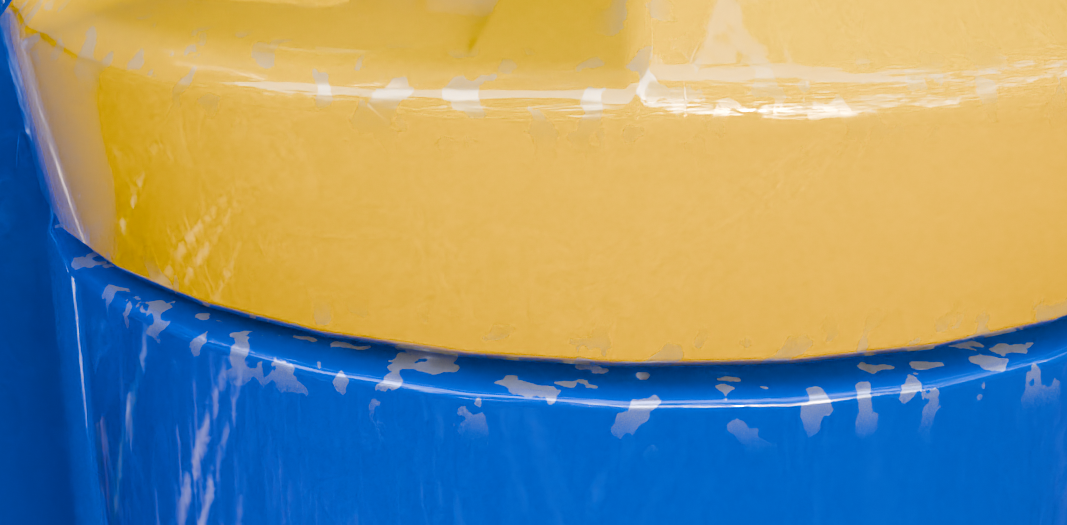
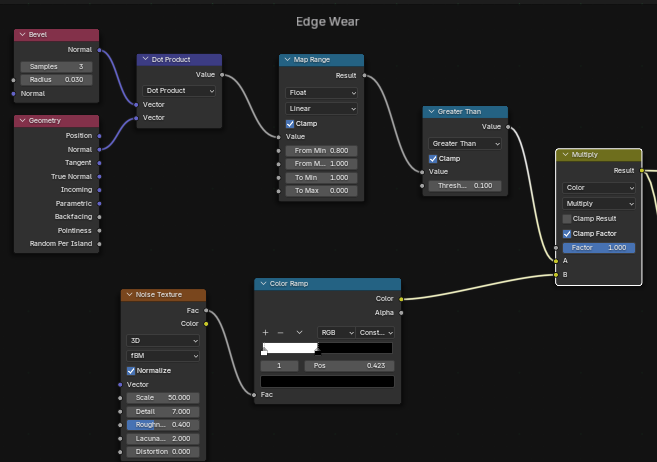
The fact that there is a “fading” effect on the noise texture near the limit of the edge mask makes me think it is not a display artifact 🤔
Adding a additional “Greater than” after the multiply node didn’t correct the problem either.Anyway, i think that for this project i’m going to paint the edge wear by hand… or forget it altogether…
Link corrected !
I am using Blender 4.3.2
I went “texture size overkill” and made a 2×2 UDIM with each tile 4K.
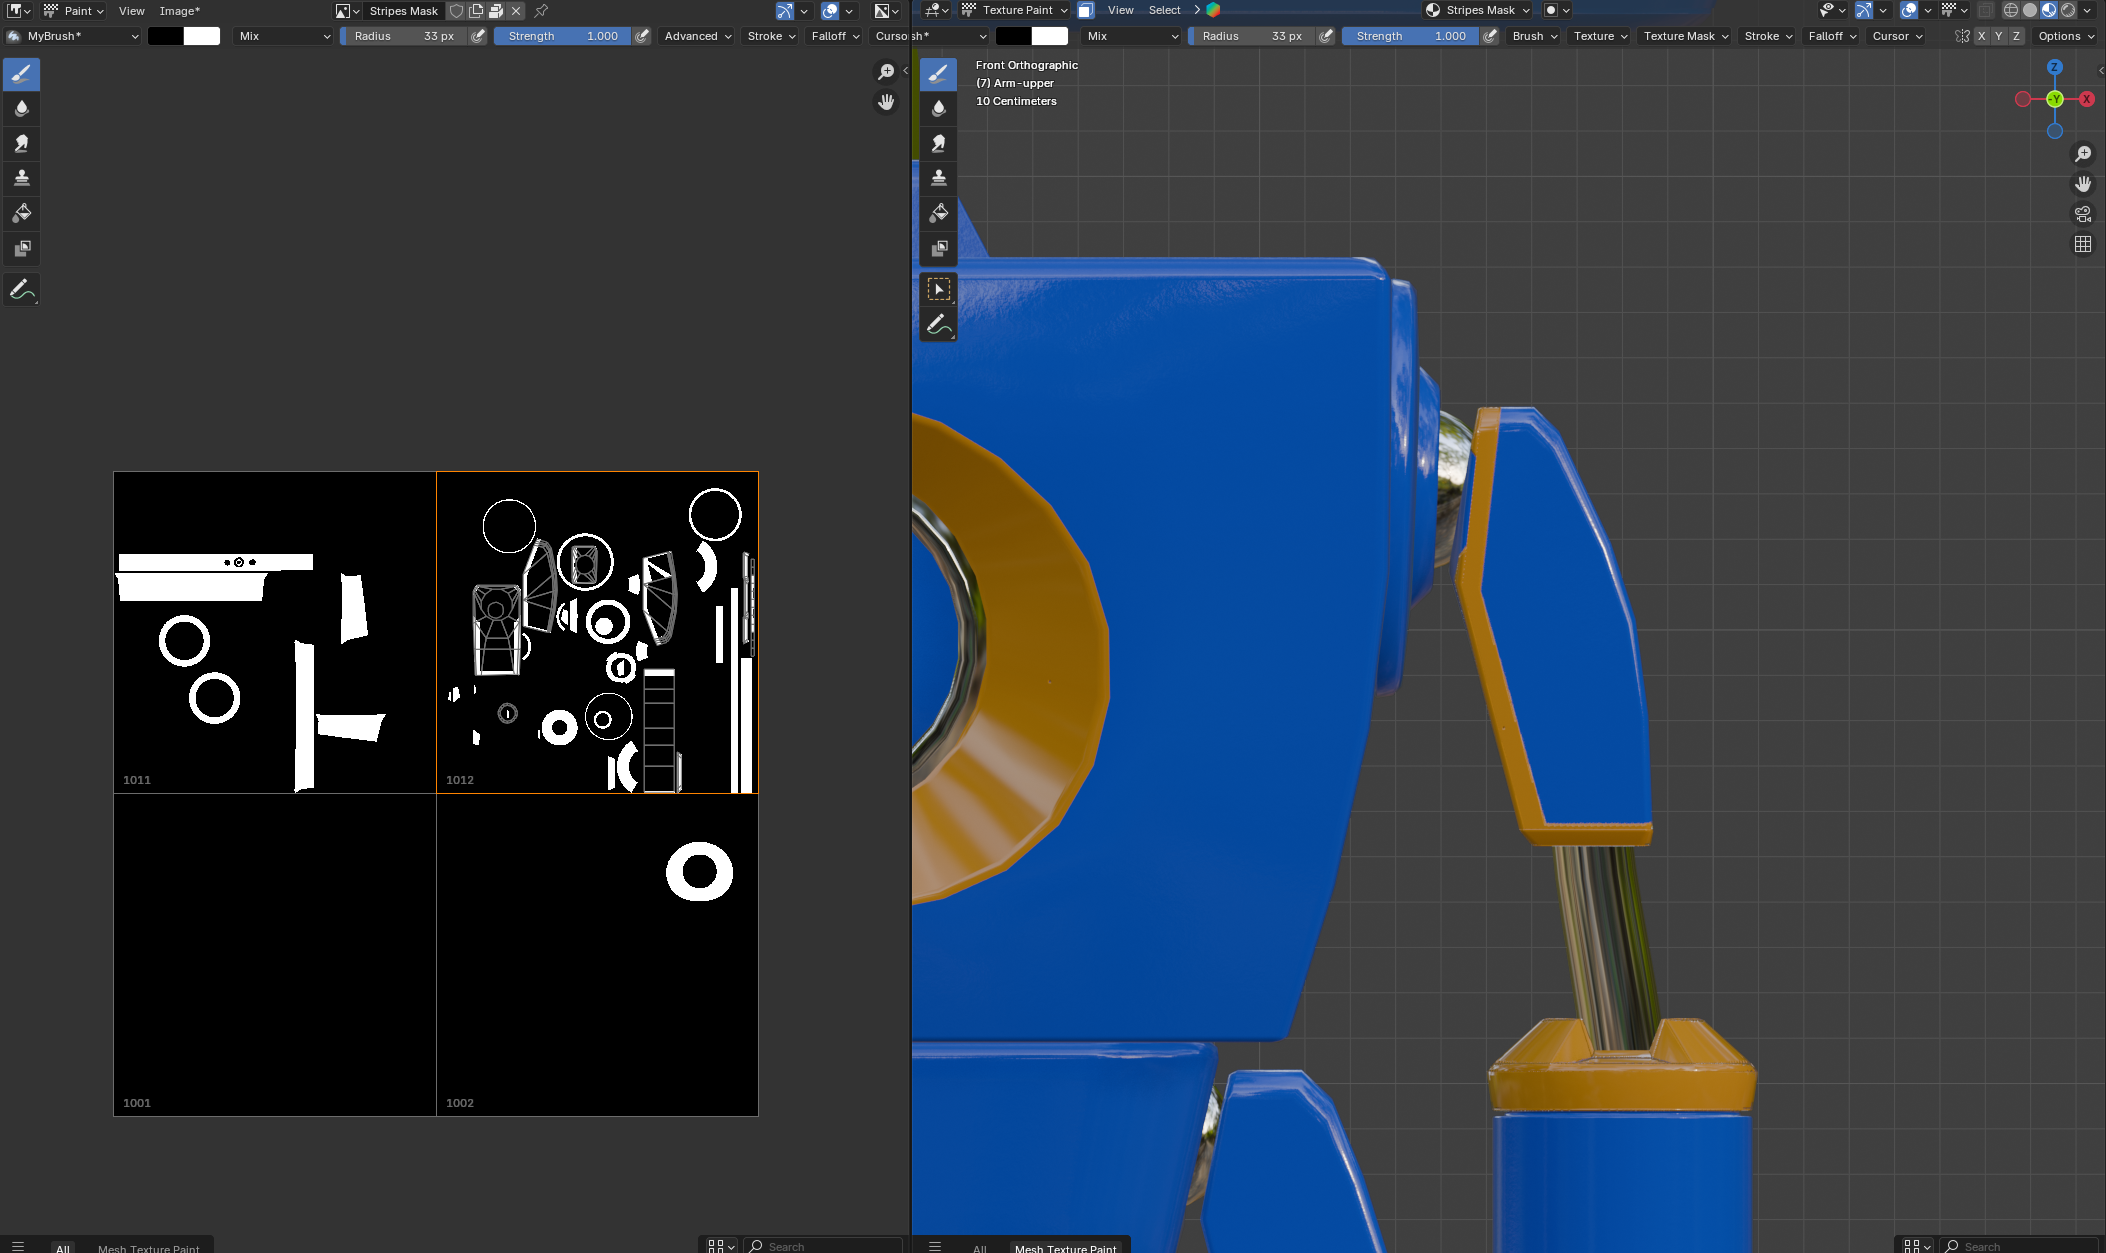
It looks better 🙂
(by custom brush i meant only that i created a new brush asset with “line” as a setting. It’s not a “directly in the shelf” asset 🙂 )
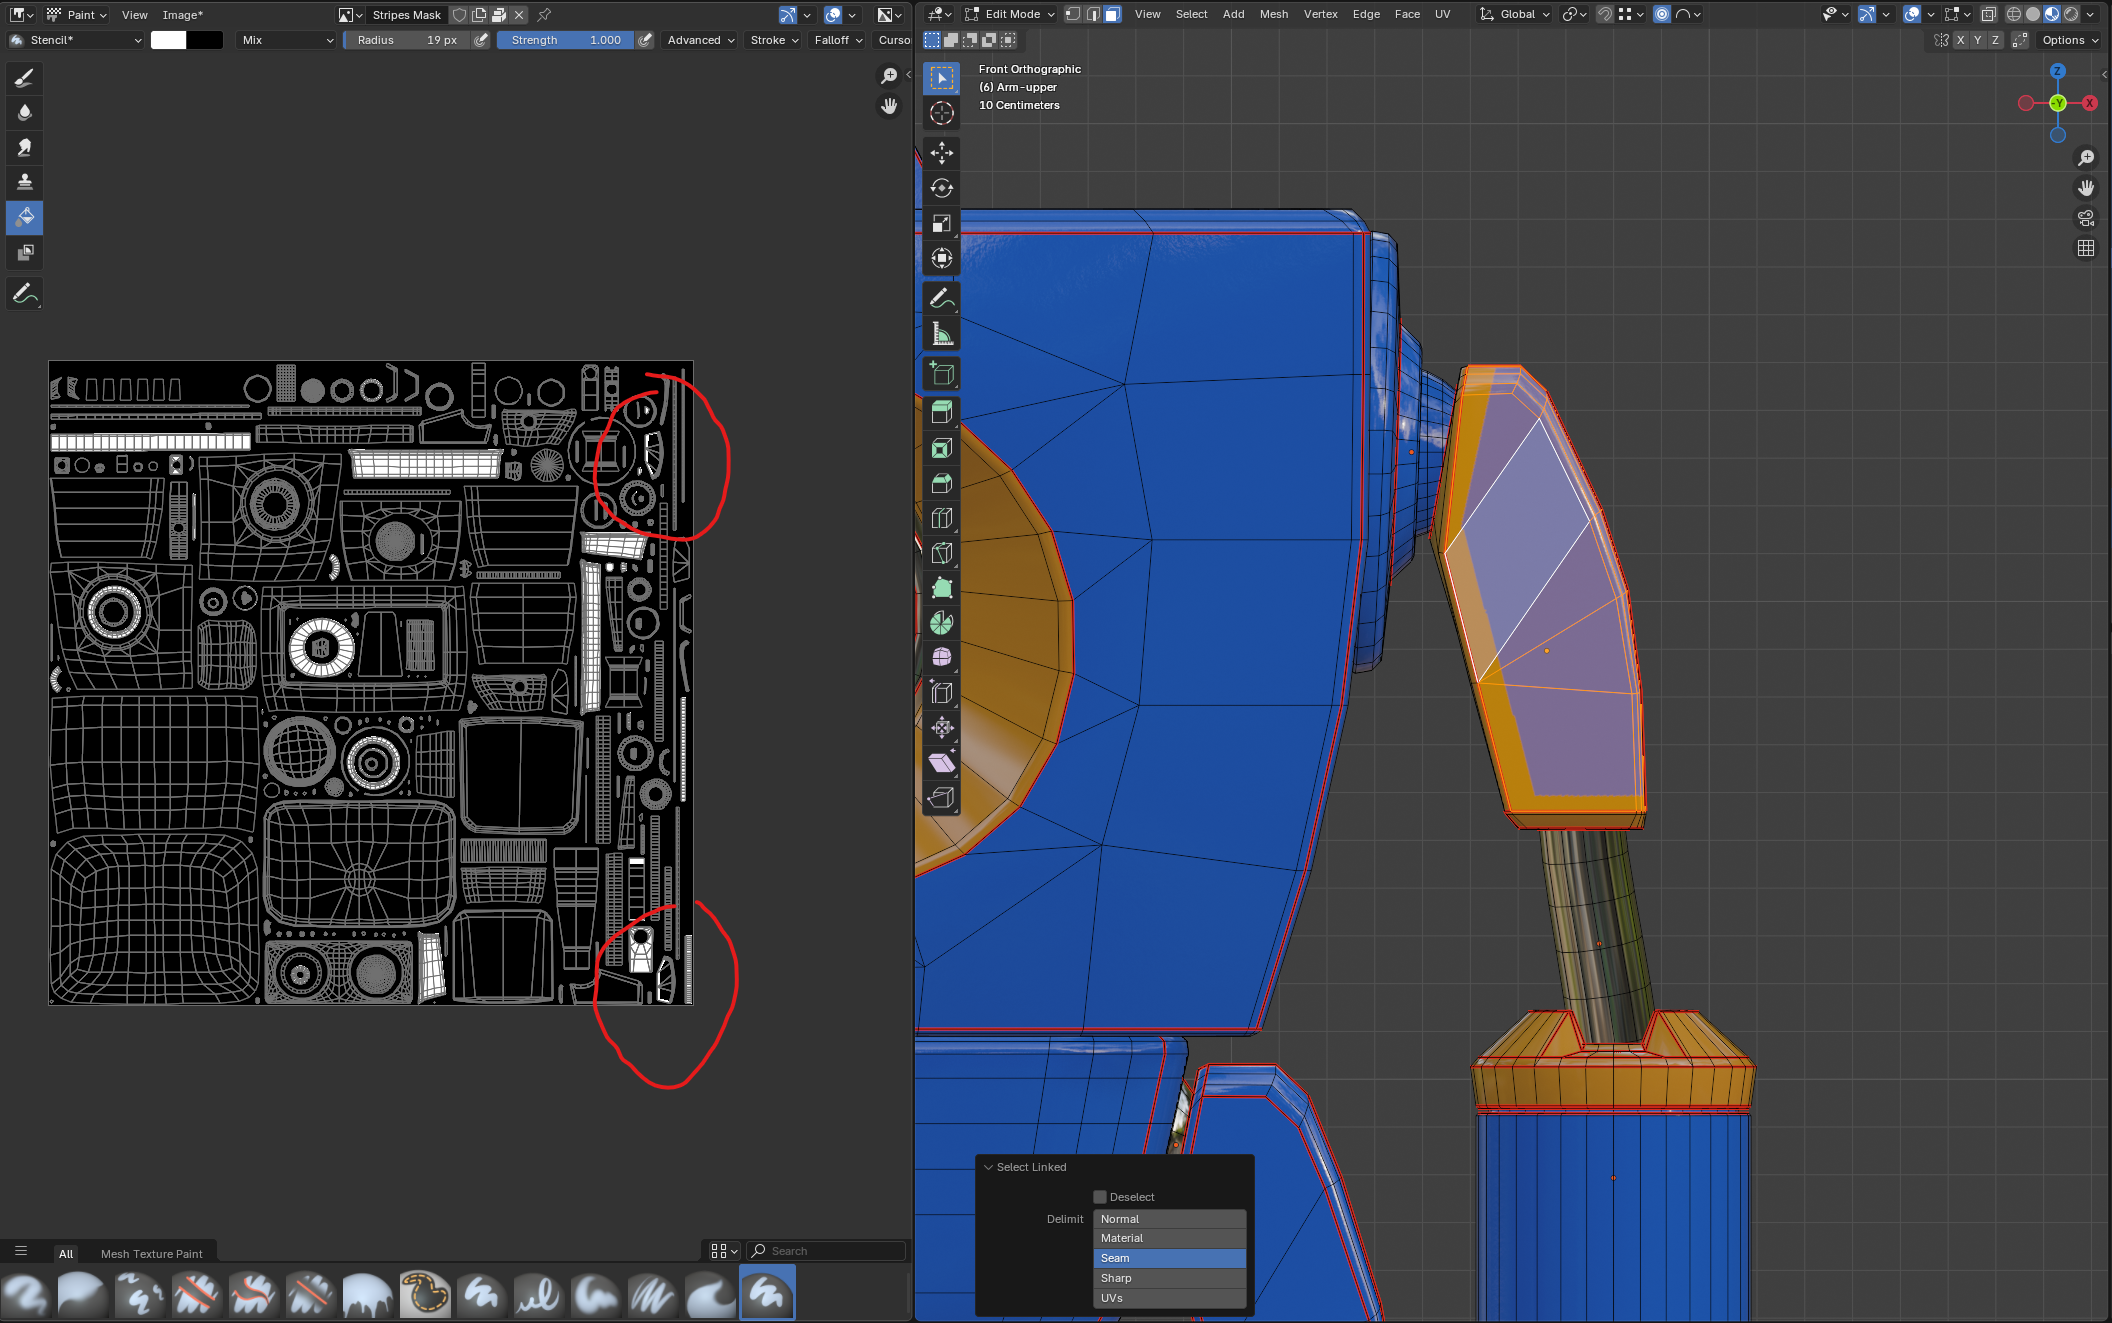
Front face and back face are here.
I have just redone my UVs and aligned them all with the texture, preventing blender to change the rotation while packing. This doesn’t seem to help :/The shoulders are not the biggest part of the robot indeed…
how do you change the brush resolution ? 🙂
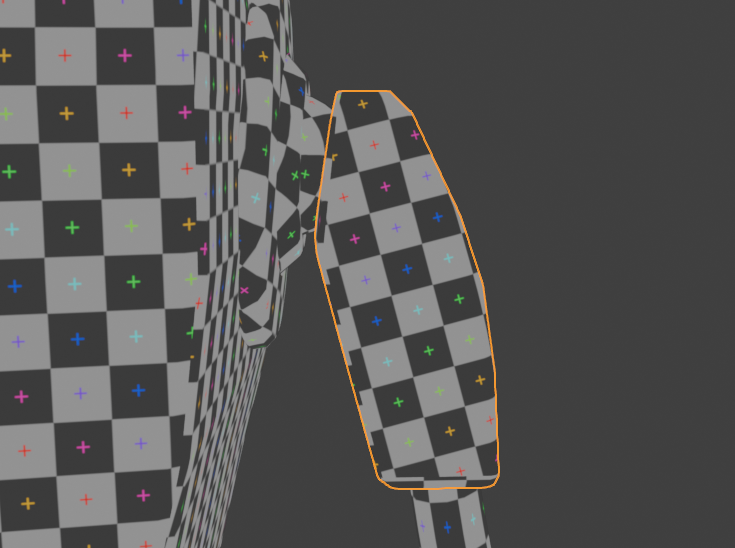
If this uv texture can help :
Thank you for the great courses you provide us with, and for the inclusion in the student reel !
Now that baby number two sleeps well and i am not in zombie mode all day long, i hope too achieve even better (and more regular) results next year 🙂
(Fun fact : baby number 2 is a girl, and though she was not named after it, she shares her name with a famous 3D software 😅)
Back in the DAY 😀
July 17, 2024 at 4:38 am in reply to: [Geometry Nodes] Rotate instances around local Z axis not working #87458Here’s a link to the .blend file 🙂 :
https://drive.google.com/file/d/1Mfb4qqnVQOHfR6xcLXwSrbYnGn_eQy–/view?usp=sharing
-
AuthorPosts
