
Jake Korosi

Forum Replies Created
-
AuthorPosts
-
We have a finished front suspension!
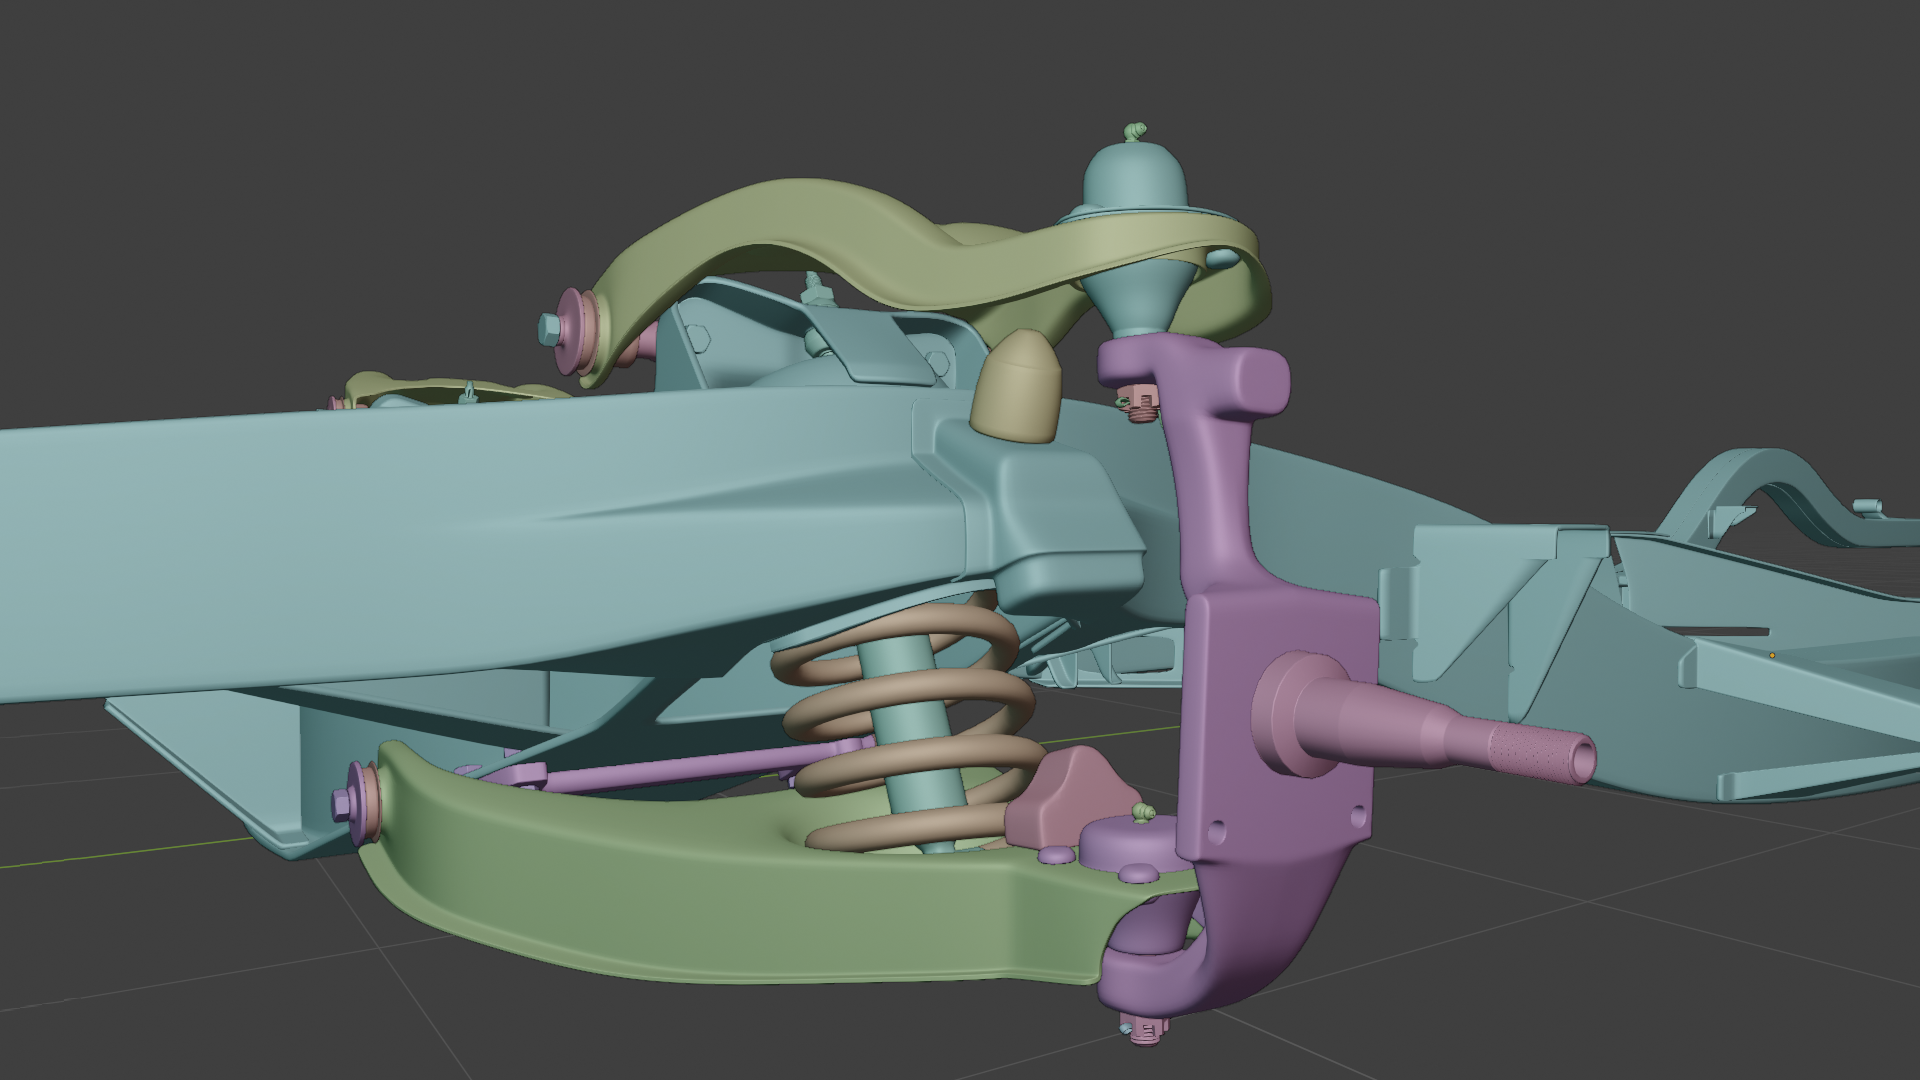
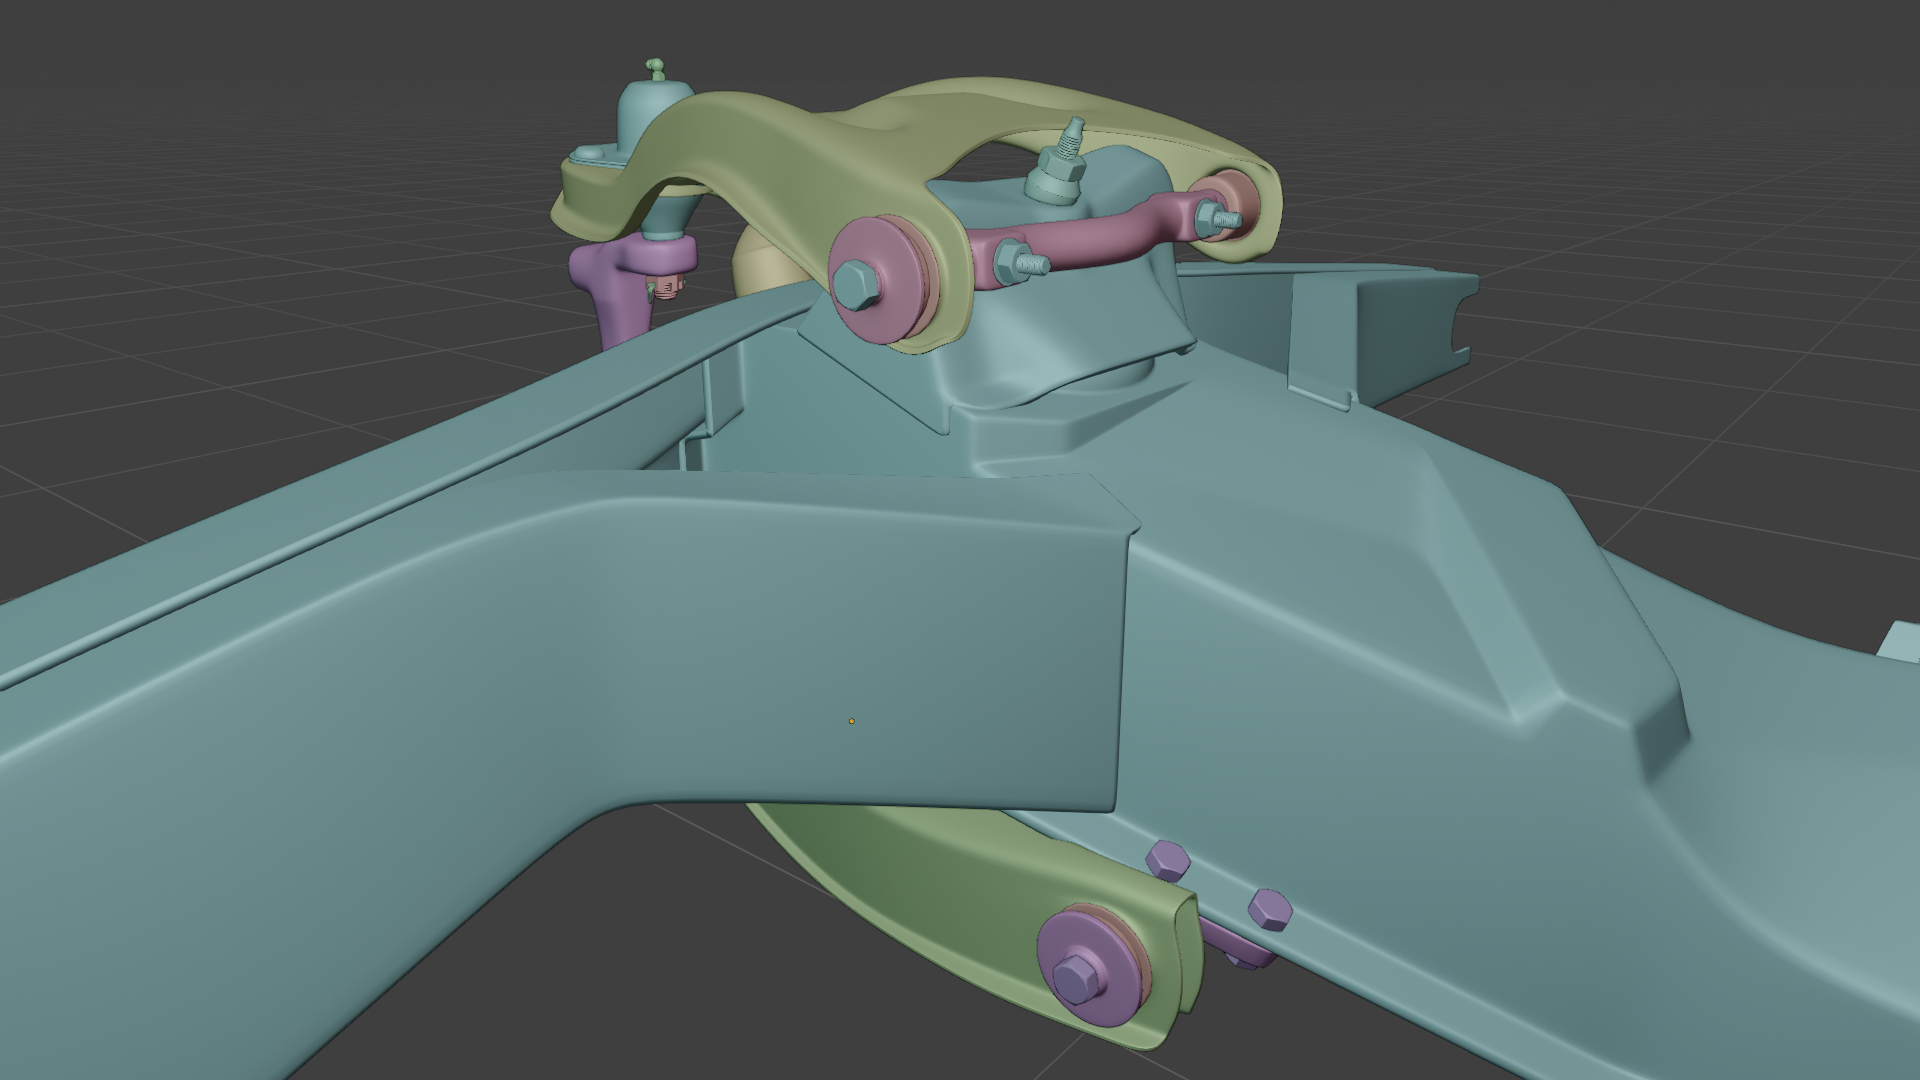
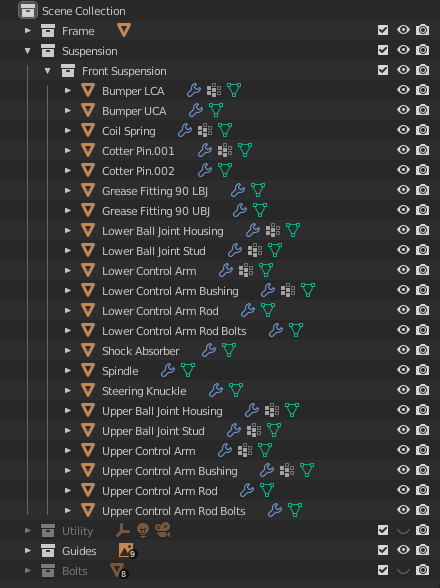
The control arms were a little tricky – they’re not symmetrical and have, again, all kinds of curves that need to stay smooth. The shrinkwrap modifier and some low-poly planes came in handy while making those.
I used Blender’s stock addon Bolt Factory to create the bolt threads. Threaded hardware is expensive though, poly-count-wise, and Bolt Factory’s bolt heads just have too many faces for my liking; you can’t change their poly count the way you can change the thread iterations and pitch. So I made my own bolt heads and nuts and joined them to the Bolt Factory threads – easier than it sounds. I cheated a little on the threads though; in general, I only added thread that is actually visible. The parts of bolt shanks that are inside components are smooth and there’s no inner thread on nuts at all. There’s going to be a LOT of fasteners by the end of the project and all the unnecessary polys will snowball if I don’t trim them where I can.
Rear suspension is next! There’s fewer components back there so I don’t EXPECT it to take as long as the front…but we’ll see.
I continue to be really happy with how this is turning out!
By the way, while working on the frame, I discovered a little something about Blender that might prove useful to you all if you encounter this particular weird mystery I ran into, which I couldn’t find any kind of answer online for – or maybe I was just somehow managing to miss it even though I looked reasonably deeply.
So when I take my frame there and turn on Face Orientation in the Viewport Overlays menu, this is what I get:
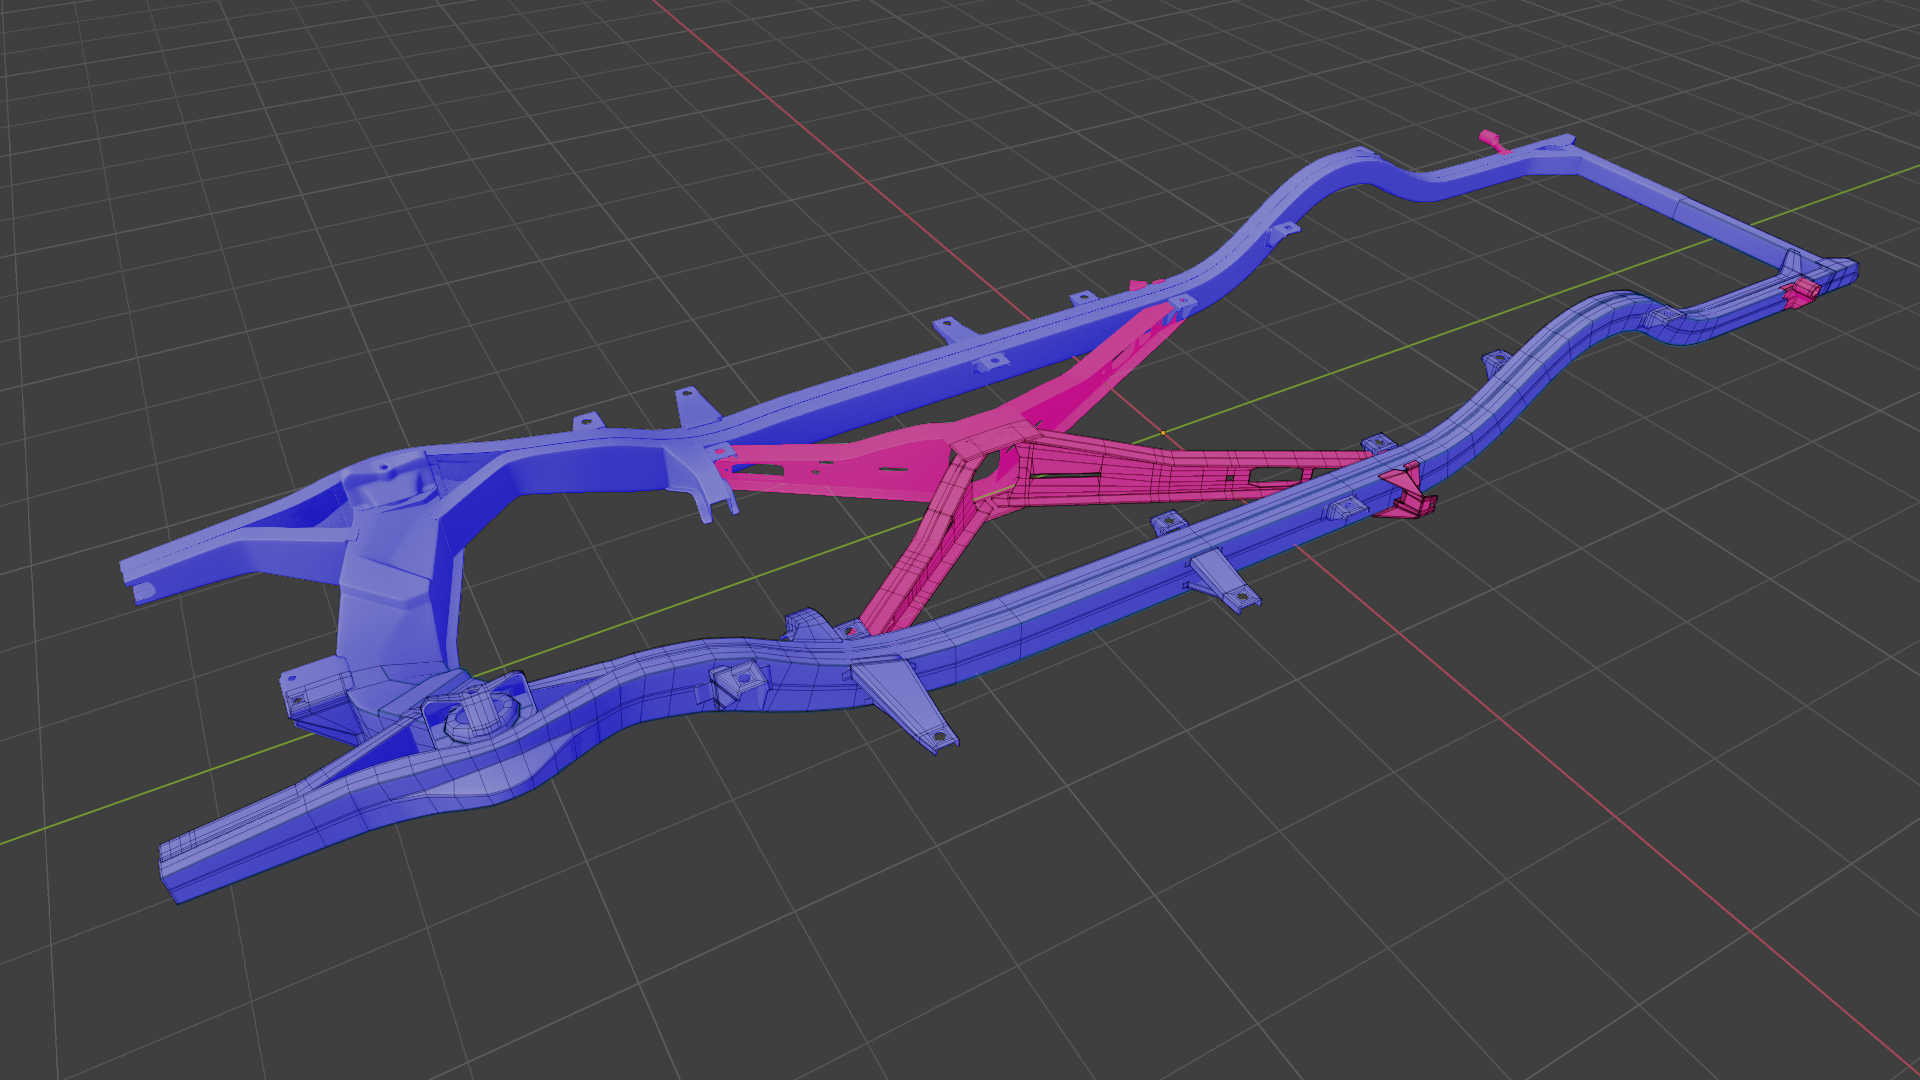
Now I know what you’re thinking – on those parts that aren’t blue, the normals are just backwards. I thought the same thing at first. But it turns out, it’s not that. Because when I selected those faces and flipped the normals, this is what I get:

Flipping the normals doesn’t turn them blue, it turns them…..purple? What on earth? And in this image I’ve included an upside down plane to show you what the actual reversed-normal color ought to be, and we now clearly see that the “backwards normals” I didn’t flip aren’t that color either, they’re hot pink.
So what’s causing this? I knew right away that it had something to do with the Solidify modifier, because the funky colors only appeared when the modifier was active – turn it off, and the normal colors go back to, well, normal. So there was the first clue. But why would the Solidify modifier be changing the colors of the normals overlay?
All of the pink/purple normals belong to meshes that I excluded from the modifier. This is easy to do; you just assign all the appropriate vertices to a vertex group (I named my vertex group “Solidify Exclude”) and set that group in the modifier’s vertex group, like so:

By default this tells the modifier to apply the Solidify effect to only that vertex group, but by clicking that double-ended arrow button I’ve highlighted above so that it turns blue, you invert that instruction, telling the Solidify modifier to apply to the entire object EXCEPT that vertex group. And, visually, this works perfectly.
But as I’ve found out, Blender cheats at this a little bit. When I zoomed in far enough on the weird-colored normals that my viewport was clipping into the mesh, I saw this Disco Fever going on:
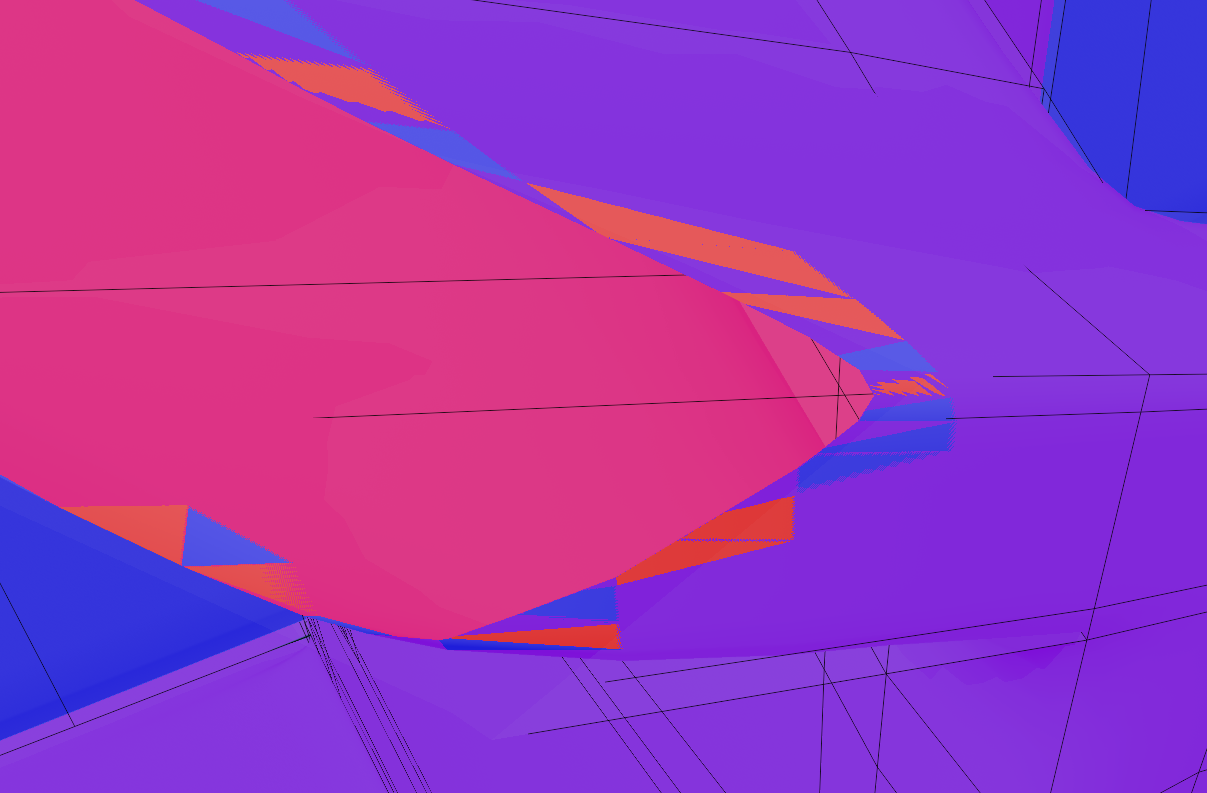
This immediately looks like duplicated mesh, no question – except, it’s not. I deleted various faces and edges and vertices and rebuilt them from scratch and this still happens.
It turns out that using a vertex group with the Solidifier modifier, the mesh that’s not supposed to get solidified, isn’t REALLY excluded from the effect. The modifier still creates the extra mesh where you don’t need/want it. It just internally sets the solidify thickness in those areas to zero so you can’t see it.
Again, visually, this works completely fine and you would never know the difference. There’s no artifacting or glitching ruining the surface of your model. But those faces are there and they’re adding to your poly count, which might be important to you. I verified this by going to Object Mode and watching the number of tris in the scene statistics – turn the Solidify modifier on and off and you can watch the number of tris change, but invert the vertex group influence in the modifier and the tri count doesn’t change at all.
It’s just something to keep in mind. If you really don’t want the extra geometry adding to your poly count then it would be best for you to make everything you don’t want Solidified into a separate object, rather than trying to exclude it via a vertex group.
So that’s the frame completed!
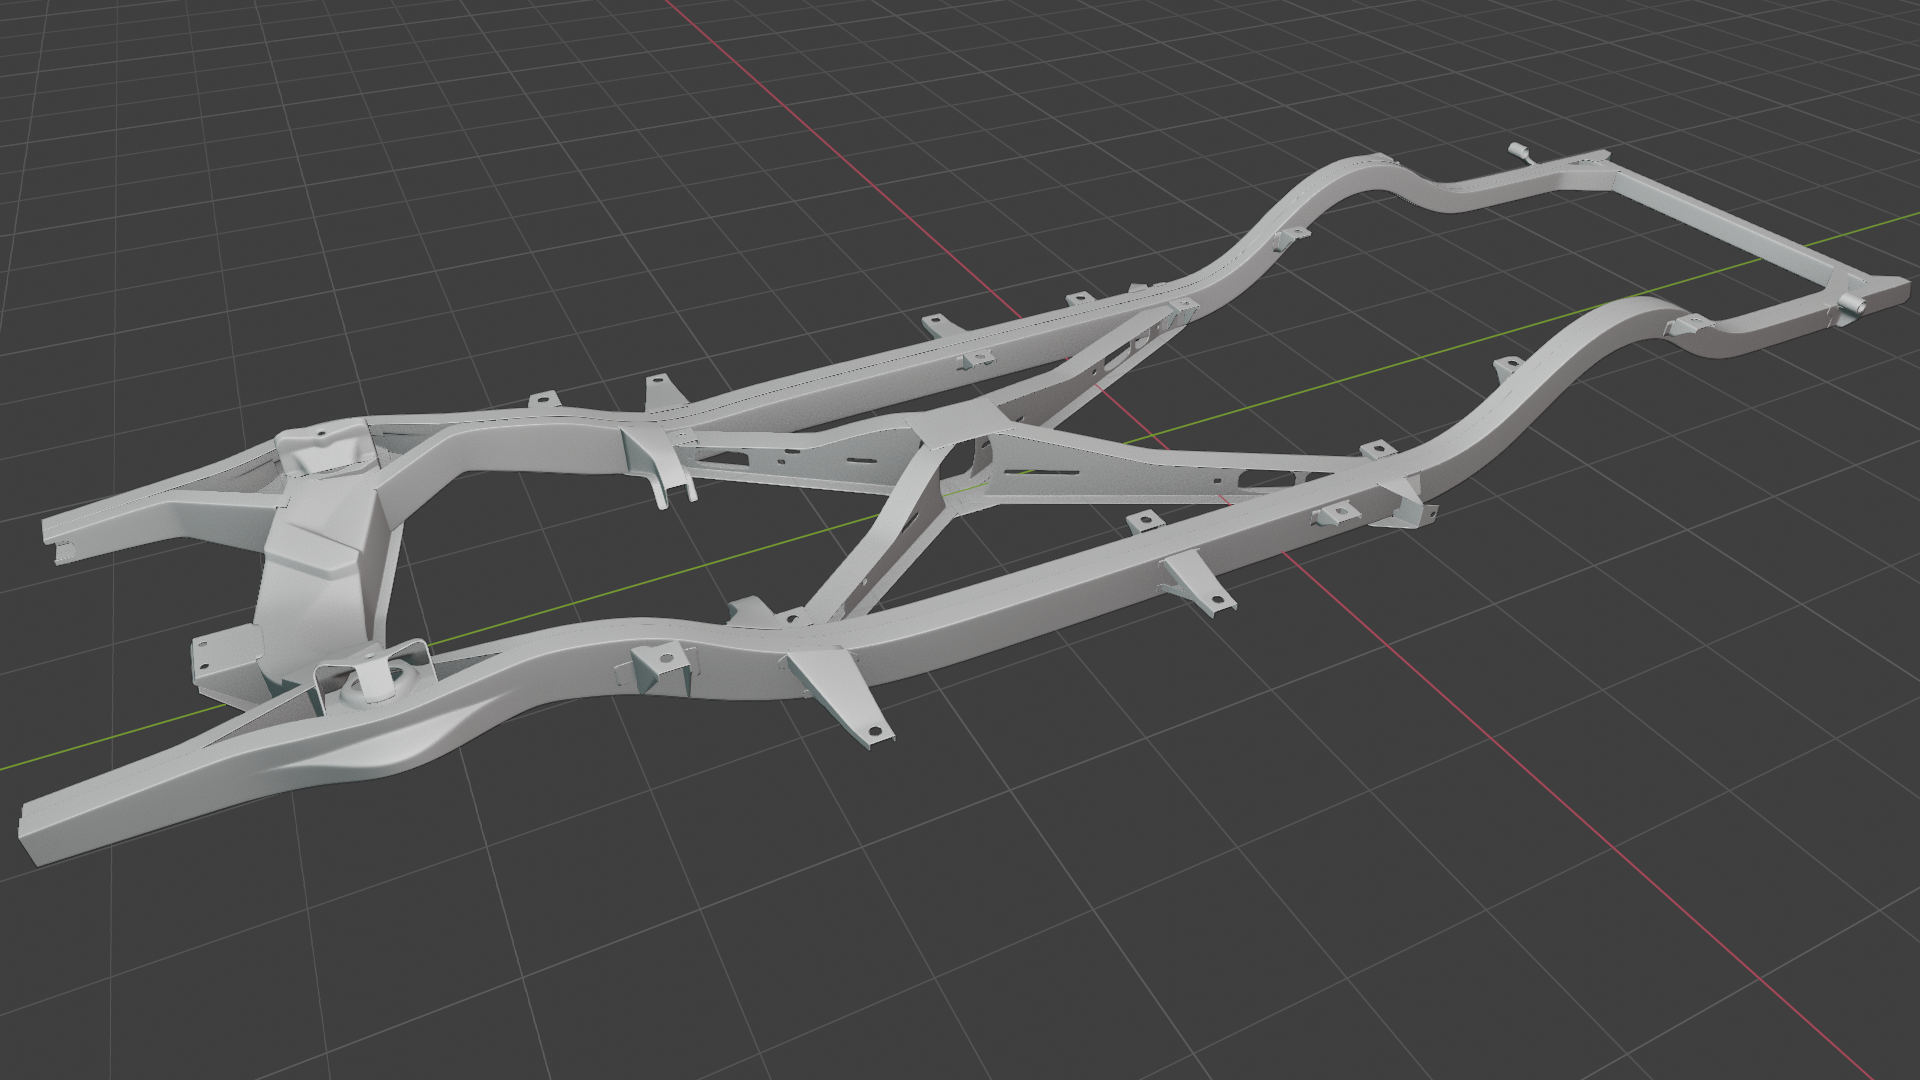
While this component looks incredibly complex, overall as a model it was not. The only really challenging part was that wide crossmember in the front (left-most side in this image) – with all kinds of important curves, angles, and intersecting plane-changes, it took a couple of failed tries and a “eureka” moment before I could finally nail that shape down correctly. After that, all of the remaining parts were quite simple to edge-model; there were just so many of them that it took a while to do them all. Most of the small tabby-dealies along the sides with the bolt-holes in them are single-sided meshes with a Solidify modifier; but a few bits and bobs didn’t play nice with Blender’s solidify math so I decided to give those parts thickness myself and exclude them from the modifier with a vertex group.
So yeah – on average, time-consuming but not too hard. There are certainly far more challenging components waiting for me yet in this project.
With the frame done, it’s time to move on to the next set of parts that it makes logical sense to me to work on. I hate to leave you all in SUSPENSE, but…..yes fine, the suspension comes next. And oh yeah, I’m going to have lots of pun with this project. You’ve been warned.
This month on “Let’s See If He Finishes That Project”, Jake starts a new project…
Been working on it for a couple of days and here’s what I have so far.
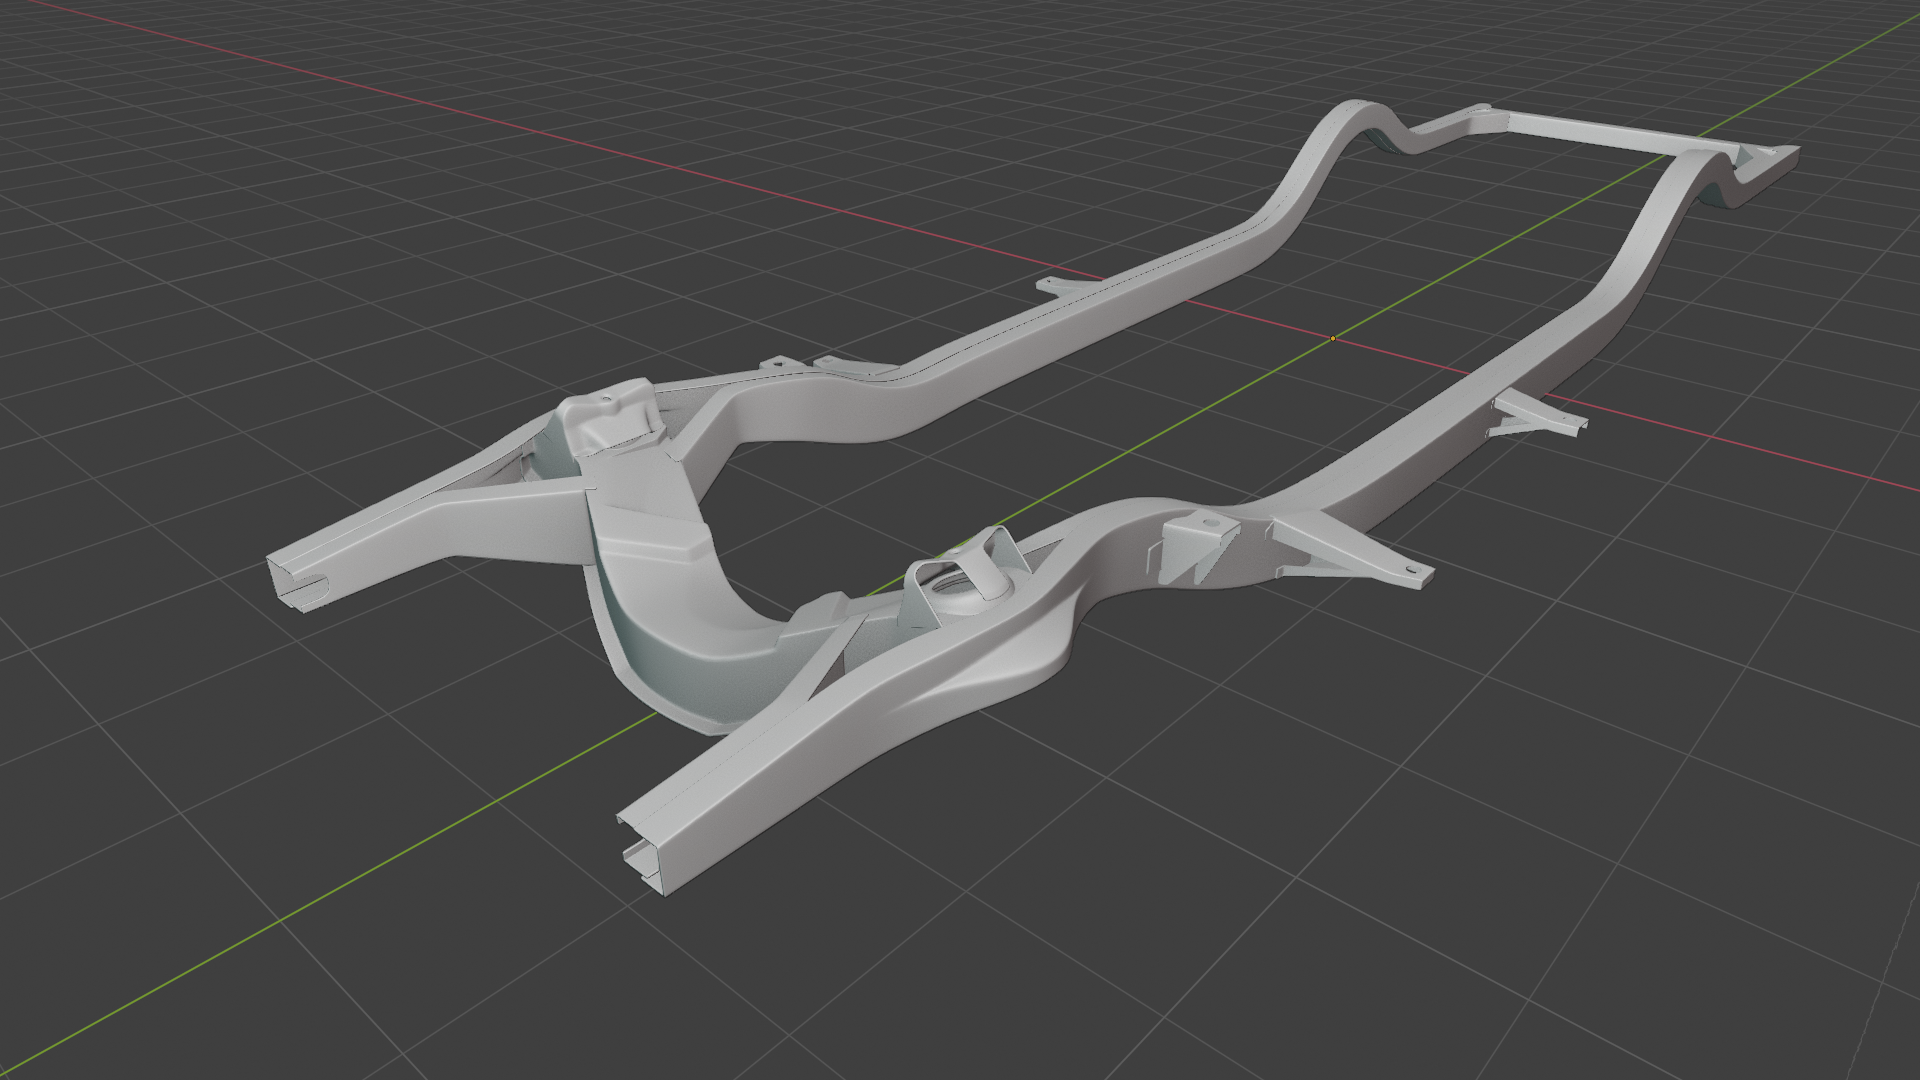
It is a vehicle – or will be, eventually, if I keep at it. I’m really pleased with how this is looking so far so chances are good. It’s a very specific vehicle but I’m not telling what it is yet. However, I’m sure it will become apparent in time.
Behold my newest creation….
DOCTOR GRID-FACE!!!
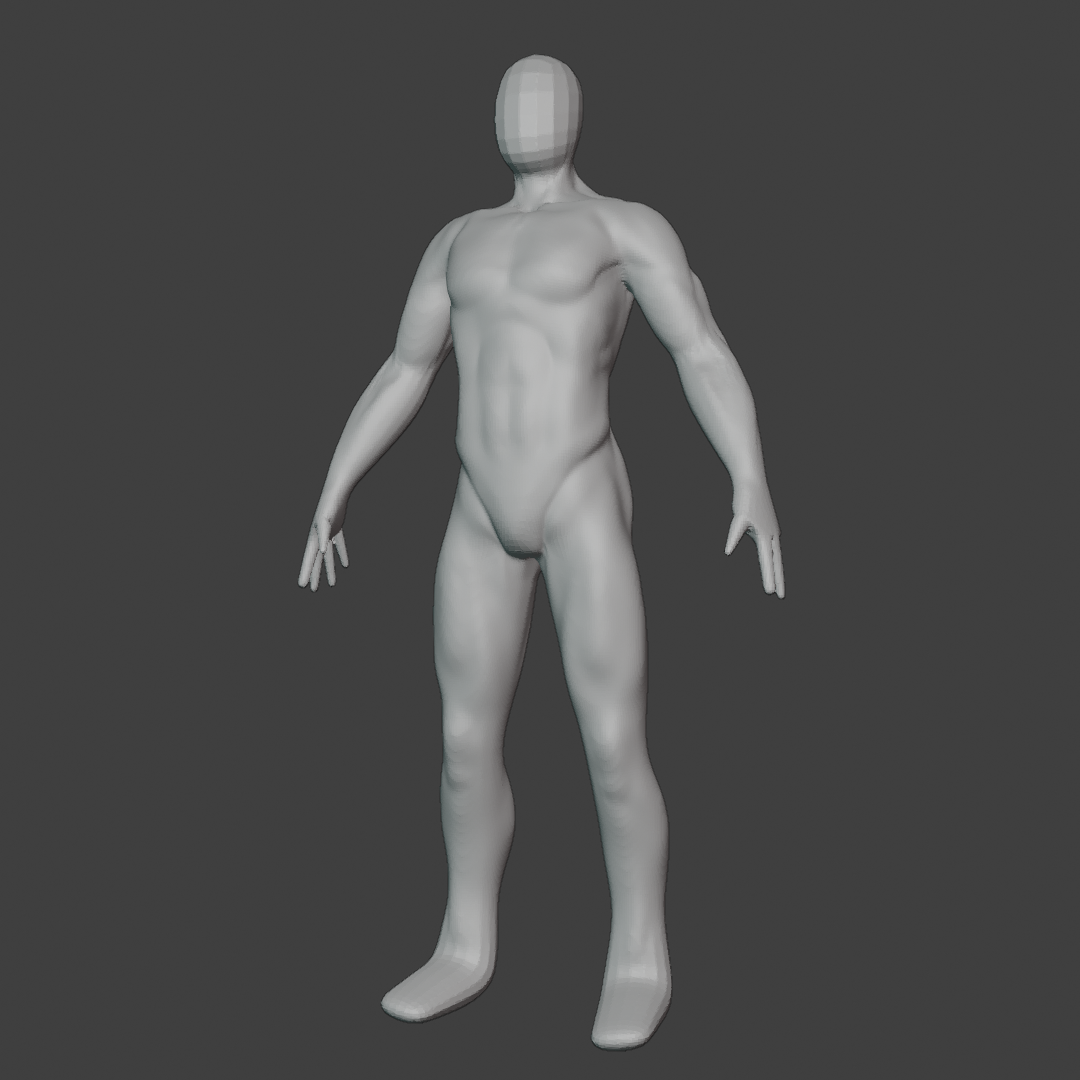
Okay so it’s actually just the very beginning of my new character’s anatomy blockout. It has begun!
As I’ve already mentioned, this will be a completely new character. But, it’s not an original character this time. I’m making (or trying to make) a character that already exists. I’m not going to say who it is though until the project is done, because it’s more dramatic that way and also makes for some plausible deniability if I fail horribly at getting the likeness right, heh!
Also, this guy is going to be not quite as muscularly-detailed as my Egyptian soldier was. The anatomy WILL be blocked out fully, just for practice’ sake, but honestly, pretty much everything except this guy’s arms (and only a portion of those) is going to be covered by clothing and equipment.
@theluthier I have watched the whole thing! I was quite happy with it all, and of course the procedural shading lessons had the most of my attention (as they do). I’m a big fan of not bothering with UVs when it’s not necessary – and although IMO there is certainly a point of diminishing returns when shaders start to get extremely complex, yours were not and it’s awesome to see that a large environment like this can look completely convincing without the need for a single image texture anywhere.
All that aside though, the course would’ve been worth it just to learn how to model a pipe cross-junction with nearly zero effort like that. Making it that easy is just not fair…
I WILL make an environment based on what I’ve learned from this course, but it’s going to have to wait. I need to start on that character before pushing it back becomes a habit, ha.
I am happy with the Shark. I used the course as like a natural refresher to get me re-oriented with sculpting, and it did that; I caught on, got comfortable, and even got into a groove very quickly, and with a couple of tiny nitpicks I’m VERY pleased with the result! I feel absolutely ready to tackle the realistic course again, and I am all set to do just that. In fact, I was planning to get it started today.
Buuuut then @theluthier had to go and drop this new Eevee industrial environment course and it’s too relevant to my interests to ignore. This first, THEN the character, I promise!
Fini!
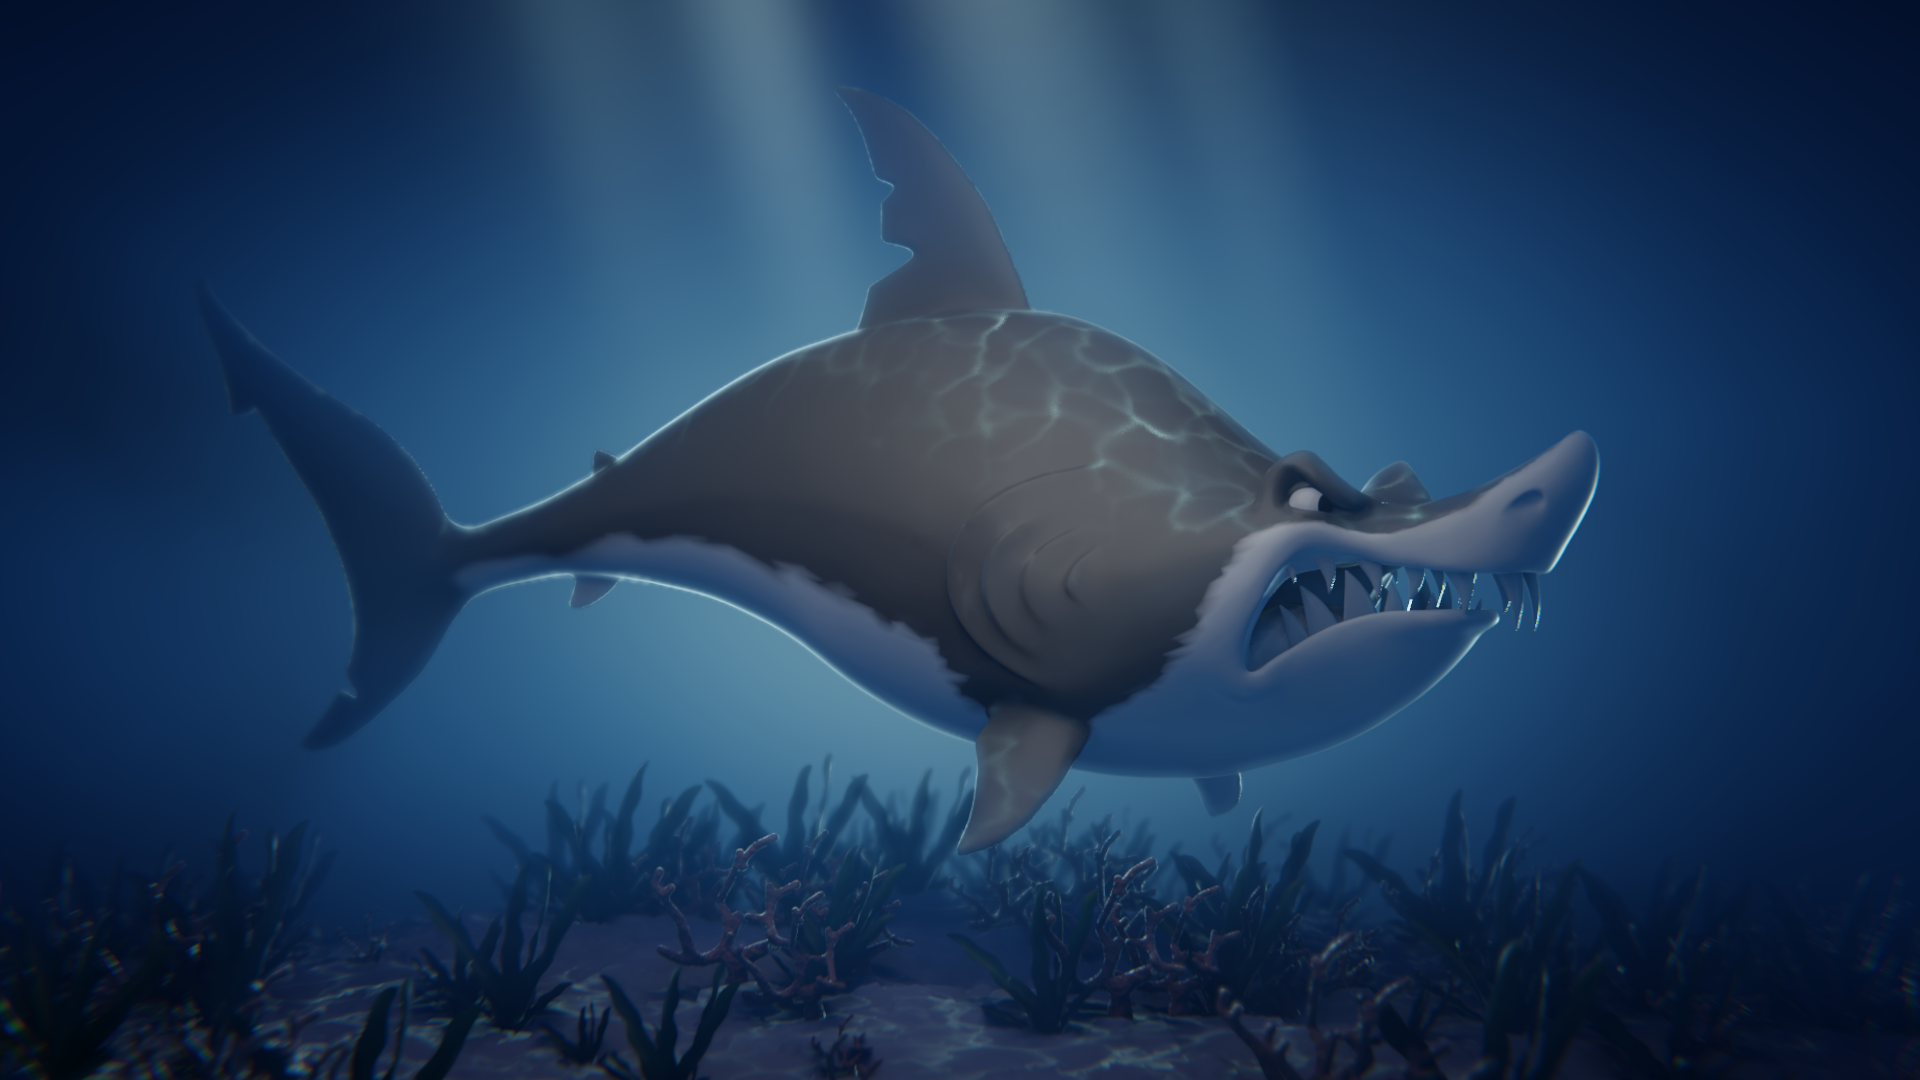
Rather than retopologizing, unwrapping, and painting a texture for a very simple two-tone skin, I decided instead to go with vertex colors; the choppiness from the decimated mesh gives me exactly the kind of “ragged edge” I was looking for and I’m pleased with the result.
All righty, ol’ Sharkie’s done – the sculpting, at least.
Shark by jakeblended on Sketchfab
I think I’m going to give him some shaders and an environment, so I can add him to my sadly neglected project gallery here at CGCookie. I’ll be giving him basically the same treatment as in Kent’s bonus stream, but with one exception – I think I’m actually going to give him a quick retopo (famous last words) and paint his skin by hand. Nothing fancy at all, but I want a little bit more control over his two-tone coloration. Procedural shaders are fine for the rest of the scene though. I’ll probably do all that tomorrow, or as much of it as I can.
Well you may have noticed that I had an entire pandemic-year, that would’ve made an awesome excuse to literally do nothing but Blender courses and projects of all shapes and kinds with all the free time I had, and I spent it doing not that. I participated in the DOG project and I was very happy with my work in that! But that was really it.
Meanwhile, in all that time our sages here at the Cookie have been dropping new course after new course – the treasure chest course, some new animation courses, almost an entirely new set of Fundamentals of X courses now! And I have not been doing any of it! I mean, I’ve been watching the videos and educating myself about the concepts but that’s it.
Well that changes now. Seeing the results of the DOG project and working on the Spice Vendor House has re-invigorated my interest in 3D and now that my main contribution to the latter is finished (I may contribute some interior items later), it’s time to re-commit myself to serious study.
First up – sculpting. My pen hasn’t touched its tablet since I lost my Realistic Character Course project file when my SSD fried. Since then the sculpting system in Blender has gotten a serious upgrade, with all kinds of fun tools added. So my first stop is the new Sculpting Fundamentals course. I started on the homework yesterday; here’s my sculpt so far:
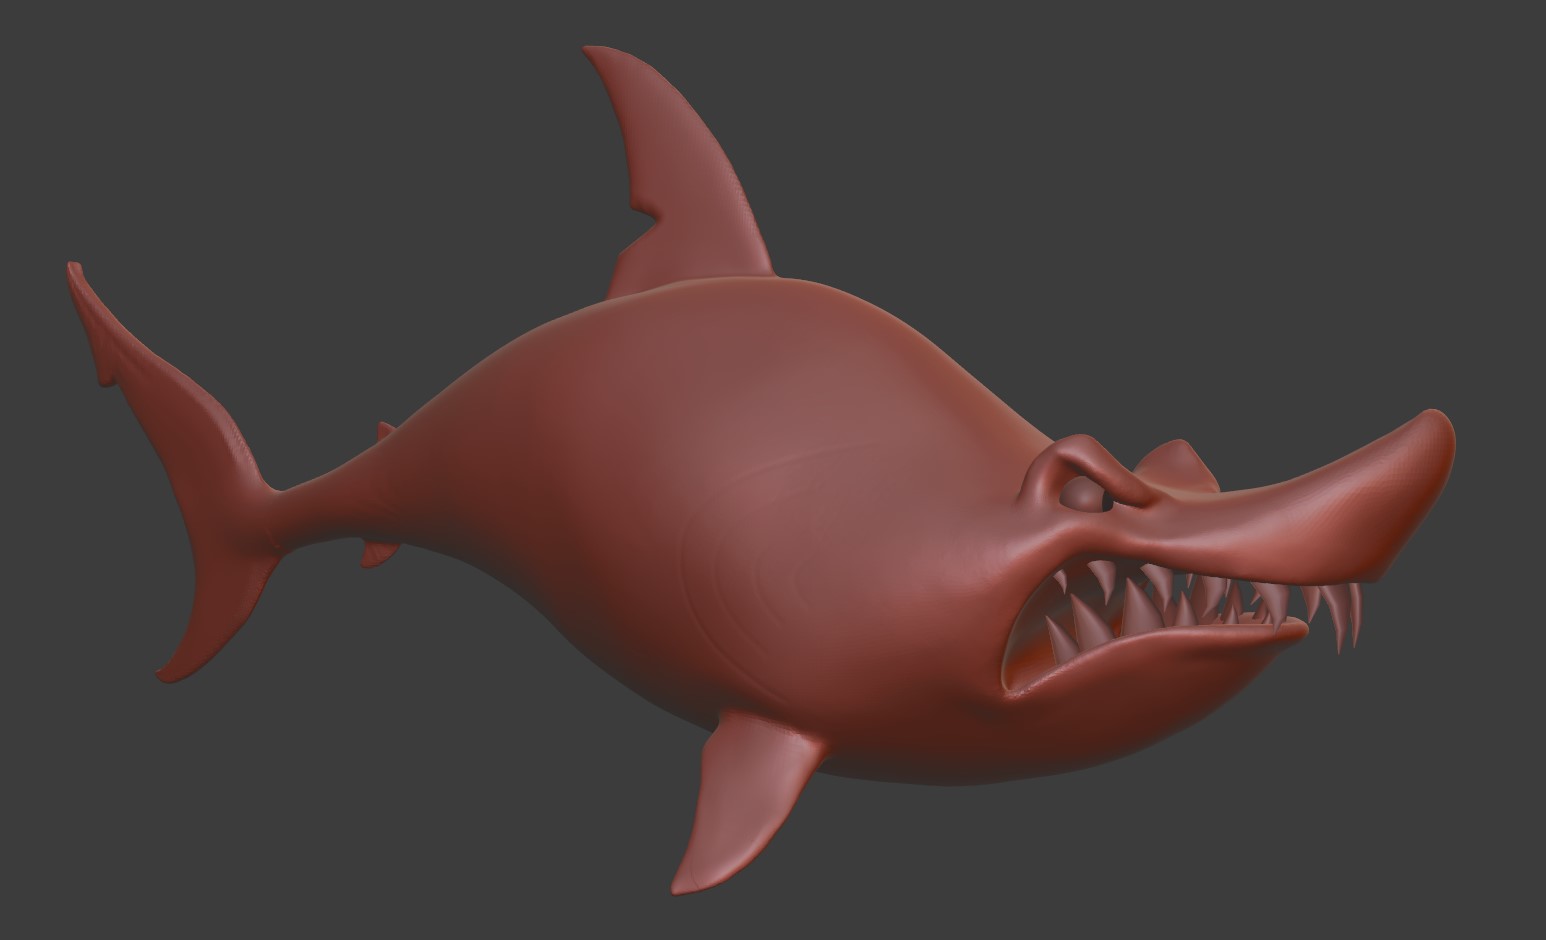
When this course is done, I’m going to restart – and FINISH – the Realistic Character Course once and for all with a new project. I’ve been spending the last week or so gathering reference for it and I believe I’m ready to go with it.
I missed this morning’s AV-channel hijinks with @theluthier ; but I saw that @onelombax‘s wood beams were appended and they look AWESOME!
I have rebuilt the wall UV’s to align with the wood beams, so now all the seams are properly hidden. I’ve also made some minor mesh edits, particularly to the rear wall of the main house so that the window-holes now align with the windows there.
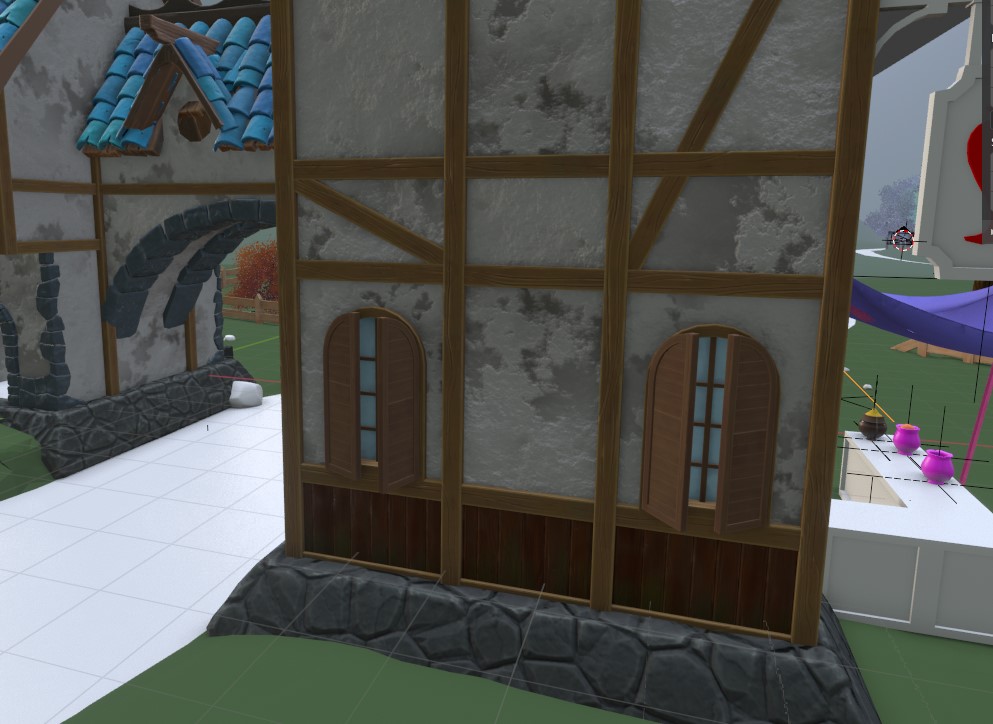
This build is looking SOOOO GOOOOD you guys…..!
The walls looked amazing on the livestream!
I did notice some minor UV issues; I’ll get those squared away tonight. @theluthier I agreed with the changes you made in the stream as far as the bump height and taking some of the color value down in that bright light, but aside from that everything is looking good! Everyone‘s stuff is looking great. Really excited about how this is coming together!
@theluthier Okay, great.
Oh, really quick – can you tell me what light settings you’re using in this render preview you posted?
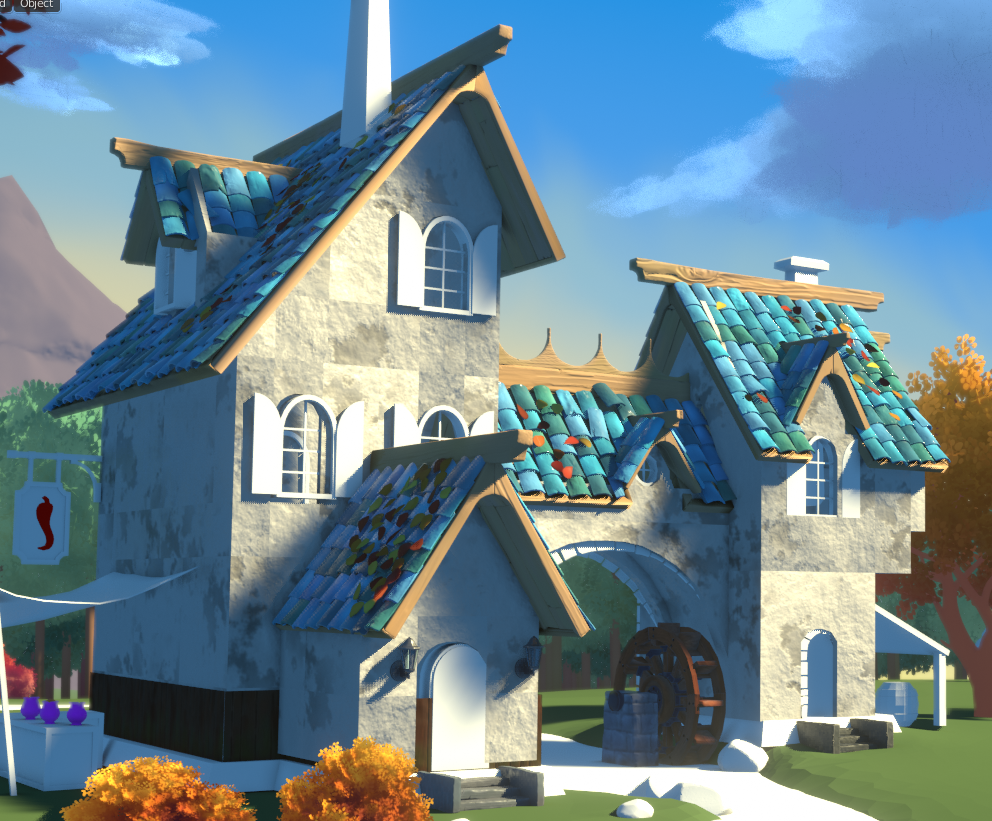
Is this more or less the expected light, or is it just an HDRI? Because while it looks fine color-wise my wall has a bit too much bump here, it looks more like rough stone than the rustic plaster I was going for. If I can get that lighting info from you I’d like to crush the bump strength a little bit.
@theluthier I have found an issue while matching up the walls and need some direction!
On the “east tower”, at the peak of the roofline our models don’t match (the yellow is my mesh):
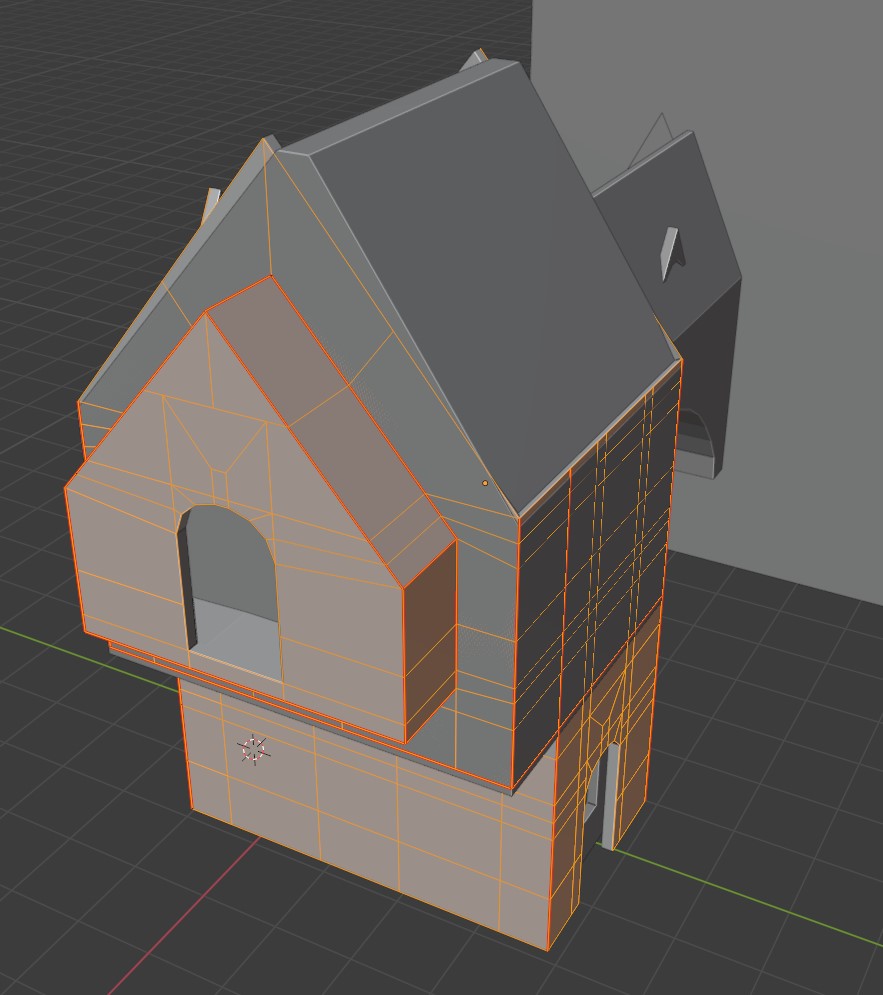
Your block has the roof a little lopsided – which I hasten to add is perfectly fine, it’s a fantasy house after all! – but this introduces an inconsistency with the rear-detail art that Vadim gave us after your block was made:
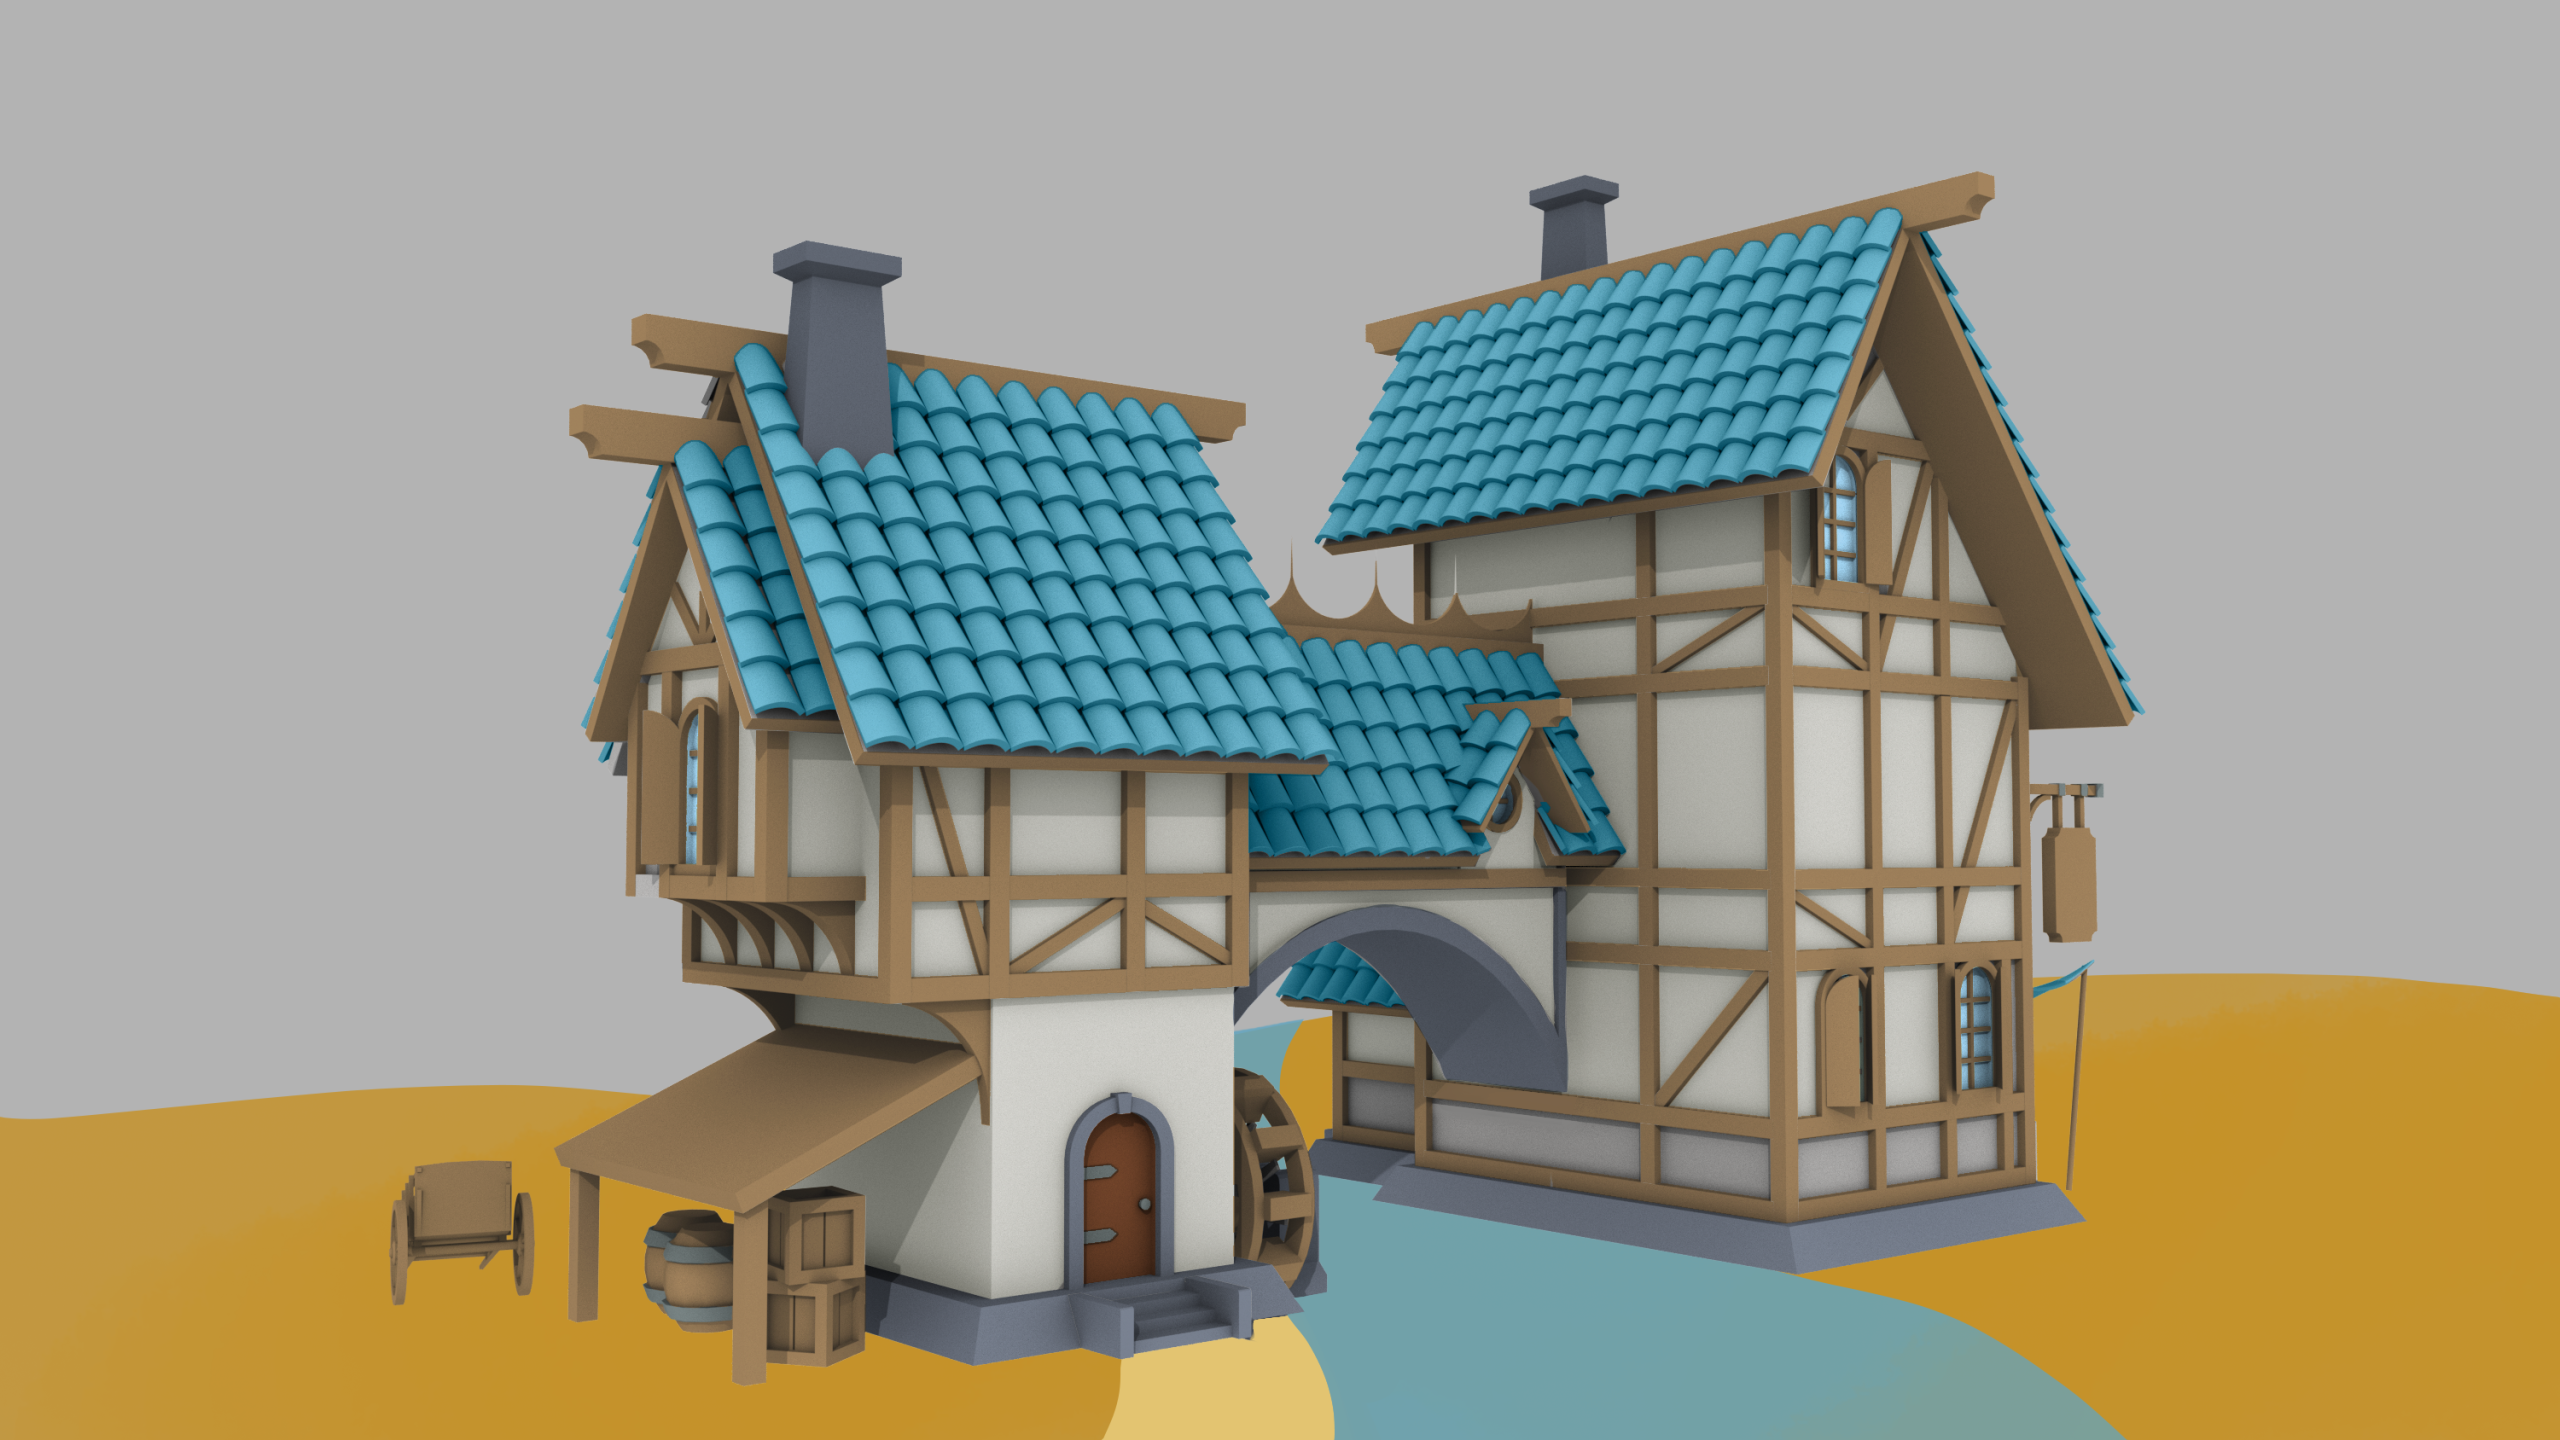
Vadim puts this kind of telescoped dormer sticking out of the east wall and it LOOKS like that feature and the roof above it are symmetrical. I had modeled the tower to be consistent with Vadim’s addition, but this creates an irreconcilable difference with your blockout.
So what-do? I could make the roofline lopsided to match your blocked roof and try to finagle the dormer to also be lopsided to match….but in my head, the predicted outcome just doesn’t look very believable as something that would actually be built. On the other hand, I could remove that telescoping dormer, making the wall flat and just sticking a flush window in it, and then I can make the roof match your block , but that would be inconsistent with Vadim’s art. On the third hand (if you have one) I could leave this tower roof symmetrical, although it would require our Roofers to adjust their work to be symmetrical too. I need you to make an executive decision!
You bet, I’ll have it done later this evening.
-
AuthorPosts
