
the motherlode of confusion
Forum Archive › the motherlode of confusion
- This topic has 24 replies, 4 voices, and was last updated 2 years, 9 months ago by
Jonathan Lampel.
-
AuthorPosts
-
November 13, 2023 at 5:21 am #17054
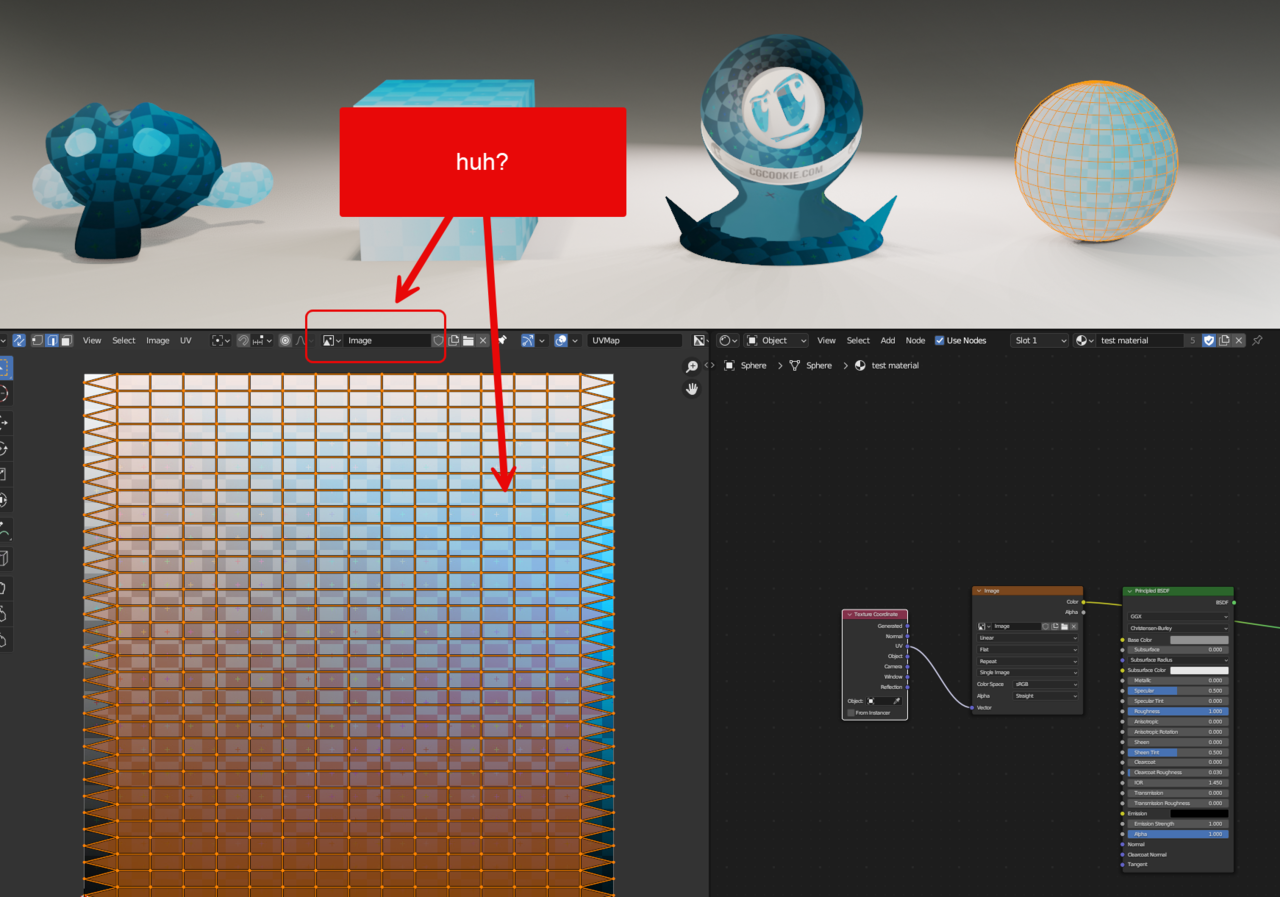
It’s not loaded in as an image and if you click on any other object and clear the seems the blue grid stays in place. Even if I delete the blue grid from the UV editor it stays in place!
 November 13, 2023 at 5:39 am #82066
Hi @thehomme ,
That’s the UV Unwrap of the Sphere, it shows when in Edit Mode and Vertices, Edges, Faces are Selected in the 3D Viewport.
November 13, 2023 at 5:41 am #82067Yes I know this what I don’t understand is why the blue grid stays displayed when the image is blank (the blue grid has been cleared)
and prior to and related to this… where does the orange square come from for the shader ball
I’d also posted to a previous question but my shader ball doesn’t conform to the user journey shown in the video.
To start with I get this
[can’t upload image…why is this button so buggy]
and then after picking all the different unwrap methods and finishing on plain unwrap I get this
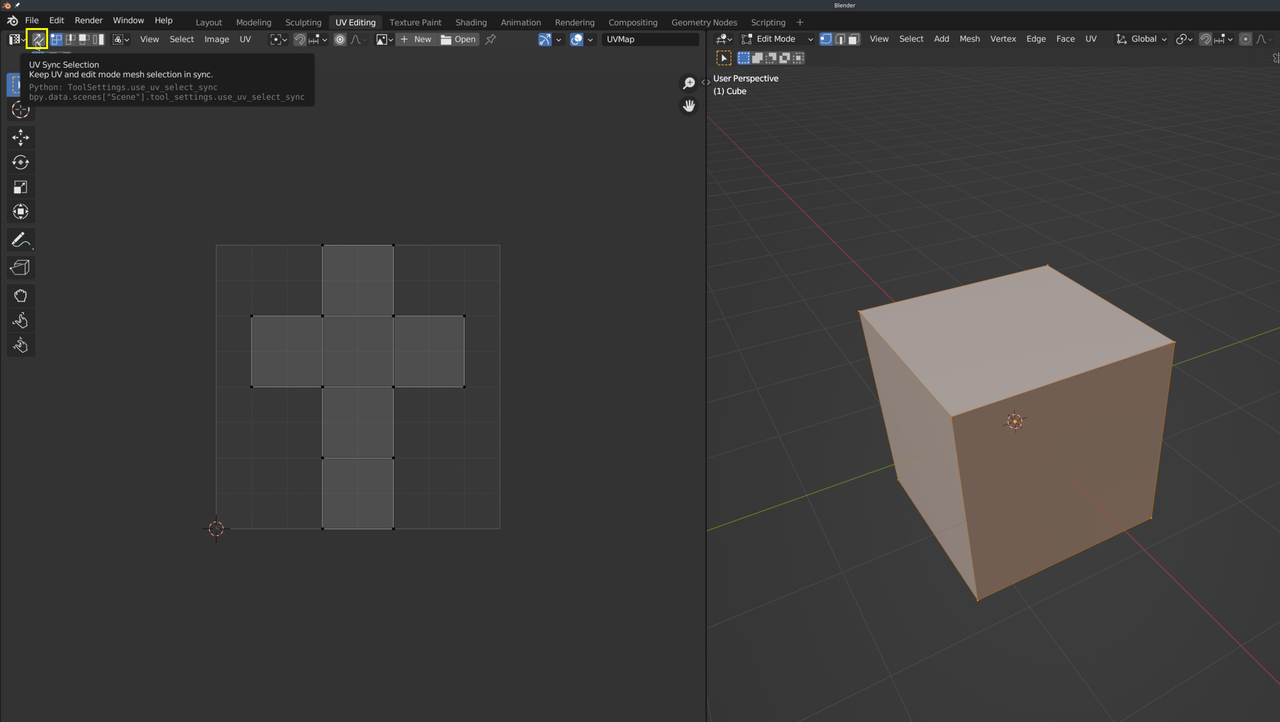
November 13, 2023 at 5:46 am #82068If you have UV Sync Selected, the Unwrapped and selected Mesh shows orange, otherwise it shows grey, unless you Select things in the UV Editor:
 November 13, 2023 at 5:54 am #82069
If you Add a UV Sphere and don’t Unwrap it explicitly, it comes with a ‘default’ Unwrap as seen in your first Screen shot.
The background shows the Image called Image. That must be the same as the blue grid.
I don’t have any problems posting images…could that be a Browser thing? Maybe clear your (Browser) Cache?
November 13, 2023 at 6:06 am #82070I’ve made a video recording of all my confusion starting from the initial shader blend file. I’ve edited it down so hopefully it’s condensed. Thanks for help. I’m ashamed of how confused I am by this!
https://app.screencast.com/sFoMBlzf14fB1
One piece of confusion over the bluegrid is resolved
https://app.screencast.com/DNZ4cBAJvE7ky
Re the image WYSIWYG.
- The button doesn’t show on starting a question but you can then edit it and it will show and you can add images
- Replies to posts 90% of the time will show the button and allow you to upload and add an images but…
- sometimes (and I can’t work out why) the image button will only trigger the image URL pop-up
November 13, 2023 at 7:23 am #82071The shader orb, probably has a UV Map added to it, but isn’t Unwrapped yet (hence the Square):
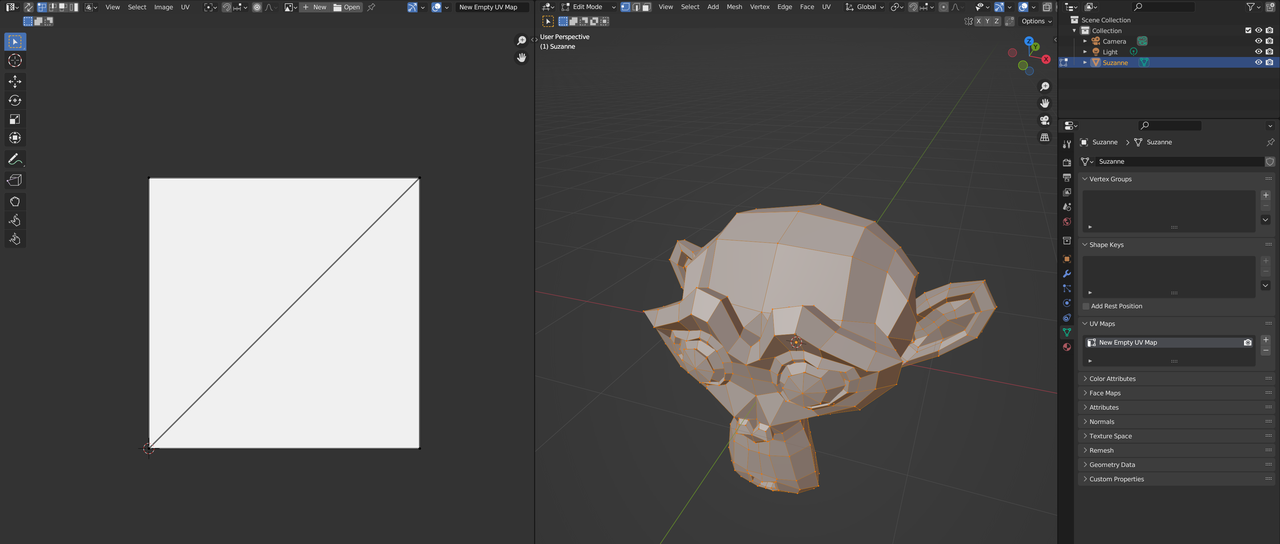
(I called it an empty UV Map, which probably isn’t quite correct, the main thing is, that it isn’t Unwrapped.)
The Material confusion, is, because you have one Material Selected, but the other Material is Assigned to it:
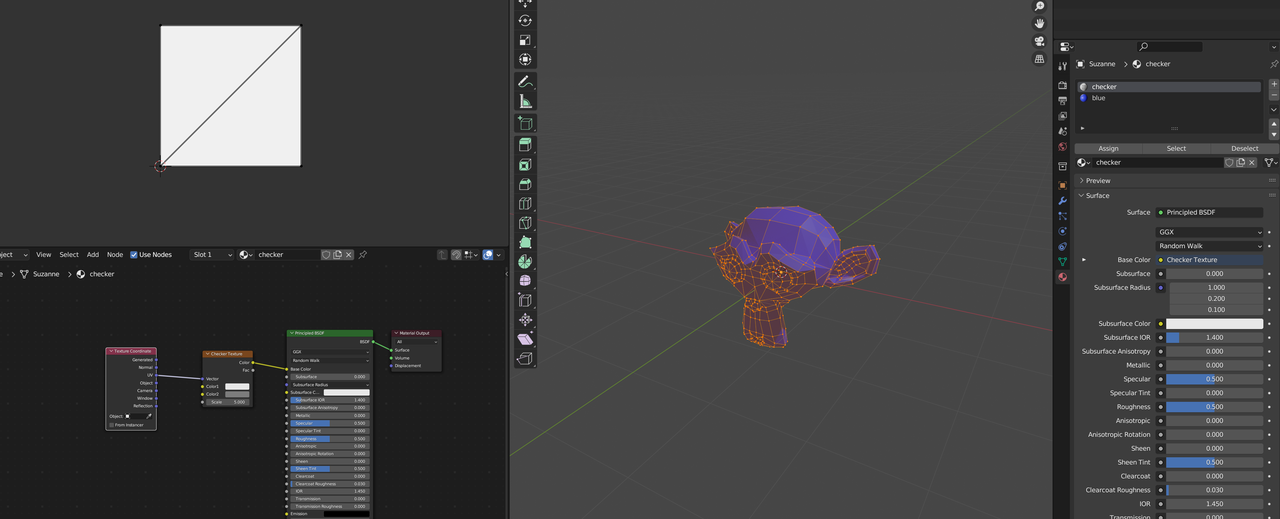
About the weird Unwraps, I am not sure, might have something to do with the Live Unwrap, but anyway, you should Add Seams to the model to get consistent and predictable results.
November 13, 2023 at 8:03 am #82072I think as you keep watching the course most of the confusion will go away. What I like to do is before I go hands on is, I watch the whole course as if it was a movie, then I go back and try things out after I’m comfortable. The UV’s are a 2D representation of your 3D mesh, it might look weird right now but that will go away, you just got to keep watching to get used to the new concepts. There are different methods of unwrapping that Blender uses, it will give you lots of results, but most of them impractical for actual texturing, they become useful later when you want to do procedural shading and lots of hacks. So try not to pay attention to getting weird results like all the little squares, the method to begin with is good old seams placements.
November 13, 2023 at 9:12 am #82073hmmm… I’m struggling to explain myself.
- I fully understand the concept of UVs and I’ve seen and produced plenty of games where the artists have used these.
- I have already watched all the videos in this section through twice
- I’ve unwrapped Suzanne no problems
What I don’t understand is why when I replicate JLs steps precisely I get shown a different result. (I opened the blue grid as the image background to the UV)
Could I have some sort of cached unwrap/packing setting from messing around without knowing what I’m doing? Someone else posted with this exact same issue so I think the answer must be something simple. The confusion is not my lack of understanding of the *concepts*
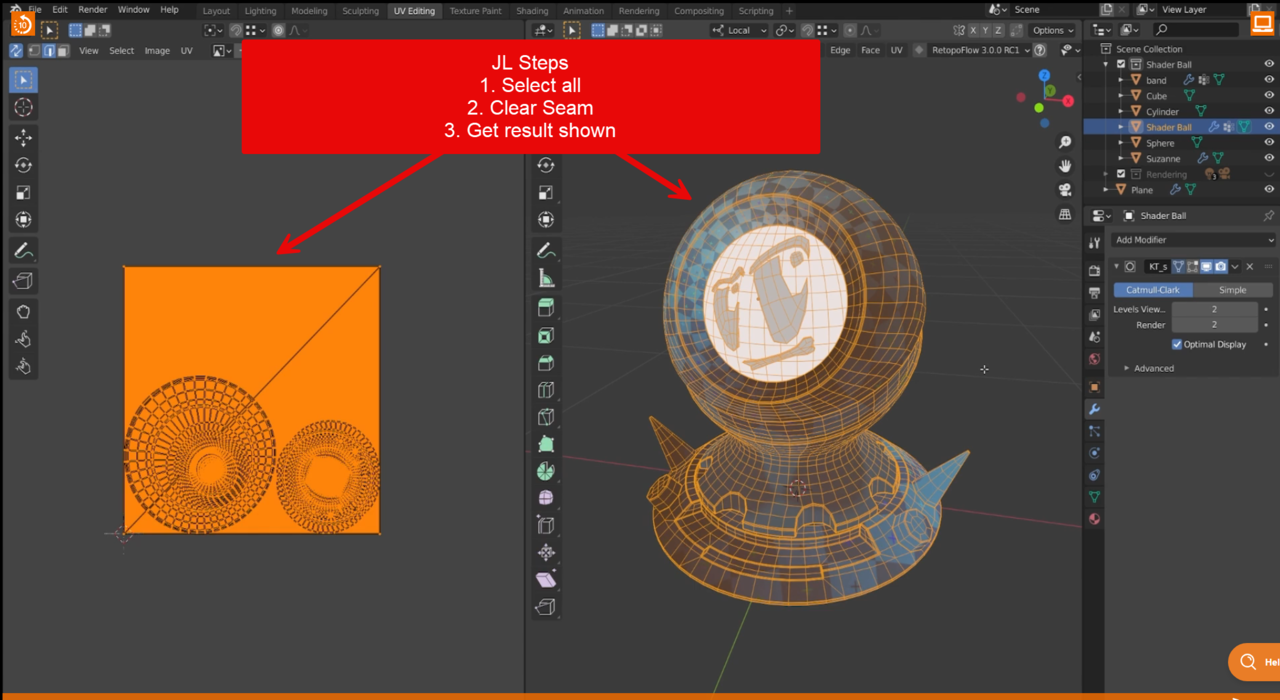
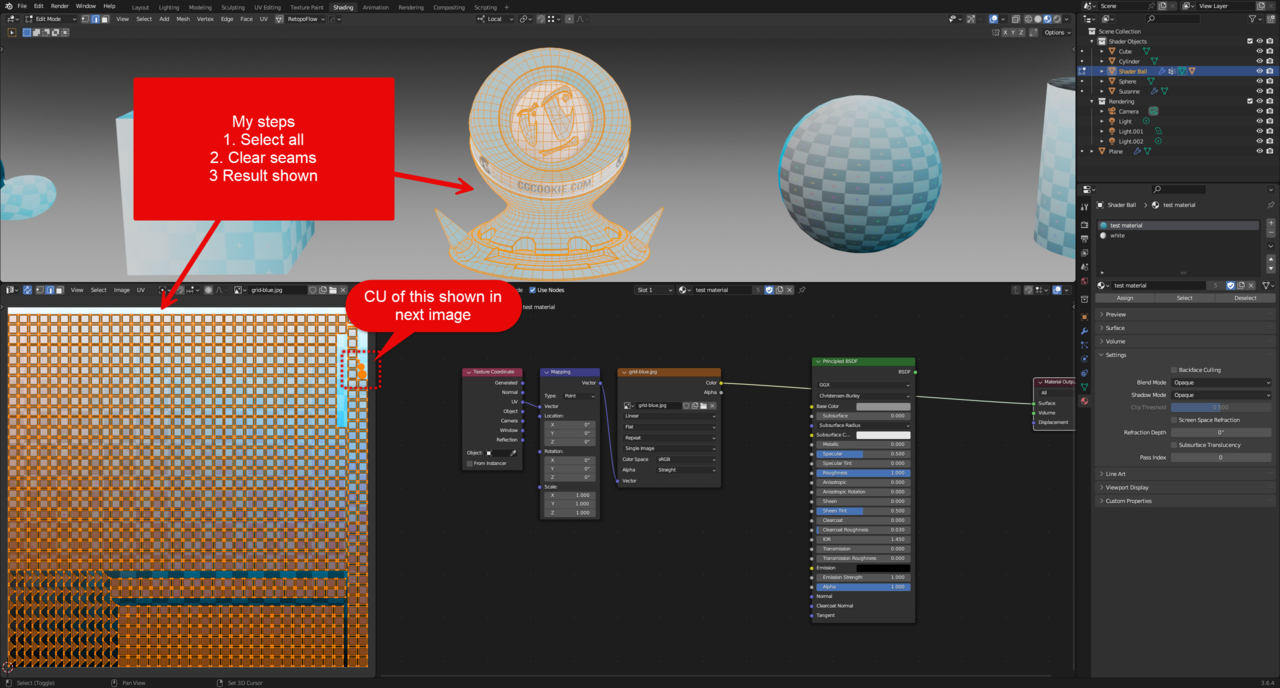
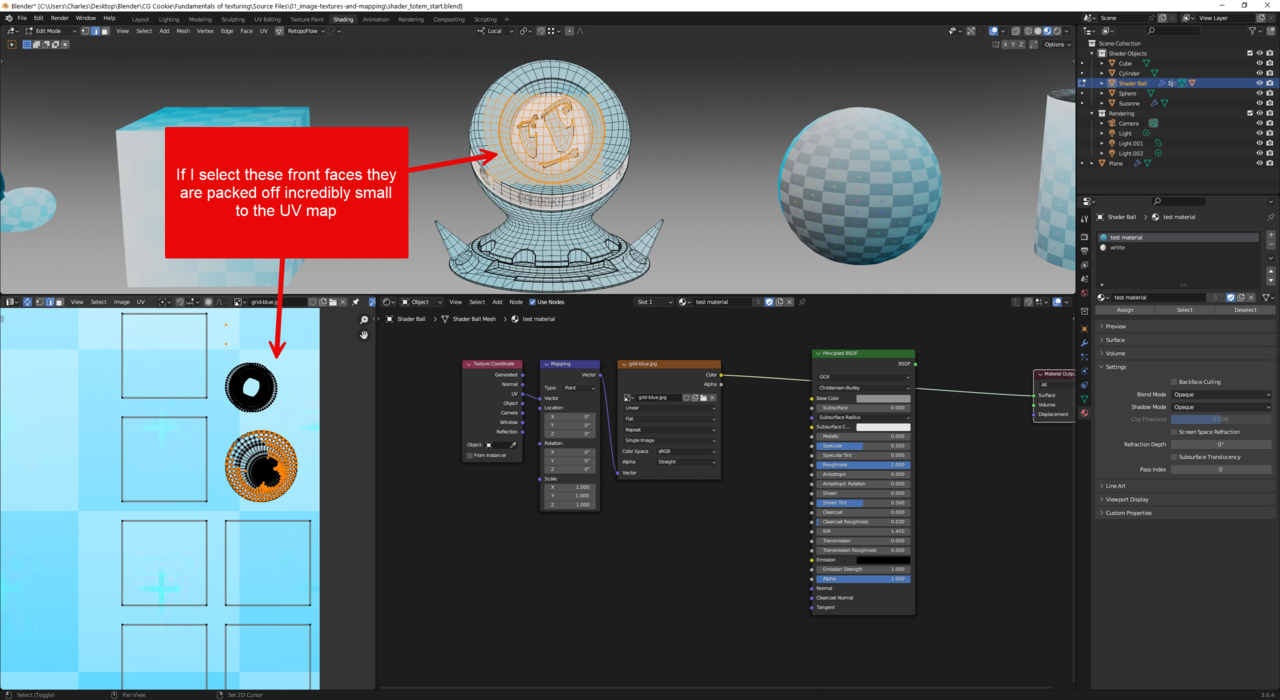
If I Select All edges of the shader ball and UV>Unwrap>Unwrap I get this
[edit: which I can’t upload cos the button again actions the pop-up image URL and not your media library]
November 13, 2023 at 9:21 am #82074[A new post does allow images to be uploaded]
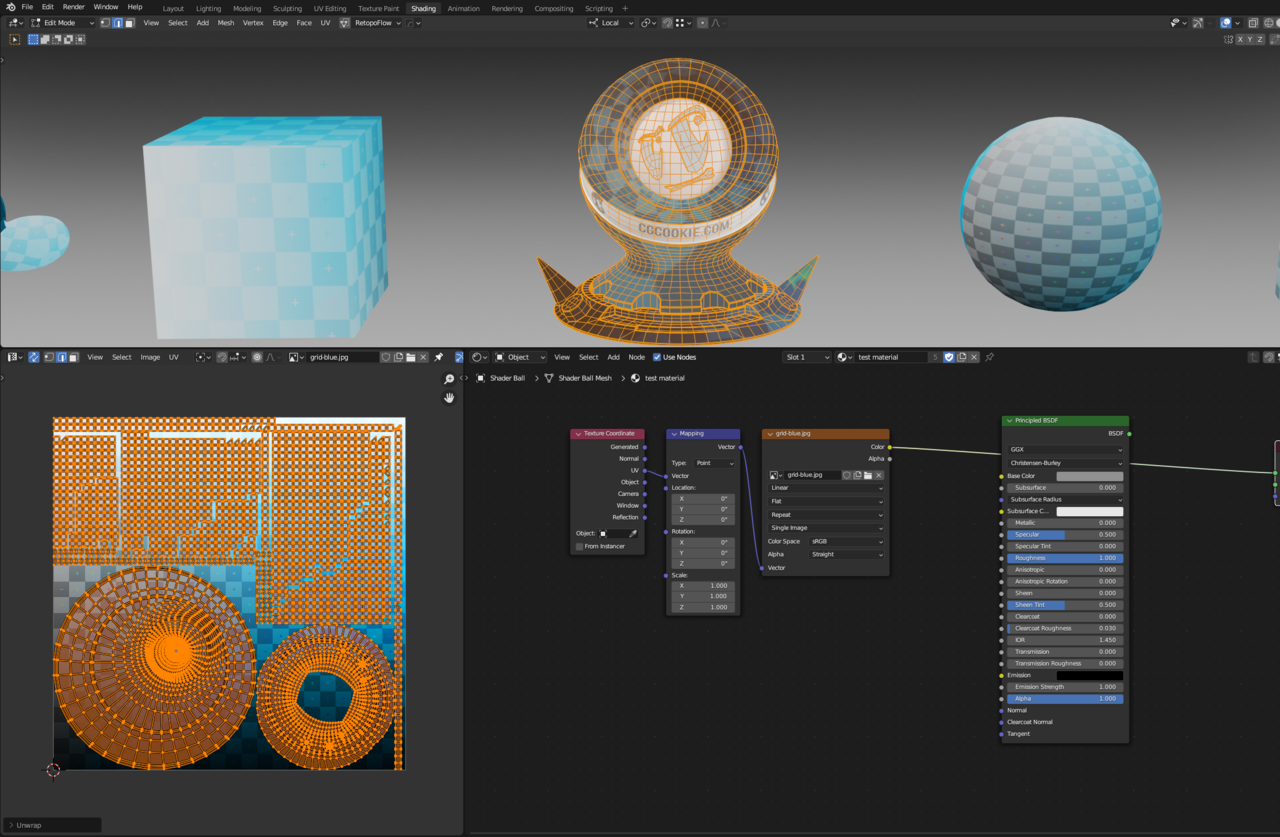
If I Select All edges of the shader ball and UV>Unwrap>Unwrap I get this
 November 13, 2023 at 9:27 am #82075
[I have to create a new post to be able to upload/post inline images. Editing previous only provides Image URL pop-up]
Further when I CTL + L the shader inner face they are all the squares in the blue grid UV map
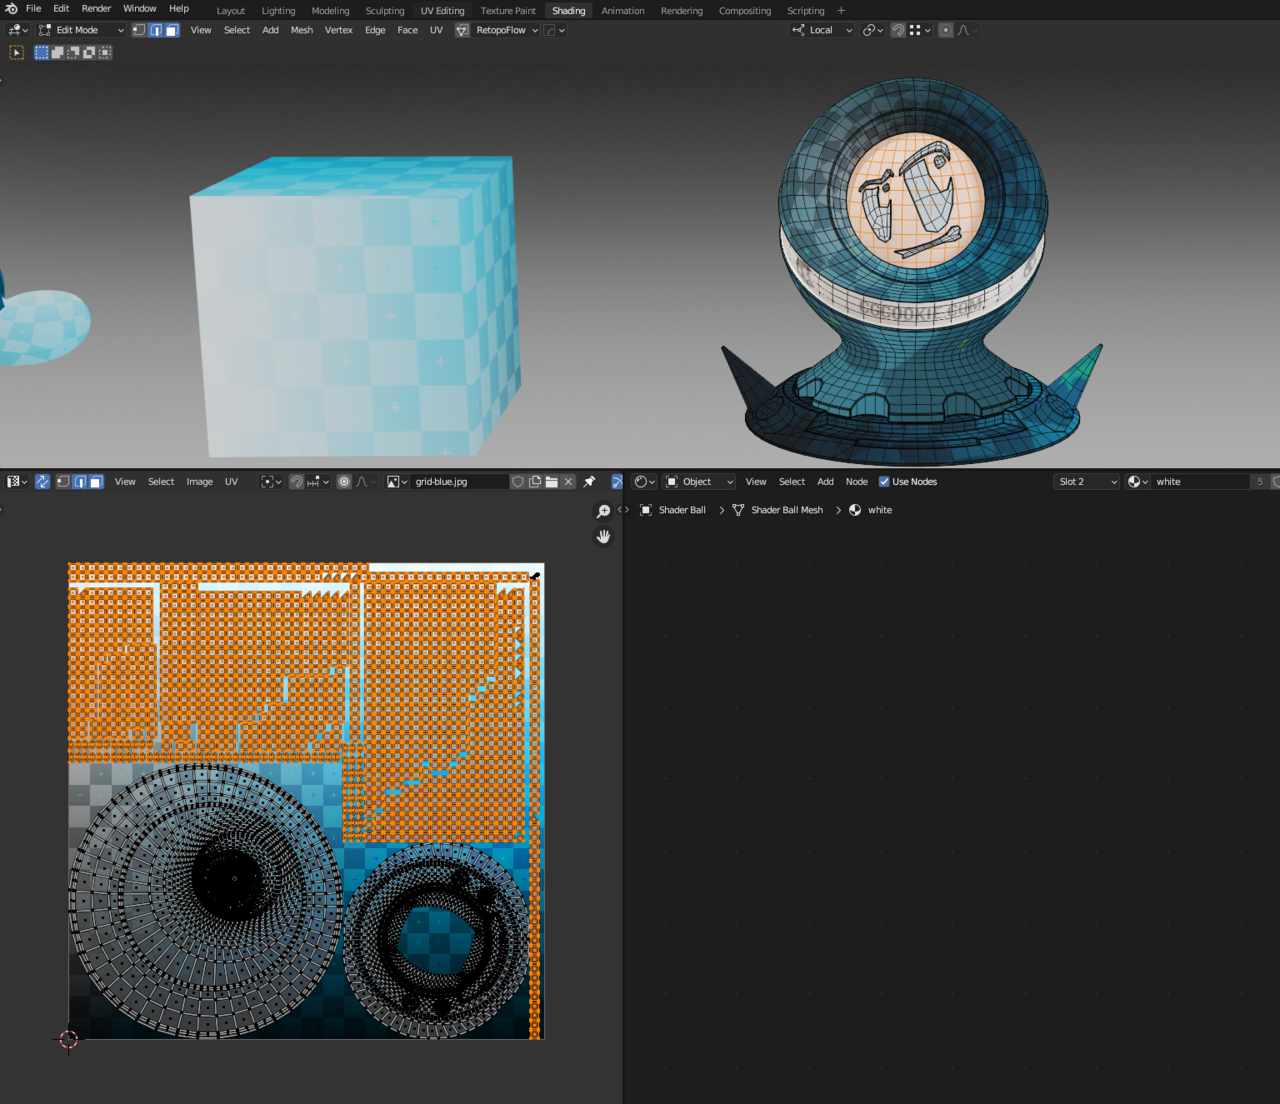
Whereas when JL does it in the video he gets a completely different result
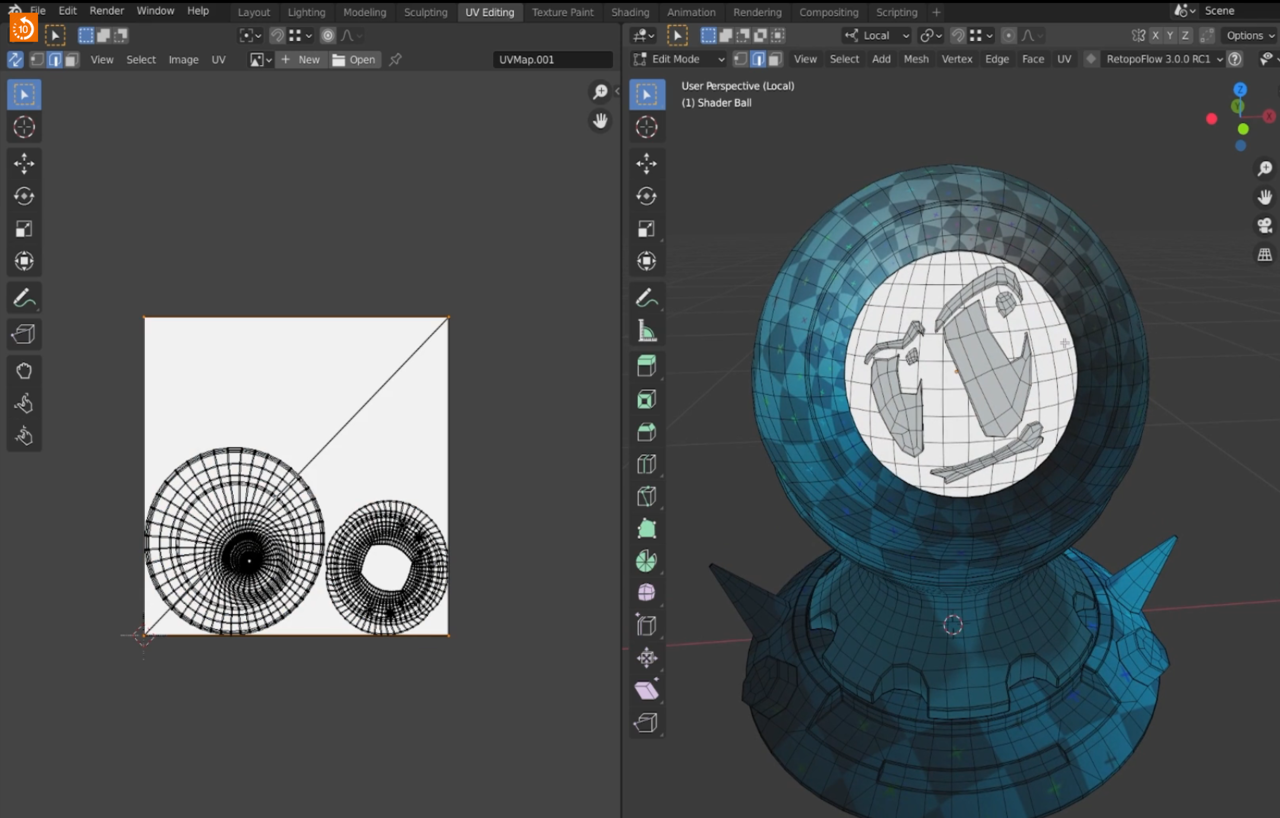 November 13, 2023 at 9:41 am #82076
Ok I understand.
Well Blender has changed a lot since JL made that recording and Blender keeps changing even more. They always change the unpacking algorithm and stuff. So I’m not surprised you are getting a different result out of the box. It might be that you changed some setting that Blender remembers, but the point is that you don’t have to worry about a different result, it’s just a different one, it’s not that it’s inherently bad. I think that before if there weren’t any seams, Blender made a jumbled mess, but now I think Blender tries to do a different unwrapping. If you start placing seams on your model you will probably get a result more that how it looks on the course. The point is that your goal is to unwrap the model, try to not get too fixated on how different it is from the video, that will always happen, if at the end the result is a great texture mapped to the shader ball and you got all the concepts, then you’re all good.
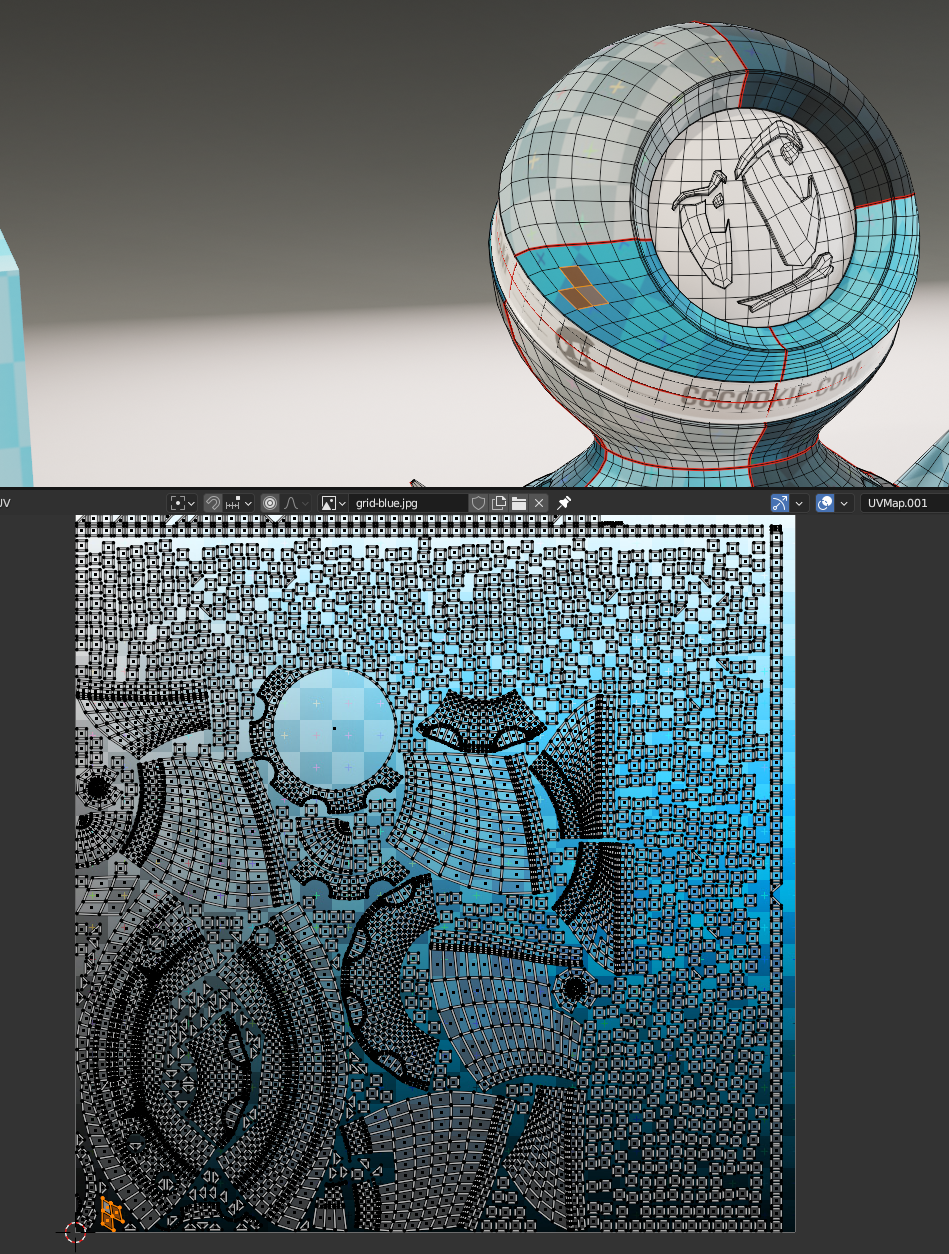
November 13, 2023 at 12:12 pm #82077OK I’ve marked seams on the shader but not touched or put seams on the inner part of the shader (the white bit with the eyes and smile) at all. I selected all those faces, hid them, marked the seams on the rest of the shader, then unhid them, select all and uv>pack
And I get this… which surely can’t be right Every single face of the inner part is split as though it has been marked with seams.
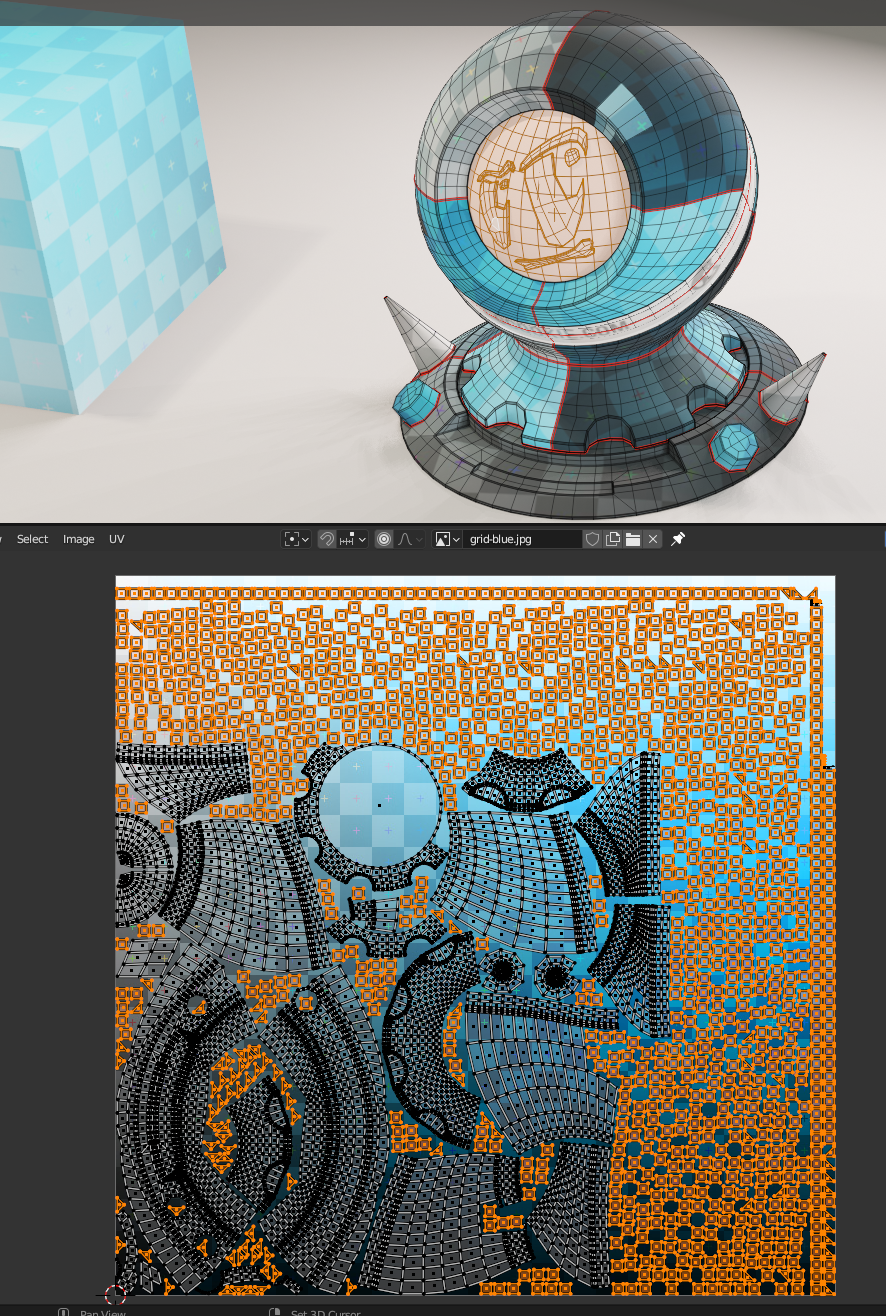 November 13, 2023 at 12:17 pm #82078
I also don’t understand why/how these few faces got separated?
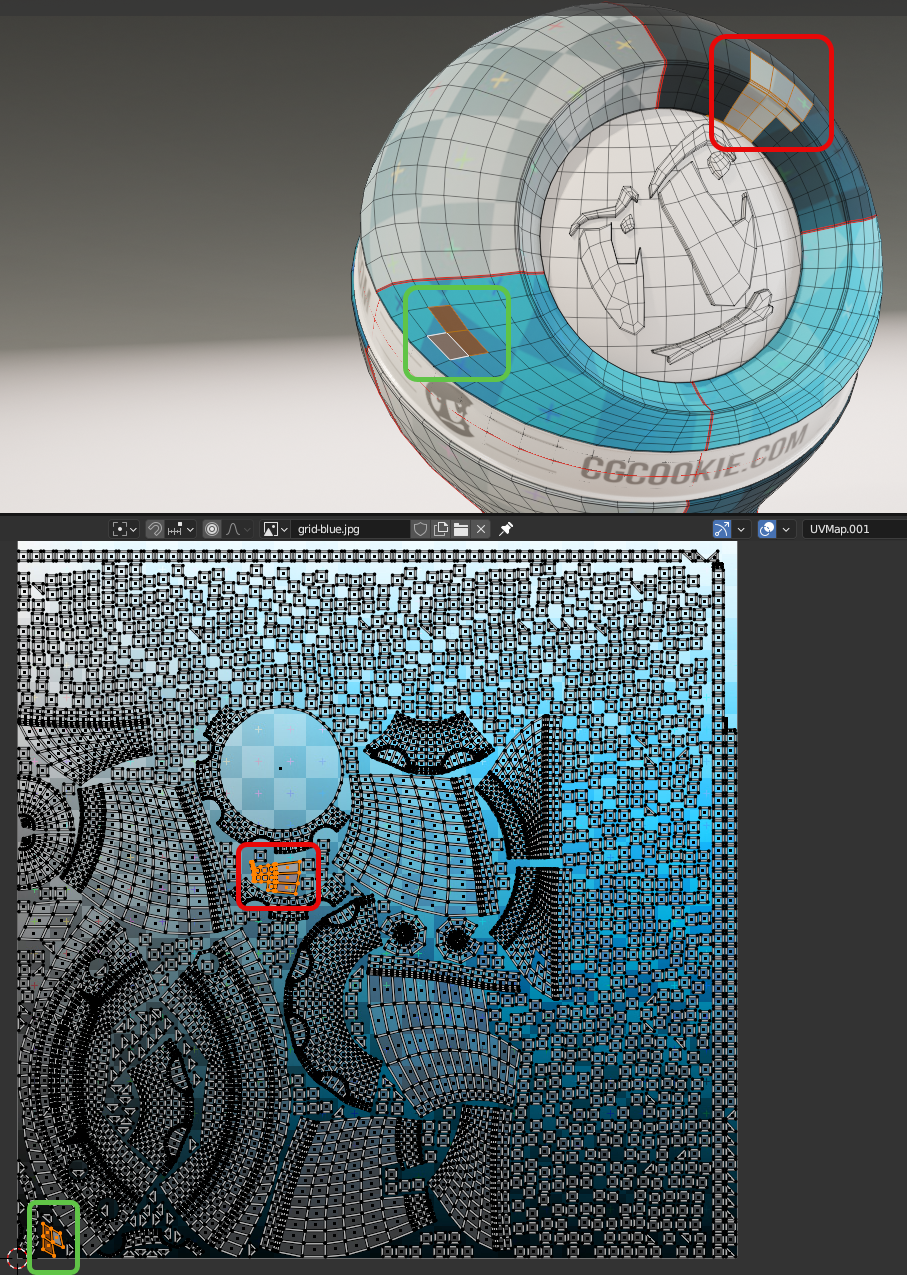 November 13, 2023 at 12:22 pm #82079
Then if I select all, pack islands again, one disappears but the other remains
-
AuthorPosts


- The topic ‘the motherlode of confusion’ is closed to new replies.