
Polybook – Tomas Plasil
Forum Archive › Polybook – Tomas Plasil
- This topic has 44 replies, 6 voices, and was last updated 5 years ago by
Tomas Plasil.
-
AuthorPosts
-
January 29, 2020 at 8:40 am #51844
Looks fantastic, Tomas.
(Maybe add a skirting board between floor and walls and it will look photo-real.)
January 29, 2020 at 11:09 am #51845Thanks Spikey 🙂 The floor will not be in the shot, this render is just to show the table cloth.
January 29, 2020 at 11:20 am #51846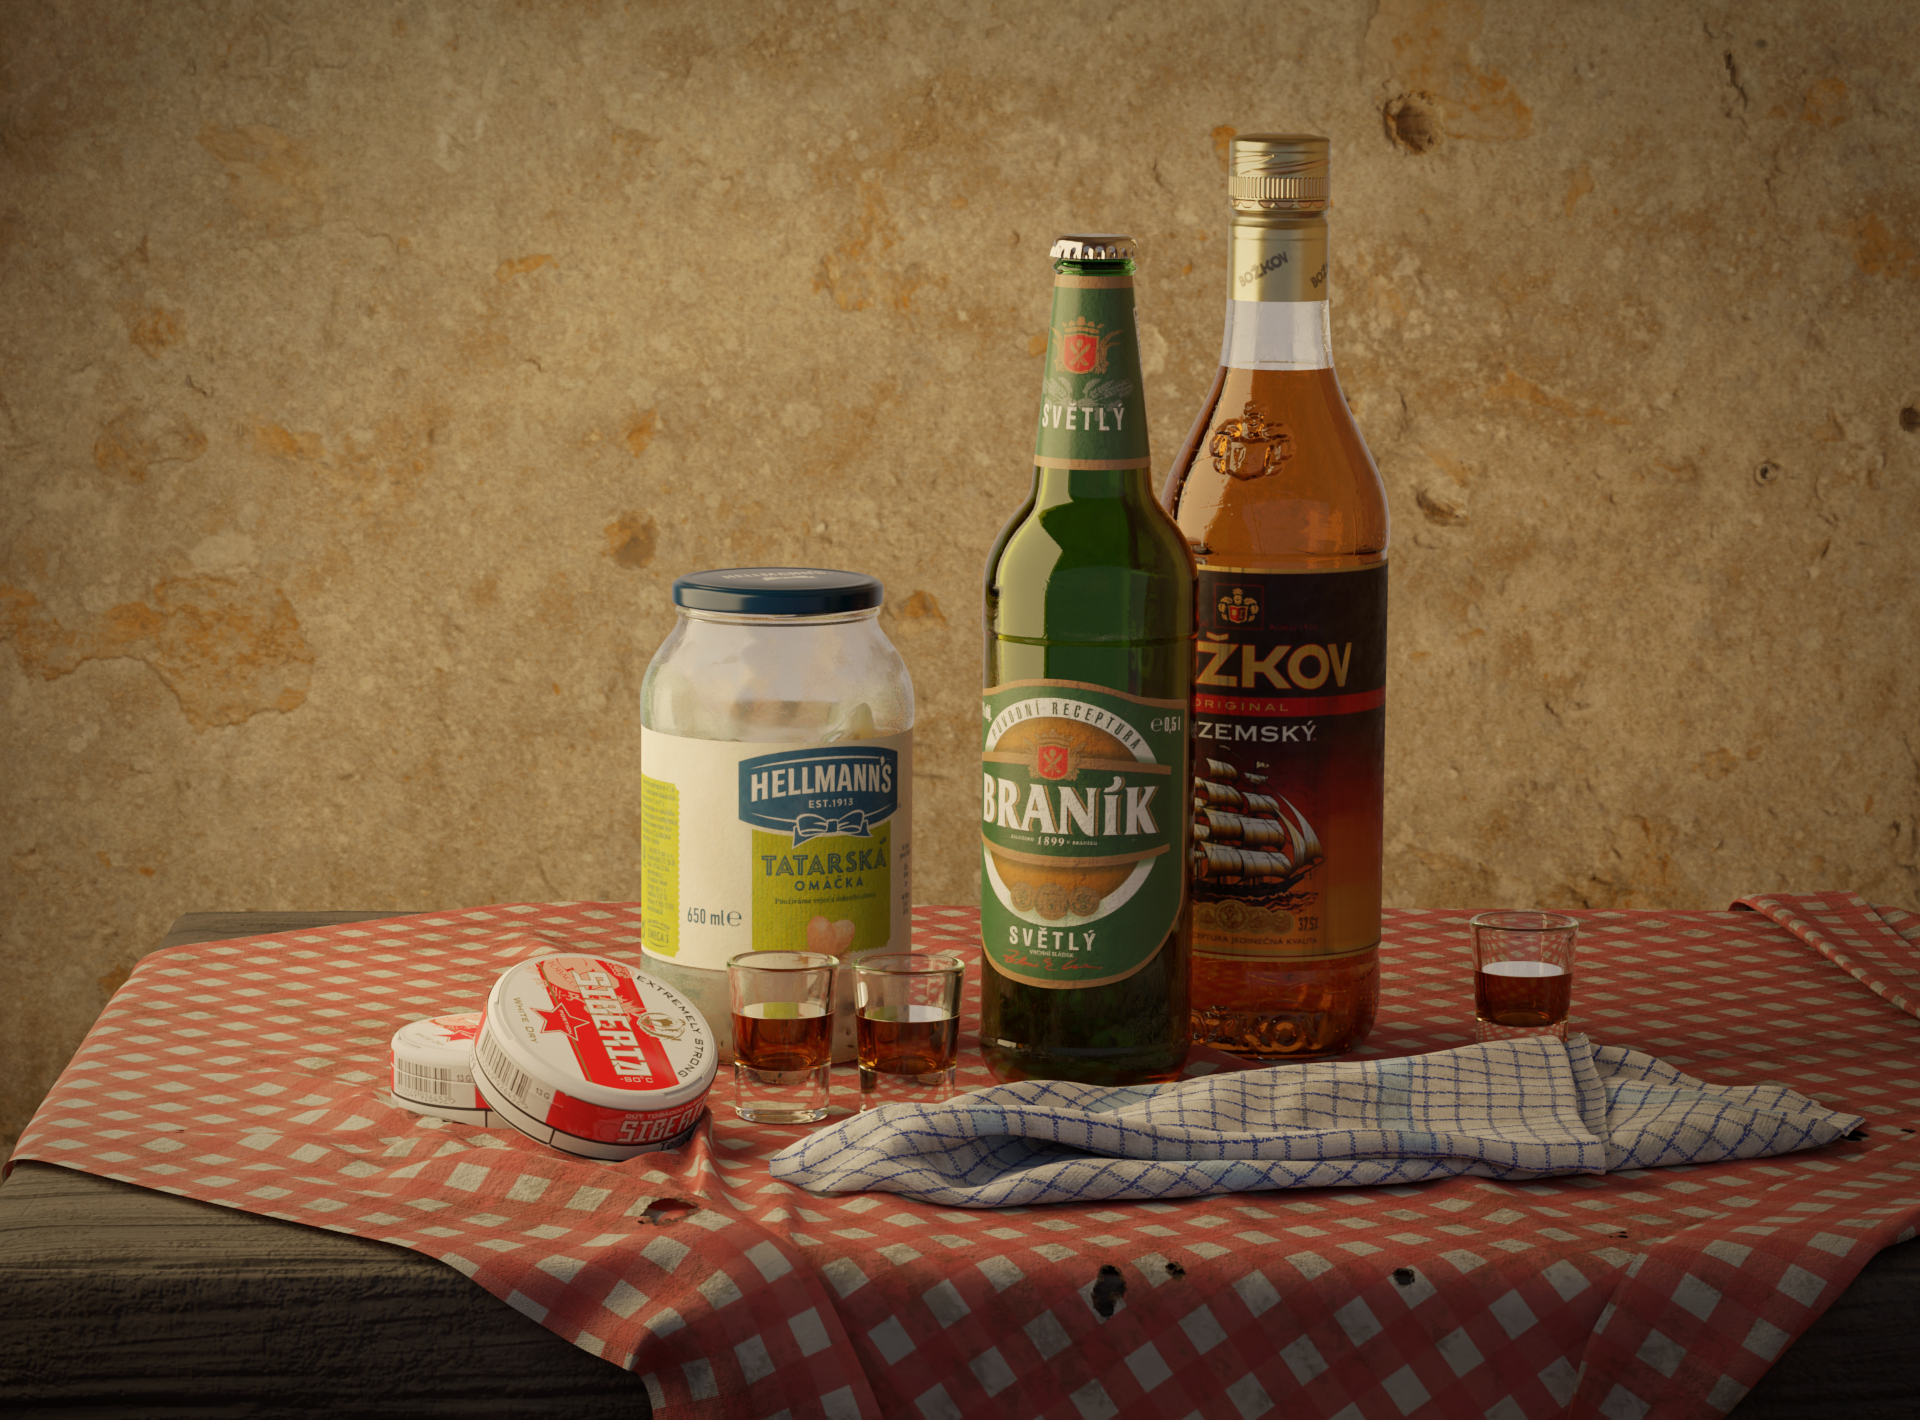
This is the progress so far…. I made some folds on the table cloth and came up with this composition layout. Im thinking I will also model some cigarretes so the burnt holes make more sense. Im also considering making a bunch more objects like some food or something to filll up the “canvas” and emulate those cluttered still life paintings…or maybe ill just keep it simple i havent decided yet.
I added a light in the back to create a soft rimlight, which I like how it turned out, except it also made the top of the rum bottle this milky white…So Ill have to solve that somehow. Or maybe Ill just get rid of the rimlight because it might look a bit artificial.
January 29, 2020 at 5:35 pm #51847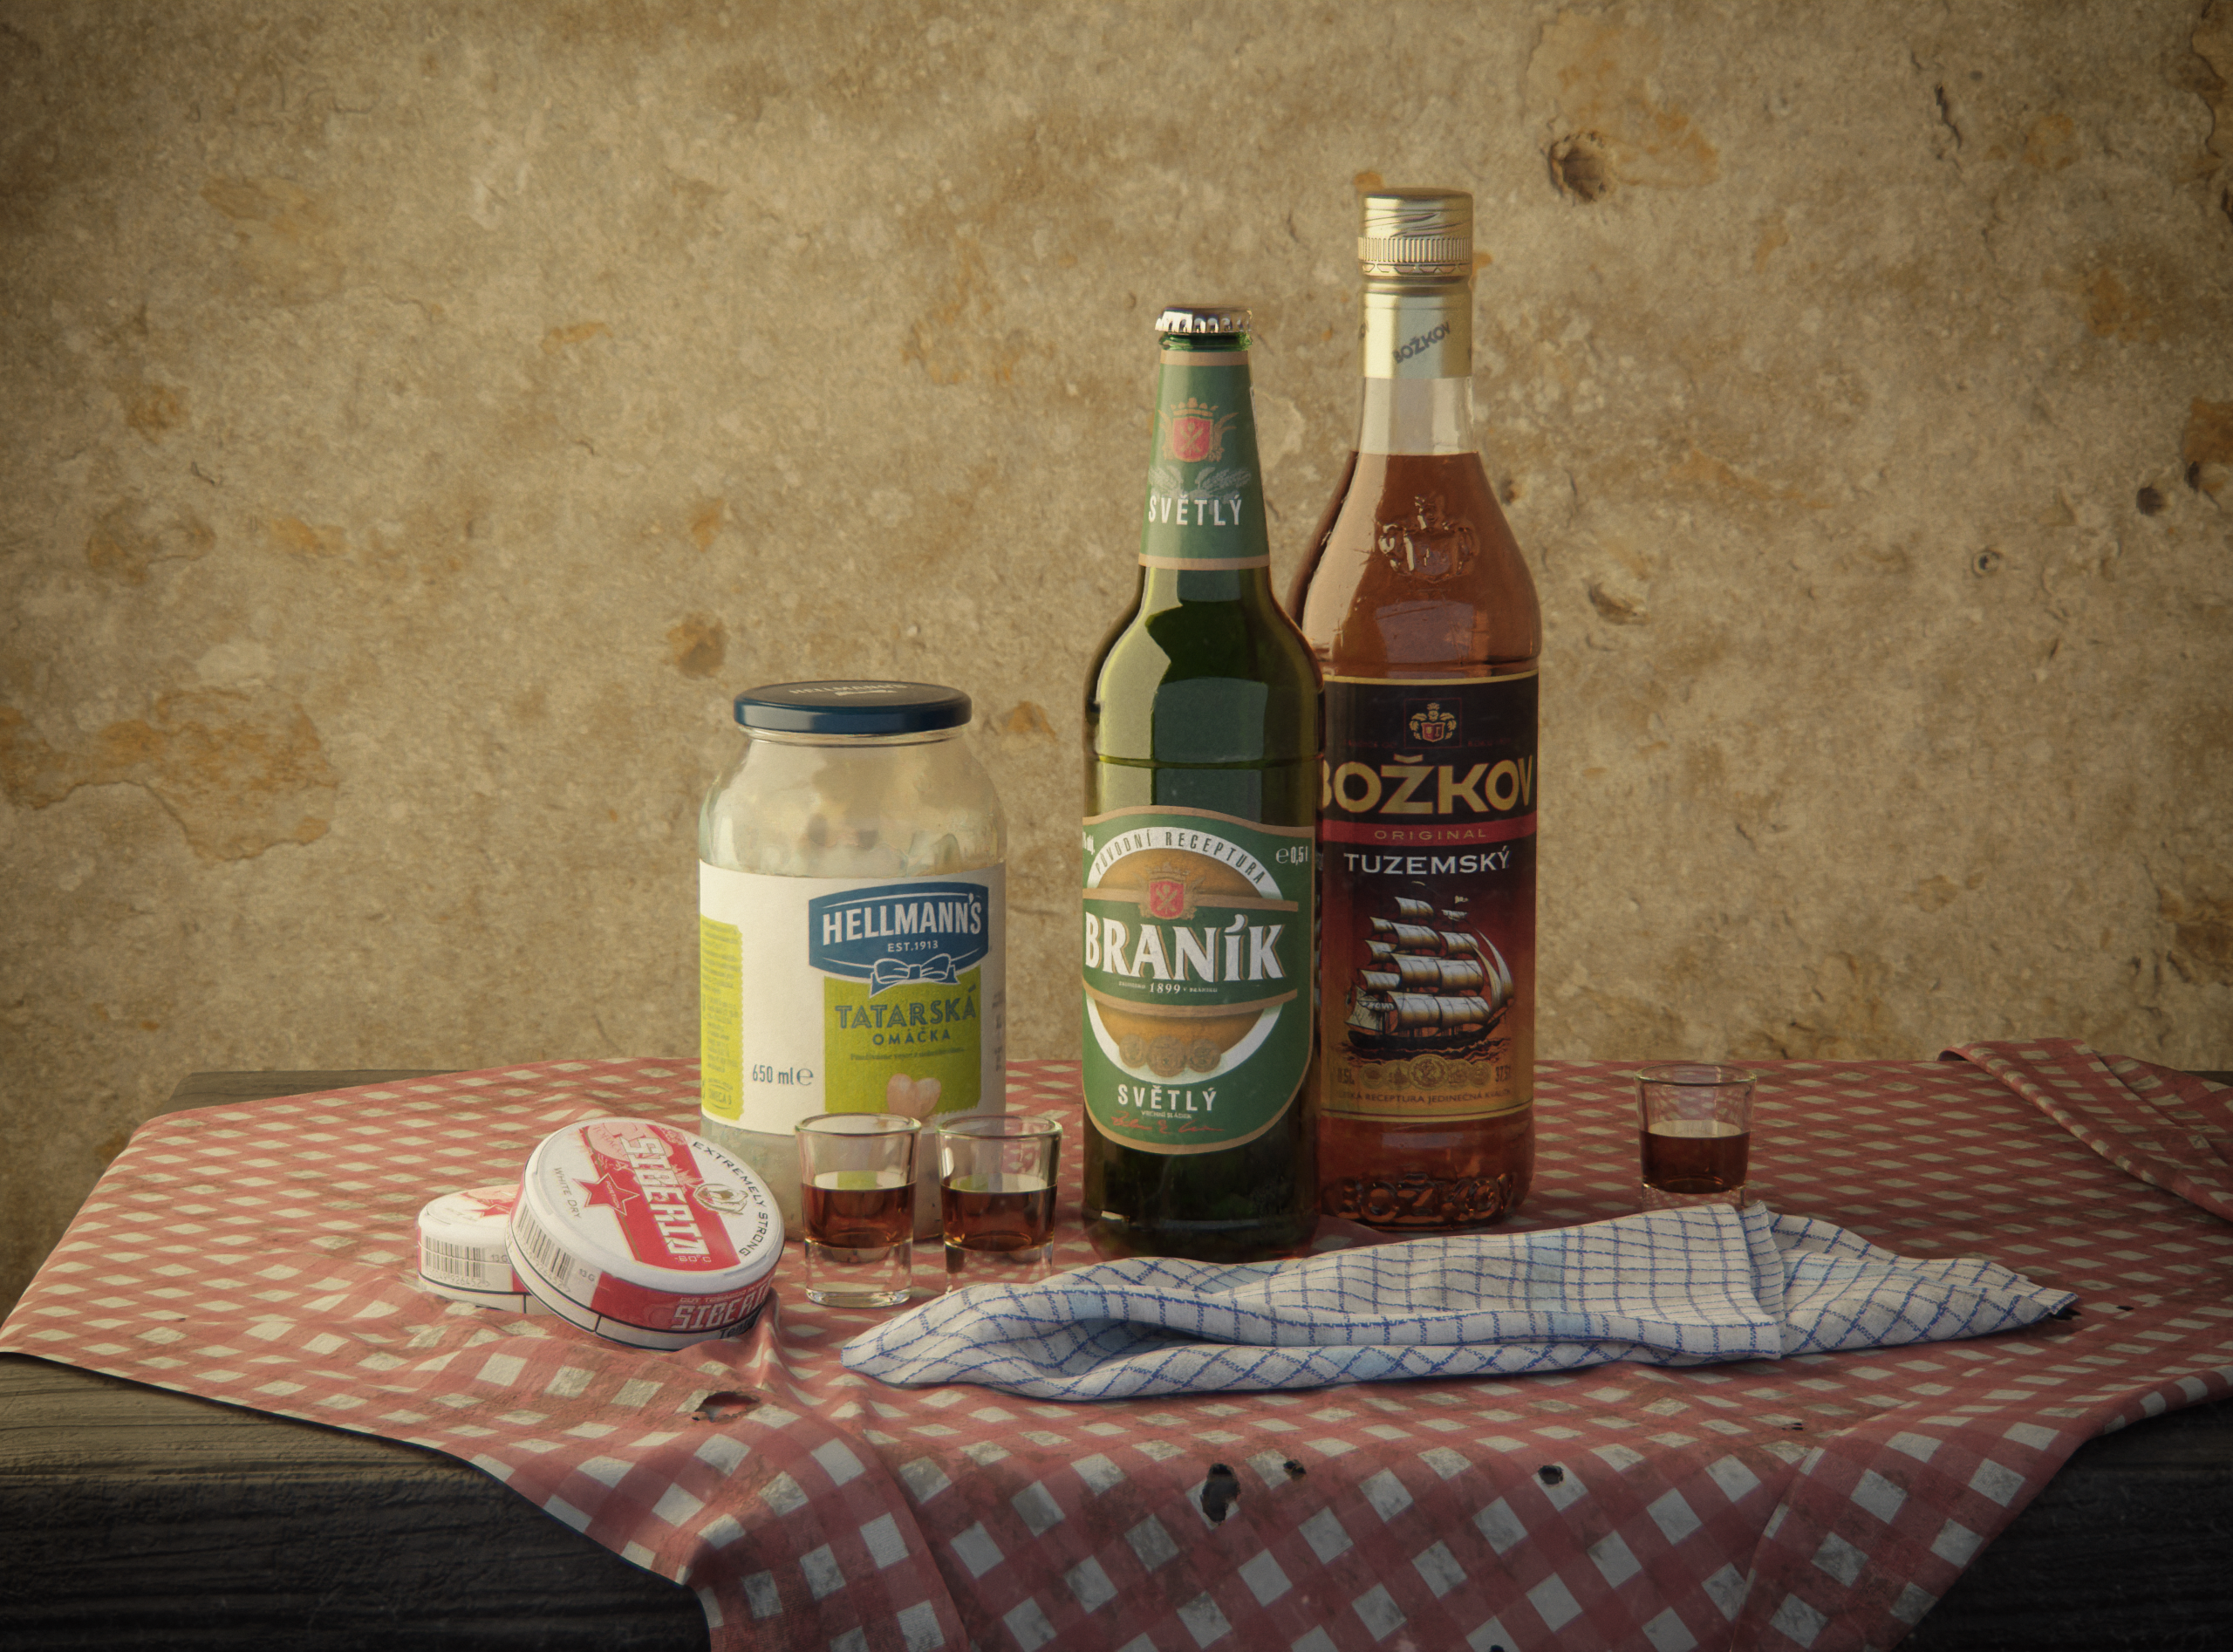
I have decided to leave it as it is 😀 I made some minor tweaks, but I like the simplicity…
January 30, 2020 at 5:27 pm #51848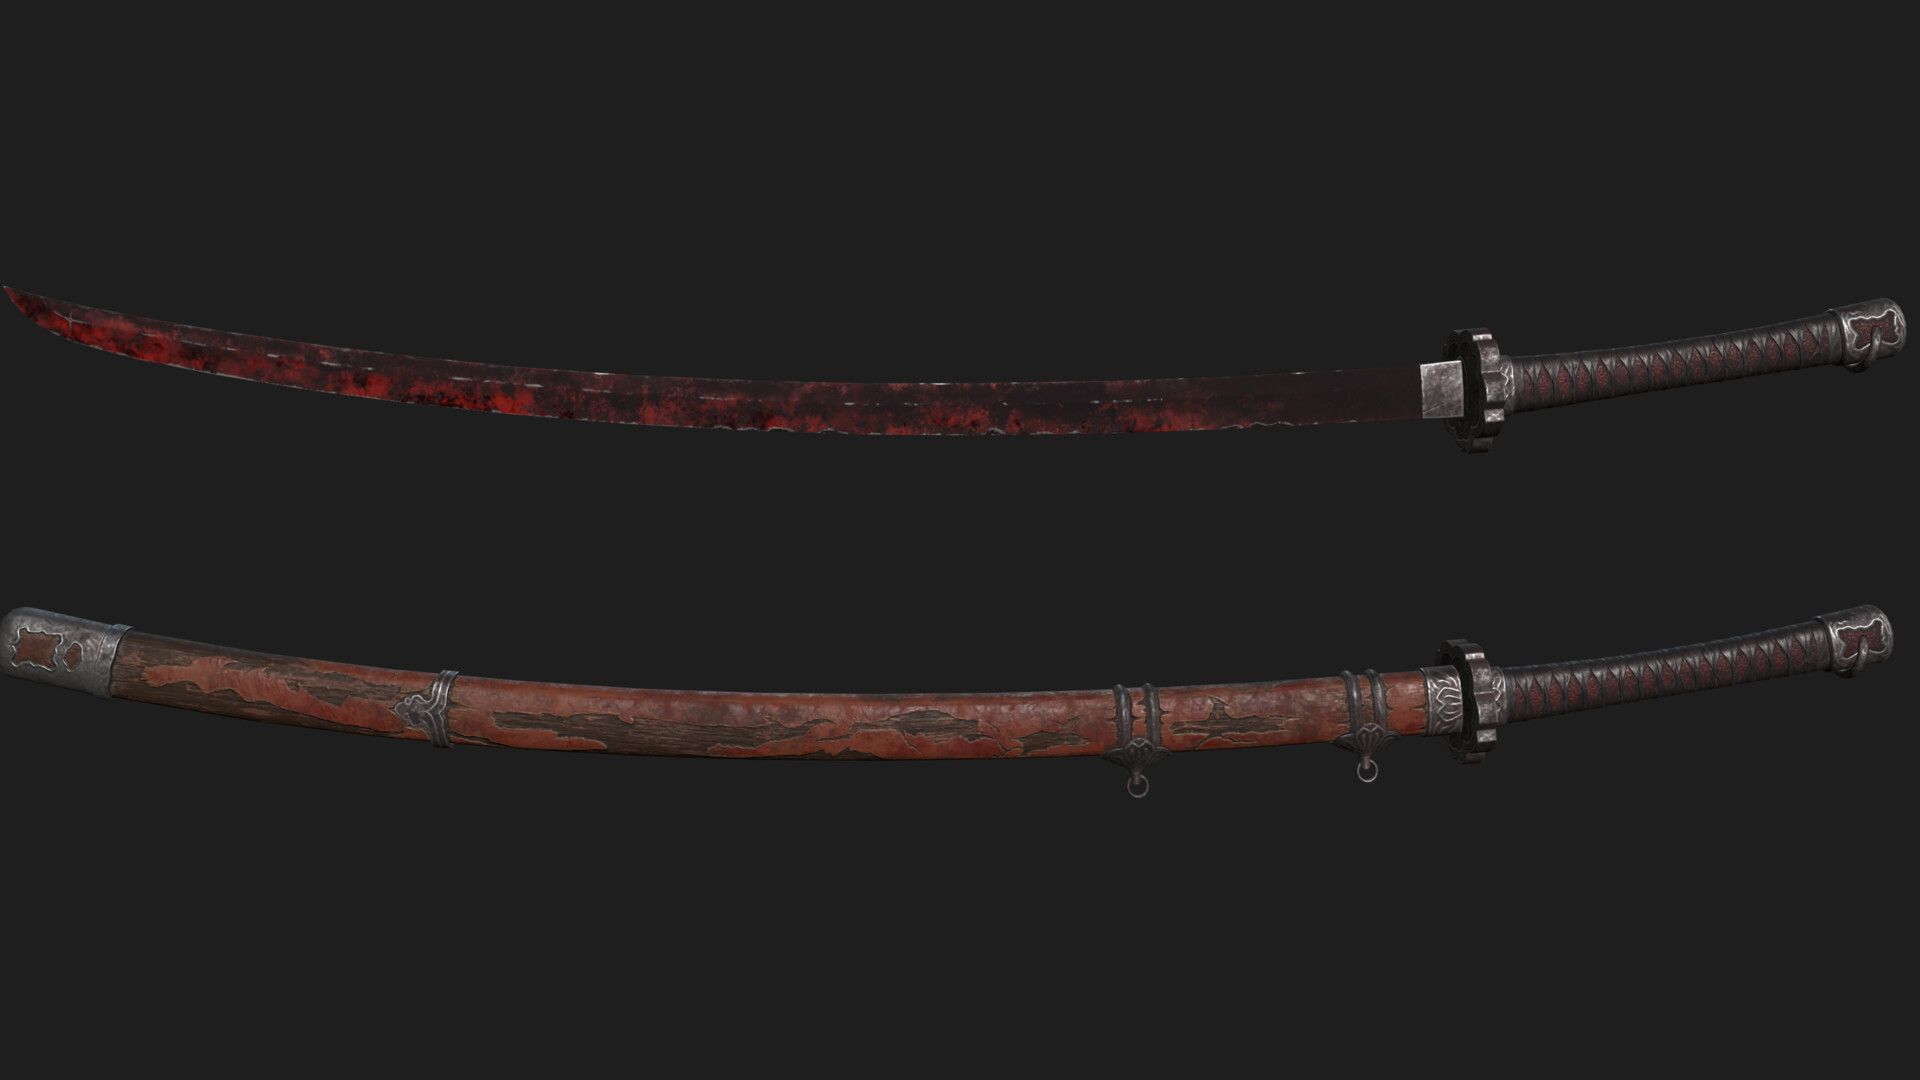
New project! Mortal Blade from Sekiro: Shadows Die Twice. I think its gonna be great practice of texturing and sculpting ornamental details. So far I made this blockout:
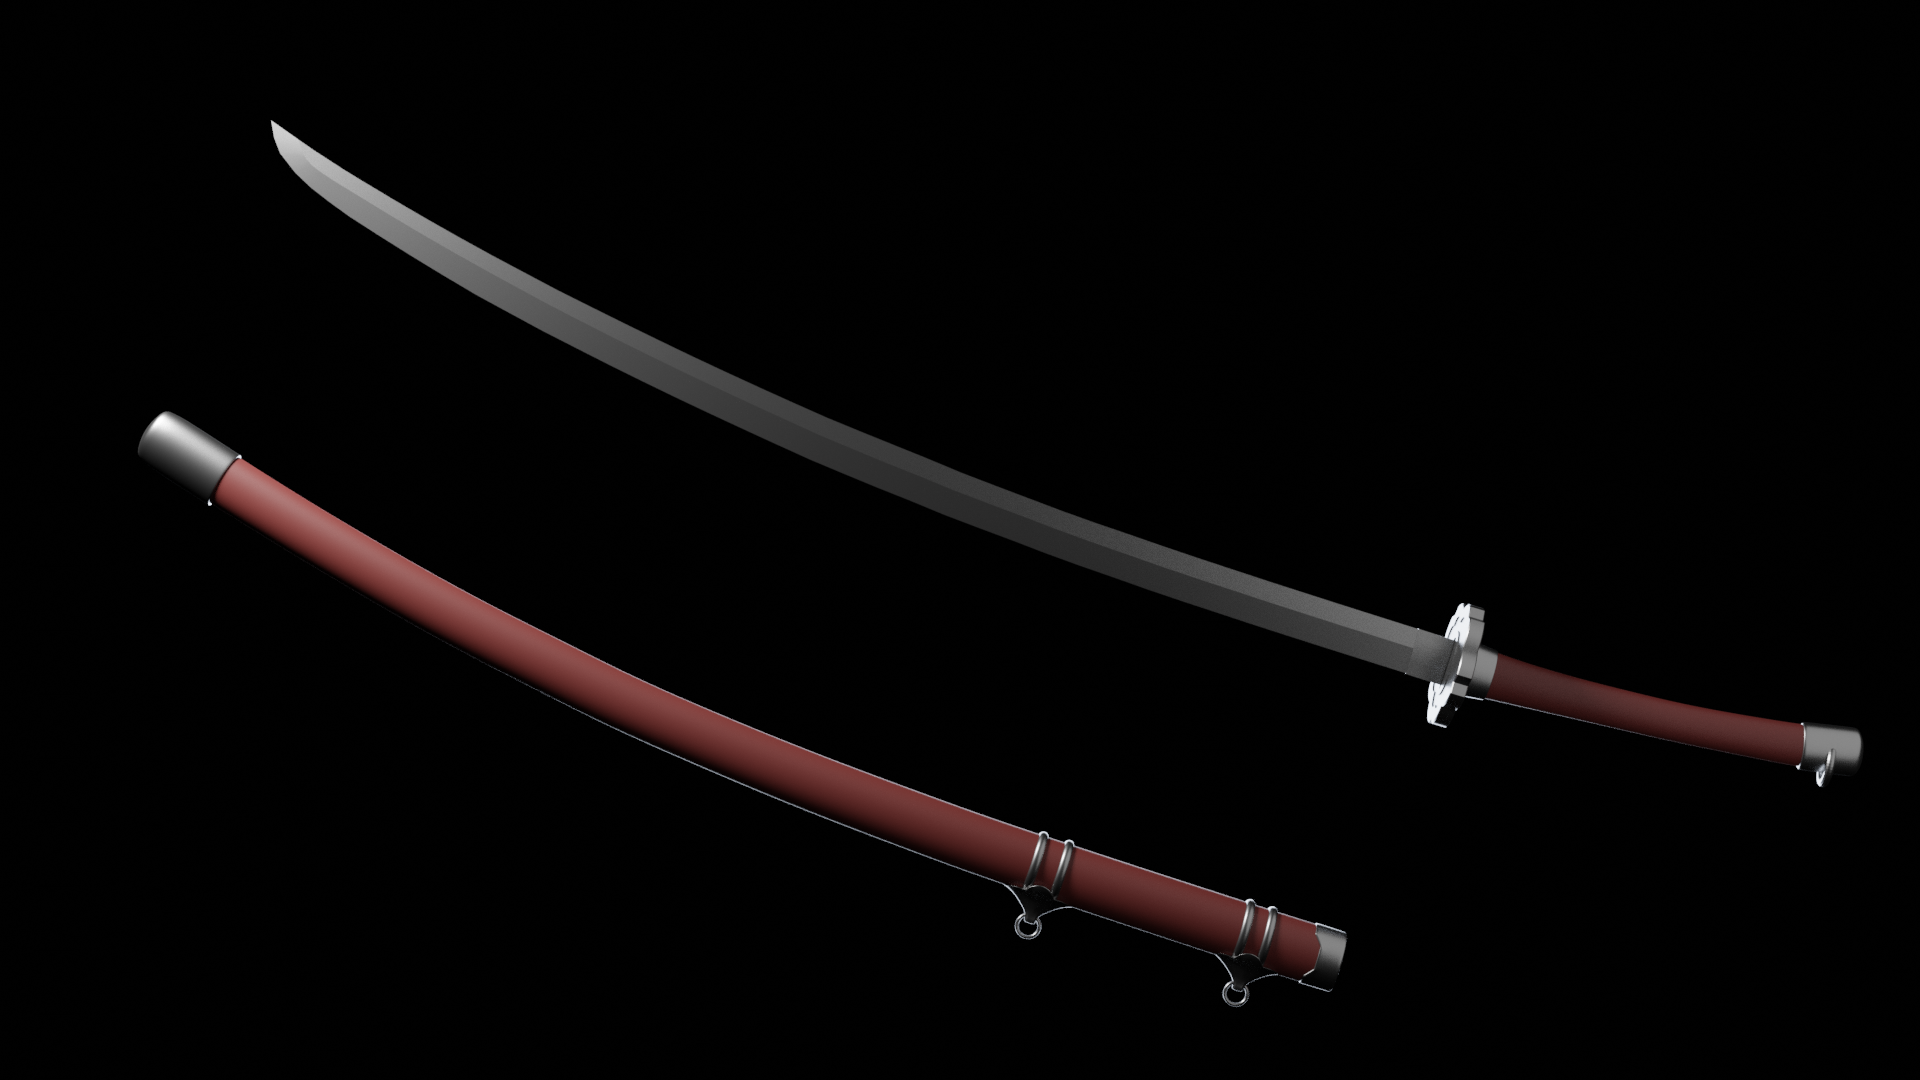
Next im gonna take it to zbrush to sculpt a high res version.
January 31, 2020 at 11:32 am #51849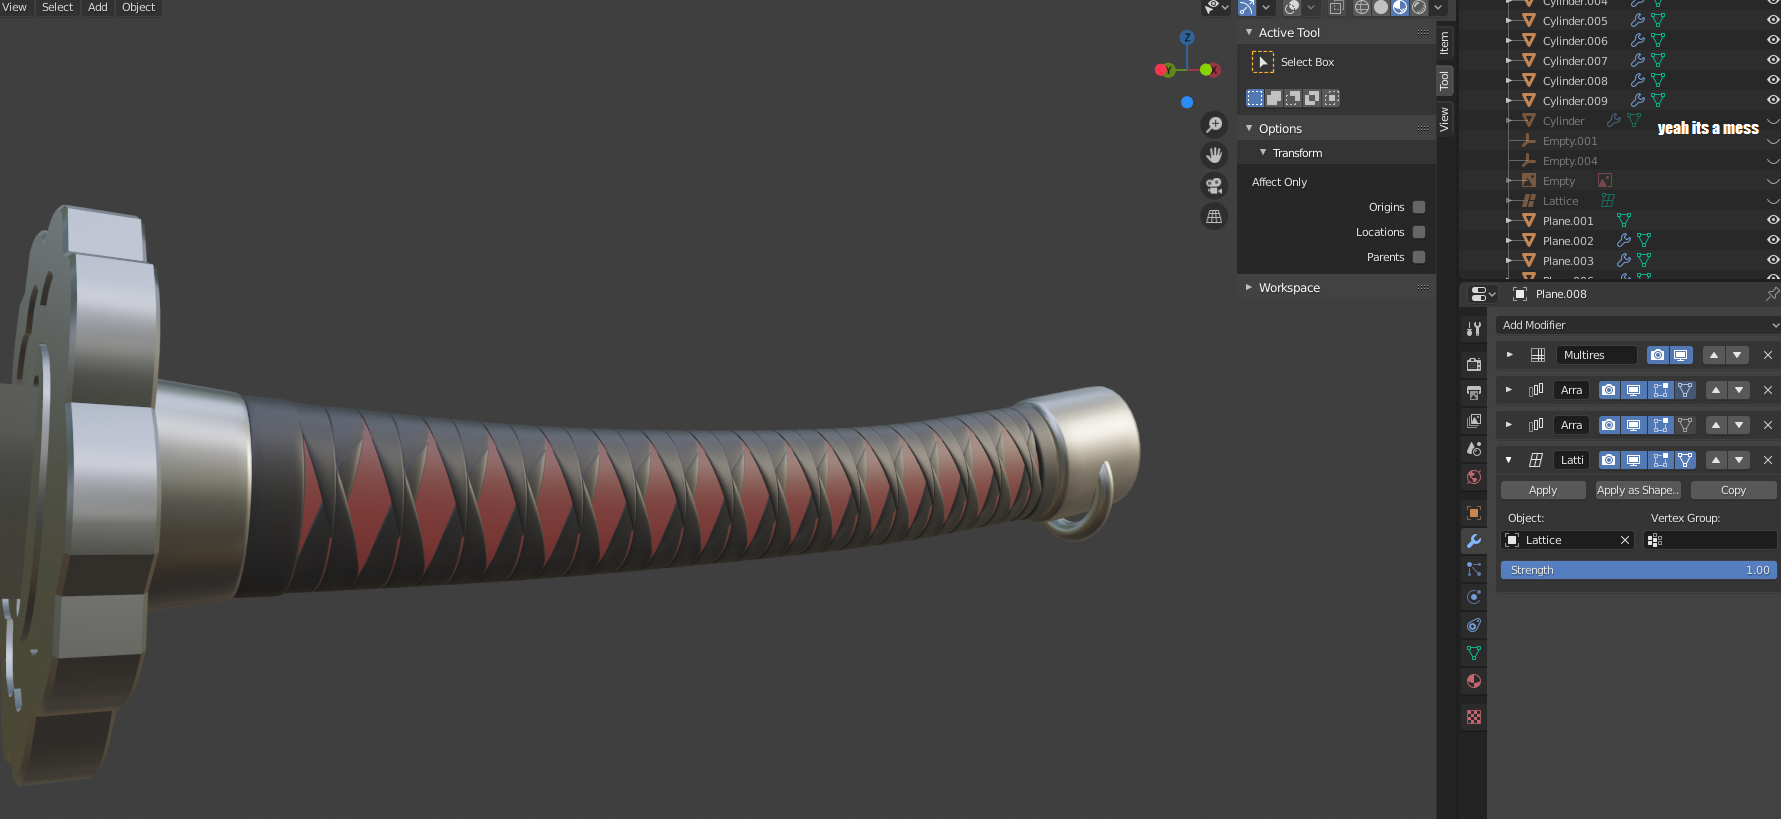
Today I made the handle wrap in a way that is pretty … handy.
…
Basically I just modeled one segment on one side of the wrap made of two straps, and the tube of the handle is just a straight cylinder. It looks like this:
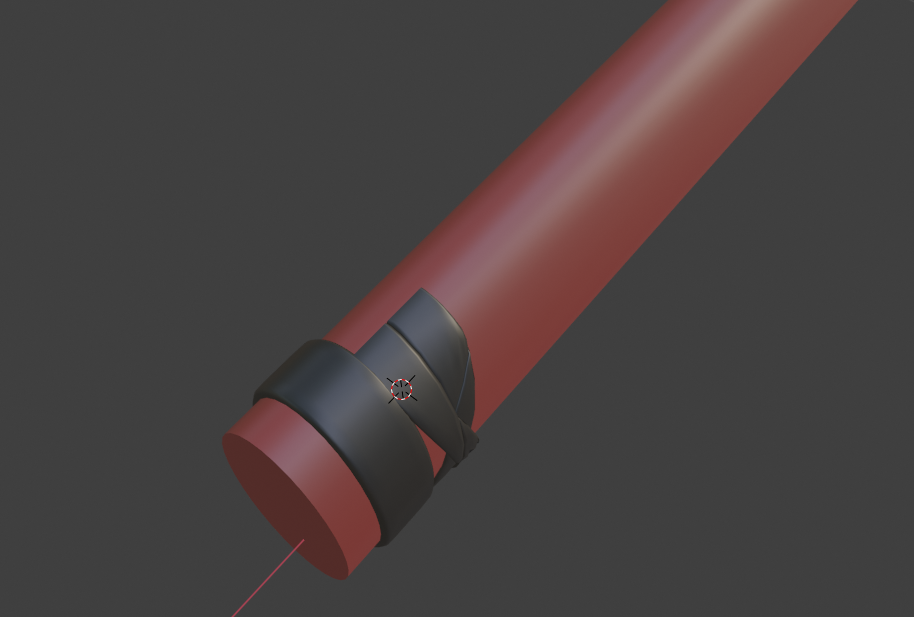
The wrap of the handle is “mirrored” to the other side with Array modifier with object offset. “Mirrored” in quotes because it is rotated 180 degrees around the center and offset by the width of one strap. That way the straps create two continuous loops around the whole length of the handle. So it is like the authentic katana wrapping technique…at least according to my research.
Another Array modifier repeats it along the whole handle.
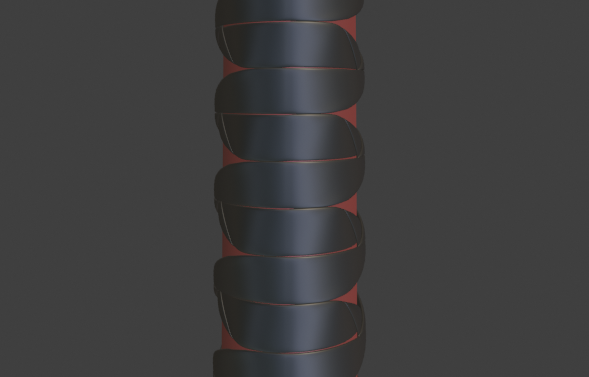
Next I put a Lattice modifer on both the wrap and the handle so that I create the tamper and slight bend non destructively.
What it all means that I can modify the shape of the wrap segments or the entire handle very easily. I can sculpt detail like folds on the wrap and and it will repeat itself all over the handle. I can also easily change the number of loops around the handle just by increasing the array count and then scaling it along Y axis so it fits the length.
When Im done, I can apply all of it and do another sculpting pass to create smaller detail and break the repetition.
February 2, 2020 at 3:33 pm #51850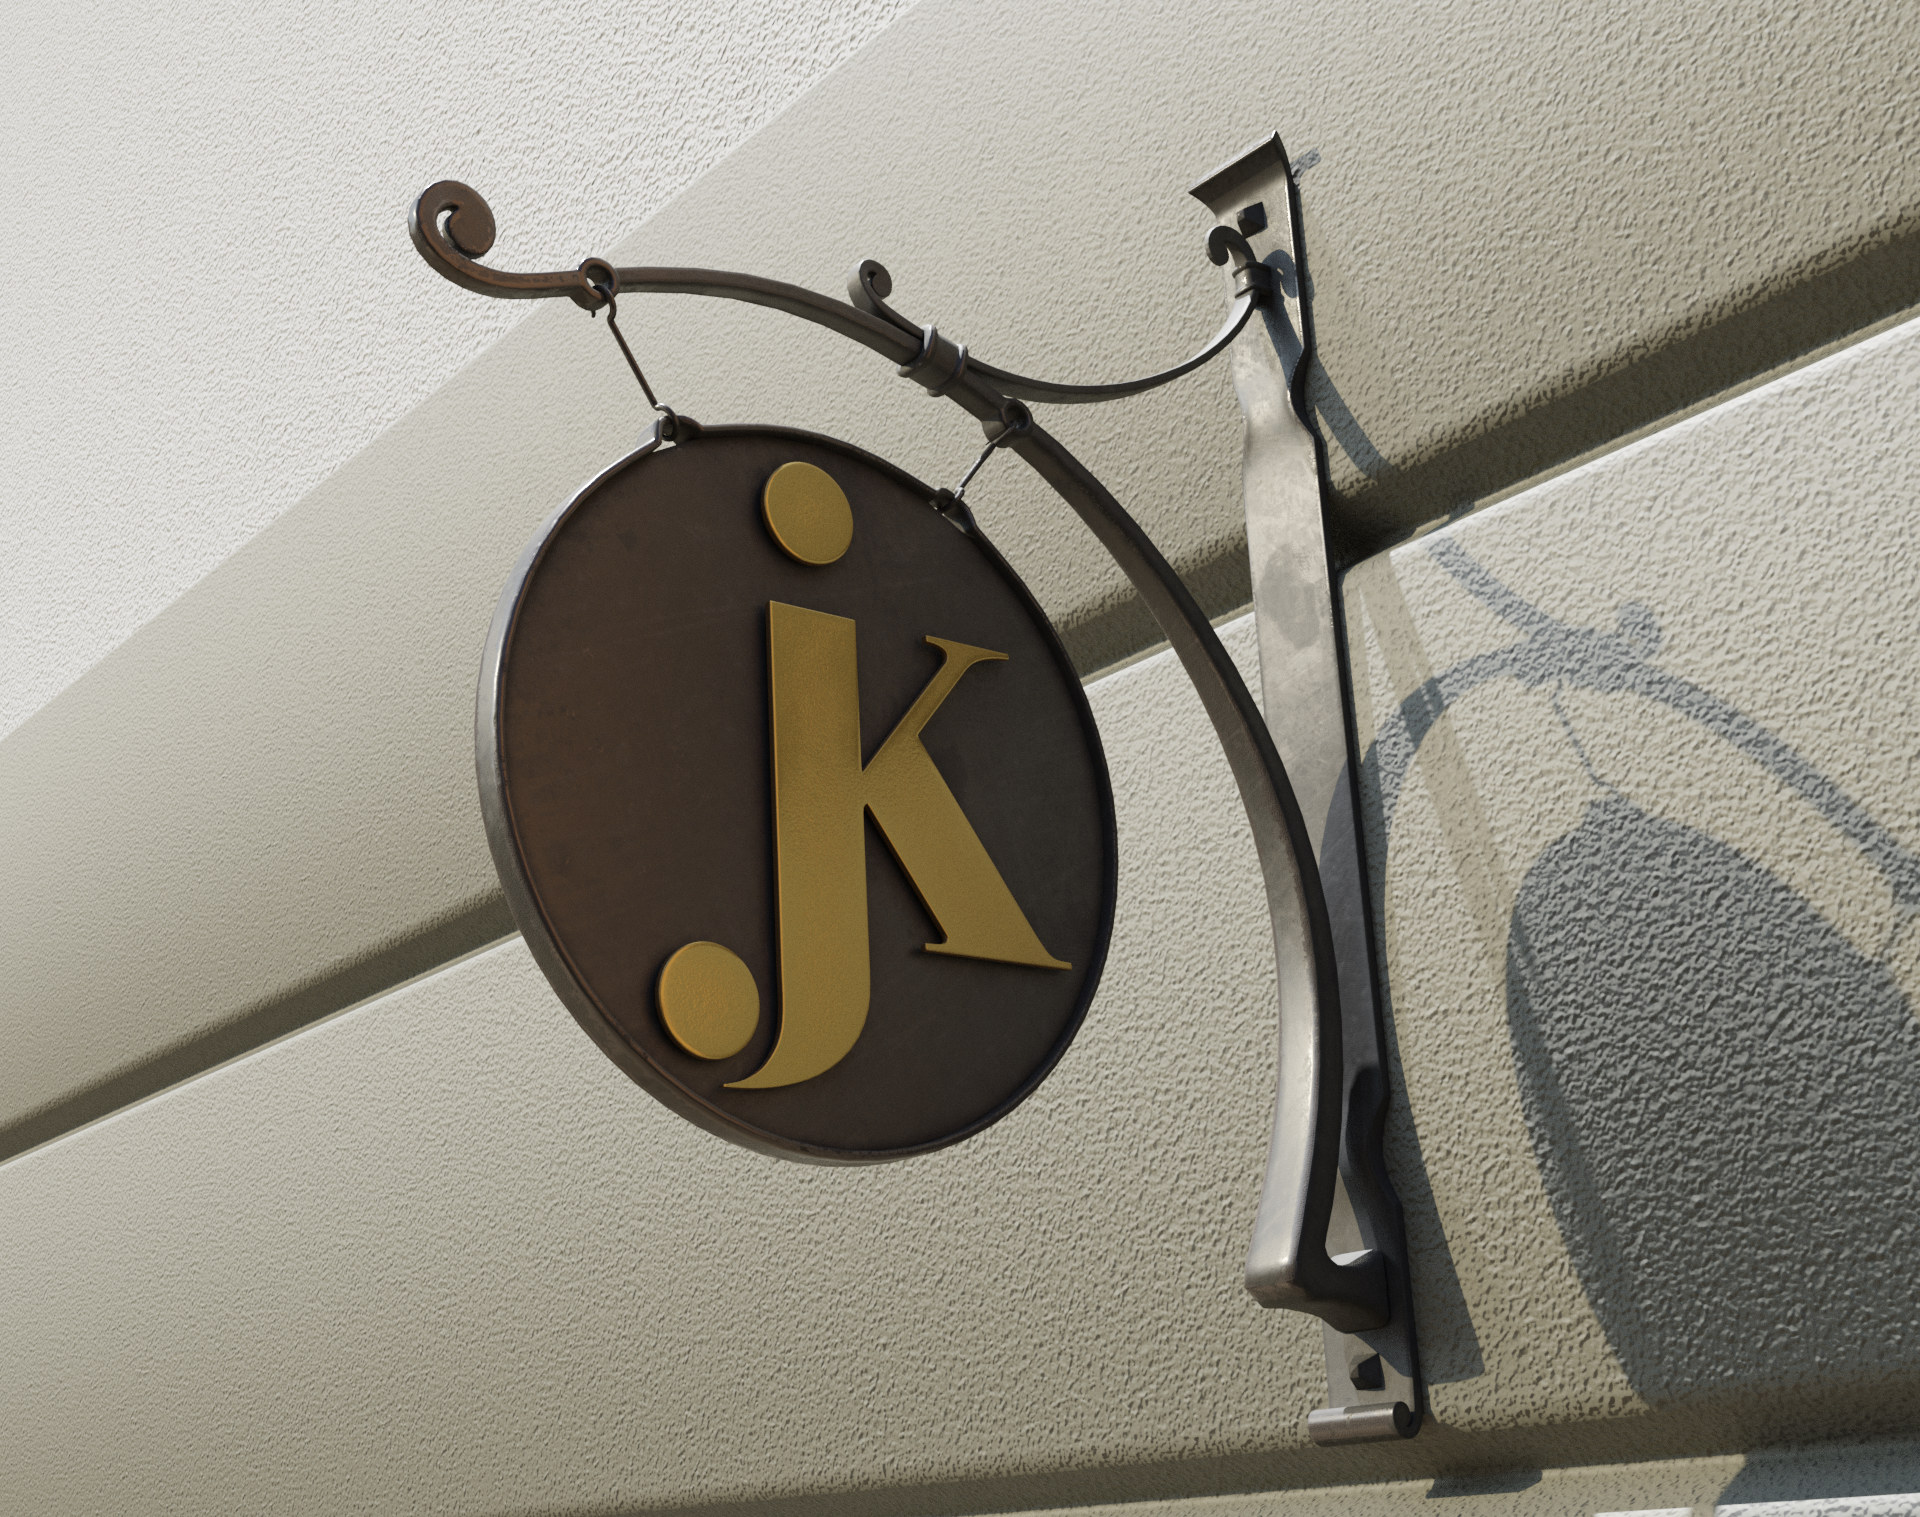
Today I made this this for my dad, whos a blacksmith, to propose this design to a client. Yeah the wall is ugly but there was not really a point in sinking more effort into it…
February 4, 2020 at 9:01 am #51851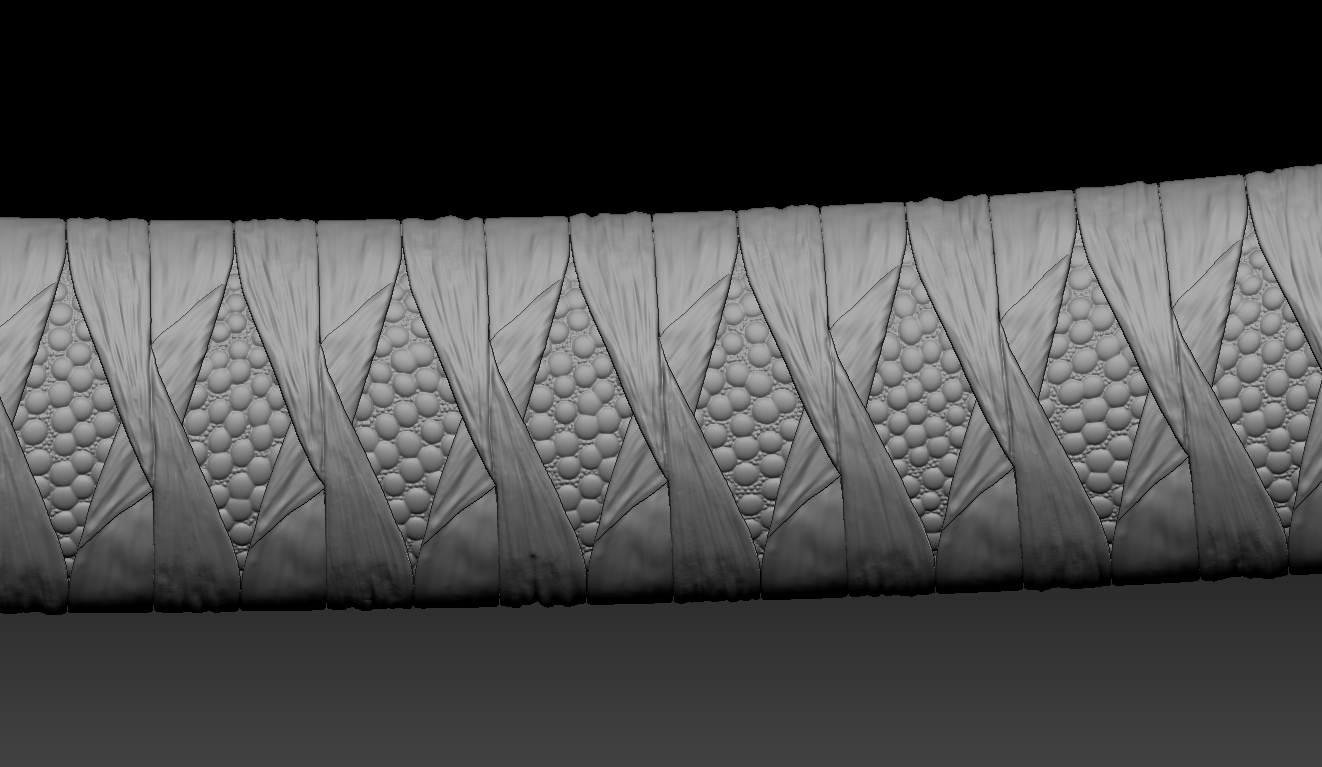
Progress on detailing of the handle
February 5, 2020 at 7:02 am #51852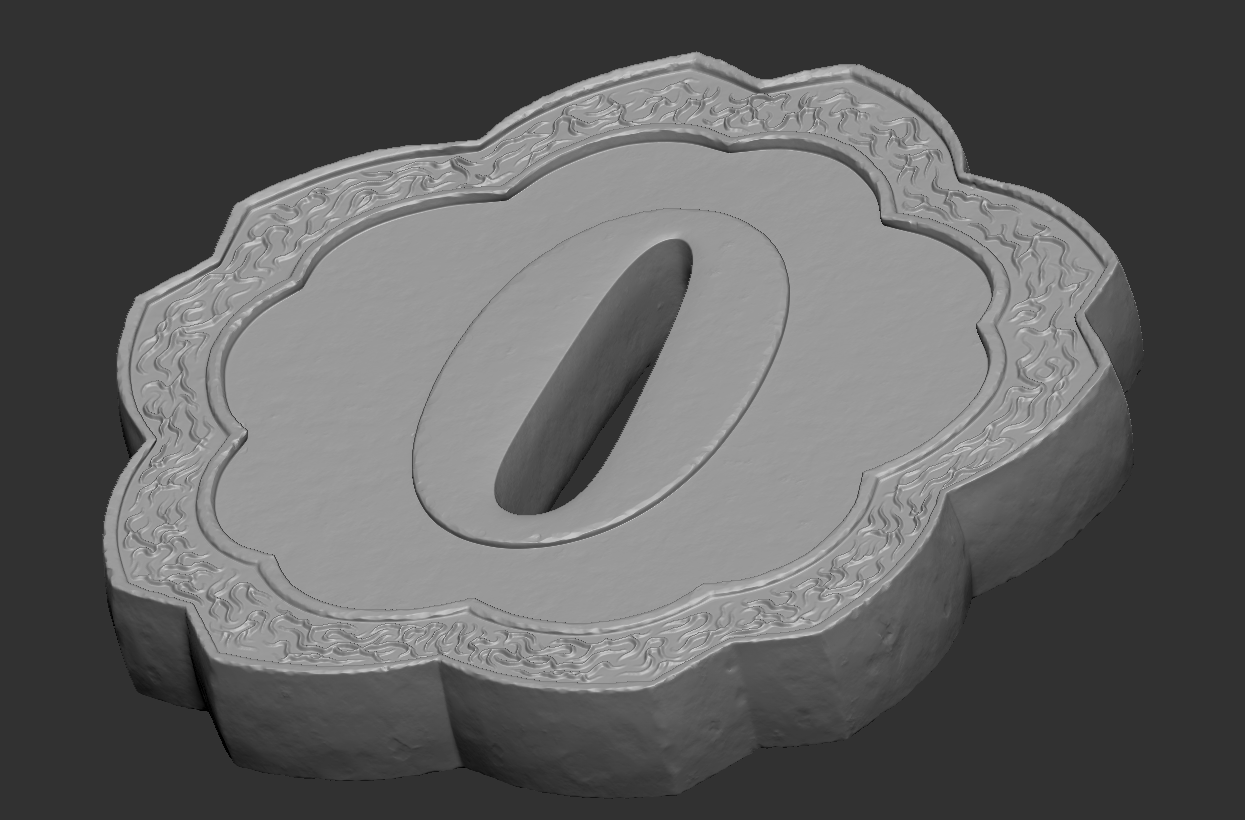
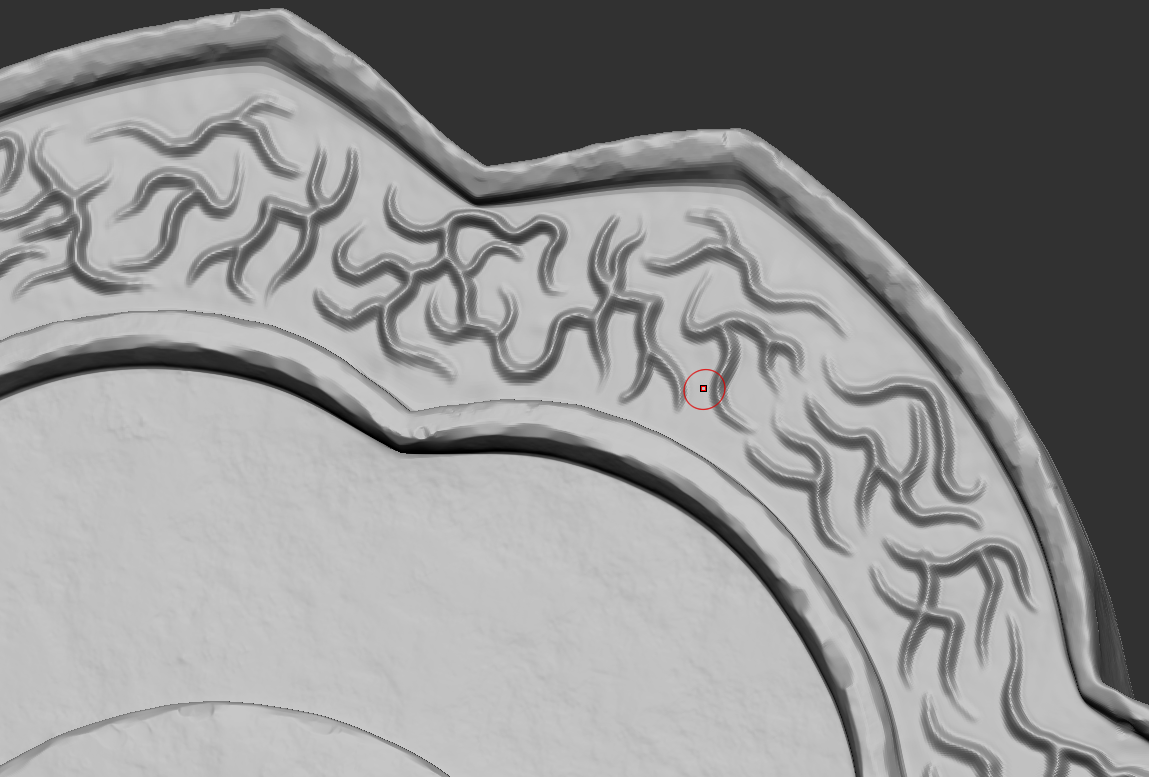
Finished detailing the guard. Doing these ornaments was a great practice for hand steadiness on the tablet 😀
February 6, 2020 at 1:55 pm #51853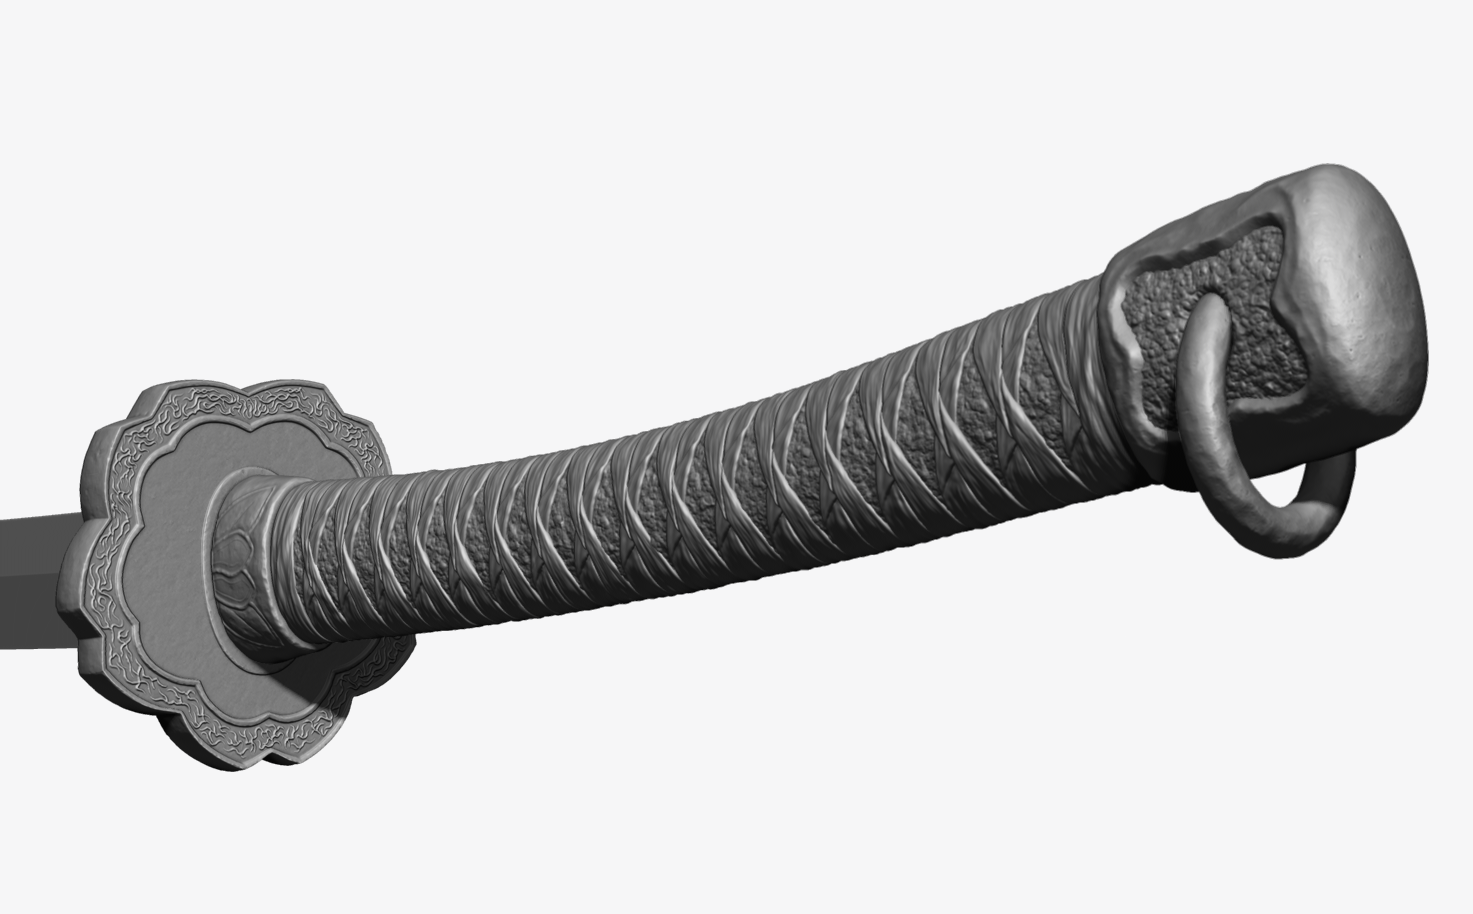 I think Im finished with sculpting the handle. Im not completely certain about the ornamentation around the guard, but Ill leave it for now and when Im done with the rest of sculpting, bake it and put some textures on it, Ill see if it looks ok…The sheath hopefully wont be so complicated 😀 February 9, 2020 at 5:21 pm #51854
Really looking nice @tomasplasil
How did you get the ‘battered metal’ look and the end of the handle. Really great detail in my opinion. Did you make us of a brush texture ?
That’s one of many areas that I am currently lacking, for now….(optimistic laugh).
February 9, 2020 at 6:07 pm #51855Hey Shawn,
Thank you 🙂
I used Zbrush, so im not sure what the best workflow would be in Blender…I guess the workflow would be same just different settings.
I didnt use a texture exactly, just a trim dynamic brush with a round alpha with a sharp falloff and some depth. So in Blender you would set up a brush that makes an indentation kind of like lightly pressing a ball into clay, with a sharp edge around the indentation 😀
I went over the whole surface to create a randomly beaten look, then I went over the edges to break up the straight lines and kind of cave them in on some places, and then used a very sharp square alpha to create some sharper damage like rusted spots. And the last step was using few layers of noise displacement of varying scale and different curve adjustments (something like color ramp node in blender).
I got a lot of tips for this from this video: https://www.youtube.com/watch?v=MSkwih9Vq8U&t=393s
It is about zbrush but im sure the same techniques can be done in blender too. My head is kinda rewired for Zbrush now so I cant think from the top of my head how I would do it.
The main thing really is to first create larger forms and then go into progressively smaller details, which is what you will hear in like every sculpting tutorial ever 😀
February 10, 2020 at 2:44 pm #51856Great! Thanks I will add that to my watch list for later. You know it looks good when people like me ask how to replicate a part of your workflow.
August 30, 2021 at 6:35 am #51857I would also like to see the results of your studying the course. I am also interested in taking this course or something similar, because I want to practice more. We study theory more in college. For example, we studied how human structure was viewed by Leonardo da Vinci and Michelangelo. At that time I used https://gradesfixer.com/free-essay-examples/a-comparison-of-the-works-of-leonardo-da-vinci-and-michelangelo/ to prepare and write my own essay on the subject . This resource helped me a lot, because I myself would definitely not cope. I recommend all students to use this service, so you will have more time to practice and get more interesting things.
August 30, 2021 at 7:51 am #51858Hey,
This is a pretty old post 😀
Unfortunately I don’t have much to show in terms of results, only the stuff you see here. I did finish the course and learned a lot, but as it usually goes with me, after a the initial burst of motivation, my interest in sculpting kinda died off. Some time later I stared working as a freelancer doing real estate photography and videos, which I fortunately still enjoy almost two years later, so now I dont 3D model almost at all, except for an occasional Archviz job.However, I do recommend the course. Its called Artistic Anatomy with Eric Wilson. Its a 10 week course with a small group of students and he gives them feedback each week. I only watched a recording of it, it cost me 200usd. I dont know if he still does these courses but the real time version of it would be obviously much more expesive 😀 But you can still get the recording.
He doesnt go too much over the basic proportions, so its not for a complete beginner, but I didnt know much when I started and I could keep up. He goes over a section of the body in each lesson, shows and names all the important muscles and bones, where they are attached, and also gives a lot of relevant information that I didnt see much in other places. How the muscles and bones interact with each other in different poses, how they look when they are relaxed or flexed, how they look “exposed” vs what you actually see when theres fat and skin on top of them…
Dont expect too many sculpting tips though, he gives a few but its not like “you take this brush and you move it like this”. He just explains how the body looks and works and the sculpting you gotta figure for yourself.
I also got a buch of resources with the course, like 3d scans of people to study and sculpt on.
At least thats how I remember the course, it was two years ago so im not completely sure.
Considering I didnt sculpt or know anatomy almost at all before this course, the progress I made with it was pretty amazing for me. Definitely beware of some cheap courses on Udemy or similar places. You can learn a lot of things there that are just completely wrong. Im not saying they all suck but always do a background check on the instructor, dont just go with what they write under the course. Eric Wilson has done anatomy workshops at Pixar for example, and his sculptures speak for themselves, so you can have confidence in what he says. But do your own research about him if you decide to get this course. I know 200 bucks can seem like a lot, especially if you see courses for 10 dollars in other places, but in my opinion the information you get from it is worth it. He definitely knows his stuff and also knows how to teach it.
-
AuthorPosts


- The topic ‘Polybook – Tomas Plasil’ is closed to new replies.