[ENDED] BC3-1806 – June 2018 Class Homepage – Vehicle Modeling with Blender

Forum Archive [ENDED] BC3-1806 – June 2018 Class Homepage – Vehicle Modeling with Blender

Viewing 15 posts - 766 through 780 (of 1,277 total)
  • Author
    Posts
  • #35821
    Palo Piktor
    Participant

      @thecabbagedetective It looks like a couple of noises with different sizes, bit of distortion and a color ramp would do it.

      #35822
      Thibaut Bourbon
      Participant

        @thecabbagedetective  it kind of have similar pattern to marble, I’d use the musgrave texture (severall, different scale for each and mix or multiply then) to get this. Then add an extra layer of glossy shader at the end because it really seems to have a lot of coating layers. 

        Take a look at the shaderforge part on the marble, that I’m sure will help!

        #35823
        Palo Piktor
        Participant

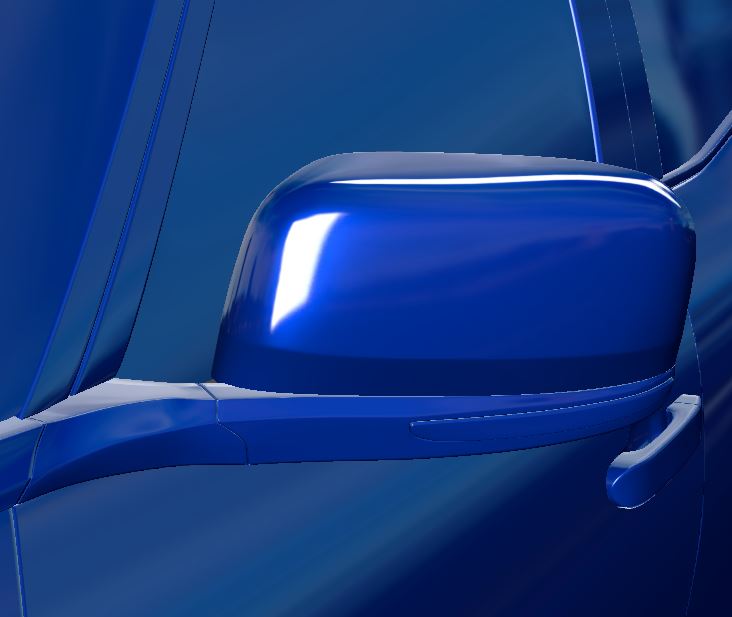
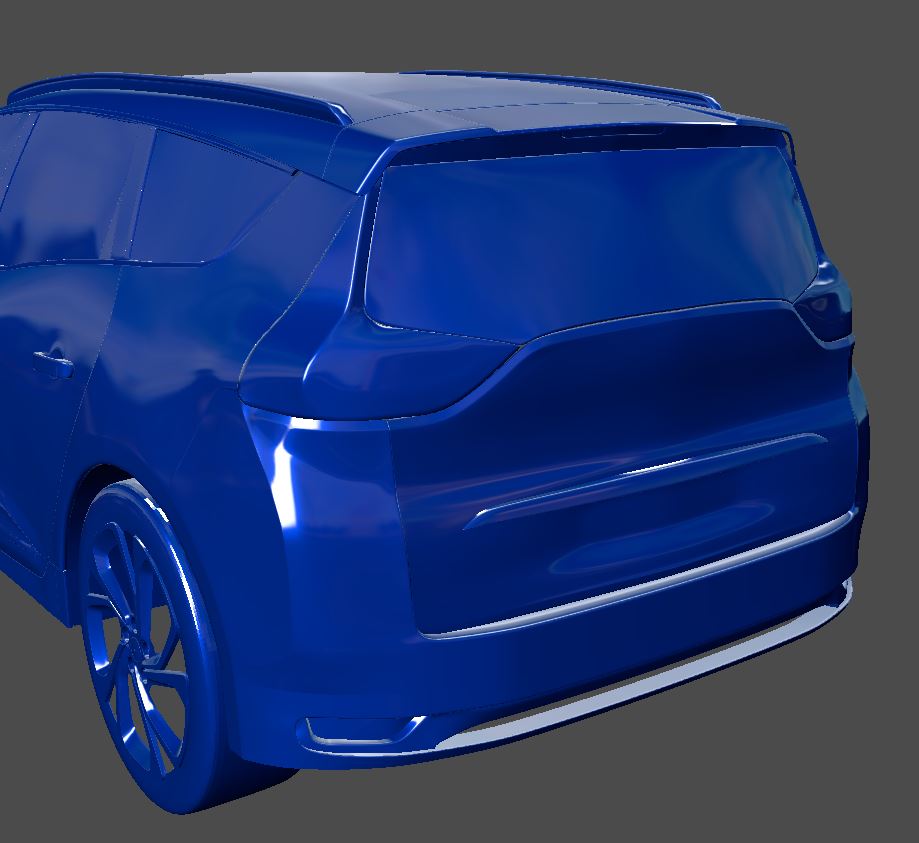
          Added some additional details to my car during Monday like inside of fenders, headlights, changed fog light from squareish to cylindrical and added detail around it, added roof details, and reworked the back part, started over on the mirror and its connection to the car wich is not finished yet.

          Next update will need to wait till the class is over as i start to work on the interior.

          #35824
          Jake Korosi
          Participant

            I had to take a break Monday; but Tuesday night and it’s back to work.

            #35825
            Michallis Pashidis
            Participant

              @jakeblended 

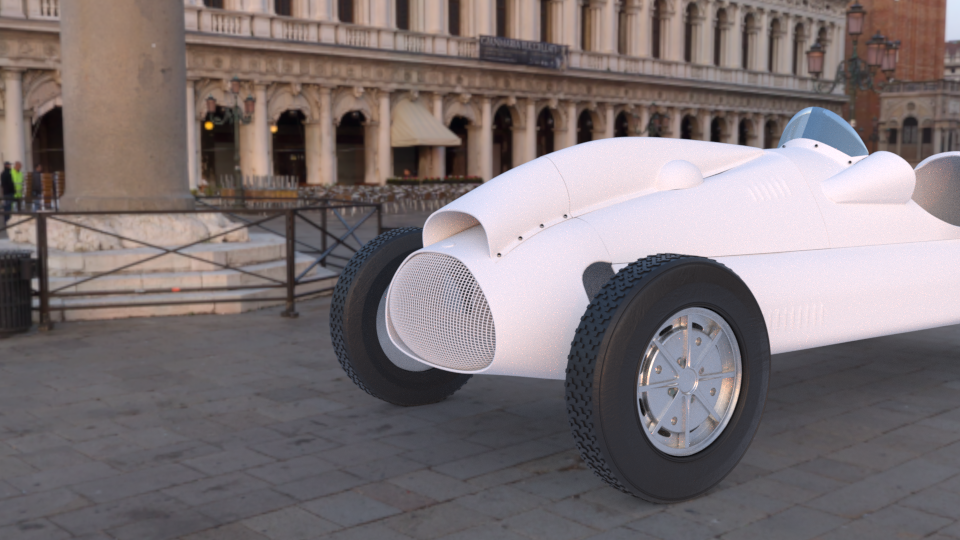
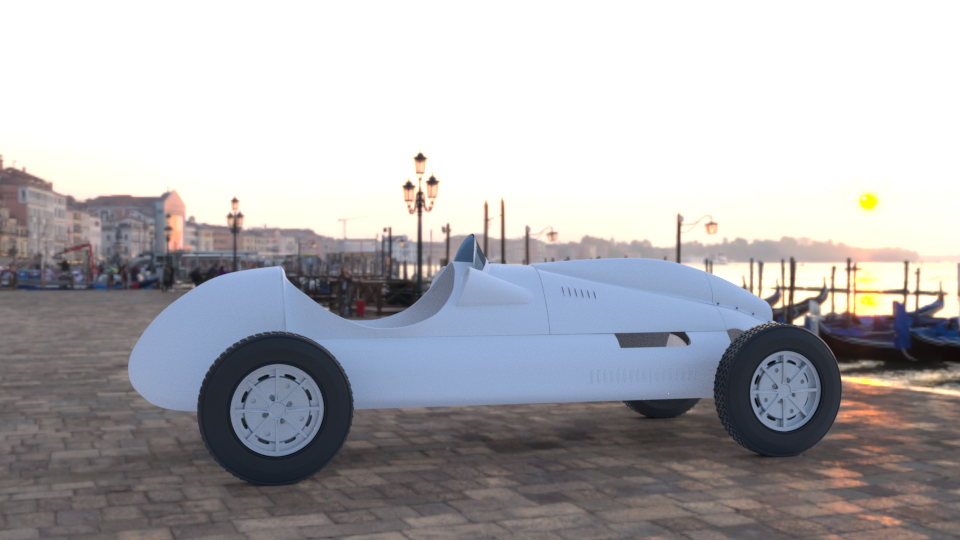
              Thank you again Jake, really appreciated! I could finally park my car at San Marco in Venice 🙂

              #35826
              Jeremy Pouillot
              Participant

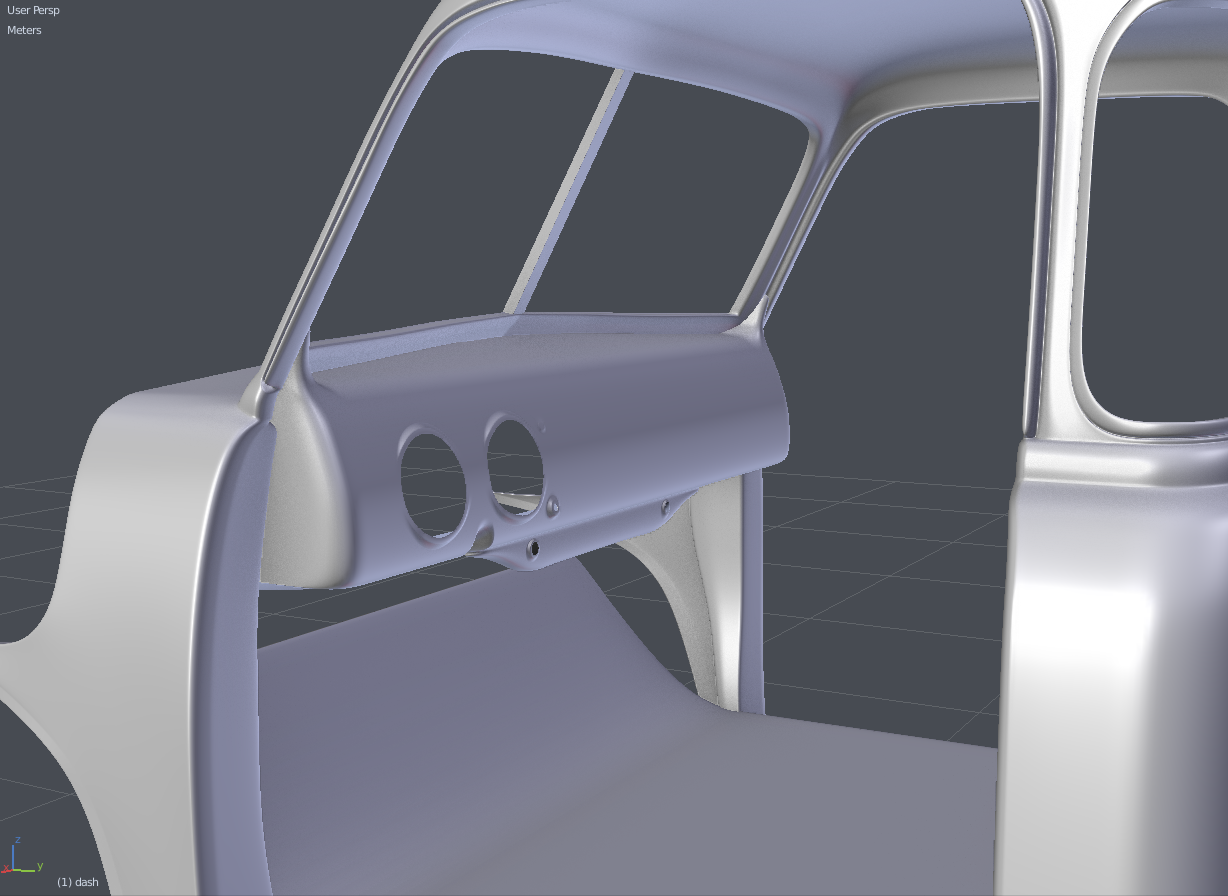
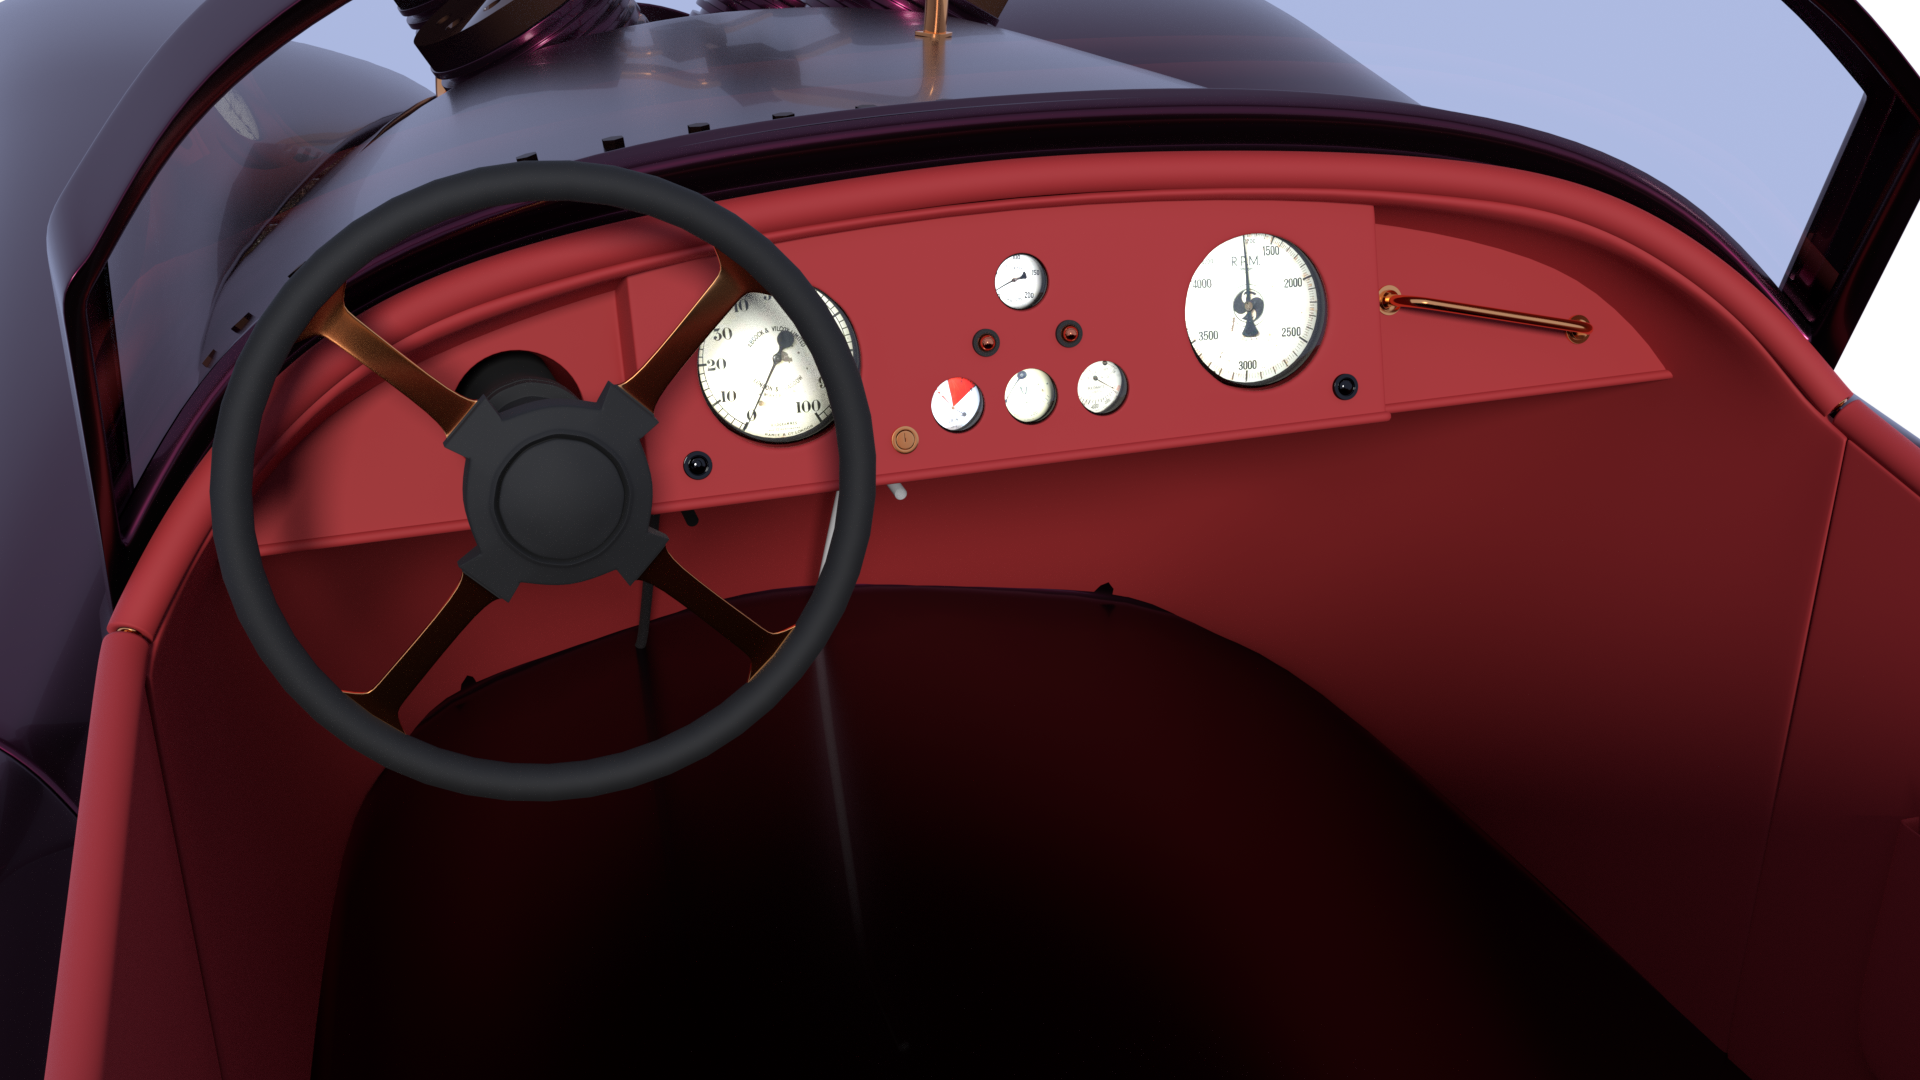
                dashboard

                #35827
                Bauke Post
                Participant

                  @jakeblended Maybe it is just me or the angle, but the dashboard seems a little short to me. Could you post some other images perhaps?

                  #35828
                  Bauke Post
                  Participant

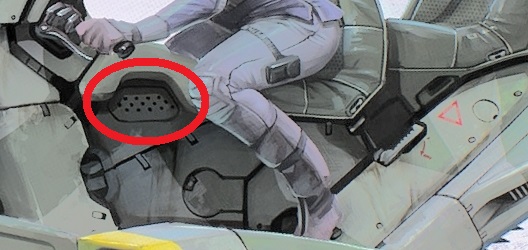
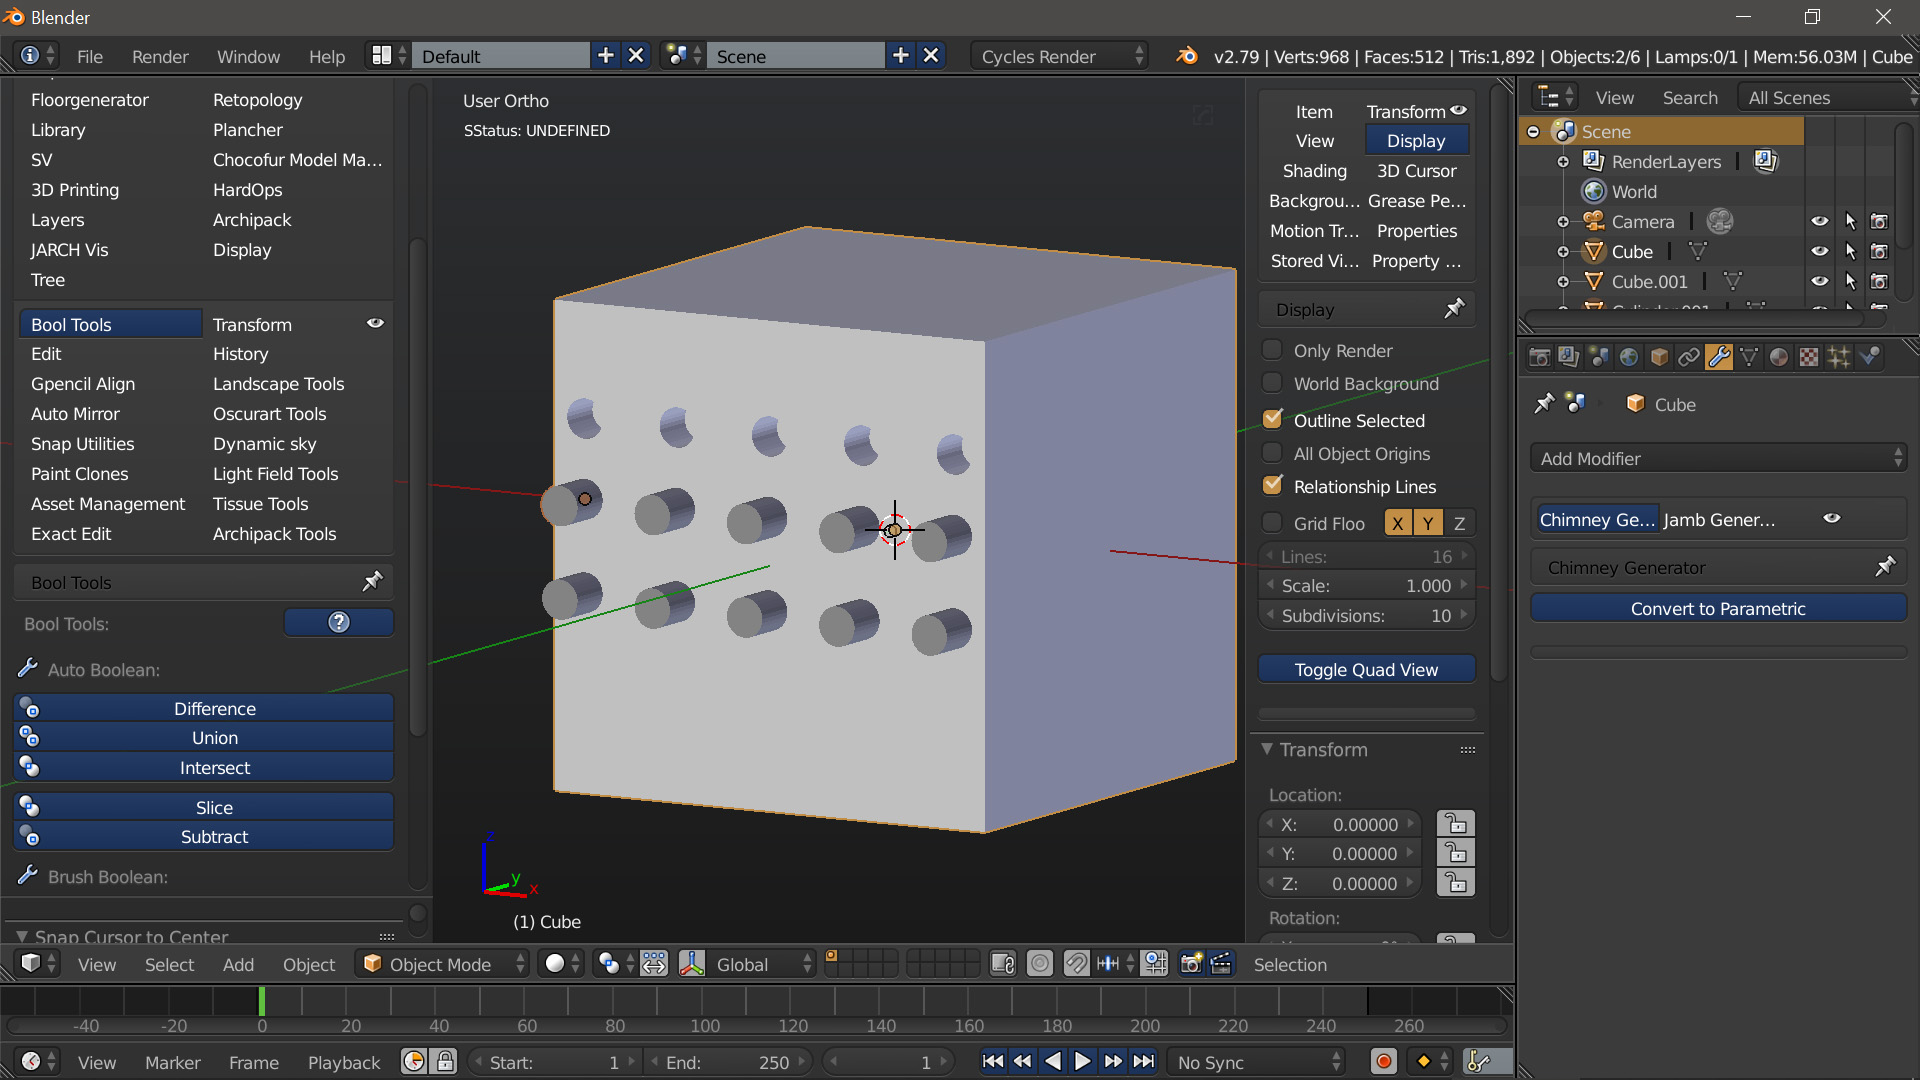
                    Hey guys, I’m not completely sure what to do: I have to make those holes on this object you can see on the picture, but I’m not sure what approach to take. Any ideas?

                    #35829
                    Kaj Suominen
                    Participant

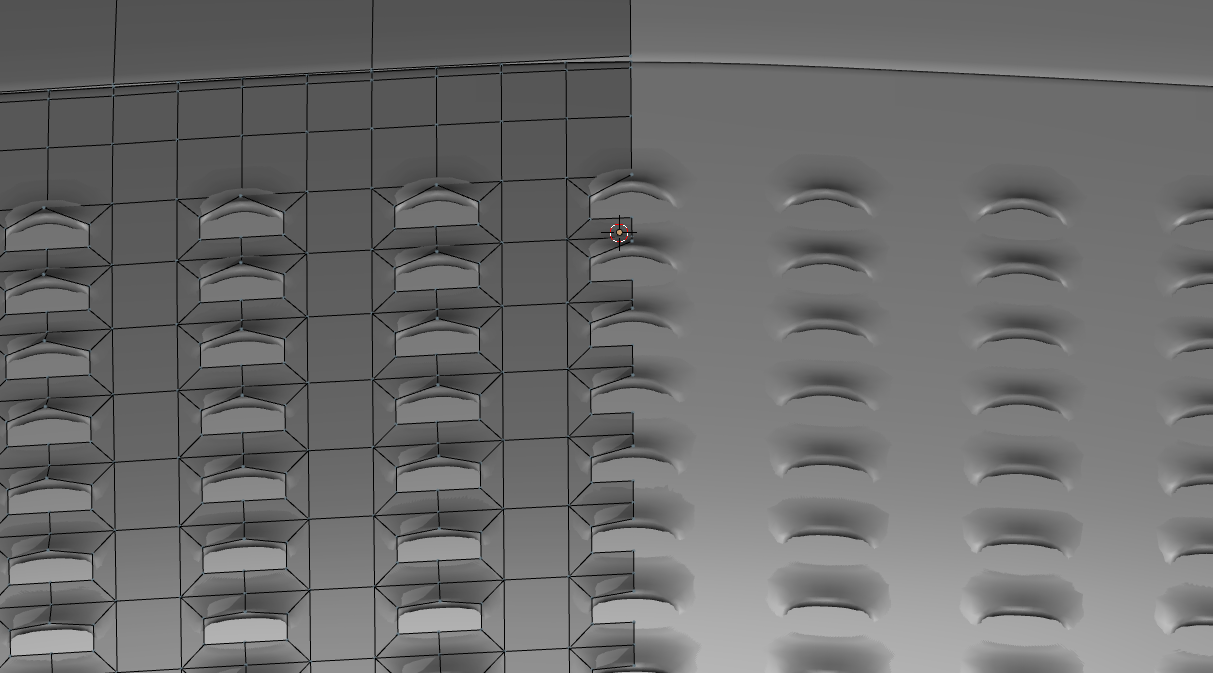
                      @baukepost first cut the main panel shape out. duplicate it, then go in to the edit mode of the duplicate, use shrinkwrap and target the original. then subdivide the copy, enough times that you have enough geometry. similarly how i punched the holes in my roof and and boot. (yours cirles and you can propably do with just 6 sided circles with sub-d

                      #35830
                      Kent Trammell
                      Participant

                        @thecabbagedetective Haha the shower story 😅 I agree with the limo extension. I forgot it was a limo till this. Great job on the champagne bottle’s torn wrapper 👌

                        #35831
                        Kent Trammell
                        Participant

                          @thepainter Mmm I like those fine details. Could you post a non matcap screengrab? I’m curious what the grey default shader + viewport AO looks like.

                          #35832
                          Kent Trammell
                          Participant

                            @dieedi Ah yeah, progressing nicely 👍

                            #35833
                            Bauke Post
                            Participant

                              @louhikarme That’s a good one, I’ll try!

                              #35834
                              Char Hunter
                              Participant

                                @baukepost You can try bool tools addon also.  

                                #35835
                                Aaron Rudderham
                                Participant

                                  @baukepost Whilst I’m not a very experienced modeler I’ll certainly give this a shot.

                                  First get a plane and a cylinder with 6 sides. Use a Boolean – Difference on the plane to cut a hole in the middle with the cylinder.
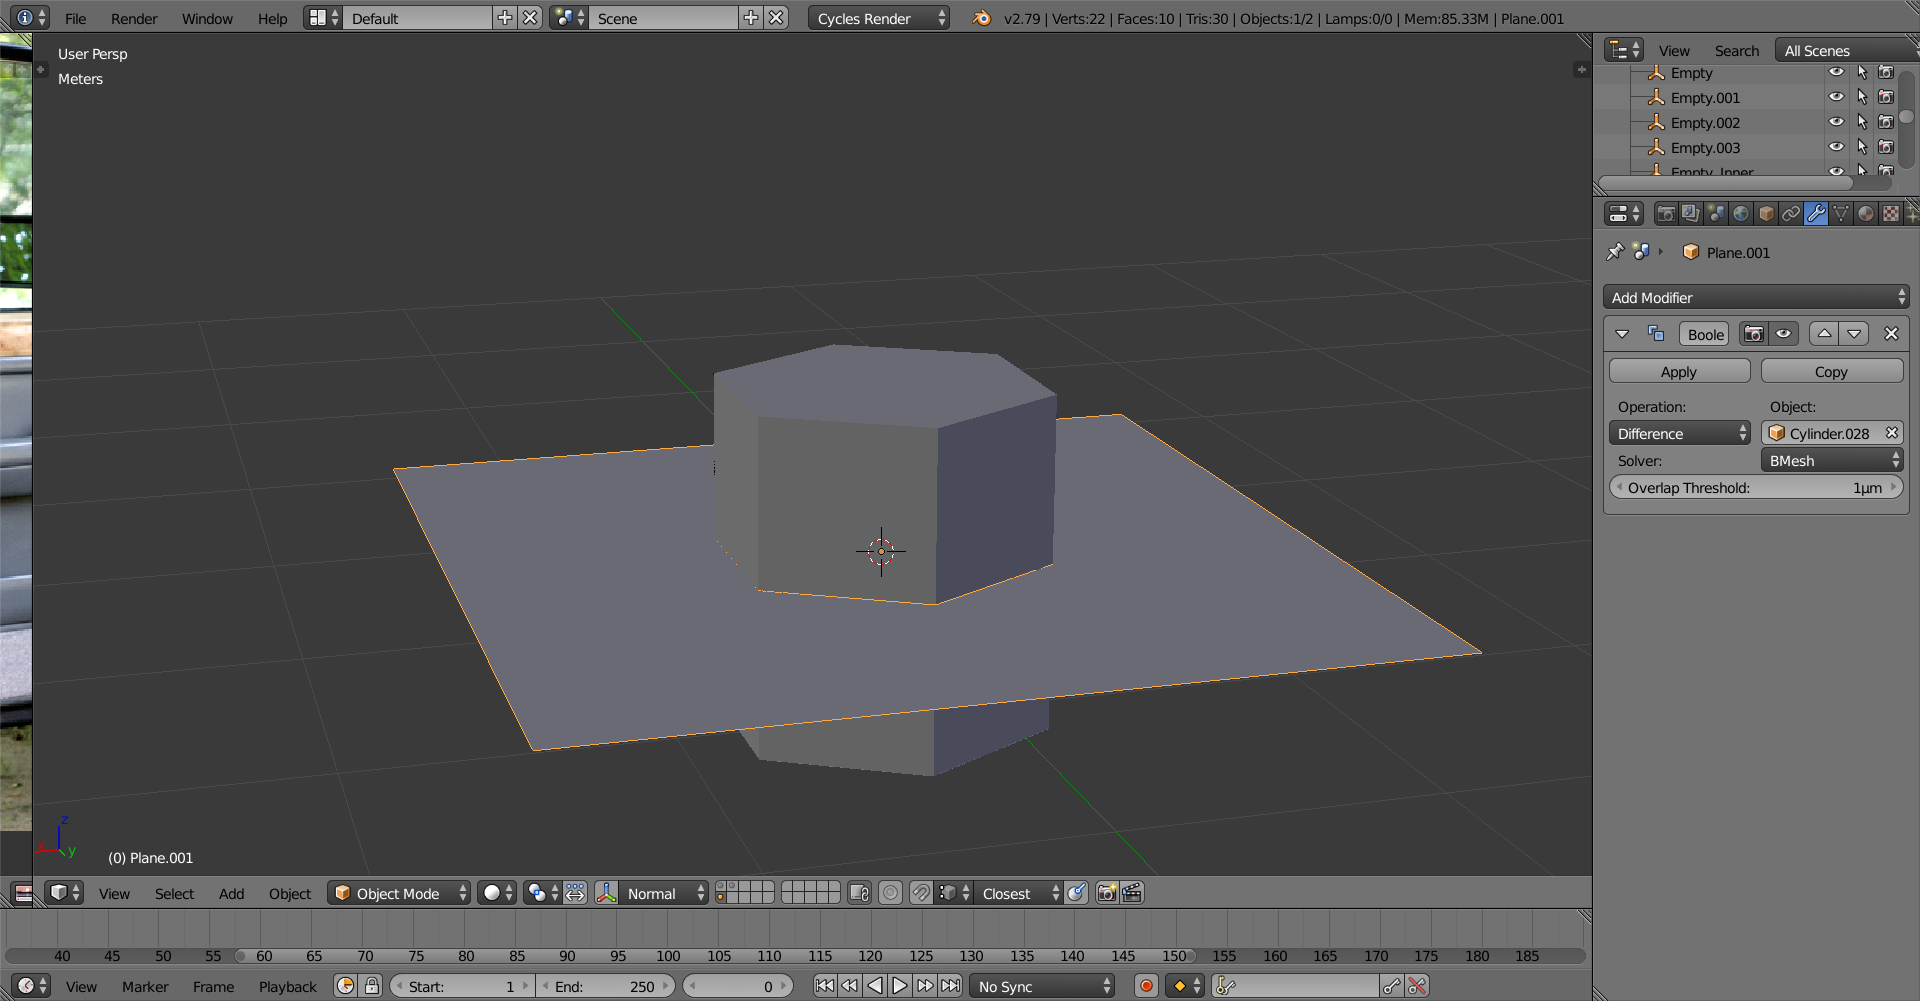
                                  Once you do that, simply connect the verticies up.
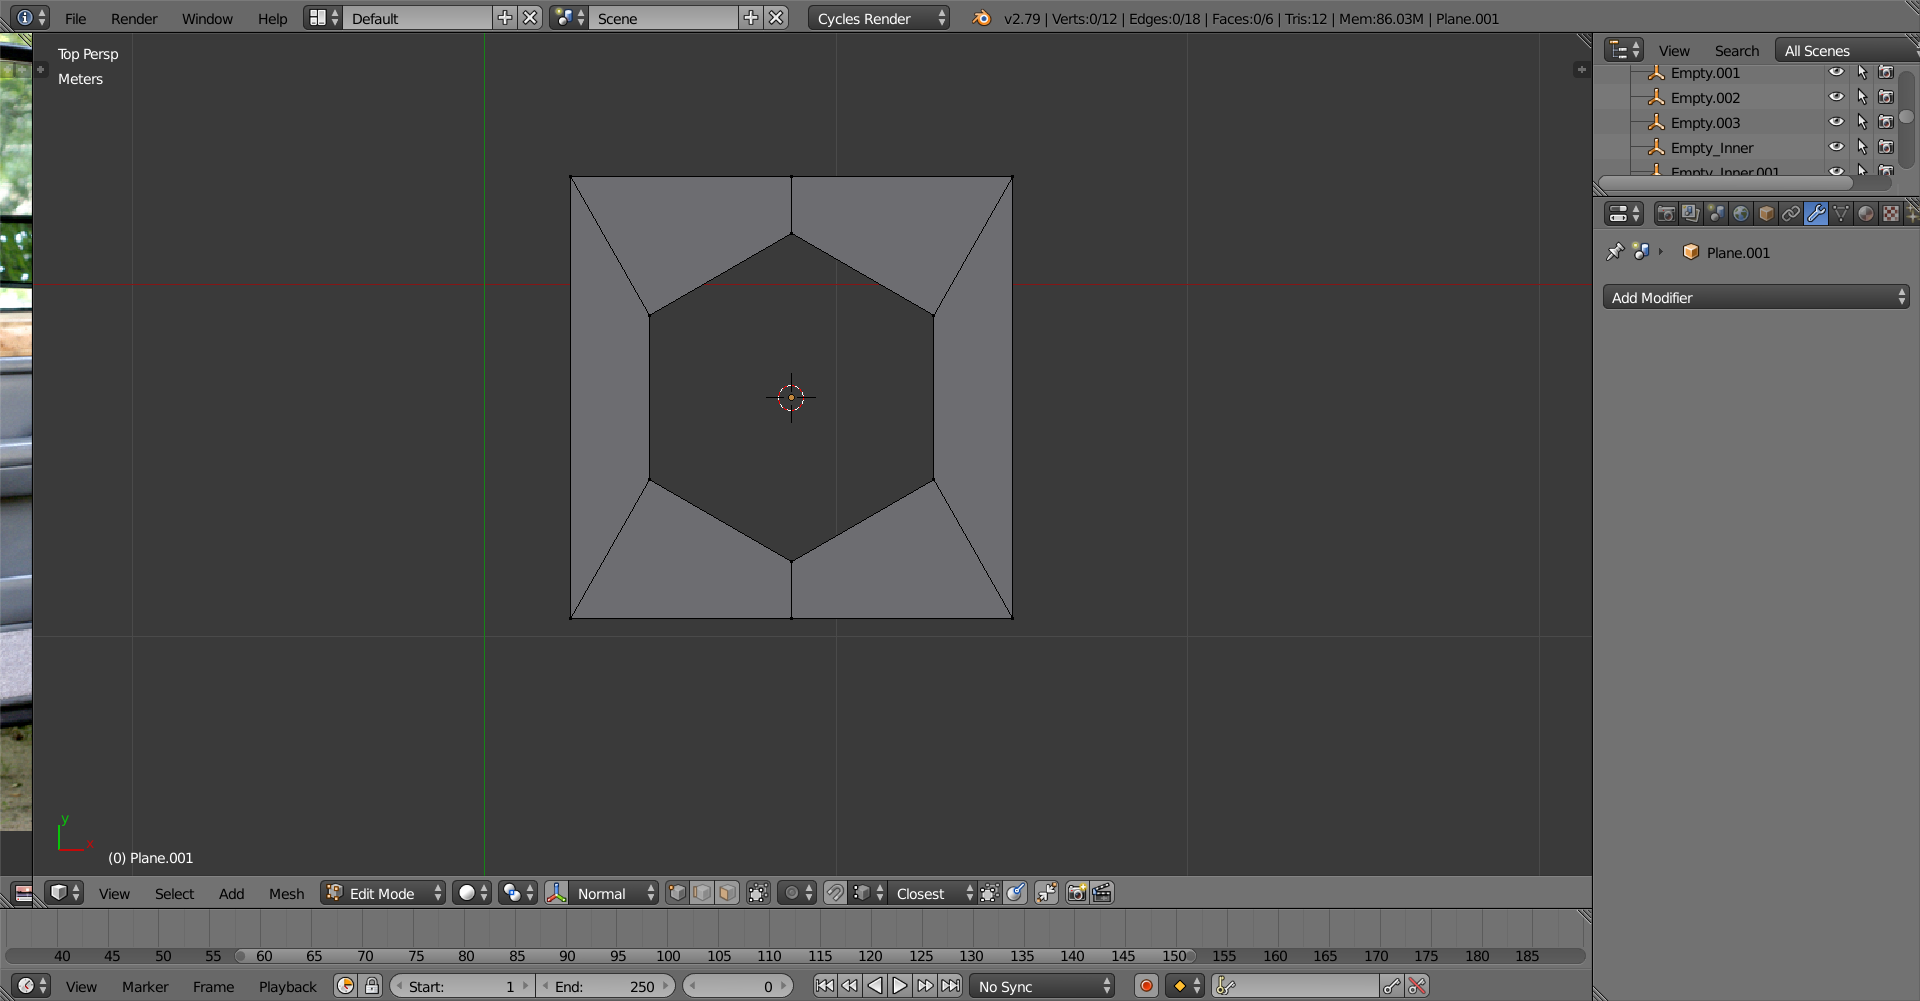
                                  After that, using the knife tool, cut squares into each corner of the plane.

                                  Next, delete (not dissolve) the edge within the face, fill the four verticies and then move them as close together with Gx2. Do this for each corner.
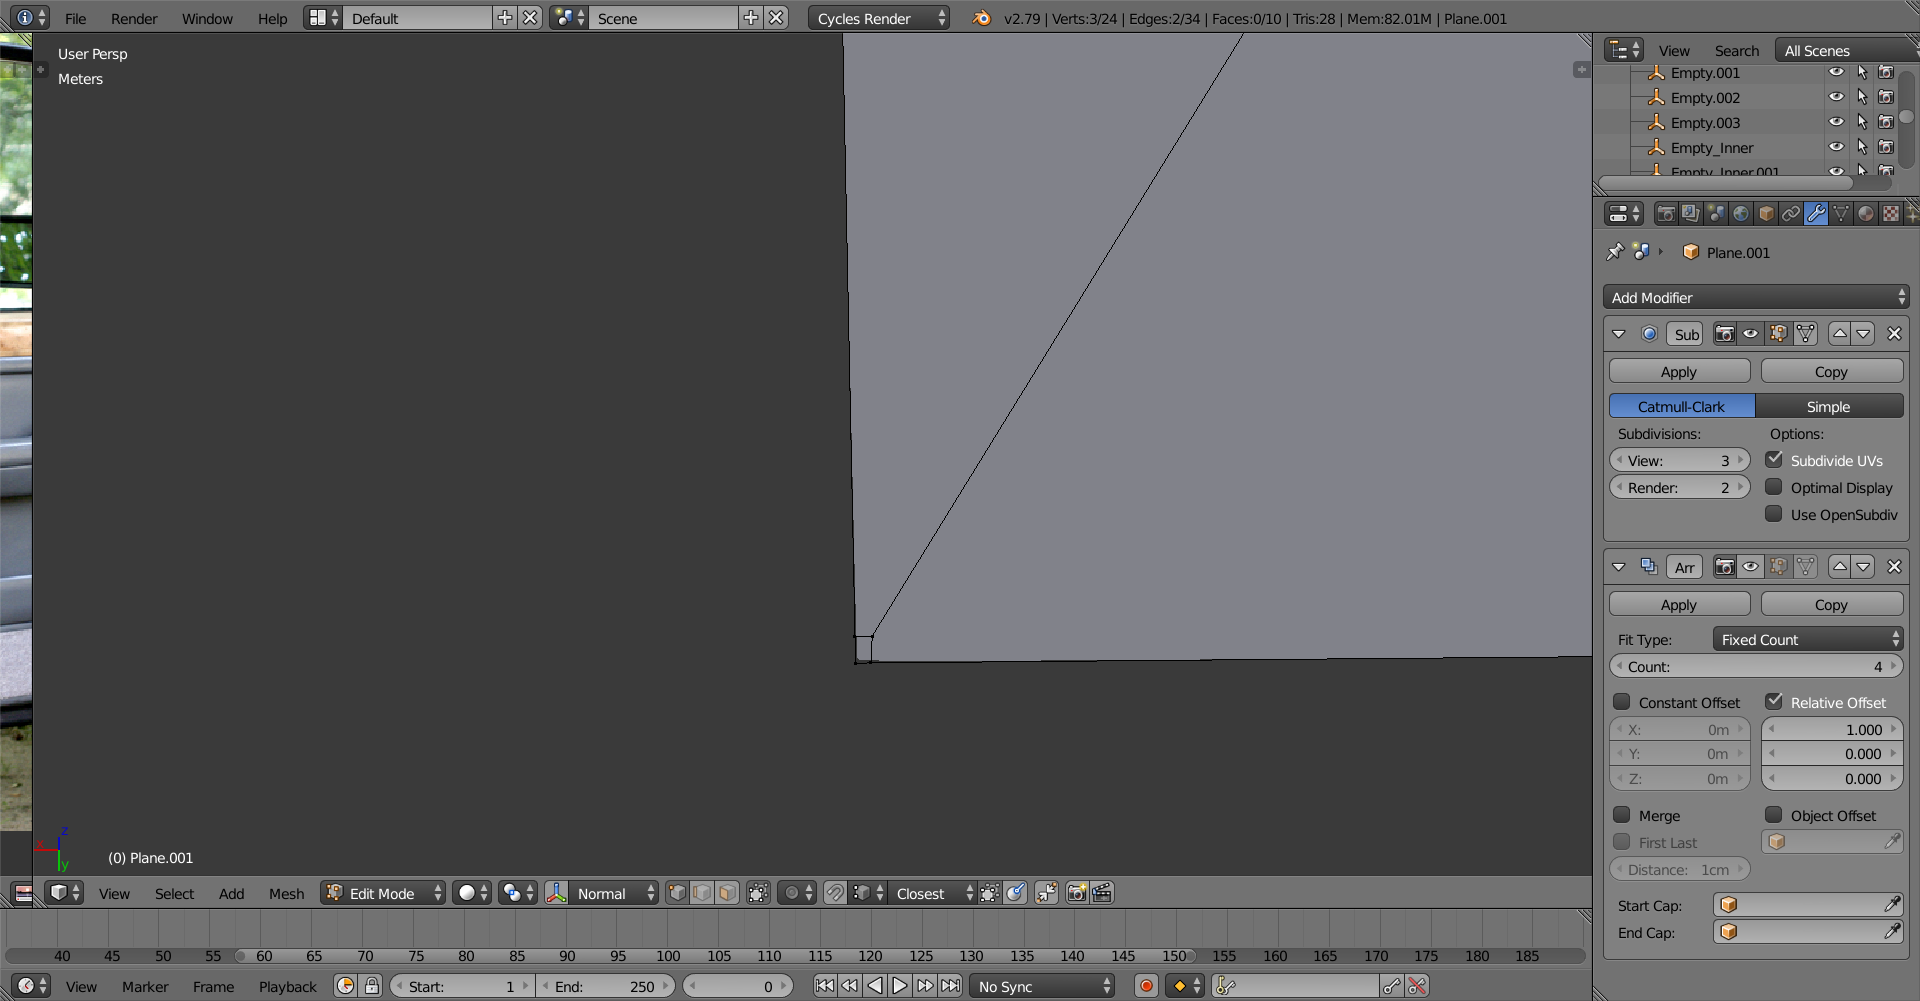
                                  After that feel free to use an modifiers like subsurf, solidify, array or mirror, though I find with an array you need to be very consistent with how tight the corner faces are.
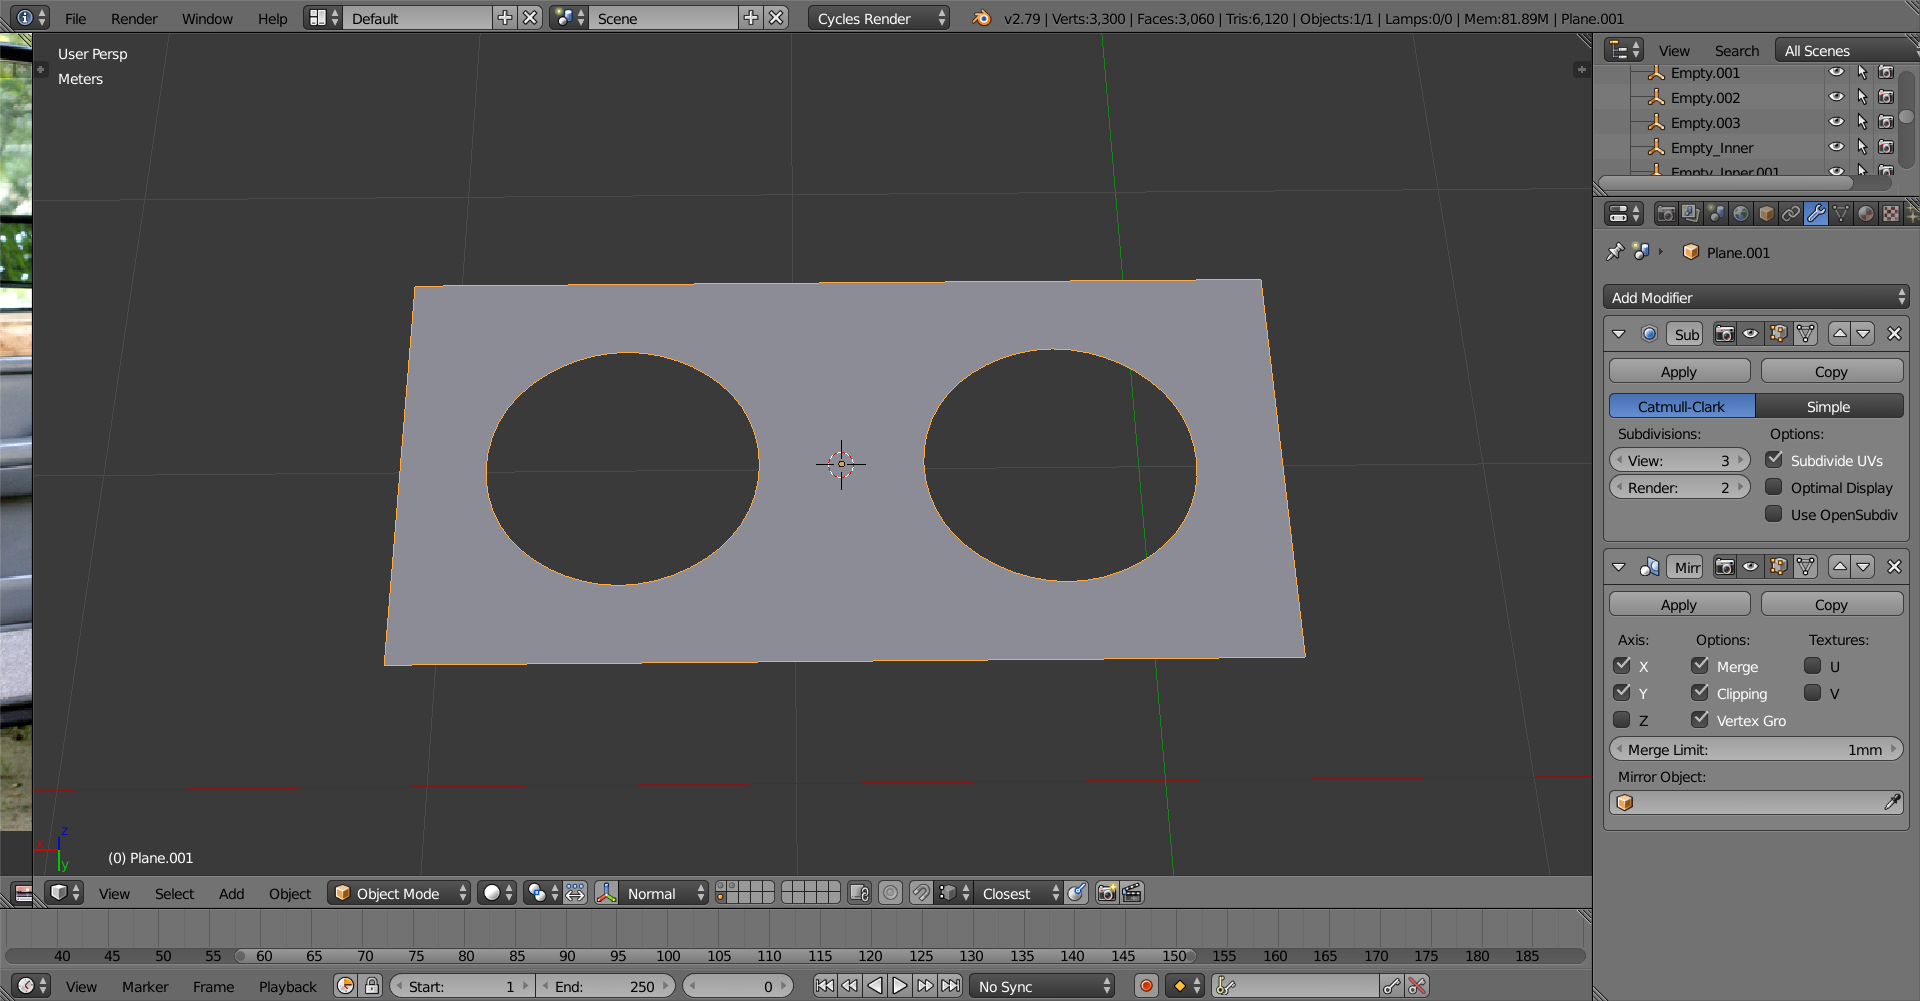
                                  One thing I didn’t show and just realised is you probably should connect each corner as to not have N-Gons.
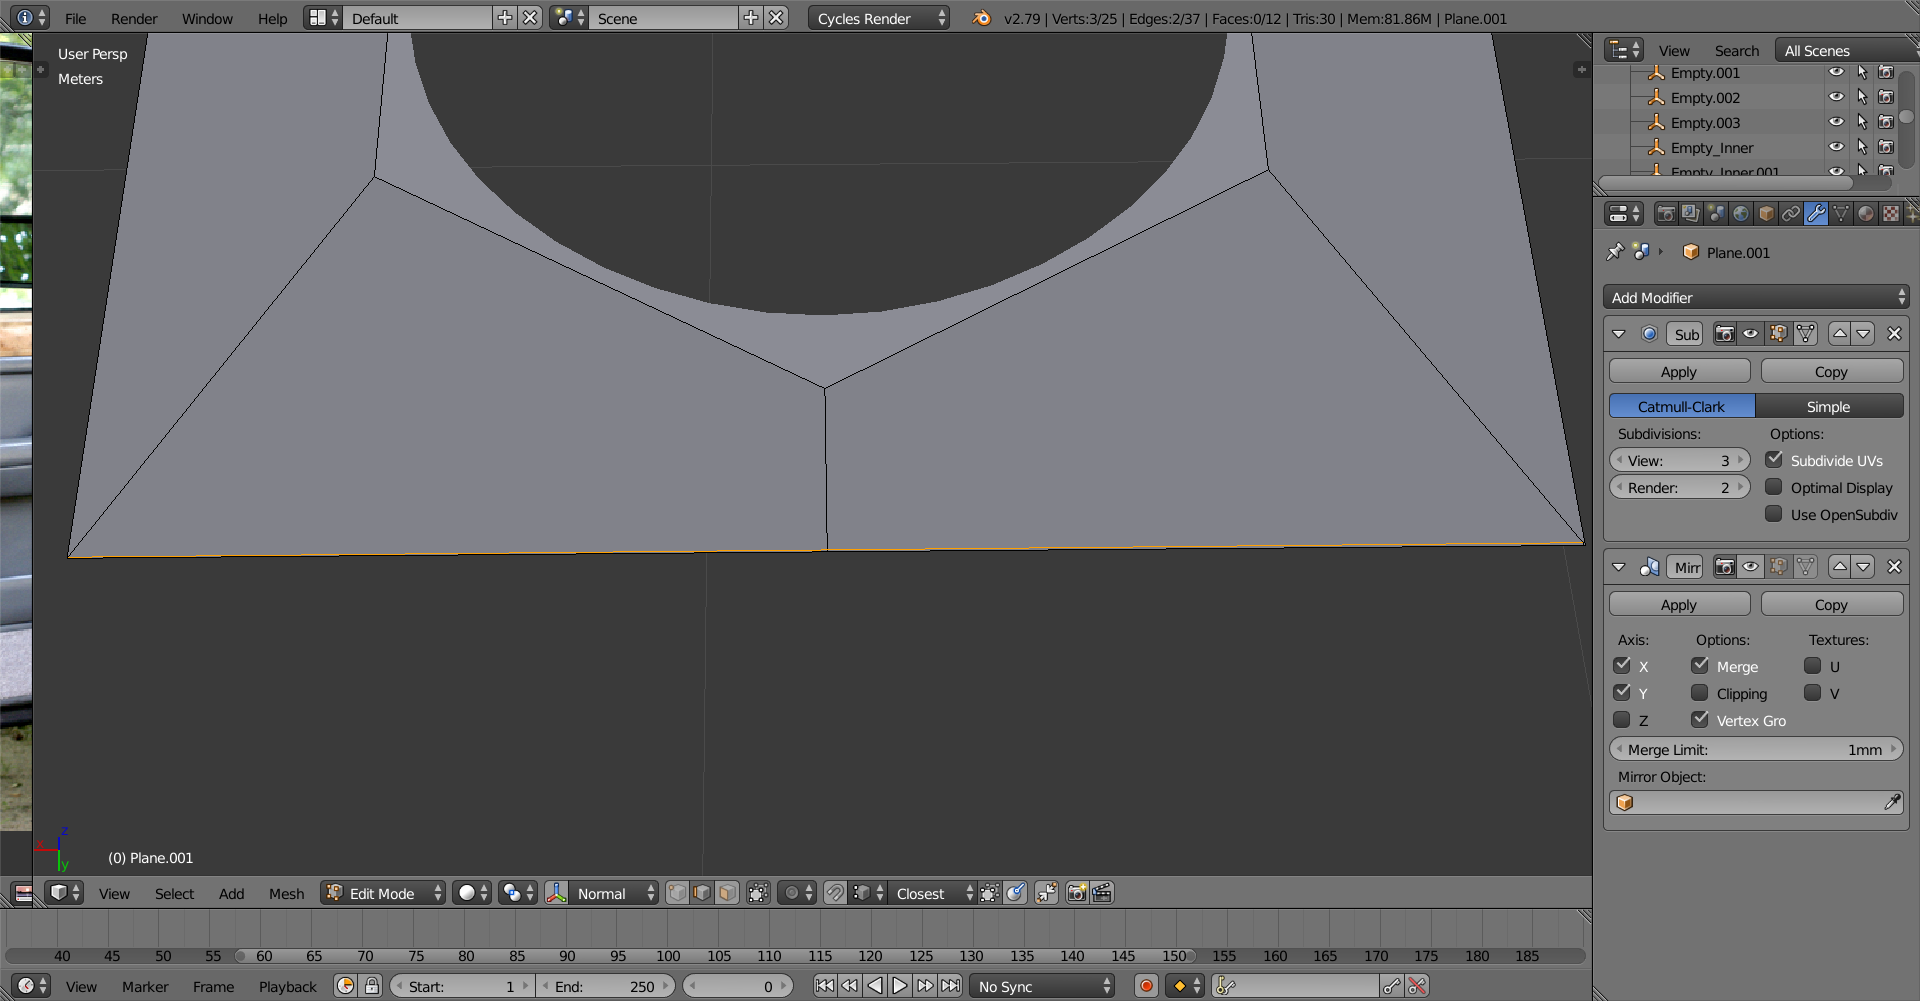
                                  EDIT: Just realised someone else responded with a much better way. Well I’ll keep this up regardless, and good luck with your modeling!

                                Viewing 15 posts - 766 through 780 (of 1,277 total)
                                • The topic ‘[ENDED] BC3-1806 – June 2018 Class Homepage – Vehicle Modeling with Blender’ is closed to new replies.