
COLLAB2021-WIP_procyonlotor
Forum Archive › COLLAB2021-WIP_procyonlotor
- This topic has 39 replies, 10 voices, and was last updated 5 years, 4 months ago by
John Sanderson.
-
AuthorPosts
-
April 17, 2021 at 1:40 pm #68015
@elcangrejo Are you asking how to bake the AO map?? In Properties panel go to Render Properties (the camera icon). You will have to switch the render engine to cycles. Go down to “Bake” and choose Ambient Occlusion for bake type. Once you have created a material for your object, create an image texture node, click new, choose your size (I did 2048 sq) and hit ok. Be sure this node is selected when you hit bake. There are some render settings you can optimize but it probably won’t make a significant difference for such a simple object. Clicking bake will create the AO texture. And you can plug it into the node setup as above. As always the texture is only in RAM so closing blender will permanently delete unless you save it externally.
April 18, 2021 at 3:35 am #68016Ah, thx for the info, I tend to stay in Eevee as much as humanly possible ^^
April 18, 2021 at 12:36 pm #68017Homework Submission Week 2
NO FEEDBACK REQUIRED!! (from @theluthier . Other members are encouraged to give feedback)
File is in synced folder if you want to check out the nodes.
April 20, 2021 at 5:50 am #68018Excellent job to produce this shader @procyonlotor . One note I made was the lack of reflections, so I took a look at the nodes. You have it plugged in to a viewer node. I did a little test and added a mix shader , a glossy shader and a diffuse shader to get some reflections, I’m sure this maybe just an oversight, or your intentions for week 3, you obviously know your nodes.
Here’s what I added but I didn’t save it though.
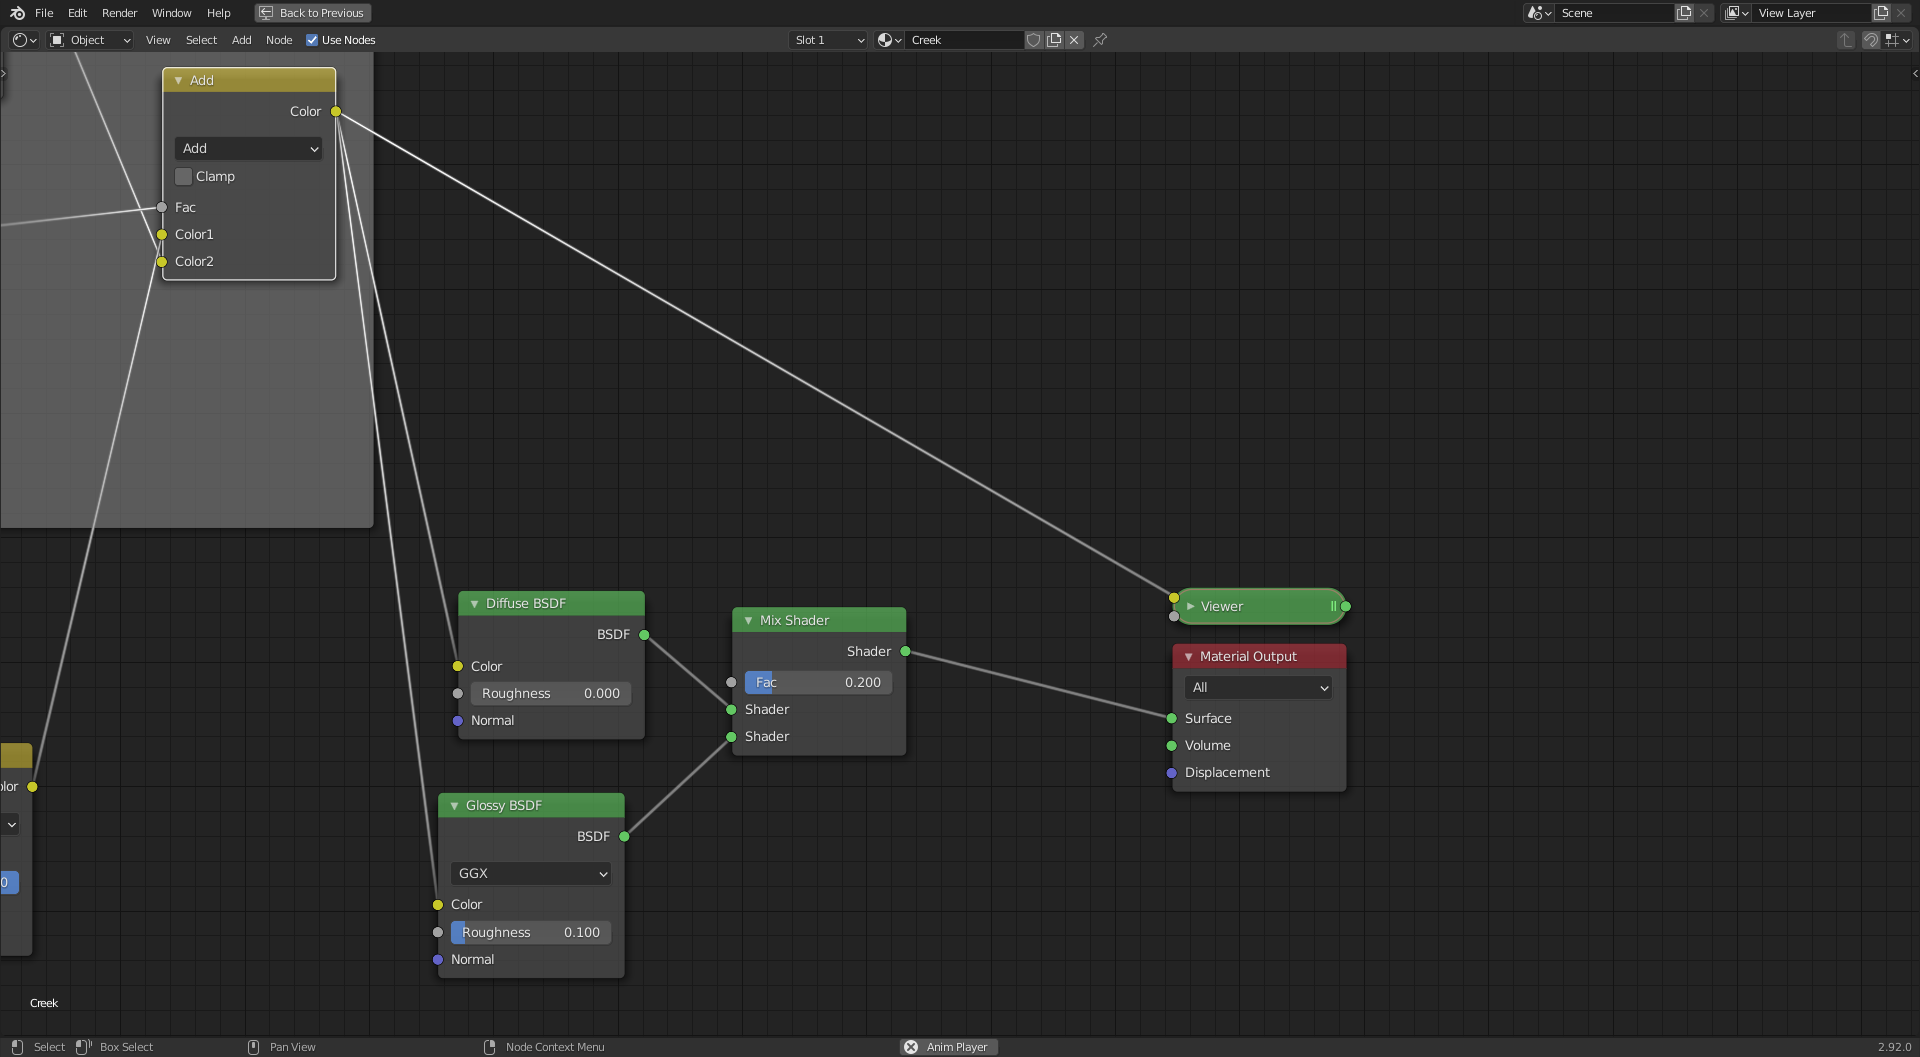
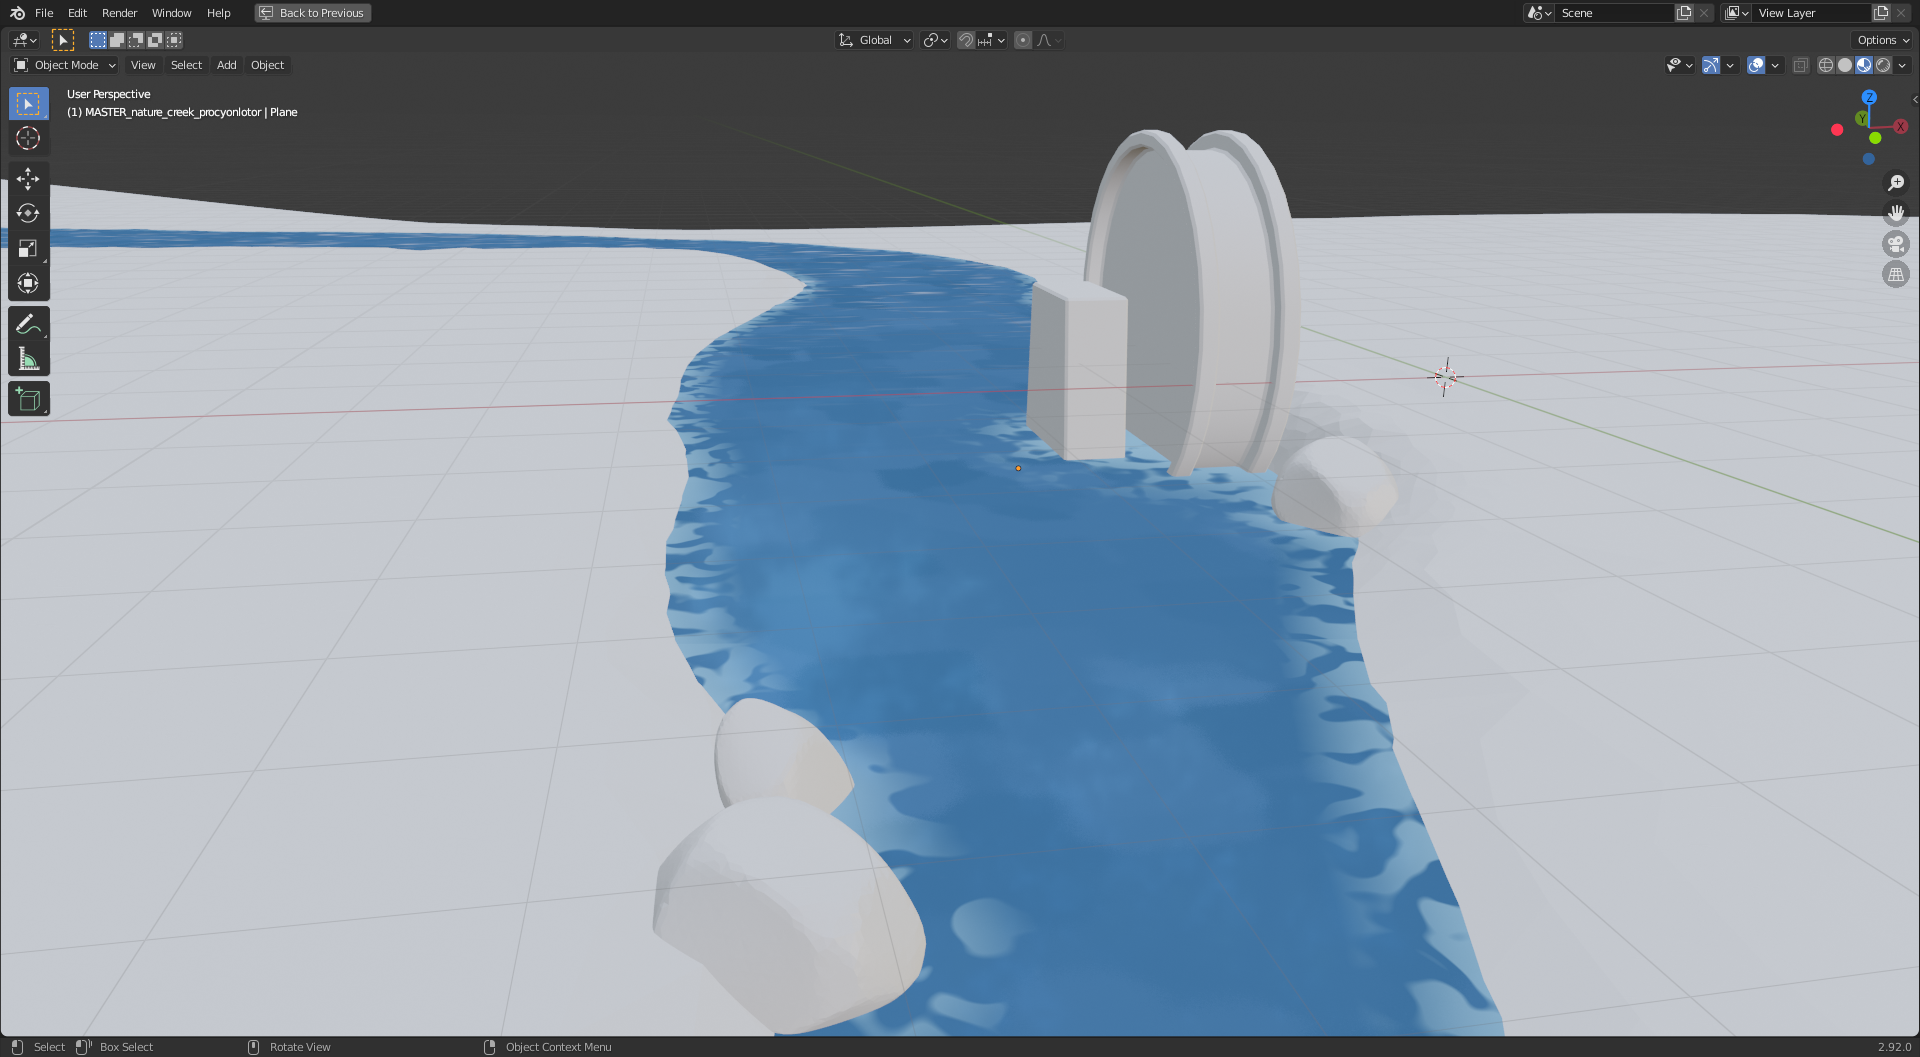
You could add another mix shader and a translucent shader, but won’t look to good at the moment until the ground and rocks have been textured and shaded.
Would be nice to see some displacement from the ripples of water , how? , well I’m glad it’s not me with the problem.
👍🌊
April 20, 2021 at 6:38 am #68019Thanks for the feedback @adrian2301 ! I am indeed trying to work out reflections this week. This is the set up I have come up with thus far, but I haven’t pushed it to the master yet cause there are kinks to work out still. I’m trying to keep everything in the viewer/emission node to keep it nice and stylized and probably won’t be adding any translucency both to save computational load and to match the style in the artwork as best I can. I’m fairly happy with how this set up catches the reflections in the creek, though it creates kind of an ugly voronoi glare at certain angles so I will have to fix that. The other thing is that Eevee reflections are kind of broken in and of themselves so it will be a question of tradeoffs I think and determining whether it’s worth it or not, but I want them in there if possible since the concept definitely has them.
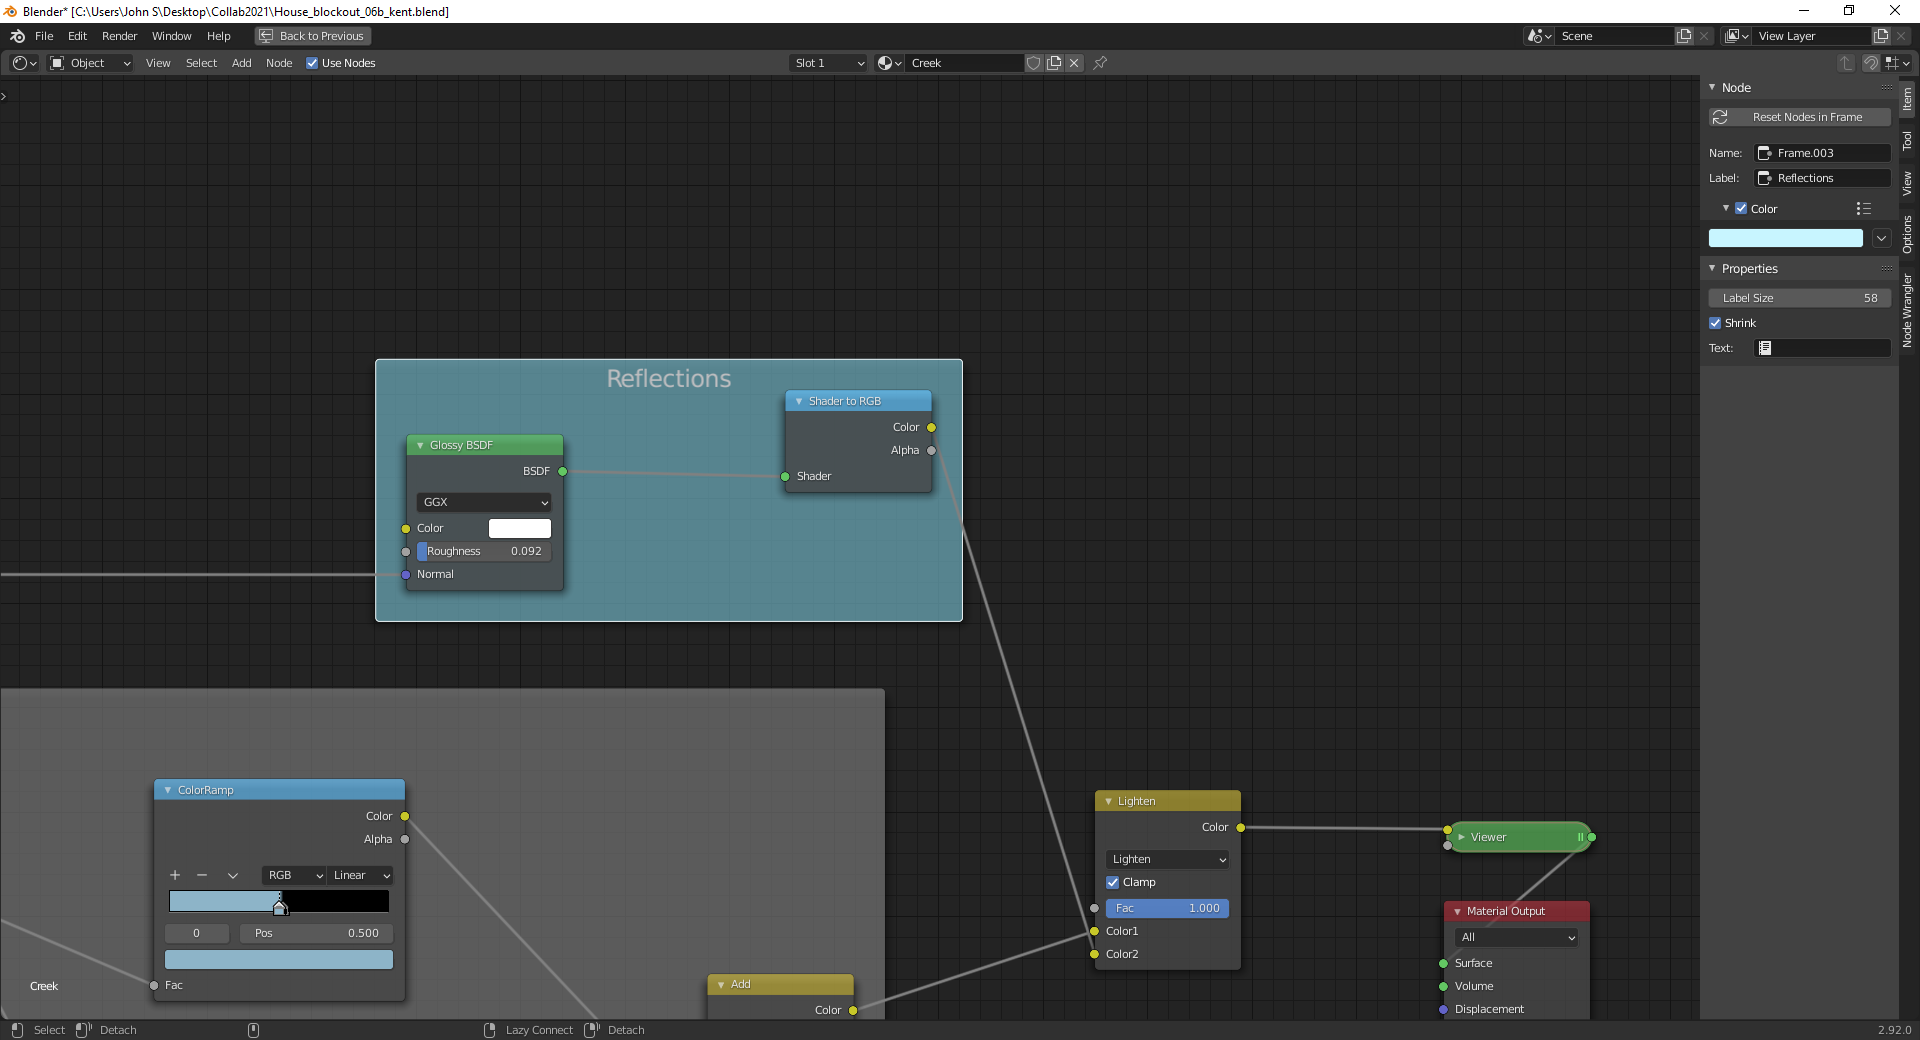 April 21, 2021 at 11:00 pm #68020
Questions…. @jlampel @elcangrejo @spikeyxxx
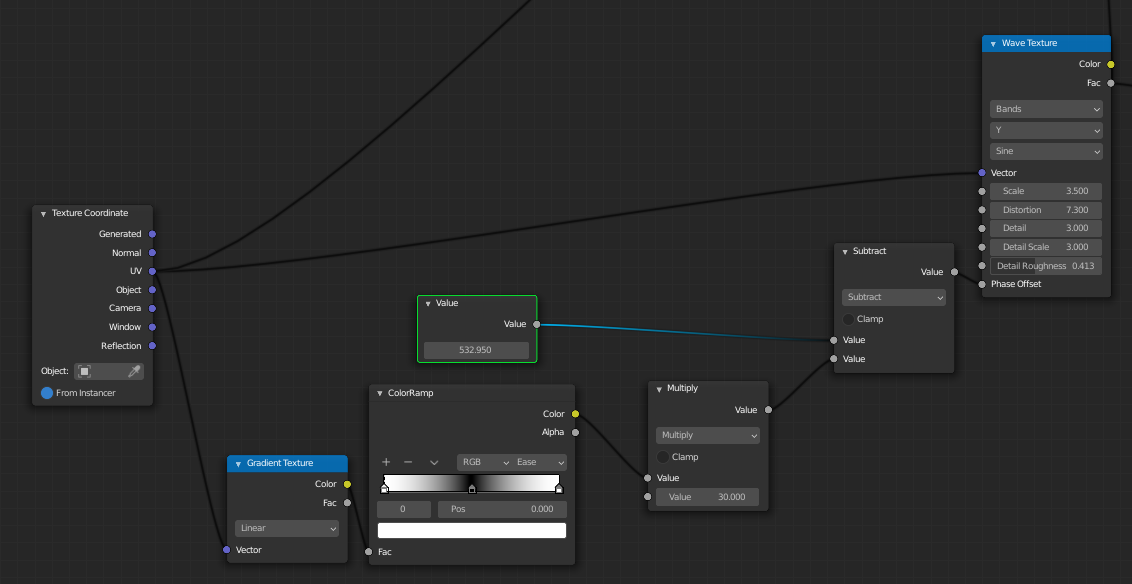
April 22, 2021 at 2:02 am #68021What I would do is clean up your creek first, so that you can use UV Coordinates for the effects (and this ain’t perfect yet, just a test):
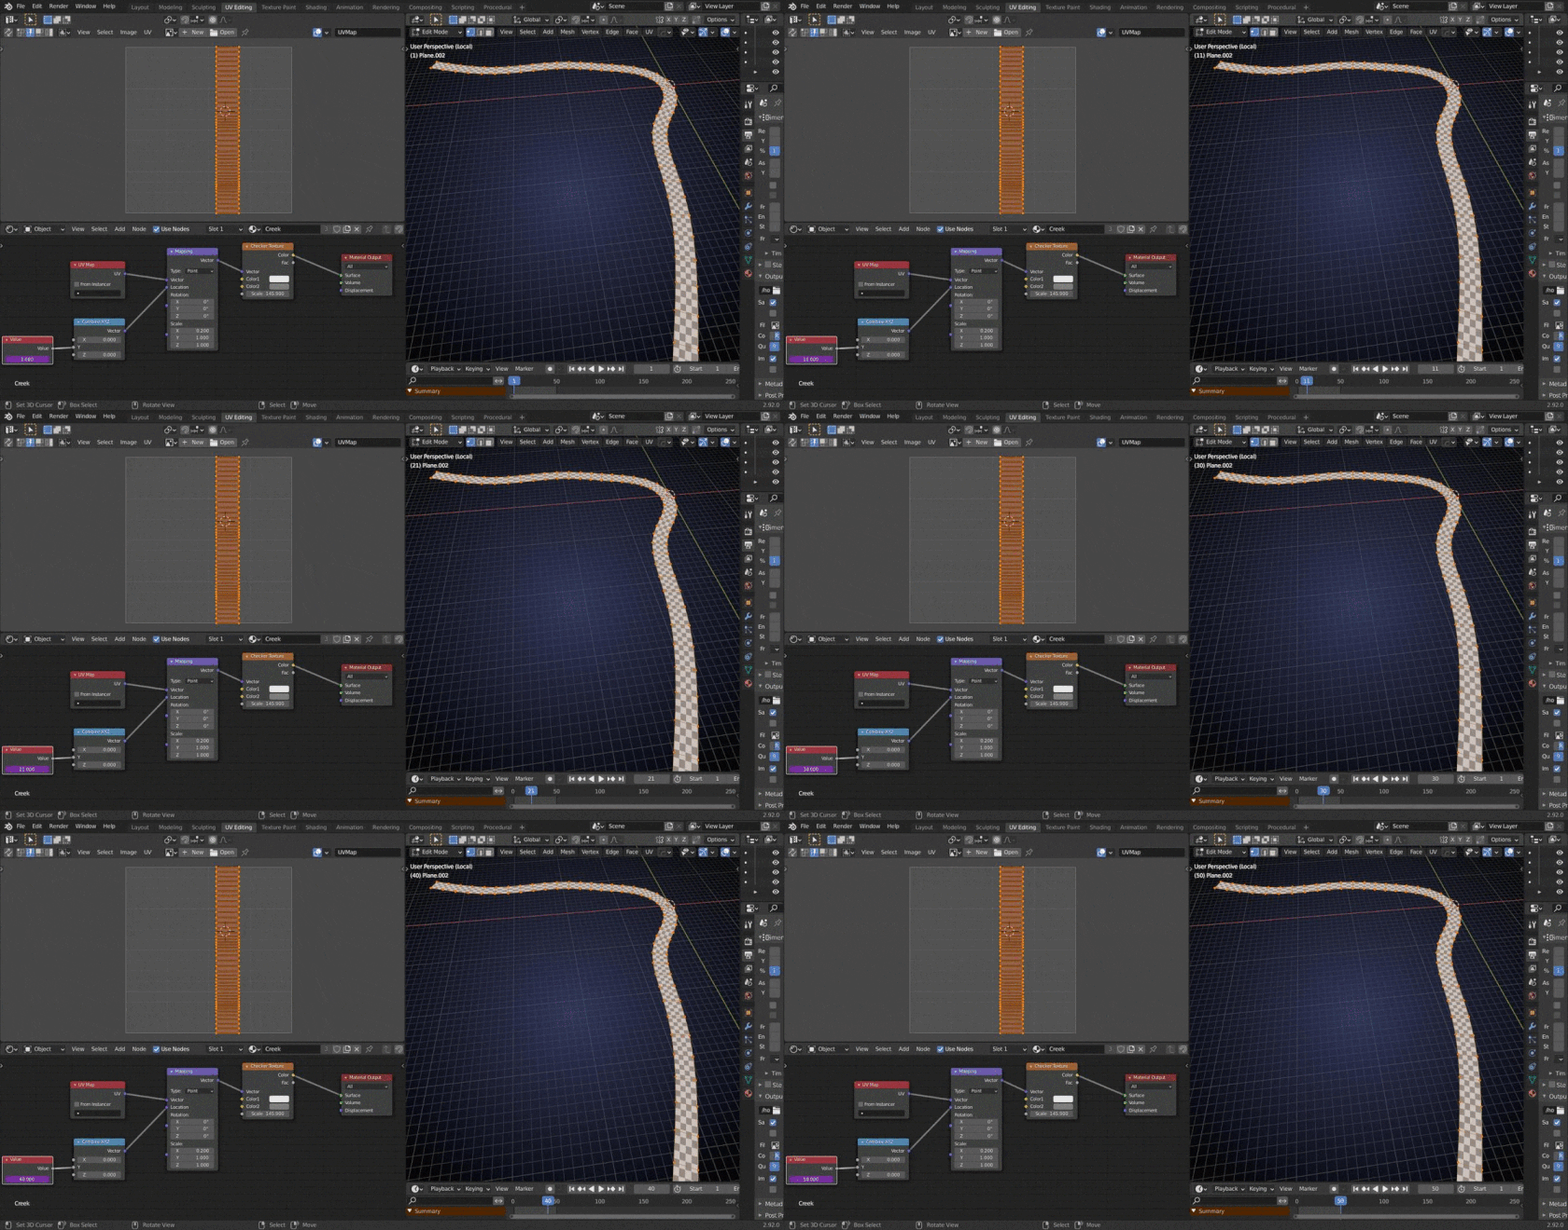 April 22, 2021 at 2:17 pm #68022
This is looking great! Easily full points for week 2.
I talked to Kent and he mentioned the ‘please don’t use procedural’ thing was for all the little assets, with the creek and clouds being specific exceptions, so you’re good to go!
I agree with @spikeyxxx about using UVs to animate your texture – that should help it to flow around corners and such.
You could also then take a gradient from the left to the right side of the creek and make the sides lag behind a bit:
Backing up a bit though, there’s one key problem I see – we can’t use an emission shader! If we did, it would ignore all the shadows from the house and look like it’s glowing:

So, while we still want it to look stylized, we’ve got to start with something that at least reacts to light believably.
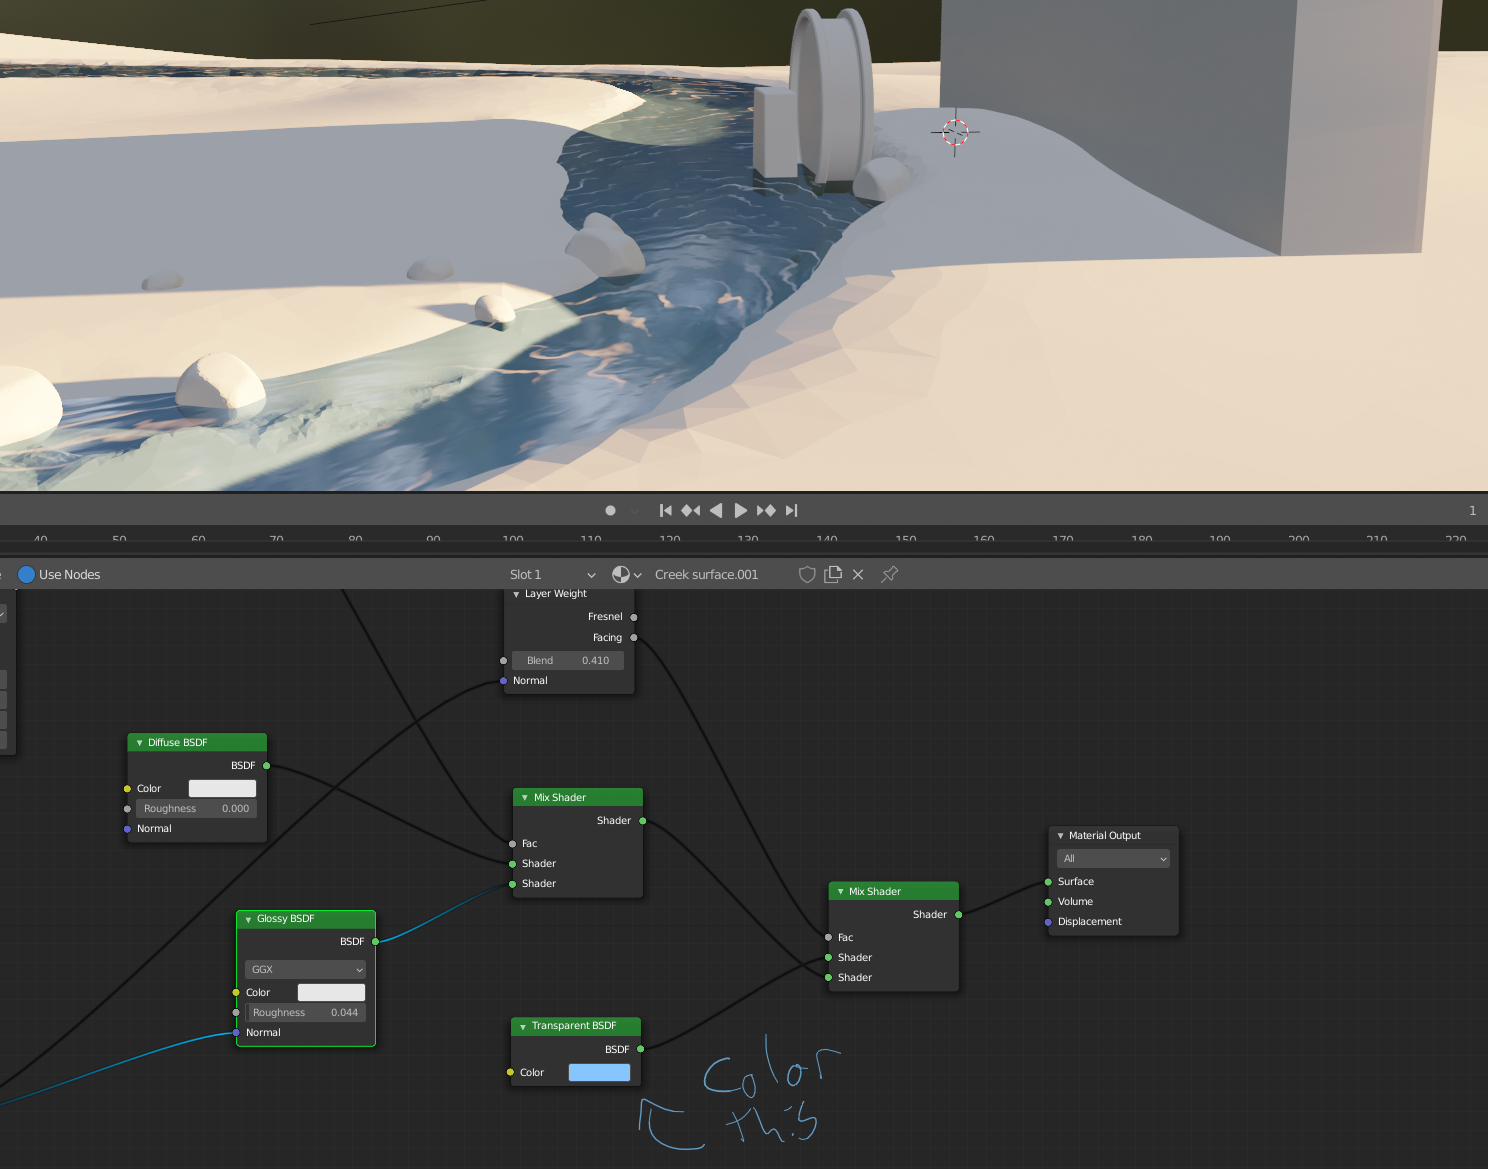
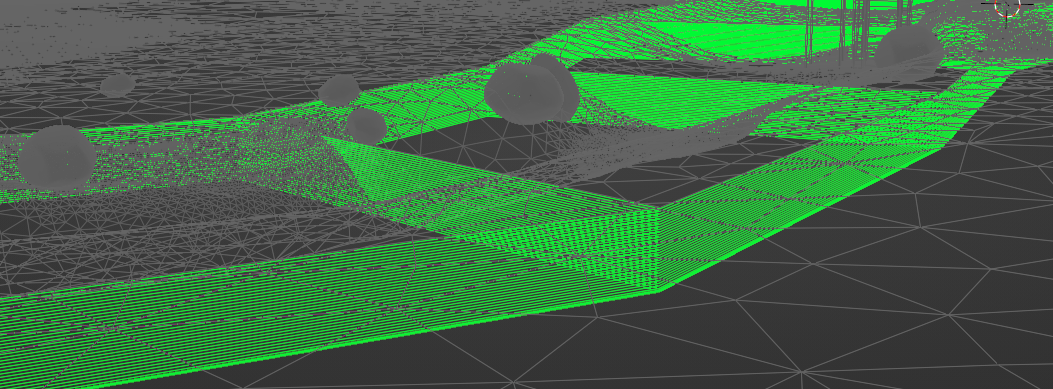
Eevee can’t cast colored shadows, so I’ve turned shadows off, but we still need the water to have some sort of absorption so I duplicated the river, moved it ever so slightly down, and gave it an array and a super basic material with alpha hashed transparency and also no shadows.
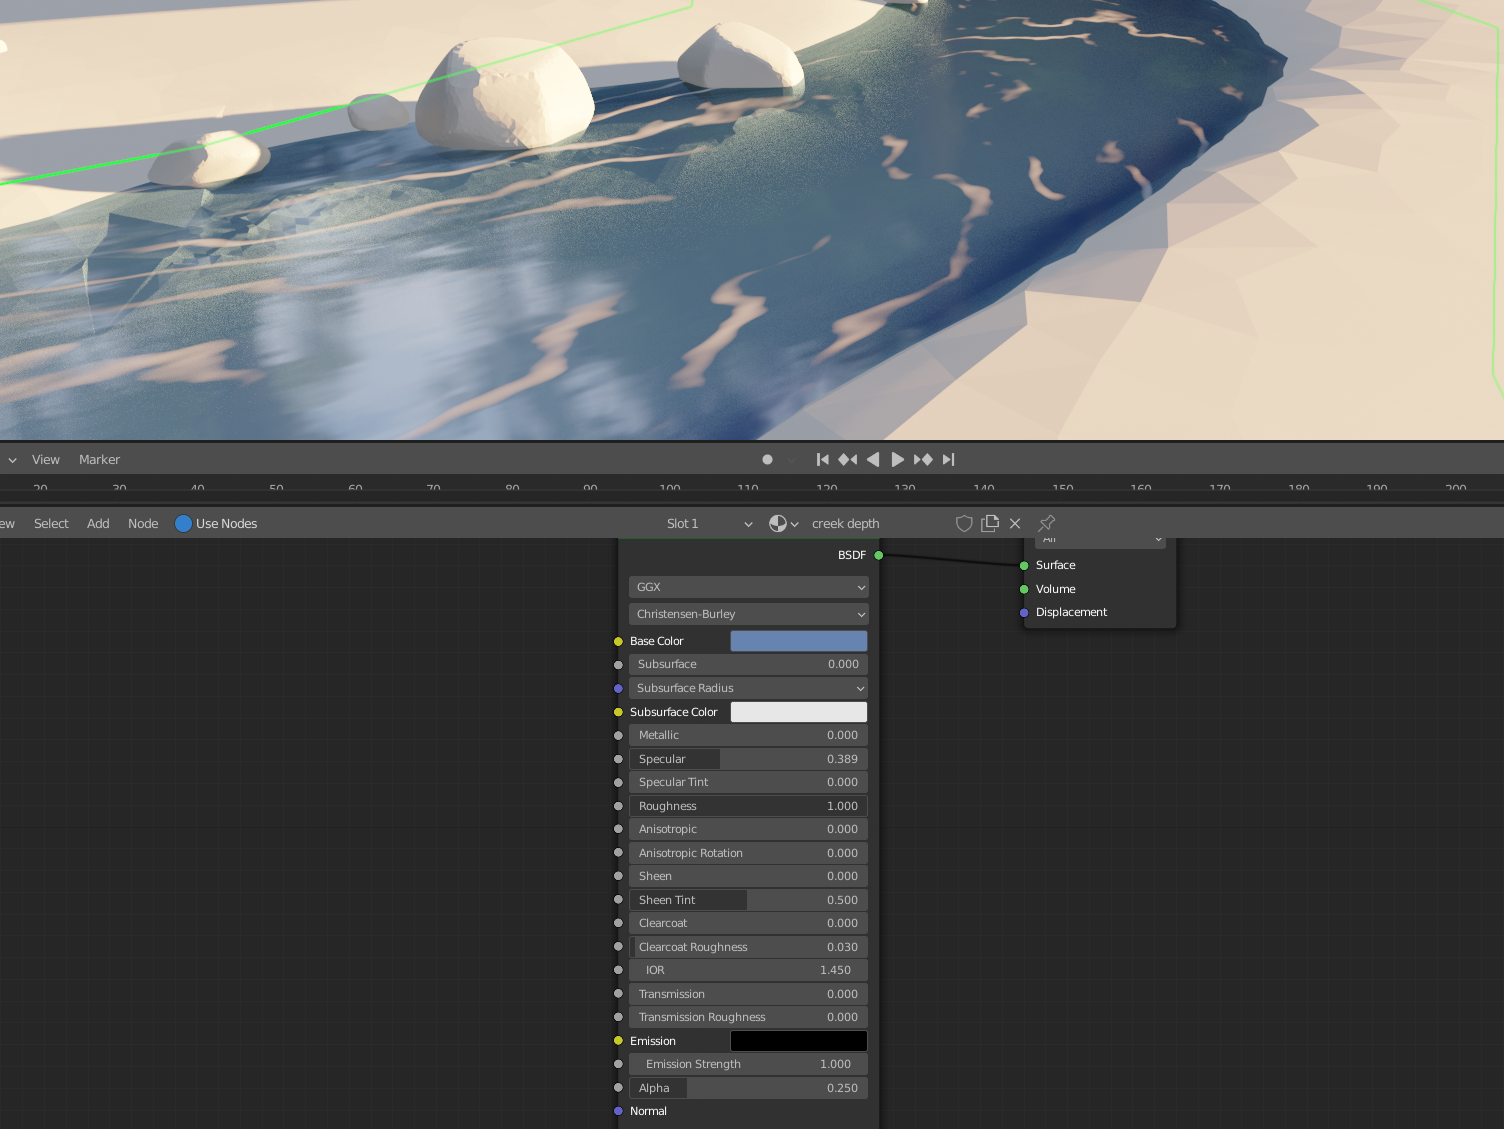
Now it’s not super stylized, but that just comes down to what texture you plug into the color for the transparent shader and into the normal for the glossy shader to smear those reflections nicely.
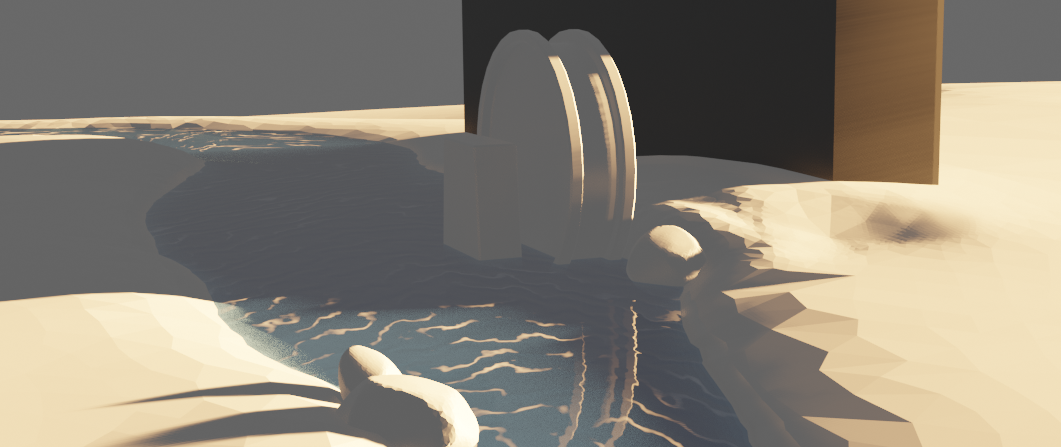
It’s not a perfect example because the shape of the reflections and foam would need a lot more work (which it looks like you’ve already done well), but hopefully it points you in the right direction! It’s in the WIP folder as WIP_nature_creek-tests_lampel_00 if you want to dig through.
April 23, 2021 at 11:05 am #68023Hey @jlampel . I appreciate your feedback and the set up you put together. And ultimately you are the spice lord who makes such decisions, but I am going to push back a little. You said”…need to start with something that at least reactbelievably to light” and I disagree. This is a stylized scene and emission shaders like this one are common in this kind of style. I’m looking at the concept and, while it has the same harsh morning light as our blender scene, I can’t distinguish any shadows on the creek. While I’m sure your setup would look great in the final scene, I don’t think my emission setup is untenable or unfaithful to the concept. I also feel like it compromises my contribution if I submit in the 9th hour a shader set up that is almost entirely your creation. Again, you’re the spice lord who is responsible for the final vision and if you don’t want to bend on this, I’ll work within your parameters, but I’d be frustrated that those parameters weren’t established much earlier in the project.
Also I understand you yourself were brought in kind of in the middle of things. And I fully understand the helpful spirit in which your post was made, just to be clear. I just disagree that the shadows are that important and feel like the shift toward realism that they necessitate fundamentally unravels the idea I’ve been working toward.
Let me know what you think and I’ll spend some time this weekend diving in and exploring options. Thanks.April 23, 2021 at 2:43 pm #68024Fair enough! I’ll take some time and think it over during the weekend while looking at the other assets as well.
April 25, 2021 at 12:48 pm #68025Homework Submission Week 3:
Hopefully it’s not weird or annoying that I keep submitting these in video. I feel like it helps you see the animation and keeps me from having to type up a novel 🙂
April 25, 2021 at 1:04 pm #68026I expected that you’d get problems with the AO bake, but you could use the existing AO with their UV Map and make a new (straightened ) UV Map for the river flow. Yes, you can use more than one UV Map in your shader.
Maybe I should have told you that right away, but I thought I’d let you struggle for a bit first and see if you came up with that yourself…(sorry)
Haven’t though about how I would deal with the reflections to be honest.
April 25, 2021 at 1:19 pm #68027@spikeyxxx You coyote’d me. Haha. I guess I knew multiple UVs was a thing, but it never would have occurred to me to do that.
April 25, 2021 at 1:29 pm #68028To be honest, I have so far never used more than one UV Map myself, so it’s not something you think of immediately 🙂
April 26, 2021 at 7:33 pm #68029Here’s something really cool that I just discovered:
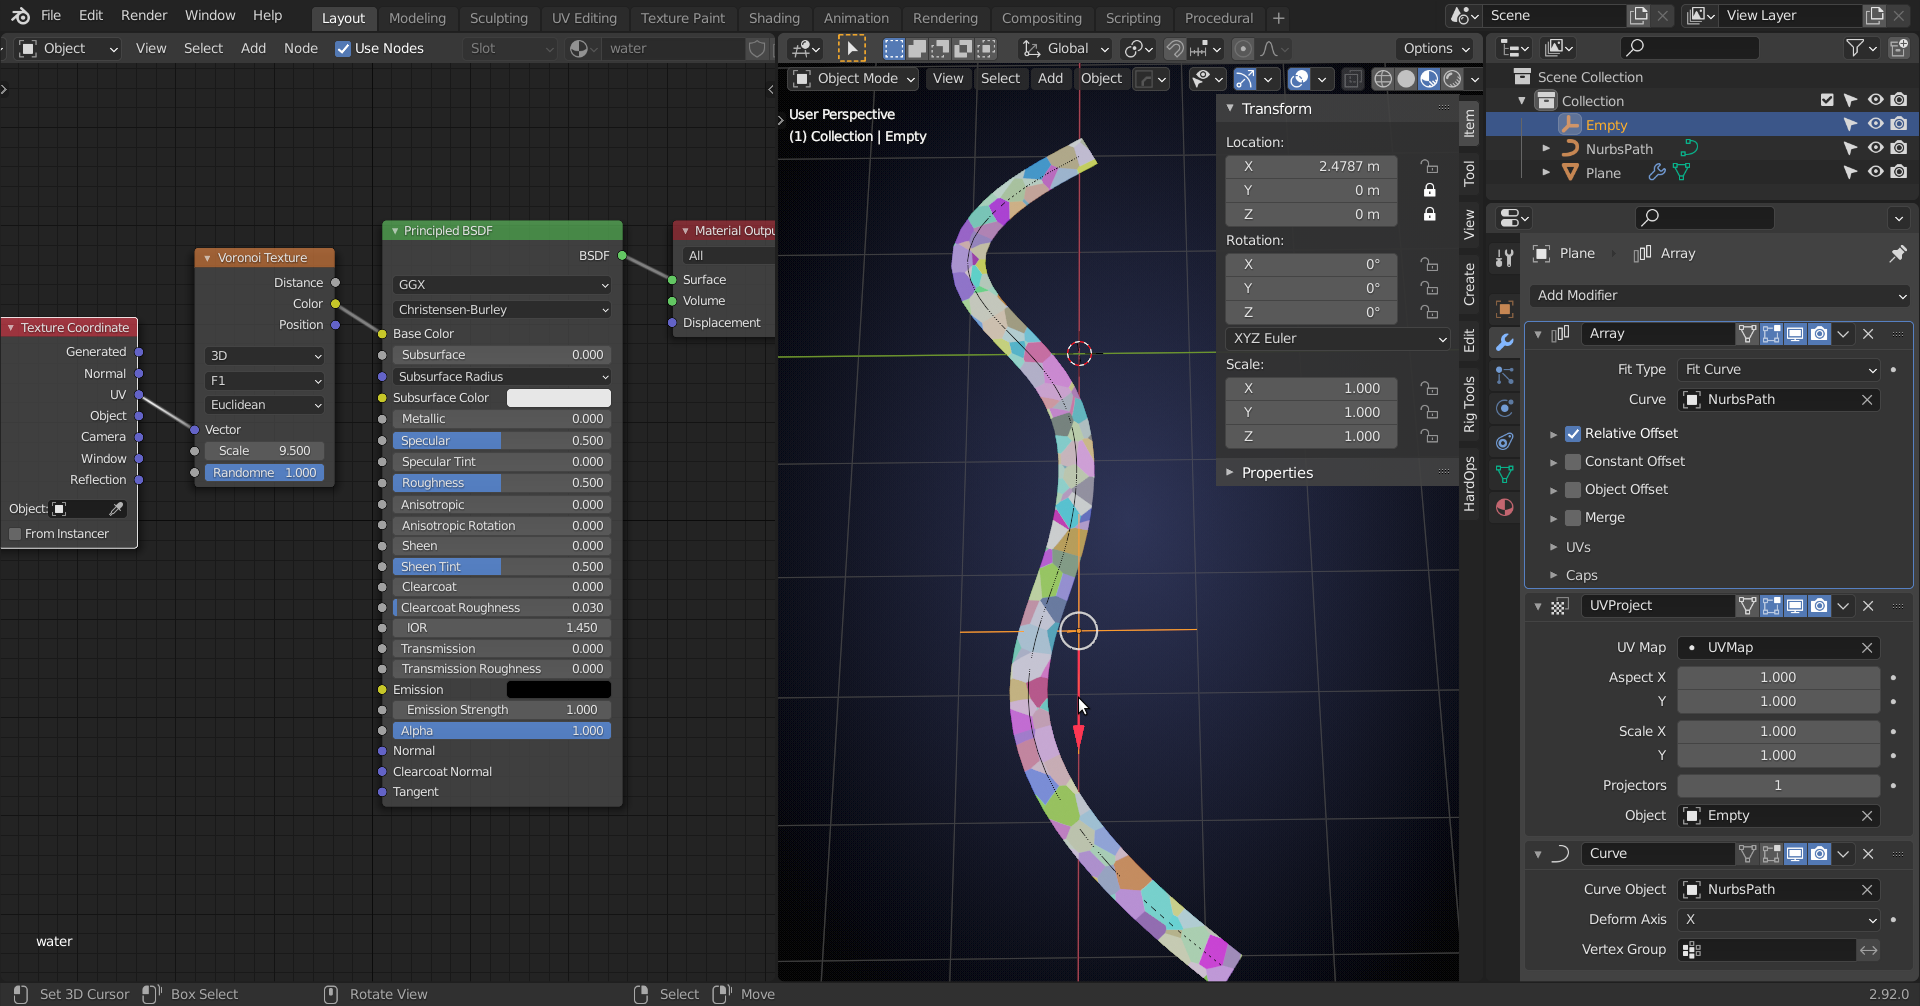
Simply move the Empty.
No difficult straightening UV’s, because you are just using a Plane.
The Radius of the Curve (Path) points controls the width of the creek at those points.
The AO bake has to be reconsidered, but I think that if you Apply the Array Modifier you could make a separate UV Map for that.
-
AuthorPosts


- The topic ‘COLLAB2021-WIP_procyonlotor’ is closed to new replies.