
Collab2021-WIP-MonaLoren
Forum Archive › Collab2021-WIP-MonaLoren
- This topic has 54 replies, 10 voices, and was last updated 5 years, 4 months ago by
Ingmar Franz.
-
AuthorPosts
-
April 18, 2021 at 6:59 am #67005
Looks beter already, maybe breaking up the edges of the top even more, I still have the feeling I’m looking at a wireframe if you know what mean. Maybe putting some deep dents in the edges.
April 18, 2021 at 12:23 pm #67006Homework Submission – Week 2 – lantern
This was an intersting and exiting week of sculpting. I had a lot of fun. But now I´m running out of time and I have to call it finished.
At least for this week. There is a lot to improve.
First I tried to get familar with the behavior of the brushes (and working with graphic pen of course).
Then I used the voronoi, scrape and crease in these order part by part of the lantern.I also used the voronoi to simulate rust. Mostly in the edges.
I had a lot of respect for the details, and did these steps at the end.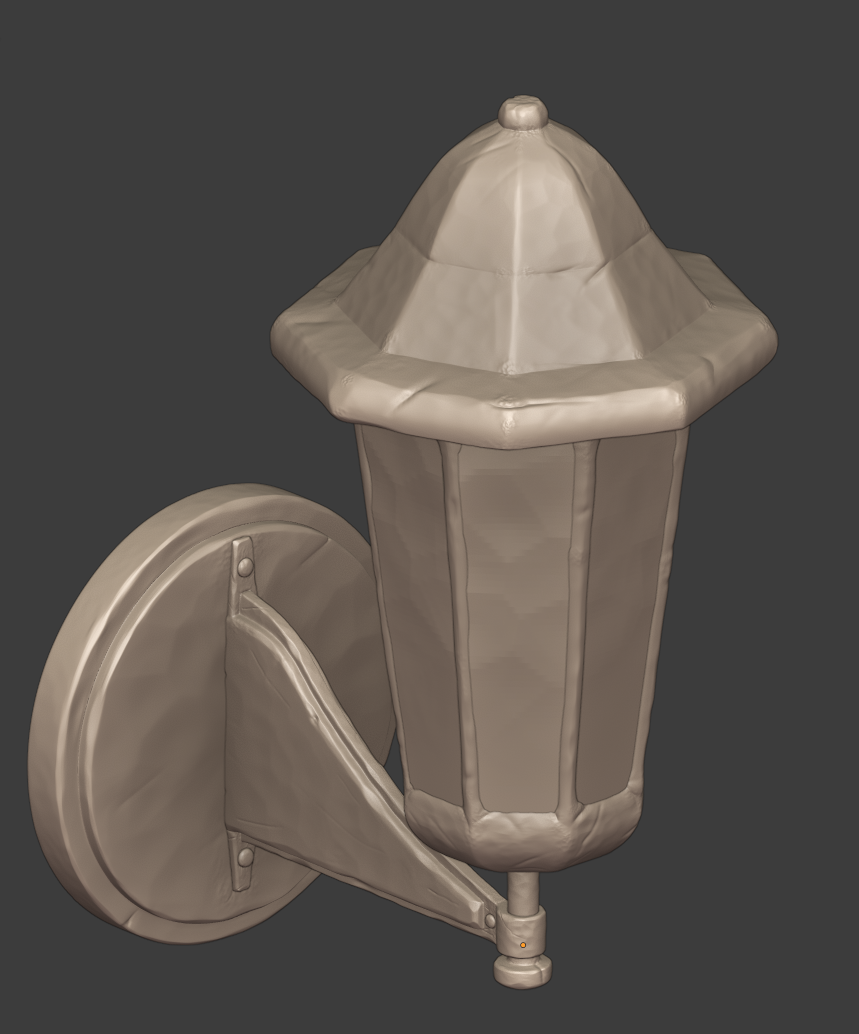
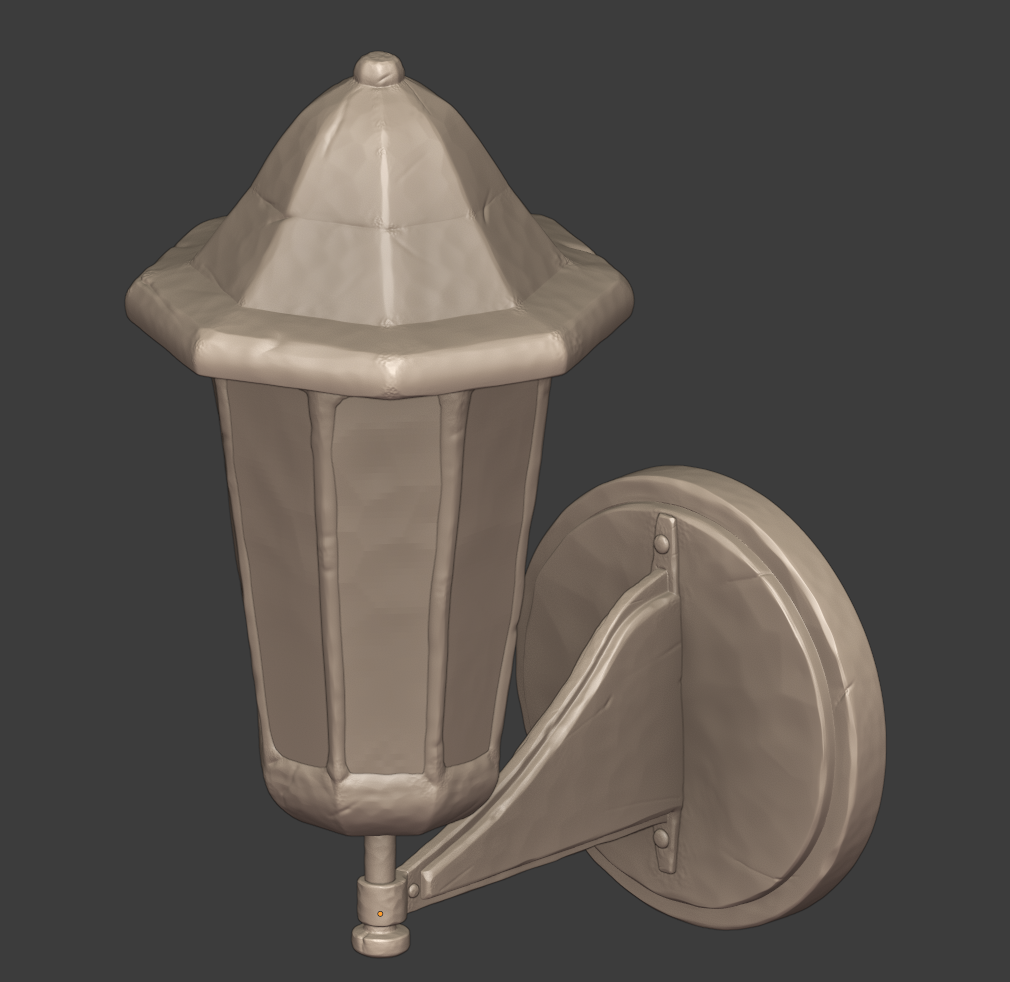
I had some trouble with distortions but could solve most of it and I am not so happy with the glass and will definitely change it.
There is so much more I could do and need much more practice, but for now, I am happy to got it to this point.(Note:made changes in the meantime -see screen on next post, and syn. with GoogleDrive)
April 18, 2021 at 10:25 pm #67007Nice work! I like your lantern! The only tiny thing I could possibly change is the glass, maybe move it inside a little bit, so this metal frame is not so thin. 🙂
April 20, 2021 at 2:15 am #67008I have changed something on my lantern body. The glass frames are slightly larger and the glass surfaces less structured like a honeycomb but sligtly wavy.
I didn’t like the structure.
I made a new brush and use a Wood Texture with Band-Pattern.
Now it looks more like my own old windows from our old shed;)
( sync. with GoogleDrive)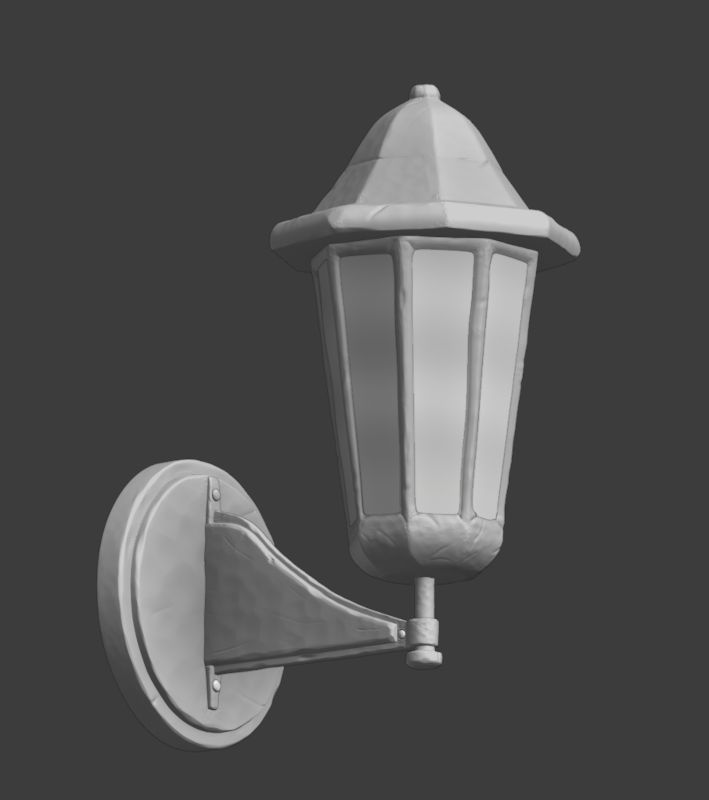 April 21, 2021 at 12:16 pm #67009
Week 3-Day 1 / cleaning to match Low/Hig Versions + UV`s
Because I changed the high-version little bit, expecially the body part, I had to fix some parts.
Unwrapping works perfectly.Thank you Kent for the hints and tricks in the streams. Helped me a lot, because earlier I struggled bit with these handle part. I tried AverageIslandScale but was not so satisfied with the result. I tweaked some parts a little bit for more space on the UV.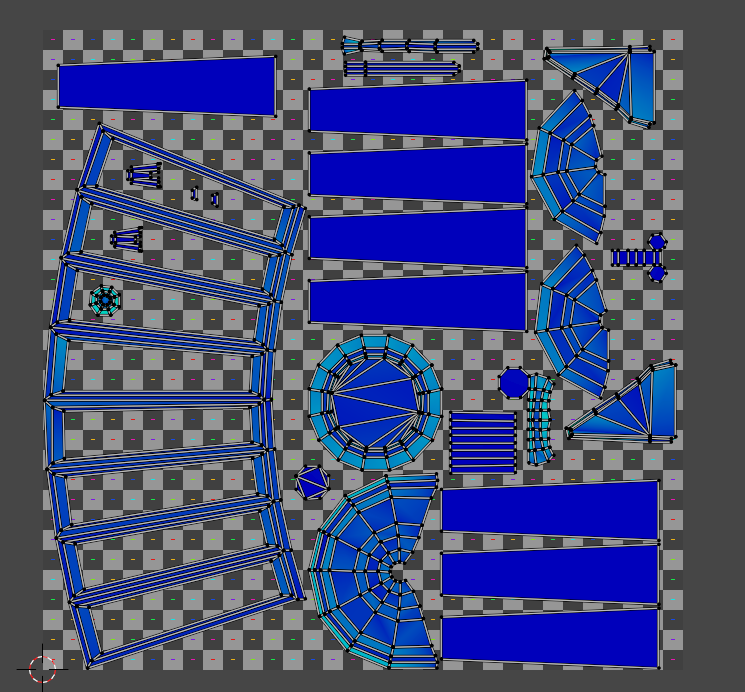 Now I was curious how the normal map will work. Only the top part so far.
1024px Normal- top part (scaled down)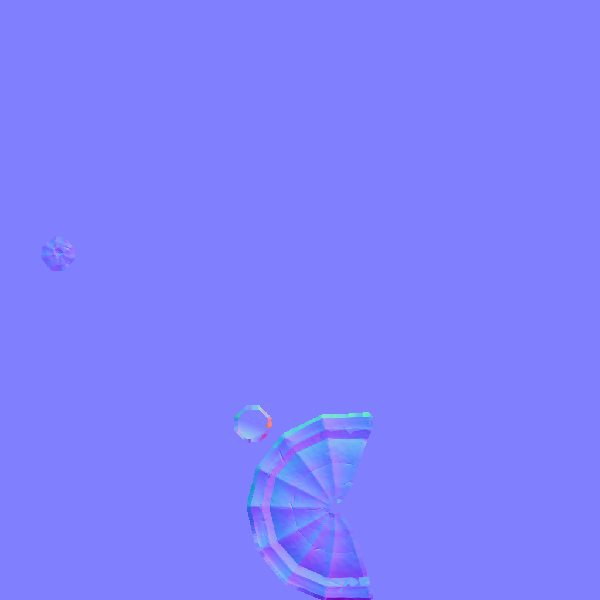 and some bake-tests: 512px / 1024px / 4096px / 4096px scaled down to 1024px with interpoloation none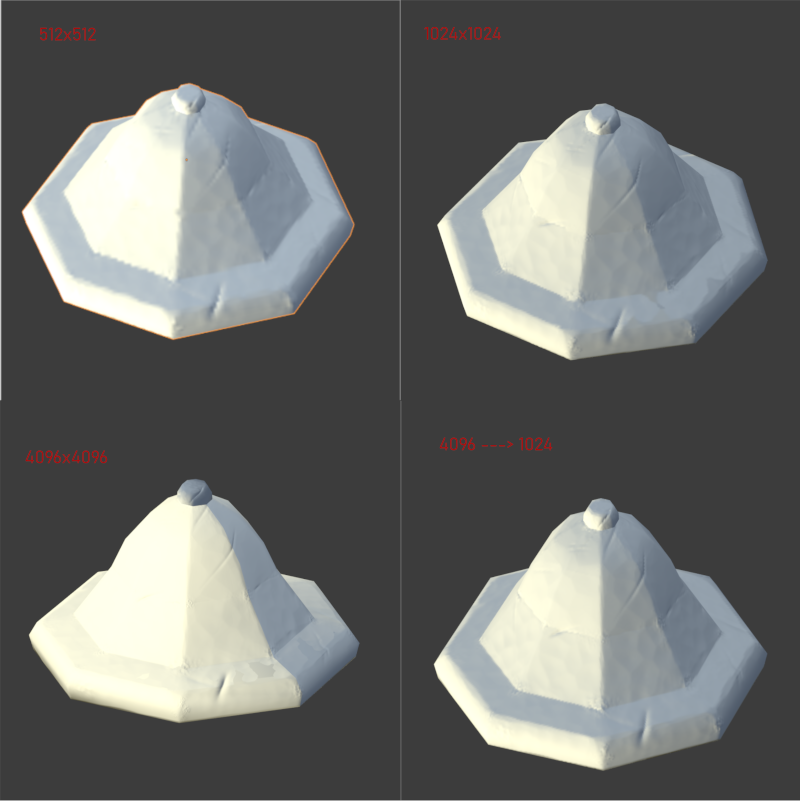
Interesting: 4096px has a more sensitiv behavior with the ray distance…I guess because of the pixel density
But I am not sure if it is really a better result with the scaled down one.Have to do some more test, if I have the time. Also I want to try to bake the normals with cage.
April 21, 2021 at 1:11 pm #67010These tests are great, I’m really digging the native 1024 bake. Not sure what’s going on with the 4k, like you said there some weird sensitivity to it. Can’t wait to see how your normals with cage tests turn out.
April 22, 2021 at 1:52 am #67011week3-Day 2 / normal map day
1. had to optimized my UV´s,for more space at the edges.
2. I probably should change the interpolation to cubic while scaling.
Someone told me that he scaled down in two steps. 8k- to 4k to 1k to get a decent result.
Haven´t tried it, but interesting idea.3. I find this course very helpful for normal map baking. Normal Map Baking for Games
Now I found this: 5 Must Know Tips
partly the same tips but especially interesting: ” Problem 3: Which file format / settings are best to use to save the bump / normal maps externally? “
There is a comparison of the file sizes with explanation(all examples are for a 1024 x 1024 texture size)
8 bit png = 117 KB
16 bit png (default 15% compression) = 1,080 KB
16 bit png (0% compression) = 6,156 KB
16 bit png (100% compression) = 792 KB
32 bit (Full float) OpenEXR (no codec) = 12,305 KB (Largest!)
32 bit (Full float) OpenEXR (Zip lossless codec) = 4,350 KB (Smallest lossless option)
32 bit (Full float) OpenEXR (Pxr24 lossy codec) = 637 KB (Smallest lossy option! Not including 8 bit)
Kent said we should save the NORMAL maps as 16bit png / seems that the compression could make a differnce in file size.
Now I`ll see how far I can get together. Despite testing, I have to have finished normal maps at some point 😉
April 22, 2021 at 5:44 am #67012Some more cleaner tests:
Each Image bake with 32 bit float/save as 16 bit png
1024px
4k to 1 k /interpolation cubic
8k to 1 k /interpolation cubichttps://gyazo.com/c548bfc4a62684c51ab29c4992dd0fe2
same with normal map setup on lowpoly modell
https://gyazo.com/ed2a5663239f755a0ec3e83a6e9bc68a
cleaner with bake with higher resolution and scaling down imho. Little bit more timeconsuming but perhaps it is worth it.
April 22, 2021 at 8:33 am #67013Your sculpt turned out beautifully @monaloren! I’m so happy to read that you enjoyed the process. Sculpting will always be one of my favorite 3D tasks.
No constructive criticism from me. Just keep doing what you’re doing 👍
April 22, 2021 at 10:09 am #67014Cage baking / top only
both 4k normal map images scaled down to 1024px
the second normal map ist baked with cage
Hardly to see on the screenshot but now there is a difference- have a look to the lower edges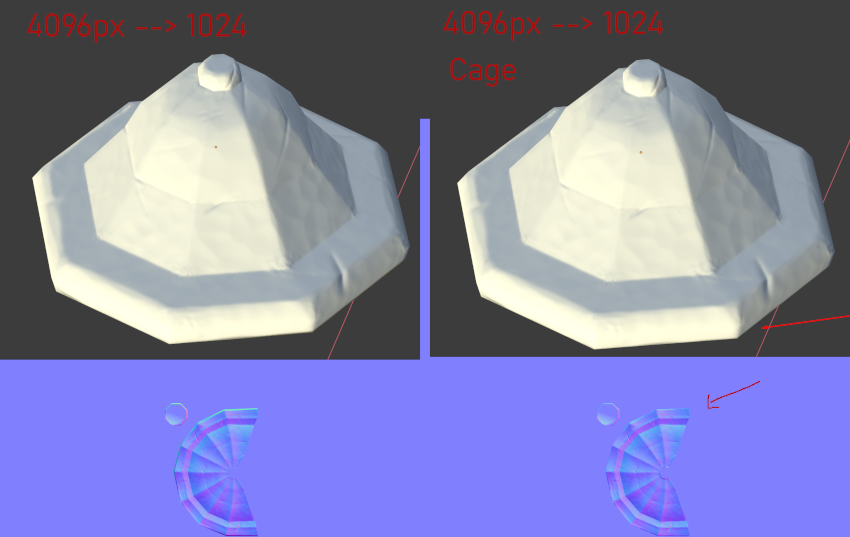 Normal Map and top-part / second one with cage
 https://gyazo.com/79c2f9f977de3aaab0ef5e5d2edb83d5
https://gyazo.com/065223633d9fba3b331f0884132b217f
I had the idea to work with several UV maps;).
But for now I stop testing and bake my normals.April 23, 2021 at 10:28 am #67015week 3-Day 3 / Normal Map and Cavity
1. New UV Map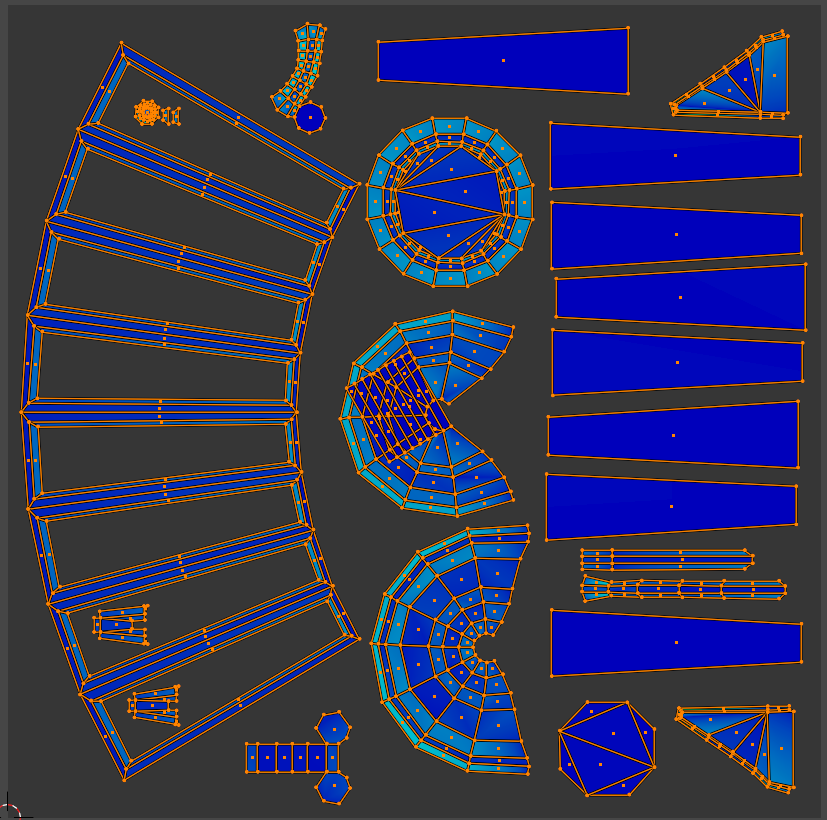 2. Baking Normal: I baked with Cage and high resolution(without the body-part)
Had some issues on every part but all could be solved.
With the exeption of the body.I was a bit too strong with sculpting and now there is a problem with normal baking.
Would take too much time to correct all these tiny things and the mesh wouldn´t be cleaner.
So I decided to redo the sculpt part of the lantern body.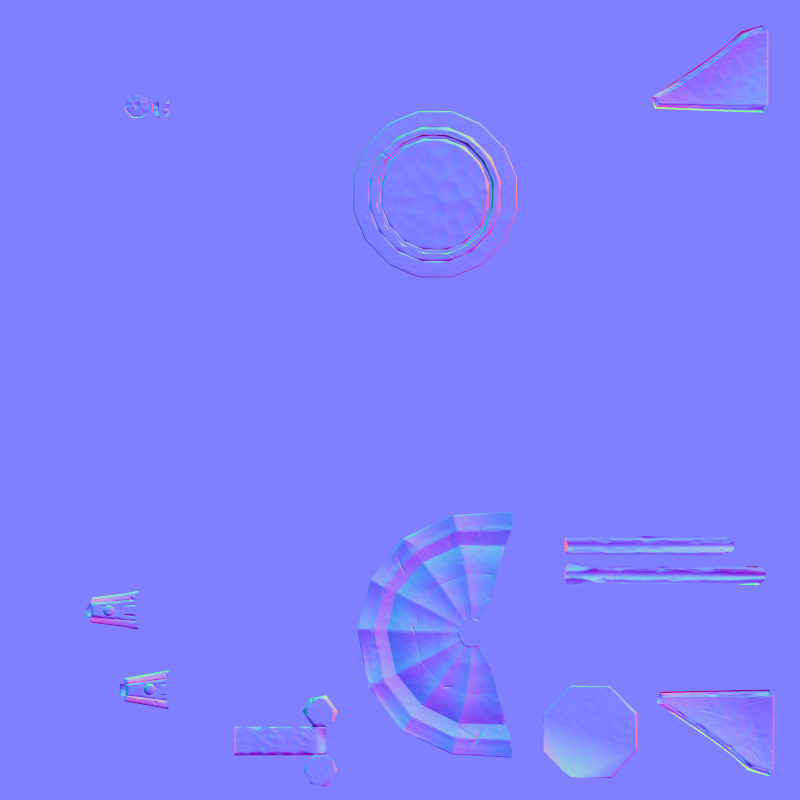 3. Cavity Map with Dirty Paint Vertex
Same. Issues on every part.
Noticed the “Dirt-Only”-button in the settings of vertex paint.
I used it for the handle part, because it is soo flat that there were almost no contrast.There is also a setting ” Blure Iteration”. Set it to 2 just for testing. Seems there is a little bit more contrast now.
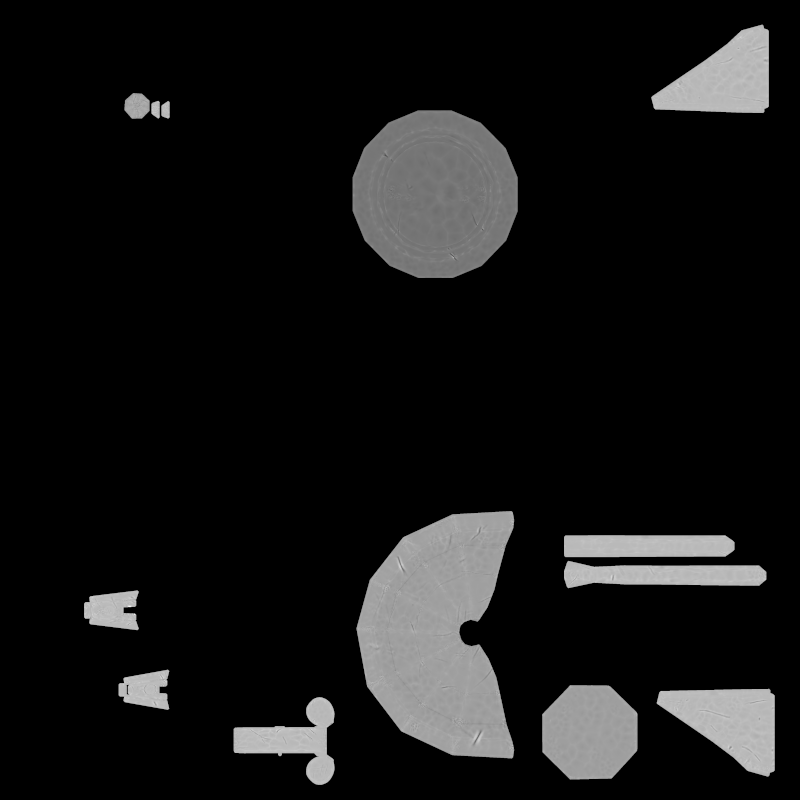 Some annoying behavior cost me a lot of time to resolve.
Often I saw no baking-result. Tried a lot, check all setting again.
Solution: the image texture had to be reloaded in the image editor. thanks for that 😉The lantern-body-part isn´t bake so far. I redo the whole part.
This is my result. Perhaps I bake some maps again. Depends on the result of the node-setup.
And I really hope I can finished it soon, because I can no longer ignore my home and garden 😉Update: Okay – just saw a mistake on the UV (grmpffff). Bake again!!
April 23, 2021 at 11:47 am #67016Texture baking is not an easy job. I also often have problems with it and have to do everything again regularly. It’s often a lot of trial and error. Don’t give up ;). I’m still not finished with sculpting…… where to find the time.
April 23, 2021 at 2:27 pm #67017New sculpted lantern body part. Hopefully now the normal map will work better.
But this evening I’m not trying anymore. Need some sleep 😉
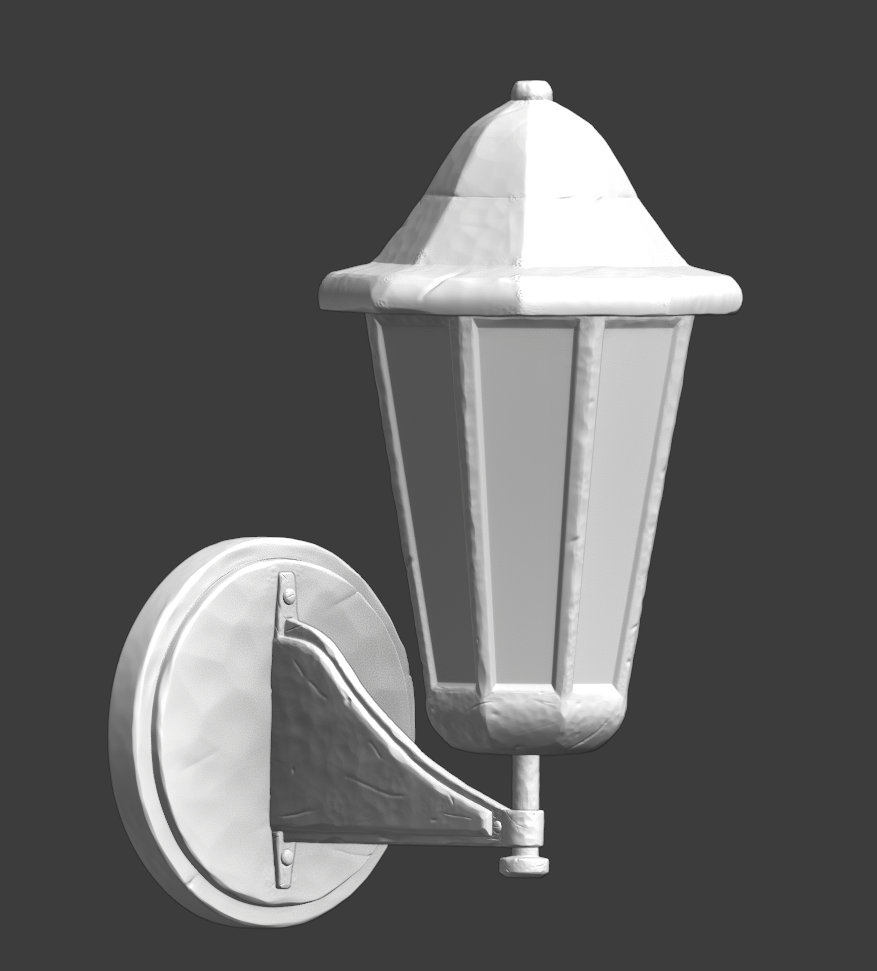 April 23, 2021 at 4:10 pm #67018
I see what you were talking about now. Great work!
April 25, 2021 at 8:48 am #67019Homework Submission – Week 3 – lantern
finished normal and cavity map / baked on high resolution 8k/4k and scaled down for GoogleDrive to 1024px
That was a long way to the normal map with a lot of doing again and again.
To do the sculpt of the lantern body again was a good decision, I still need several attemps and it tooks some hours to bake a decent normal map.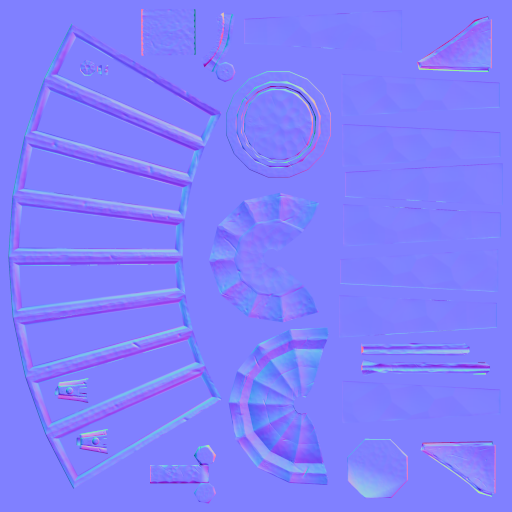 For the cavity I used DirtyVertexPaint, was curious how it works.
The DirtyVertex gave me different result for each part. I adjust the brightness.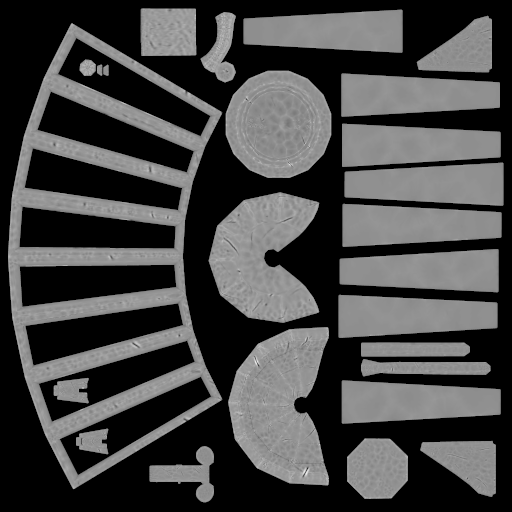 Kent said there is no color map needed for the lantern – we use the cavity.
I made a simple material and also a glass material.
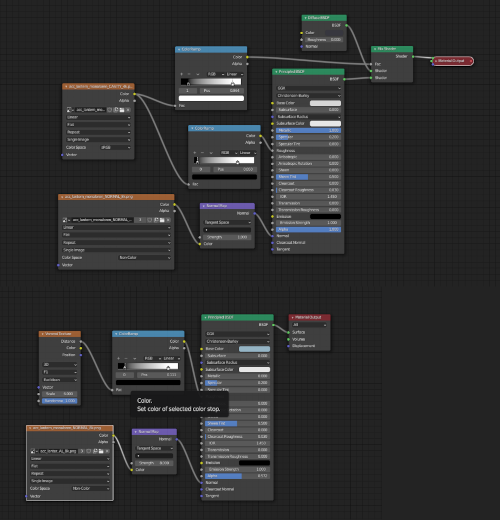 So it looks so far in EVEE with a little point lamp und sun.
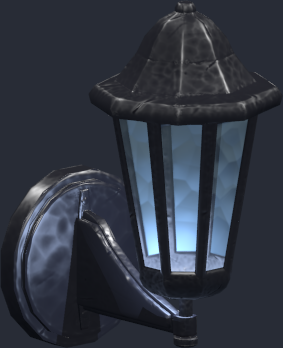 Now where I can see, how the maps going together I am not sure about the metal. I am not really happy with it.
Sculpting the body part for the third time? I`m not sure. Maybe a painted color map is necessary after all?
On the other side I am totally happy to got an result this week at all. Was not likely two days ago.
Still a lot to do an to learn. -
AuthorPosts


- The topic ‘Collab2021-WIP-MonaLoren’ is closed to new replies.