
Collab2021-WIP-MonaLoren
Forum Archive › Collab2021-WIP-MonaLoren
- This topic has 54 replies, 10 voices, and was last updated 5 years, 4 months ago by
Ingmar Franz.
-
AuthorPosts
-
April 13, 2021 at 4:16 am #66990
thank you for the feedback. I really appreciate that you provide detailed feedback to everyone. Especially with the high number of participants in the project .
Some areas have too few polys while others have too many
Caught me 😉 I noticed it too later after looking again and again at the lantern that the polycount is not really constant.
In the meantime I changed some areas. I was really often not sure how many are necessary and altered the model often.
It is okay if you like to use this as an example.I am new to google-drive, so I am not sure if I got it right with the settings to give access.
I right-clicked and got some settings, not very self-explanatory. Hope it works.Directory:SPICE-VENDORS-HOUSE/SCENES/MODELS/TEMP
Name:House_Accessories_lantern_Temp_monalorenBtw. I used a lot more refernces to work with to get an idea of stylized-style of lanterns.
Often they are more in a phantasy-style. I tend to use too much references and getting confused on the way.
I really have to find a golden middle-way to make my decisions.April 13, 2021 at 9:09 am #66991@monaloren This has been a great read. I love what you are doing and the results are marvelous!
April 15, 2021 at 1:23 am #66992week2 – day 1 : GoogleDrive Day
At least I was able to persuade GoogleDrive to syn.–Check
My way for troubleshooting if sync won´t work:
-Click on the TrayIcon (Back-Up-Sync GoogleDrive)
– Find the Settings on the upper right side
– Exit BackUp&Sync and Re-Start
then it began to work immediatelyNow I have to figure out how to these folders&files to work with
Do we have a info.txt or something with notes about how we have to named our files
and the rules how to work with the folders & files?
This would be very helpful.My understanding is for the first step:
We are each working with our own Wip file
directory: Spice-Vendors-House/SCENES/MODELS/WIP/ACCESSORES_ACC_House
file: WIPP_acc_lantern_monaloren_xx.blendthis will go later to an corresponding ” xxxxx.master.blend”
the collection of each master.blend would be linked to a “xxxxmaster.assembly”So far I have only to take care of my “xxxx Wip-file”
Hopefully this is the right way.Sadly it takes me a lot of time, so no Blender work today for me.
But had more than one look to the recommended courses.
I`m learning far more than just Blender in this Collab 🙂(one of them is patience with setting up and working with various tools and to handle these in two languages :))
April 15, 2021 at 12:15 pm #66993week 2- day 2 Redone Homework Submission week1
clean-up the model of week 1 and made a Low-Poly Version – according to Submission feedback and lifestream
Version 1 – Left side – Version according to the lifestream
Verson 2 – Right side- My ChangesChanges
1.Reduce the distance between the wall and the lamp-body. For a more realistic proportion.
2. Removed the top edge from the body. I found there is no additional edge necessary and there wasn’t one at the bottom at all.
The parts can also be connected to one another in this way
3. Change the Bottom of the body
I honestly like it more this way. The Connection and so the silhouette looks much more smoother and pleasing for my taste
I also changed the part underneath so there is a better connection and deleted some edges.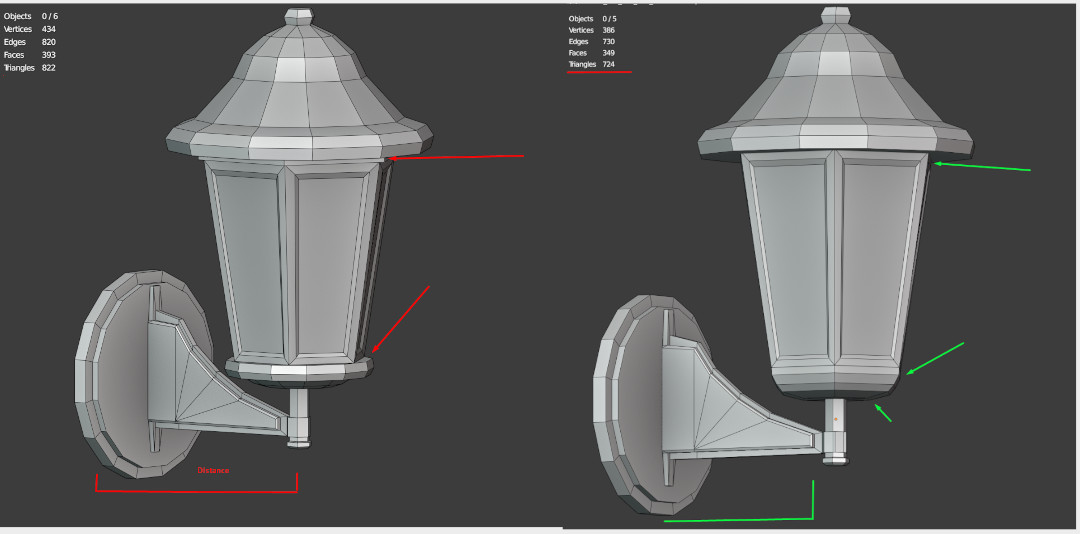
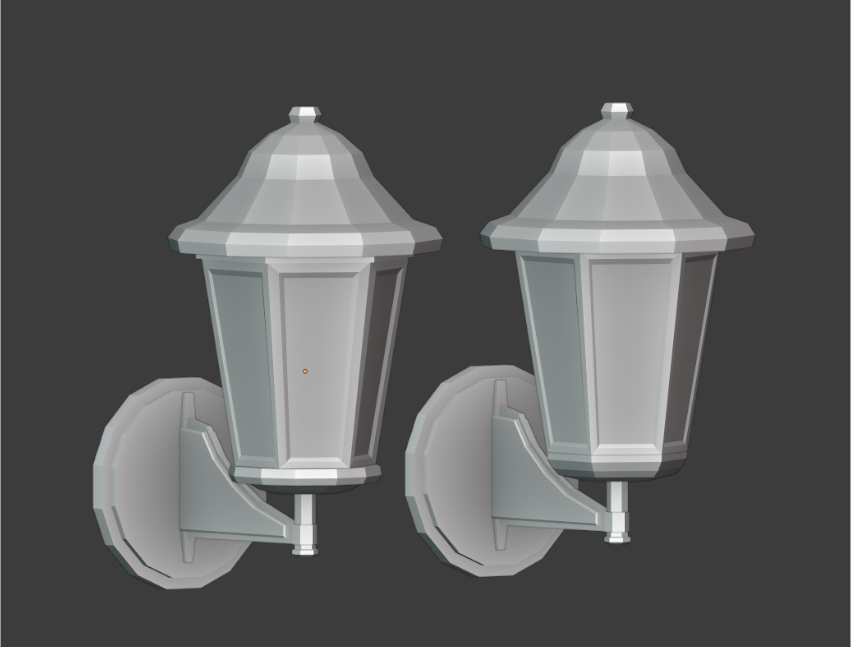
Overall I was able so save some more Vertices.
But I will try another version:
Vadim mentioned during the Lifestream that the top of the lantern was not supposed to be so rounded
rather as an octagon with faces.
Because of the conceptart I already thought it could be a 8-sided one.So I`ll model another Low-Poly version according to Vadims inspiration.
April 15, 2021 at 12:50 pm #66994Great effort you put in writing everything down. Also nice improvements on the lamp.
April 15, 2021 at 1:24 pm #66995Looking good @monaloren 👍
April 15, 2021 at 2:48 pm #66996And here it is: the octagon version according to Vadims advice
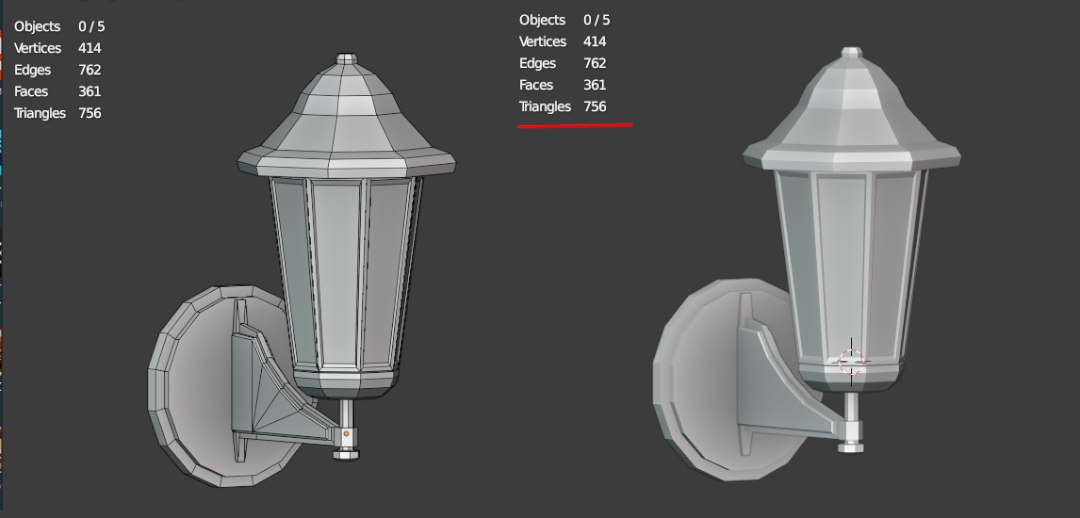
actuelly less tris-I forgot to delete a face.
I like this version. Looks very similar to the conceptart I guess
April 15, 2021 at 4:54 pm #66997Great work Mona, looks like you’re ready for sculpting your high rez 🙂
April 15, 2021 at 10:44 pm #66998Very clean and accurate work! Great job @monaloren ! Can’t wait to see your sculpting interpretation! 🙂
April 17, 2021 at 11:20 am #66999week 2 Day 3/4-practice sculpting
thats my result so far. Took some time to get used to sculping. Fortunately, Kent demonstrated the lantern in the stream. Got problems with the holder and has to start all over. In addition, details are still missing.
But overall I am very happy. Slowly get a feel for the brushes. But now I need a break first.
There is still a lot to be done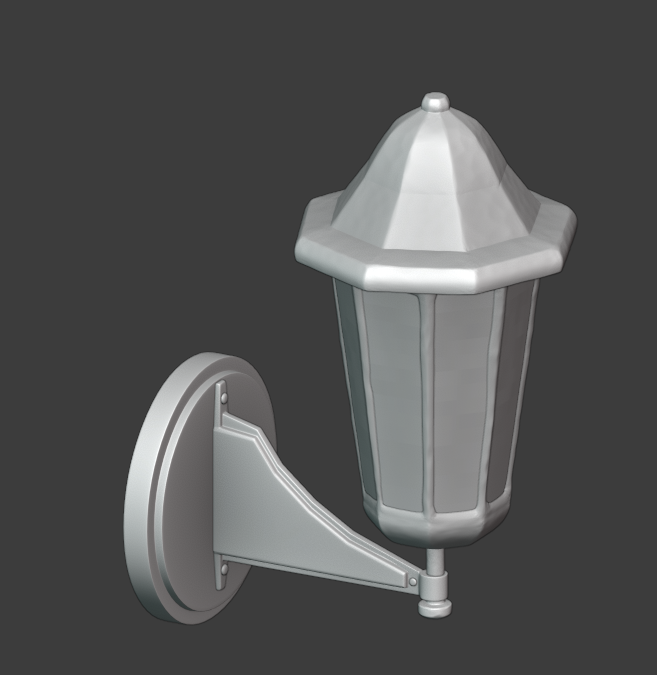
hardly anything to see on the screenshot-hmm-and I thought it could be too much
April 17, 2021 at 5:51 pm #67000Nice start but I think you may be to cautious with your brush strokes. Try to use the scrape brush with more strength to get beter contrast in your geometry.
April 18, 2021 at 4:18 am #67001Thank you for your advice @lucky. Very helpful. I think you are right. I was little bit too carefully the first time.
It looks like this at the moment.week2-day 5 – more sculpting
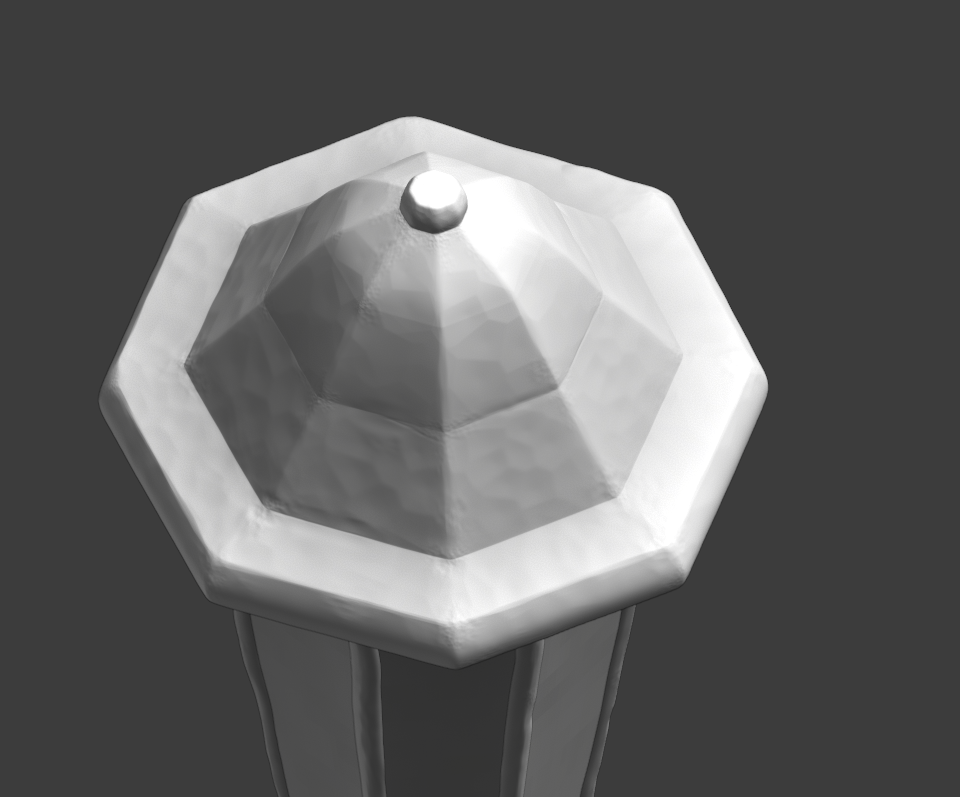
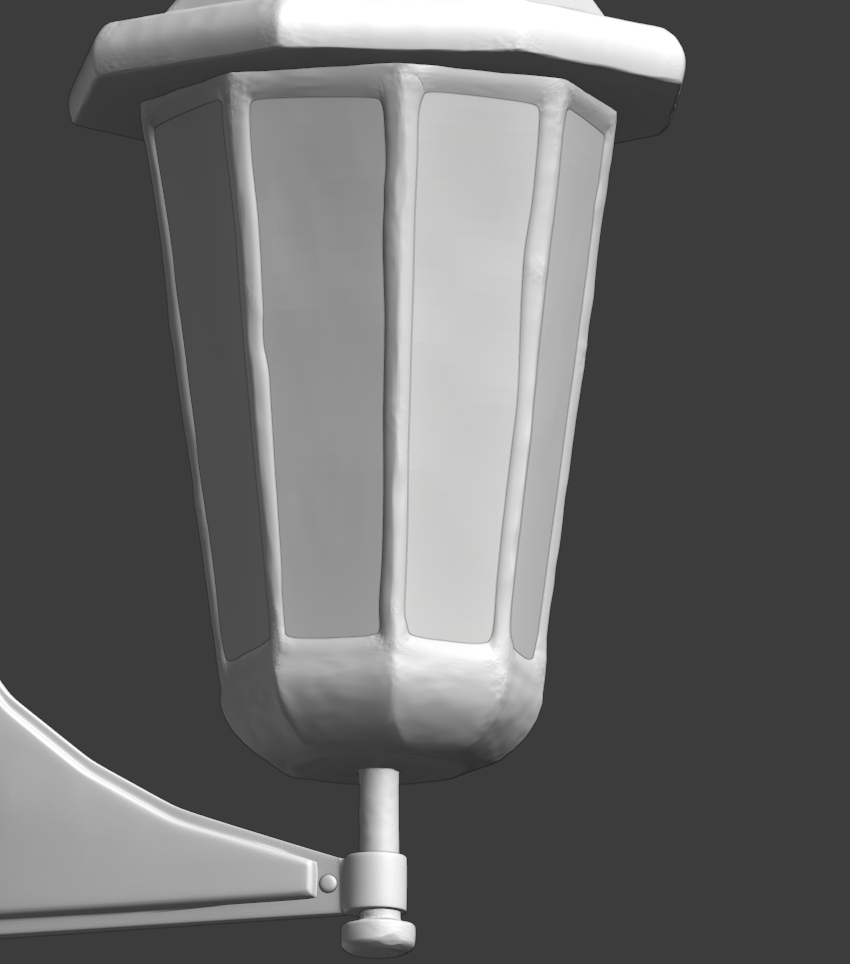
Kent said at some point in the stream the brush shouldn´t be too strong and in the normal map course is recommended to exaggerate scultping for a clear normal map.
The challenge would be to find the working middle way and to be constant in the details.
I tried to simulate rust at some edges with the voronoi. I kind of like that ;).At the body I also bended the glass frame a little bit, and rust of course.
More noticeable this time, I guess? Is this enough?
At the handle I ran into another problem. See next post.April 18, 2021 at 4:27 am #67002week2- day 5 -little troubleshoting
I always run into problems with ugly distortions expecially on the handle.
I did this part several times, smooth brush did´t help, I relaxed the edges by hand and try a lot more, but nothing worked.
It was strange because the density on the edges are similar e.g to the top part and also Kent did not have this problem in the stream.only one example
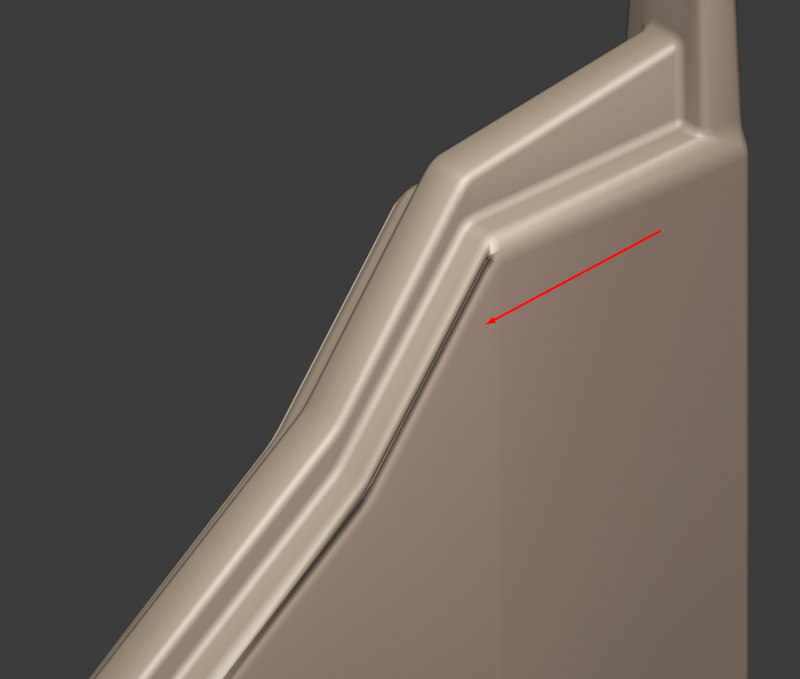
Yesterday was a discussion about normal maps and distortion etc. in the wip-thread of @lexicolopolis . At this time I still haven´t seen any conjunction with my distortion problem. But there had to be one. Something that made Kent different. After sleeping some hours I finally had the idea.
I have made a test unwrapping on the Low-Poly parts. Not very clean and final, only as a test.
Copy the Low-Poly to made the High-Poly part.
So my dirty UV-Map was copied too. The seams were also not set cleanly and there were some issues.
And the distortions are exactly where I set these nasty seams.Could be so easy. So, I delete the Seams and UV map from the High-Poly and hopefully it will work now.
First tests are promising.Totally forgot that there were these test unwrapping. Was so concentrated on sculpting 😉
Should have much more time to practice all the sculpt. But I am running out of time today. There is a deadline;)
However I will try my best to get a decent result. I have a lot of fun sculpting the lantern.April 18, 2021 at 5:24 am #67003To me it looks like it could be one of these things: an extra edge that is hiding under the real edge, some other geometric issue on seam, sharp edges not being in optimal places, smooth vertex being set at too low an angle. Those are my guesses anyway. 😀
April 18, 2021 at 5:38 am #67004Yes -it was an overall nasty unwrapp and bad setting of seems e.g. sharp edges in the wrong place and missing edge in the loop.
As I said I had completely forgotten about it. Short way – simple delete 😉 Time is precious – haha.
-
AuthorPosts


- The topic ‘Collab2021-WIP-MonaLoren’ is closed to new replies.