
Collab 2020: Modeling Heavy Equipment (Backhoe)
Forum Archive › Collab 2020: Modeling Heavy Equipment (Backhoe)
- This topic has 1,439 replies, 27 voices, and was last updated 4 years, 1 month ago by
Omar Domenech.
-
AuthorPosts
-
May 9, 2020 at 7:52 am #54197
Perhaps another pain point that everyone will probably appreciate being covered is how to line up circular parts so that they are concentric with others.
I know blender is not really a CAD program and the snap to an object’s circle-center circle ⭕️ is not a built in feature like other professional 3D cad software.
@theluthier Maybe a quick tip on how to align parts that are all concentric to each other would be helpful for the DOG Pound? What do y’all think?
There are a lot of hydraulic/mechanical fittings and hinges on a lot of these parts that are all going to need to be lined up. I know eye-balling-it is the artist way for a lot of things but the engineer in me cringes to do that over and over again haha, maybe it’s just me and I’m being overly critical of my own workflow though.
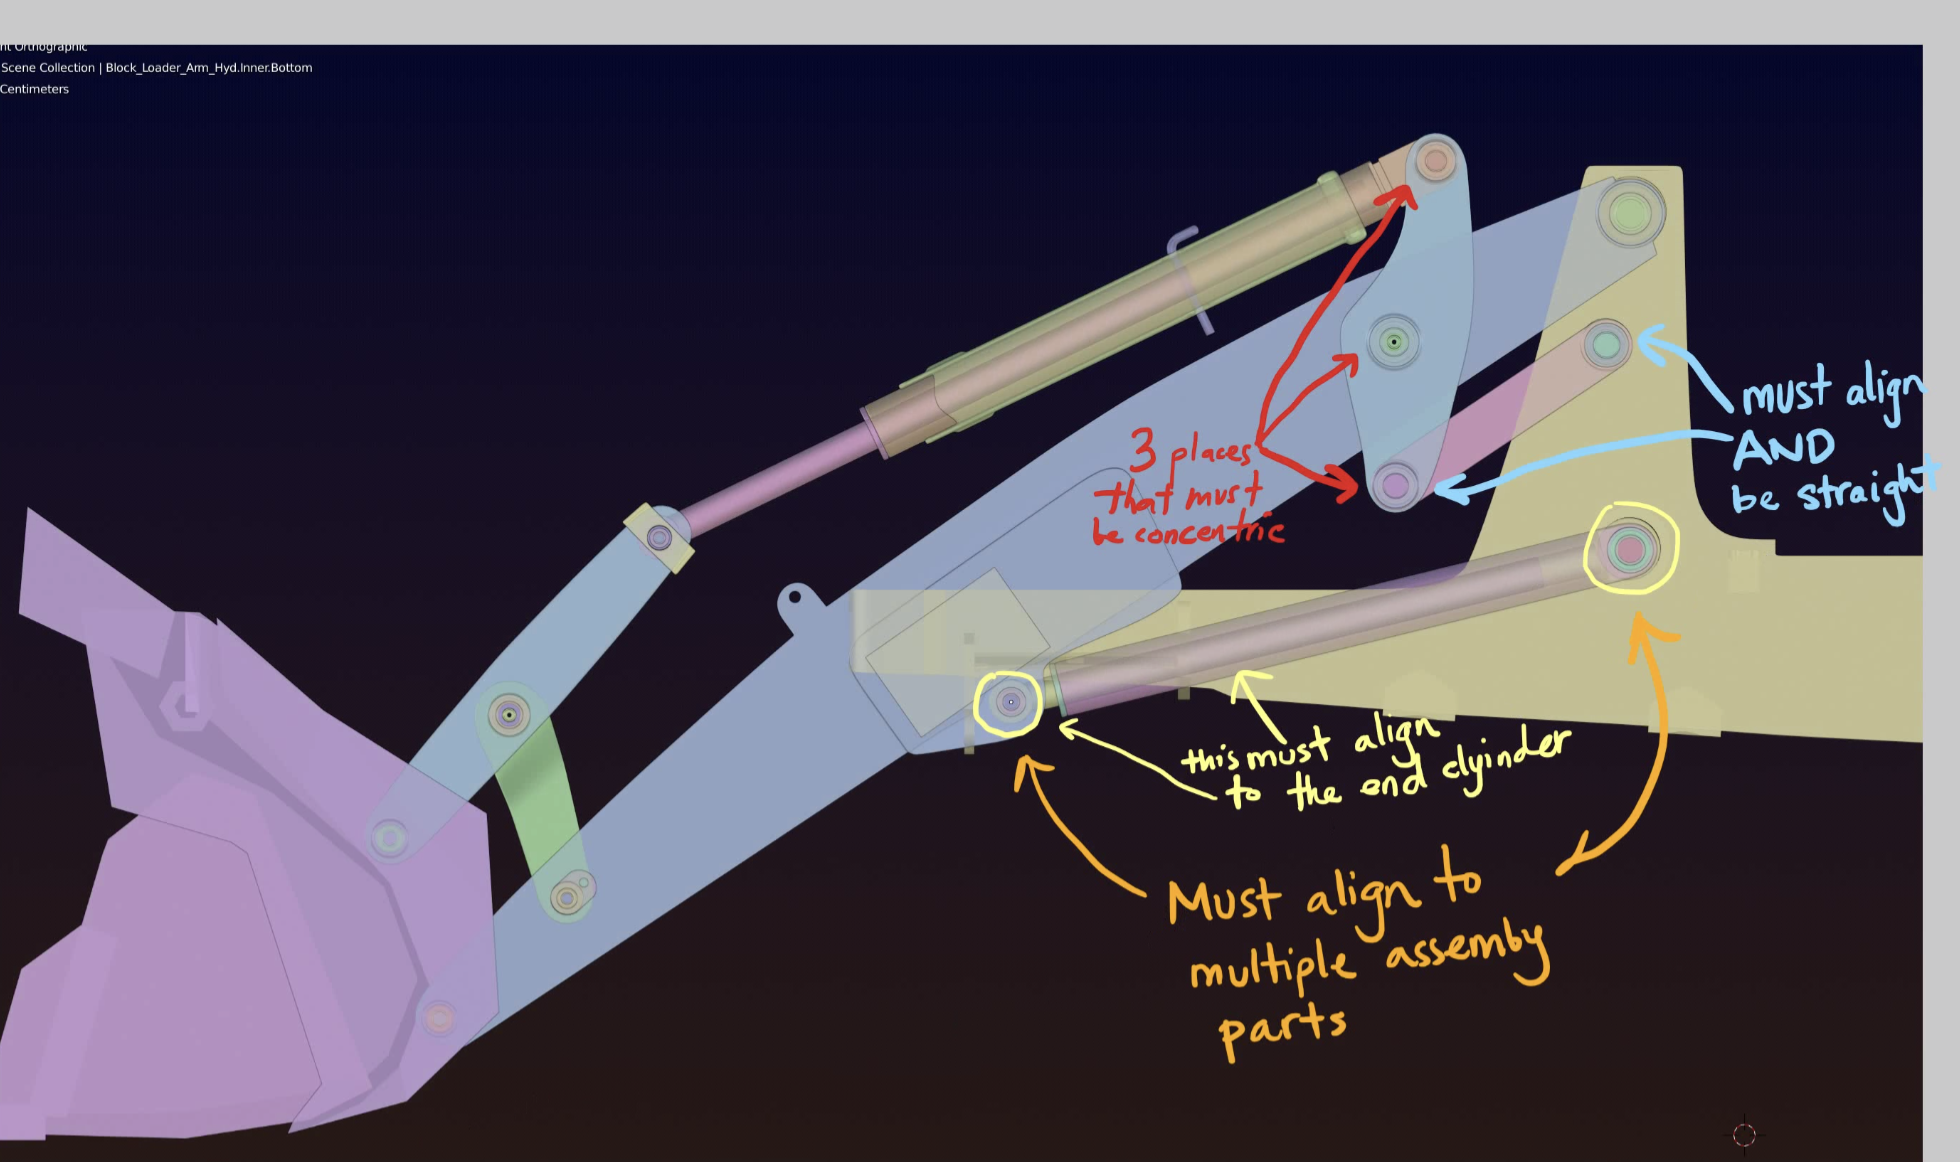
One rather hard exercise I have found is lining up 1 object with 2 other objects without deforming the mesh terribly. Say there are two hinges, one at each end, and you need to line up both ends to other hinged parts of the assembly.
Maybe this is too late to discuss this though. Just figured I’d throw this idea out. I spent way too long trying to solve this particular problem on my own and told myself “there must be a better way” and “I’m missing something”
May 9, 2020 at 7:56 am #54198@jakeblended Nice job with the swing frame. I have downloaded your new file and appended it in with my updated chassis/ stabilizer model.
This image shows my updated chassis/stabilizer, the lower rail is now higher due to an adjustment made to accommodate the position and height of the axles and tyres by @duerer and @spikeyxxx , by the way the axle looks great.
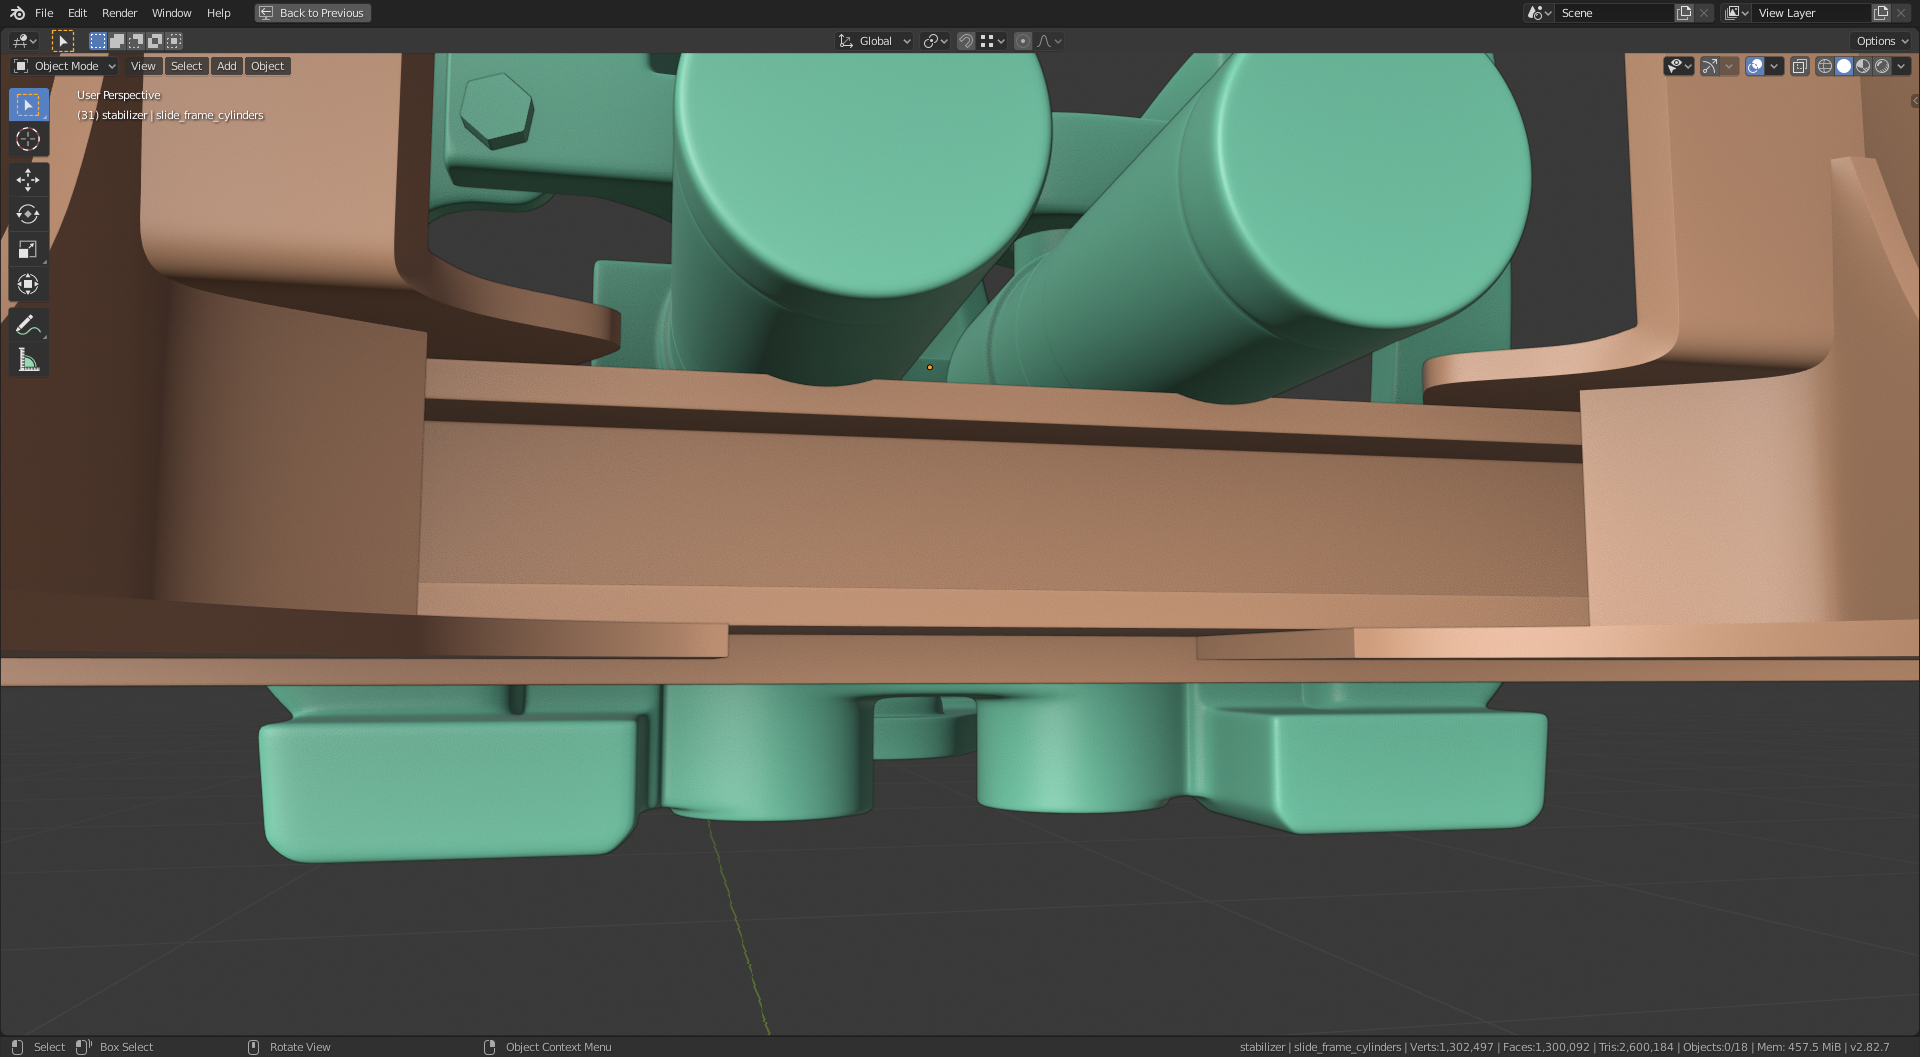
The rails are easy to move, and once I move them down an inch the cylinders should fit nicely above.
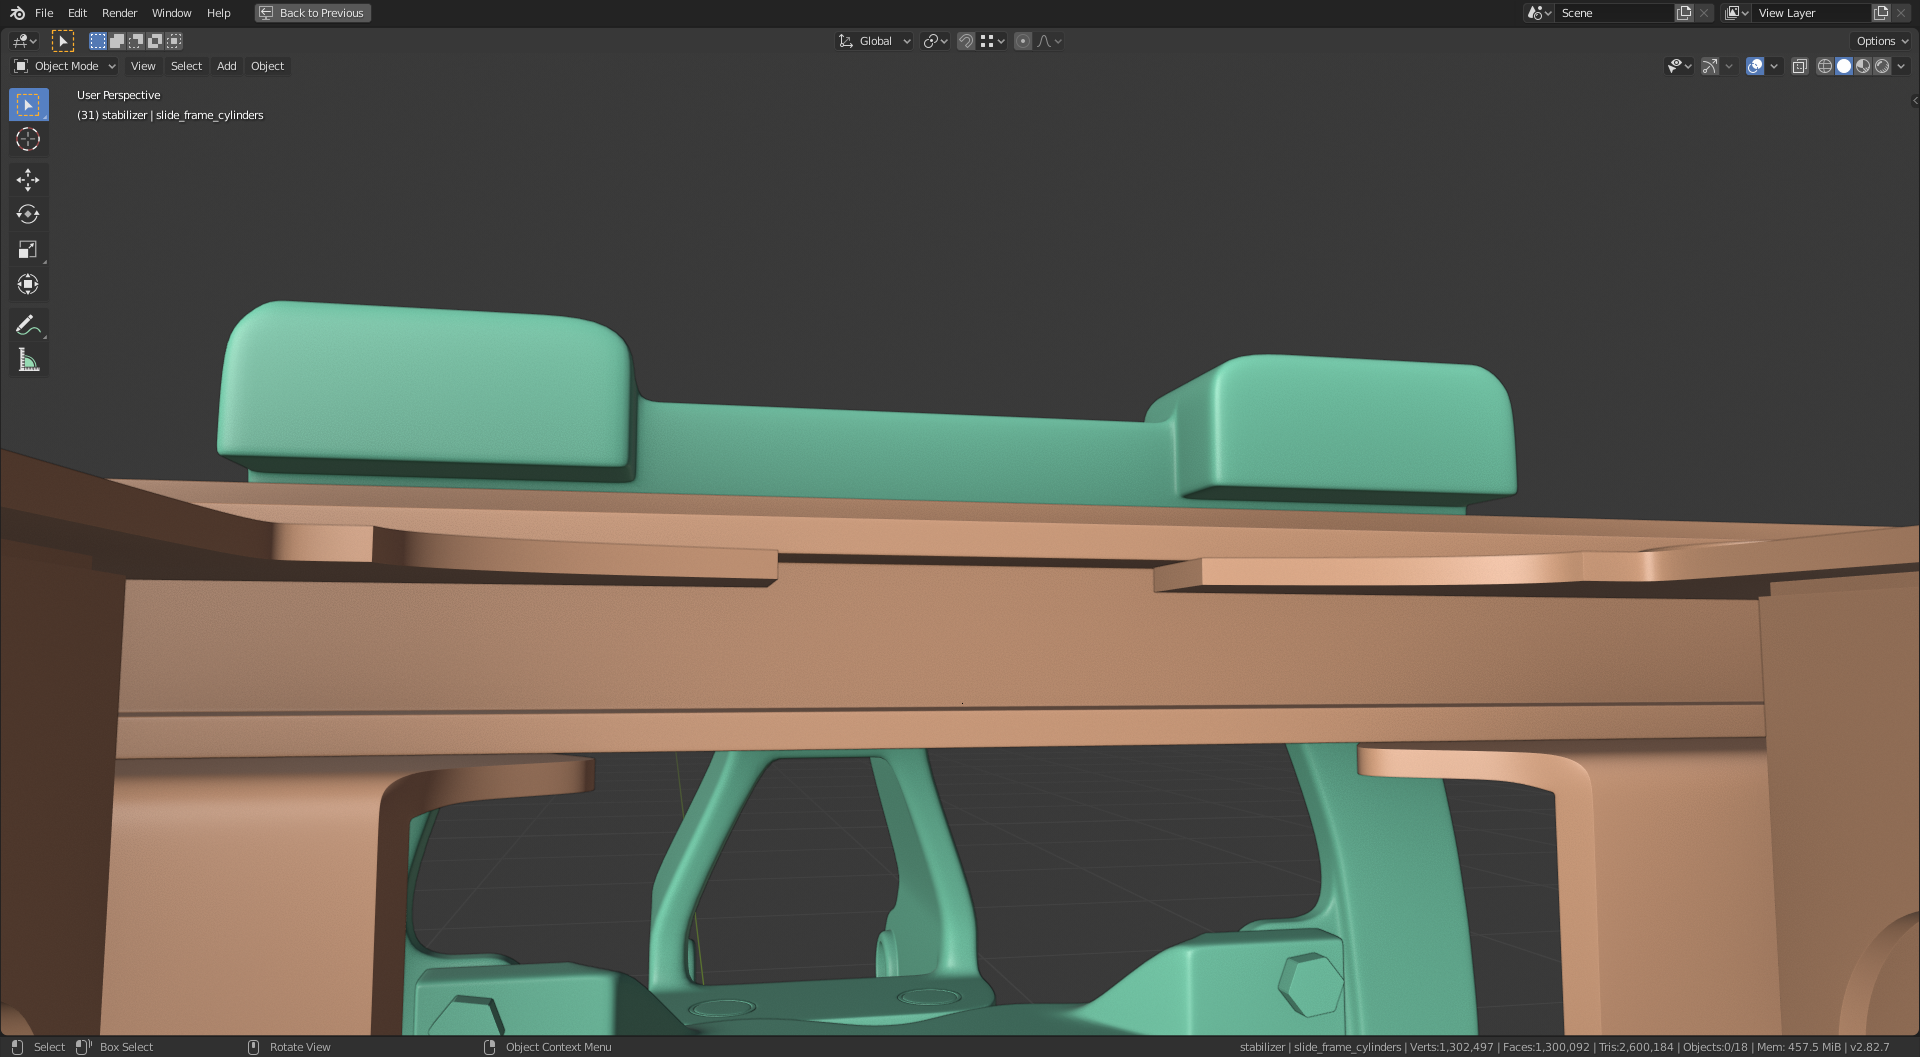
The top rail will also need adjusting, again easy to move. The more difficult part comes with lining up with the chassis support without lowering the whole chassis to much to obstruct the axles and the front end is currently nicely aligned with the loader arm from @blanchsb , but I will probably not have this done before the live stream, @theluthier , but the production line is still operational. I am continuously adjusting the chassis as everyone submits there parts because I have very limited resources for the chassis. I have the collage and the images of the chassis from the treasure trove, but nothing to show the chassis in relation to the other parts, and I thought the chassis was going to be the easy part, and it probably is in regards to detail, but as for size and positioning it is like a continuous modification process.
Overall I would say the position of the swing frame is correct according to references, however I have two questions for you @jakeblended ,
Q1. The cylinders, are they the correct size or are they an estimation?
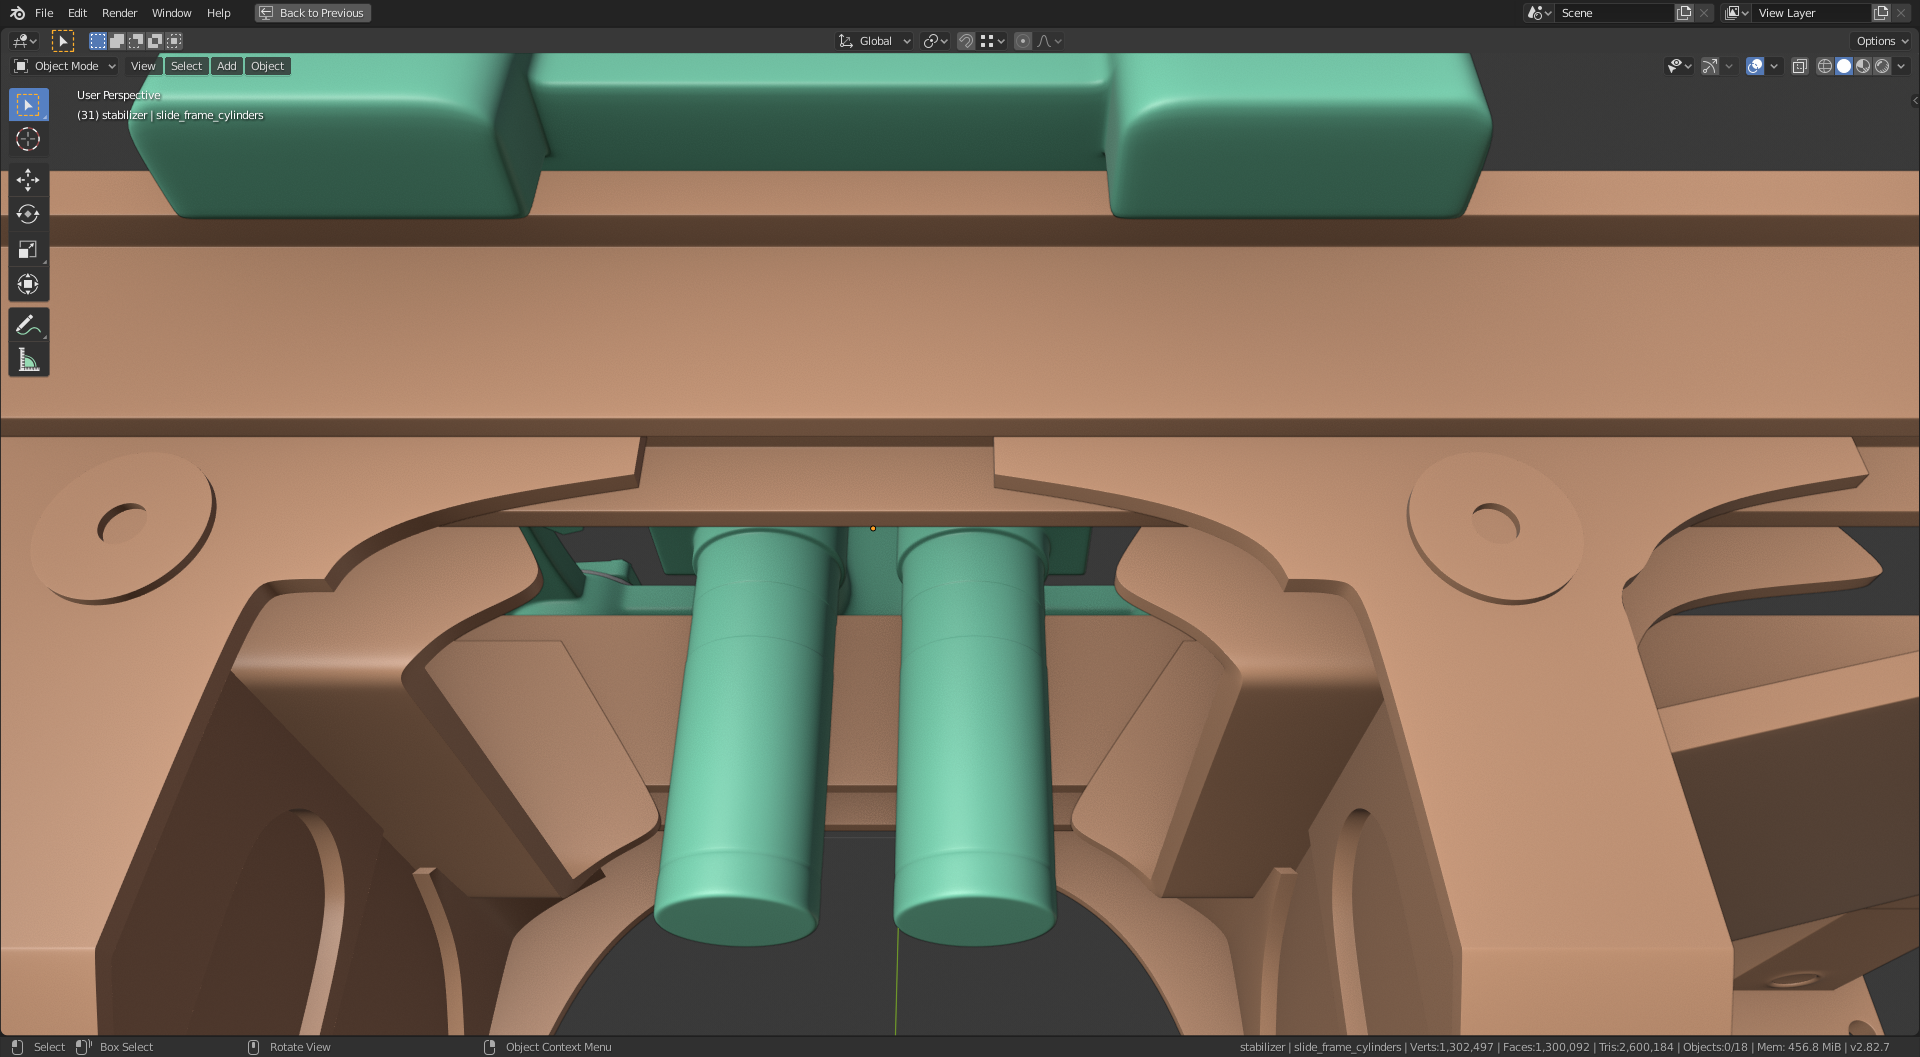
They look a little long. As the swing frame moves left and right along the rails they will collide with the chassis.
And Q2. The Slide Frame Main, Would you agree, where it attaches to the rails, I think should have a plate attached to act as a kind of hook over the rail?
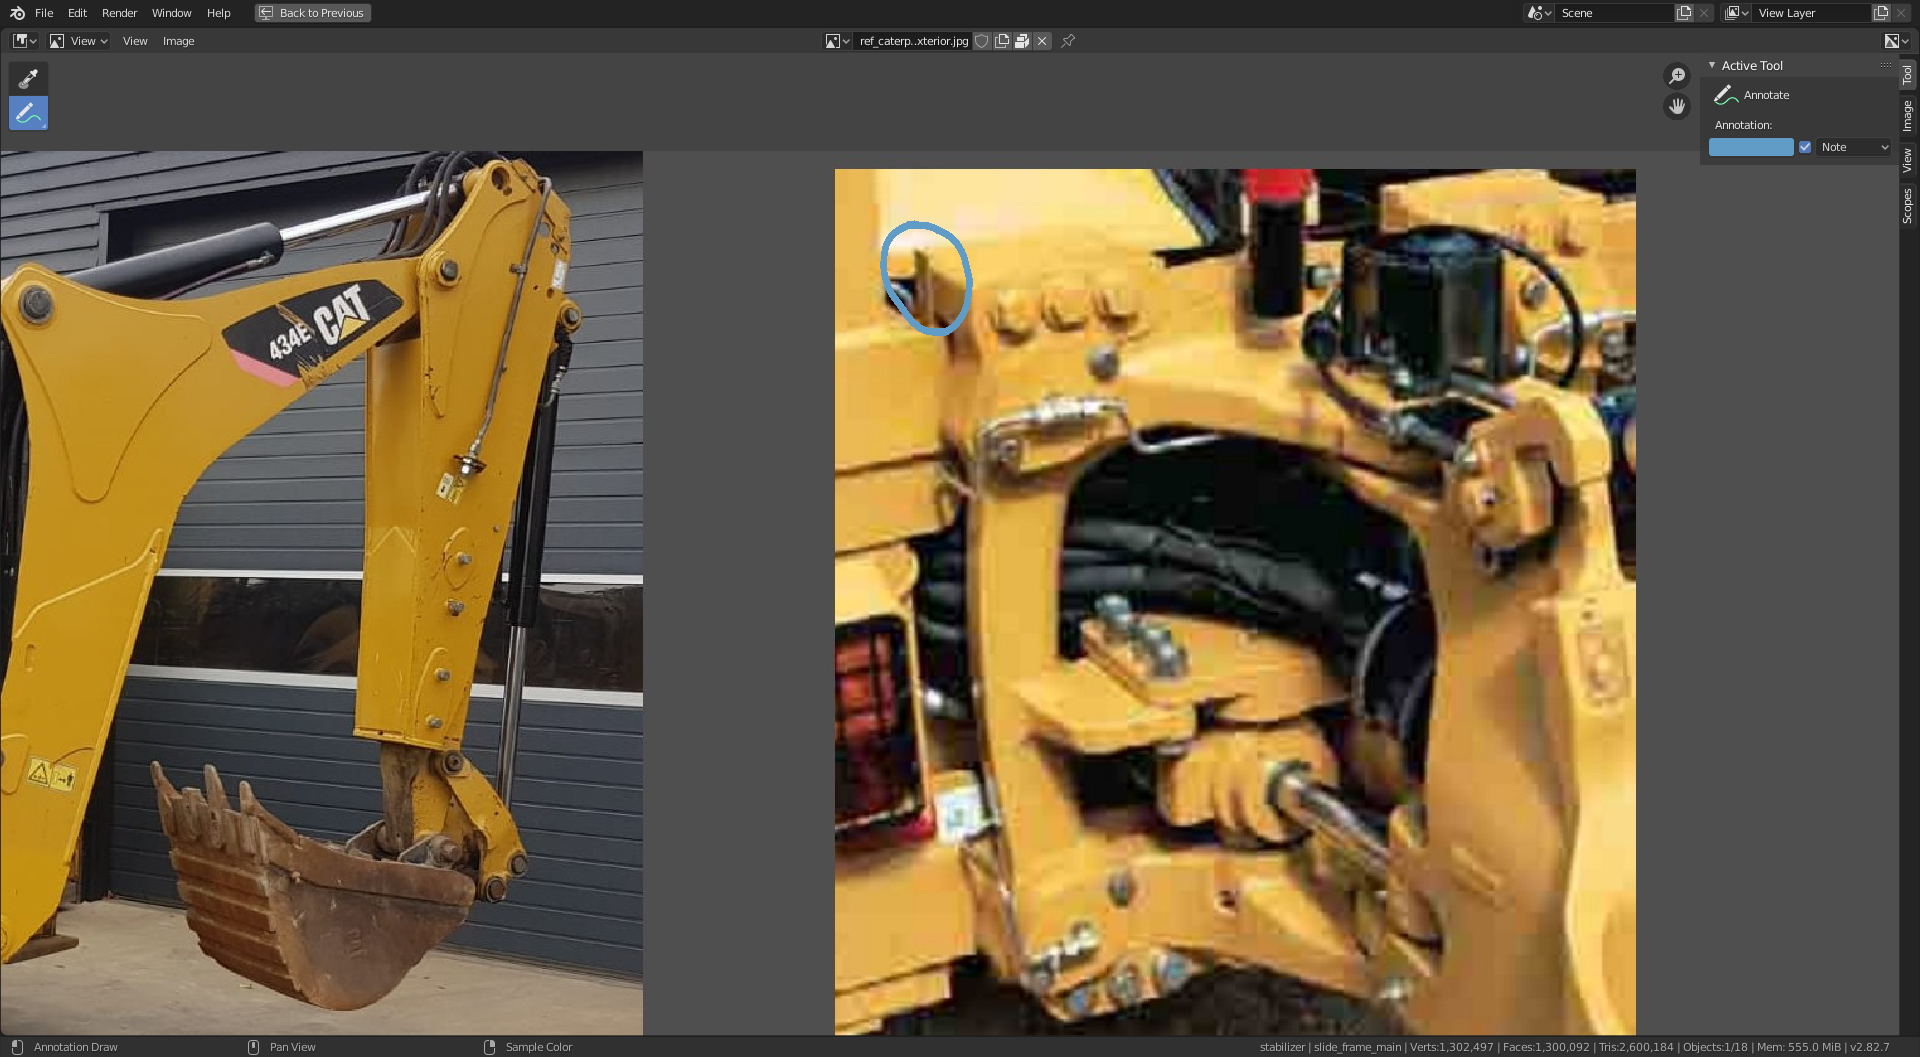
I would suggest that’s the purpose of the three bolts, same for the bottom rail.
Really looking forward to the live stream and the ‘sizzle reel’ @pfbourassa is putting together.
May 9, 2020 at 8:00 am #54199@jakeblended Holy italiano cannoli batman! The Crock just dumped a bunch of reptiles all over that dozer on 5th street!
What dedication to remodel your assembly! I think a few of us had to do that too. Learned a lot along the way though.
I’m thinking bezier curves or similar are going to be your best friend as you “charm” all of your cobras 🐍. I’ve got a few snakes to deal with myself, but rather than a basket dumped in one spot, mine have had a week to spread out and they’ve slivered all over front (in symmetrical fashion no less! Talented serpents…..,)
I think @theluthier could perhaps give some good tips on how to charm one of these snakes in the stream.
They’re probably mostly going to be the same tube size so we may all want to collaborate on the same tube diameter too haha.
May 9, 2020 at 8:10 am #54200I feel it , @blanchsb , sometimes I can be like how can it be done after what seems like an hour , and then I see a tutorial or someone explains it and I’m like ‘I knew that already’.
May 9, 2020 at 3:40 pm #54201@adrian2301 – to answer your questions:
Q1 – nope, the length of the cylinders right now is kind of arbitrary. Once I have your updated frame I’ll be able to shorten them to the right size, no problem. If I need to, I can also adjust the cylinder mounts rearward a little bit also without affecting anyone else’s stuff.
Q2 – you are right! There are clamps on both the top and the bottom; I left them off for now for clarity while you’re making your adjustments. They’re simple square plates, so not a pain to add once we’ve settled the compatibility issues.
@blanchsb My favorite way of doing hoses and tubes like these are by using paths; I used them to make a French horn for a project a year or so ago and they turned out great! There is one problem, though. From the very early beta days of 2.8, I remember reading that there were some problems getting materials to show up properly in Eevee on 3D shapes made from curves or paths – i.e., you’d end up having to convert them to mesh to add a material. I have no idea if that issue has been fixed or not – I hope it has, because I’d much rather keep all of the hoses curves rather than making mesh out of them, in case I need to tweak shapes. But, I’ll cross that bridge when I come to it I suppose.
Also this month, I see people have already begun adding at least basic materials to their components, so that is on the menu for me as well. At some point before the model is finished I feel like we’re all going to have to decide on some “universal” materials – yellow paint, flat black paint, glossy black paint, bare metal, shiny metal, rubber, etc. to apply to our stuff so that the model will look consistent when it’s finalized.
May 9, 2020 at 4:00 pm #54202@jakeblended I just added materials to a separate file to show a temporary render. The main file I believe the materials will be selected by Kent, but you’re absolutely right. I bet we will be assigned to do our own materials and we will want to pick a color pallette to stick to for the yellows, greys, and blacks I bet. It looks like he has grouped a few things together by assembly for the materials which is nice.
I just don’t like rendering white or grey objects haha. It’s easy enough for me to spend 15 minutes to a half hour to throw some mats together just for fun. I’m no guru but I am getting better at the node editor.
What’s the difference between Path’s and Curves I wonder? I’m going to honest that I bought the Fluent Power Trip add-onto see if I can use that add-on for the hoses and then just apply the mods when I am happy.
May 9, 2020 at 4:18 pm #54203@blanchsb as far as I know (so don’t take this for authoritative, ha) the main difference between paths and curves is that paths you can’t use Bezier handles to control the shape of the “curve” between control points. Neither is superior to the other I don’t think; for laying out pipes or tubes with very specific courses (like my French horn) I just like to use paths because building them is closer to the behavior of building mesh, and I feel the resulting mesh is also more predictable if I do have to turn the path into mesh at some point. For something a little more “freeform” like flexible hoses that won’t be going in straight lines, using Bezier curves might be better. I’ll find out. 🙂
Note that as far as Blender is concerned, paths are still a TYPE of curve, so they use the curve properties tab and the “Convert Curve to Mesh” operator, etc.
May 9, 2020 at 5:19 pm #54204@jakeblended I’ve adjusted the swing frame rails to fit.
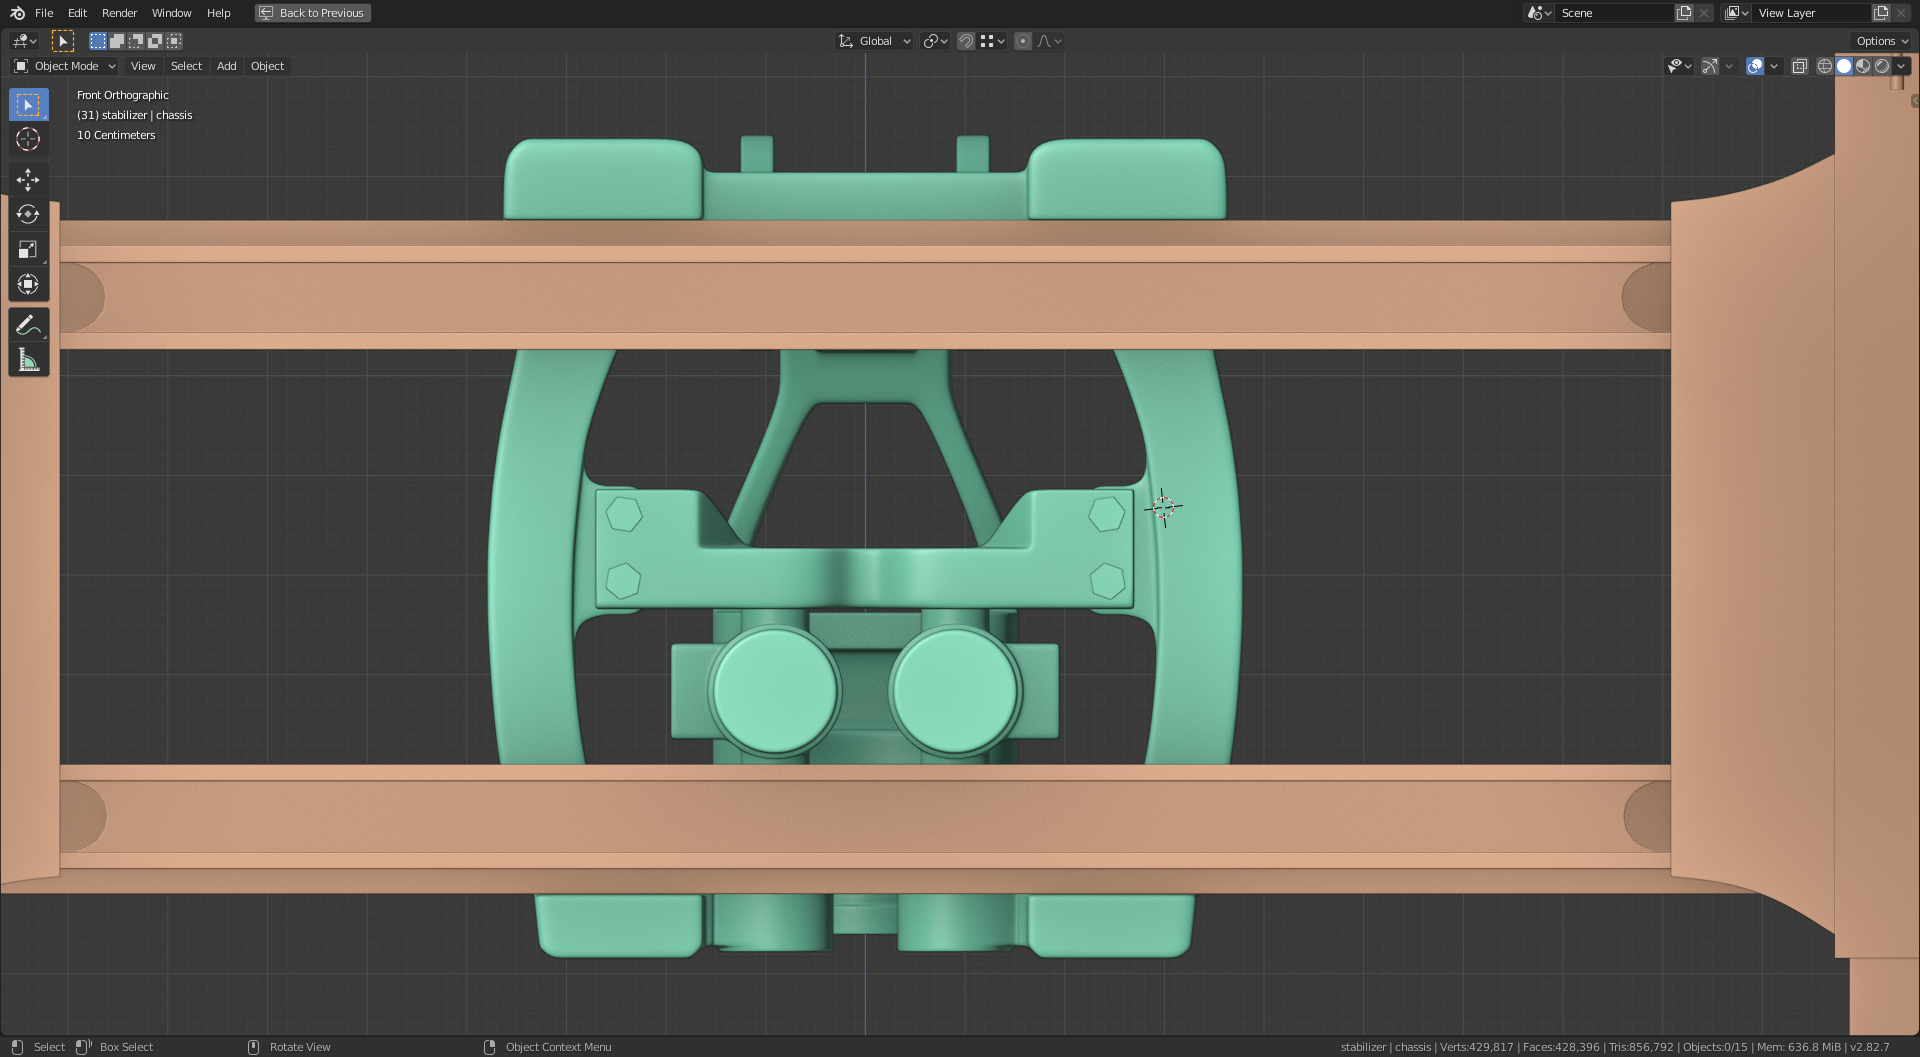
Just need to add the clamps and adjust the length of the cylinders.
The Link if you want it .
May 10, 2020 at 1:31 am #54205@jakeblended FYI: Materials on Curves/Paths seem to work fine in Eevee now. Luckily, because repairing intersections or other tweaks are a lot easier when not converted to a Mesh;)
May 11, 2020 at 3:46 am #54206May 11, 2020 at 10:31 am #54207@blanchsb I’d be happy to discuss that situation on the stream. While I think I know what you mean, could you post a screen shot of 1 or 2 situations as you described? Indeed it sounds like a common task and thus helpful for the DOG Pound.
EDIT: I just noticed the grease fitting images you supplied. Would it be helpful if I modeled that specific (most used) fitting during the stream?
May 11, 2020 at 1:10 pm #54208While I think I know what you mean, could you post a screen shot of 1 or 2 situations as you described? Indeed it sounds like a common task and thus helpful for the DOG Pound
@theluthier
Yeah I can do that: 4 different parts the must align in similar ways. Hard to explain but hopefully the picture below makes sense. I wish there was some sort of concentric snapping between two objects that have circles. Would make it a little simpler to align them all.one of my biggest pains was aligning the hydraulic main body from one pivot location on the right to the other location in the lower left (It is the note in yellow, regarding the part in pink/purple) and making the “rod” also align perfectly (the yellow part inside). Somehow these Two parts got out of alignment with everything even each other and it took me forever to figure out how to align them all again
EDIT: I just noticed the grease fitting images you supplied. Would it be helpful if I modeled that specific (most used) fitting during the stream?
I feel like I am making all of the demands for what to cover in the live stream 😂 . Sure if there is time left over I’d love the additional coverage. Or I can make the grease fitting and post it to you and you give me feedback And once it is satisfactory then it can be given to the group. With the time constraints though: I’d rather see how to make good holes on the curved surfaces and how to do the hydraulic lines easily to be honest.
May 11, 2020 at 1:27 pm #54209@blanchsb that is indeed tricky! When I was in a situation like this (actually also with hydraulic cylinders), I made a small ‘rig’;
using Empties at the ends of the cylinder, parenting (or using Copy Location and Copy Rotation Constraints,,,) the two parts of the cylinder to the Empties and a Damped Track Constraint so that I could just snap the two Empties to their positions and the cylinder would follow…Somethiong like that, can’t remember exactly;)
May 11, 2020 at 1:30 pm #54210Ooooooooo! I wanna see how to do that! Kent there you go. Empties for the win.
May 11, 2020 at 1:35 pm #54211@blanchsb maybe (hopefully) @theluthier has a better way of doing this! But I’ve got it working and the cylinder is the hardest part, when you can do that, the rest is a breeze;)
-
AuthorPosts


- The topic ‘Collab 2020: Modeling Heavy Equipment (Backhoe)’ is closed to new replies.