
BC1-1808 Homework, Andres
Forum Archive › BC1-1808 Homework, Andres
- This topic has 65 replies, 13 voices, and was last updated 8 years ago by
Kent Trammell.
-
AuthorPosts
-
August 15, 2018 at 12:18 pm #39910
Week 2 Project:
For this project I’m aiming for something more challenging, I will try to model Mazinger Z pilder.
 Goals:
1.- Learn how to use different shapes as a starting point for each part.
2.- Learn how adding edges affects the mesh.
3.- Learn how moving vertex around affects the mesh.
4.- Learn how to use subdivision surface modifier.
5.- Learn how to use blueprints as reference guides.
6.- Work with almost every shape possible.
Courses I will see:
Blender Mesh Modeling Bootcamp
Note: I will not do the homeworks since I don’t think I won’t have time to do this, I’m going to watch the classes and work on my project once I finish this I will do the homeworks.
Blender Version to use:
For this project I will stick to blender 2.79. Blender 2.8 is giving me a lot of issues and I’m afraid of loosing the project.
Side Note:
I know this model is super hard but It seems so much fun to do it and what I like about it is that it contains a lot of shapes, squares, cylinders and spheres. The other thing I really like about this model is that if you go from outside to the inside of the model, the difficult moves from easy to hard.
I will start sharing images tomorrow and ask questions if I have one 😀
August 15, 2018 at 12:35 pm #39911I think those area great goals to reach for! Go for it!
August 15, 2018 at 1:06 pm #39912@aaltuvem Damn that’s an ambitious model, really looking forward to seeing this!
August 15, 2018 at 1:12 pm #39913@aaltuvem Wow, that’s a challenging one! I really like that you made a list of learning goals, it’s a good list. Looking forward to your WIP’s 😊
August 16, 2018 at 1:12 pm #39914@aaltuvem I’ve never heard of Mazinger Z pilder but it look like it will be an awesome model! Really interesting shapes going on. I’ll be eagerly watching your thread 🍿
August 16, 2018 at 5:08 pm #39915Model Facts:
Total Time Invested: 9 hours.
Most Used Tools:
- Bevel
- Knife (My best friend forever)
- Disolve edges
- Extrude
- Inset
To accomplish this result was not an easy task, it was basically trial and error, I wonder if I took the thing to model… Anyways, the image with different parts It is the amout of tests I did to create the round thing alone this part took me about 5 hours, the other was easier because it is a flat surface that one took me over 4 hours bit i did delete the tests.
Things in Orange: My first try, it didn’t have enough faces to work with, took a break and I remembered the video of the soccer ball and the ammout of faces he used, and in the next video the one were they paint over a face and a car he explained that you should have more faces in places where details is needed.
Things in blue: Added more faces..
Things in Yellow: way more faces.
Things on the bottom: WAAAAY MORE and this is were i managed to put the details, and there you can see the tests when trying to add more details.


 August 17, 2018 at 3:58 pm #39916
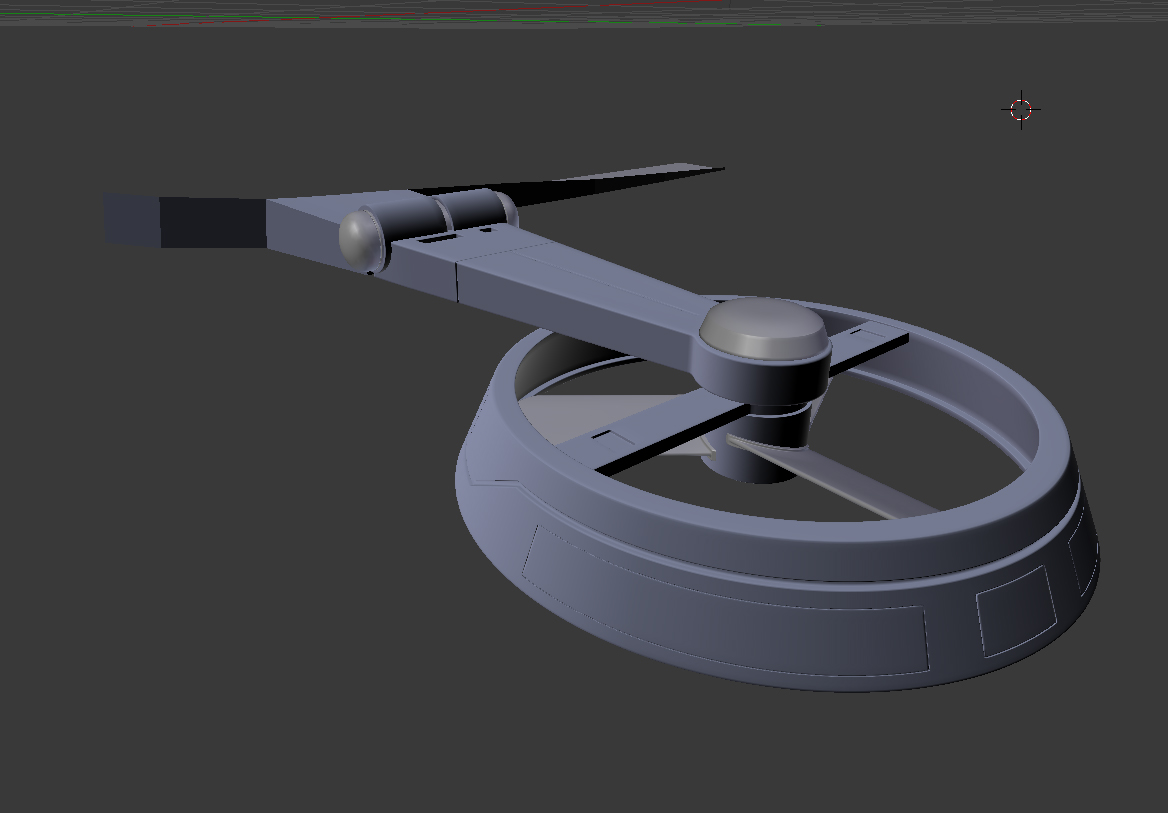
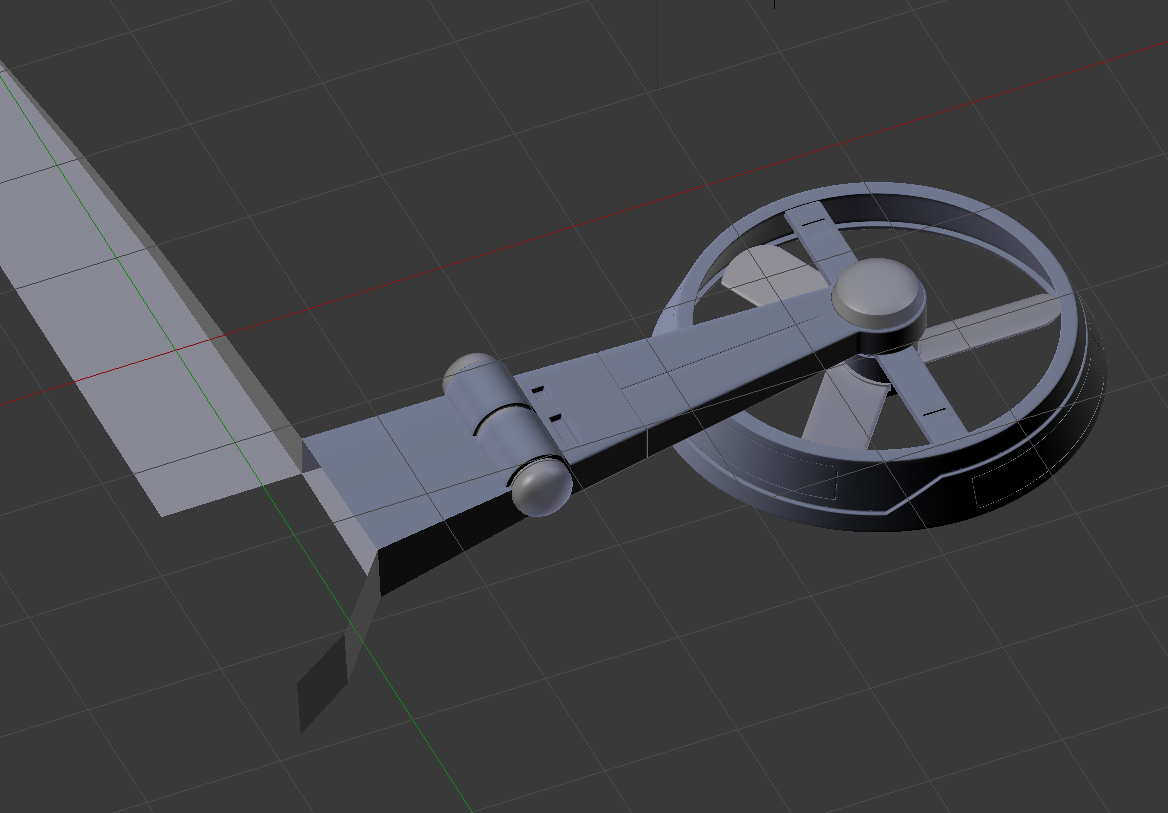
The wing (fan) is done :D, Im starting to work on the main body.
 August 17, 2018 at 4:04 pm #39917
@aaltuvem Those edges, *so* crisp. I need to up my smoothness game.
August 17, 2018 at 4:09 pm #39918@thecabbagedetective Thanks :D, dude this project has been a real challenge but I’m loving it, I feel like I’m giving birth lol… Hopefully will have more done by tomorrow.
August 17, 2018 at 4:26 pm #39919@aaltuvem Wow, this is looking amazing! I can learn a thing of two from you, such nice edges 😊
August 17, 2018 at 5:04 pm #39920@smurfmier1985 Thanks Miranda, I don’t know what you can learn from me but If you have a question I will more than happy to try to help you out! 😊
August 17, 2018 at 5:19 pm #39921@aaltuvem well I was wondering how you the rotor nice and askew, did you use a modifier or placed it by hand? Is it attached to the middle part or have you stick it through? Just curious, it looks nice 🙂
August 17, 2018 at 5:57 pm #39922@smurfmier1985 Hi Miranda, answering your questions.
how you the rotor nice and askew,?
I created a cylinder with 27 divisions no cap, then added two edges on top and used the distance between the edges to get the thickness of the fan. Then added two more edges on the bottom part with the same distance. Then divided 27 by 3 since I just need 3 fans and got that I needed nine faces, so the next step is to disolve the top and bottom edges in the same 9 faces and finally join the top ones with the botton ones using the knife tool. Then deleted the faces i didn’t need.
 did you use a modifier or placed it by hand? By hand, I only know two modifiers, mirror and subdivision surfaces.
Is it attached to the middle part or have you stick it through? stick
August 17, 2018 at 6:23 pm #39923@aaltuvem Thank you for your clear explanation! I’m also most familiar with those too modifiers, first ones you learn 🙂 I think you you did this very nicely, smart to use the knife tool, and the result looks great 😁
August 18, 2018 at 11:17 am #39924Small update, after a couple of test I was able to make the body, I eneded up using a Sphere to get a rough shape, today I will finish the body and then get into details. Hopefully I will finish this by tomorrow and submit the homework.

-
AuthorPosts


- The topic ‘BC1-1808 Homework, Andres’ is closed to new replies.