

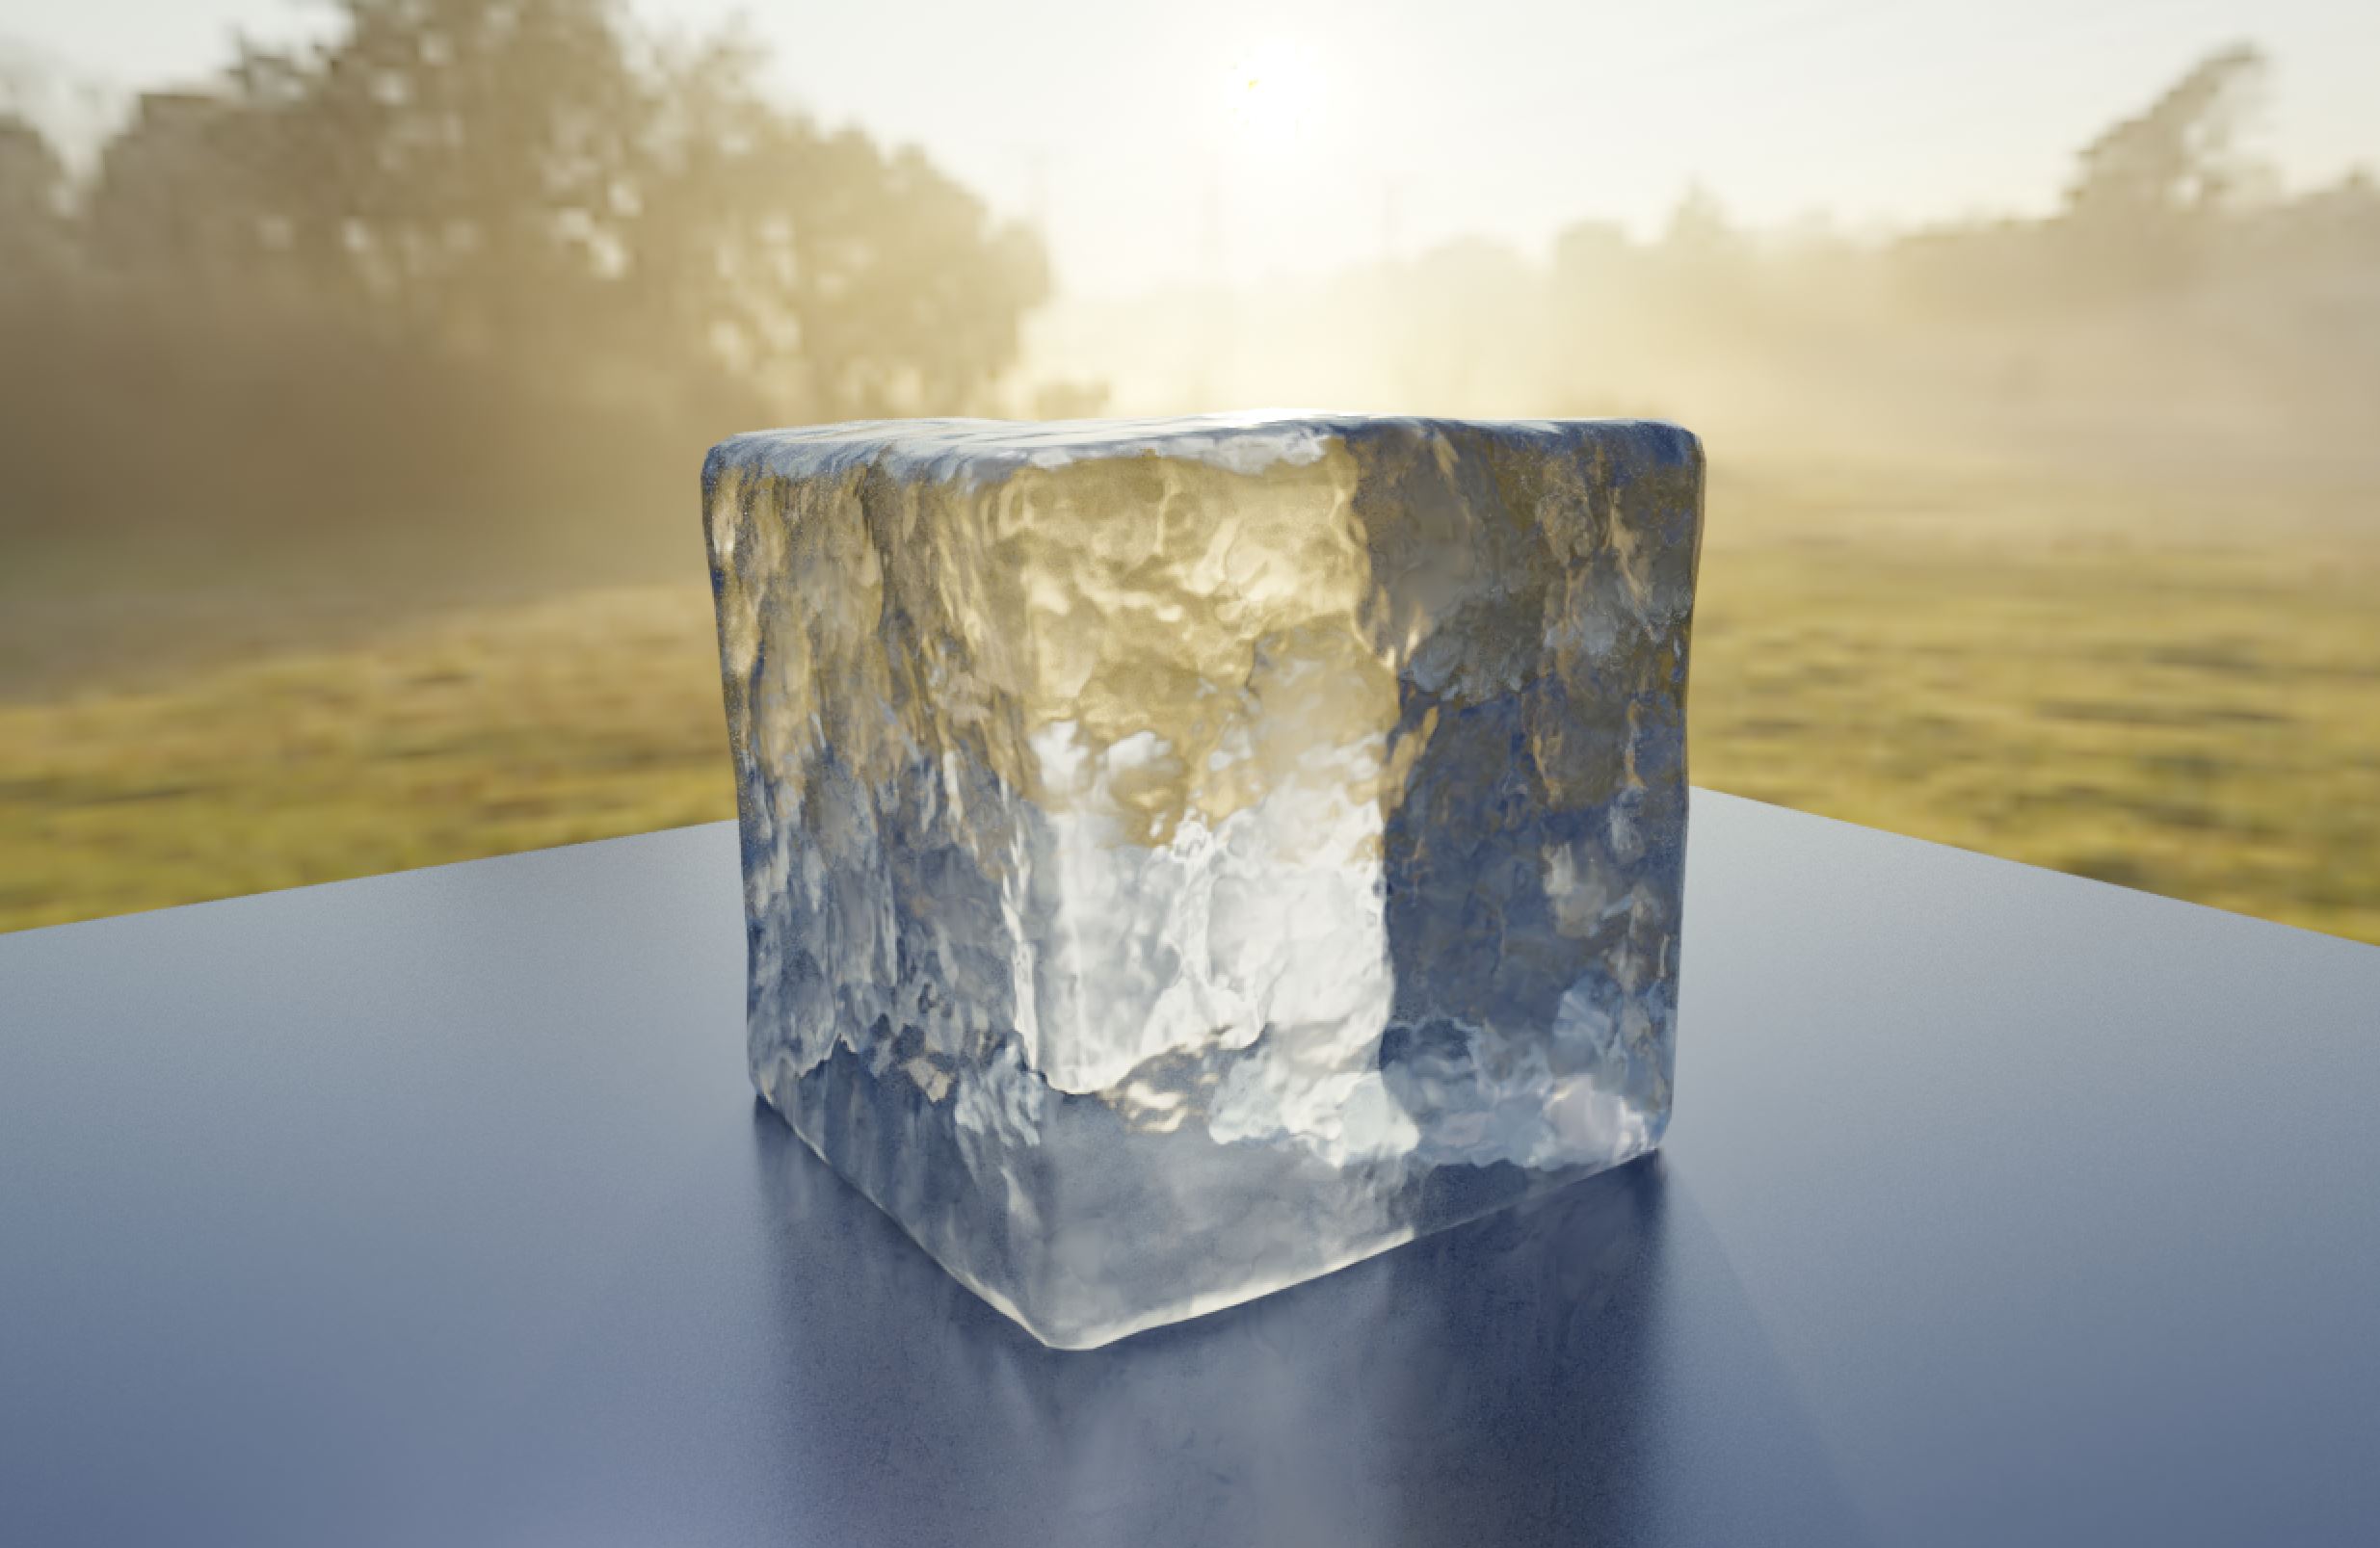
Procedural shaders are a powerful but underrated tool in Blender. Today, we’re going to learn
how to use them to create a realistic 3D cube of ice. Hopefully, this tutorial will be an effective
primer for all of you Blender beginners, and you’ll be creating ice materials from scratch in no
time. Feel free to follow along here, or take a look at the video version of this tutorial for a
step-by-step deep dive into this process.
At a high level, the properties we’ll need to tweak to create some realistic ice are:
- Shape
- Environment
- Texture
Let’s start at the top.
Shape
We’ll start off with the default cube. 😎
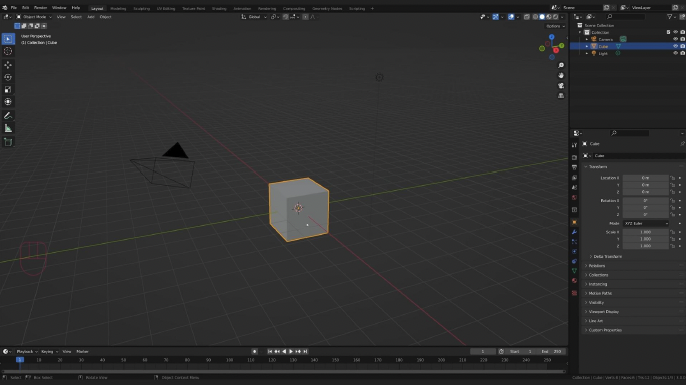
Now, in real life, ice cubes are never perfect cubes, so we’ll want to add some modifiers
to give the shape of the cube more interest. To do this, first select the wrench icon to get
to the modifiers, and then add a Subdivision Surface modifier, which is used to split the
faces of a mesh into smaller faces.
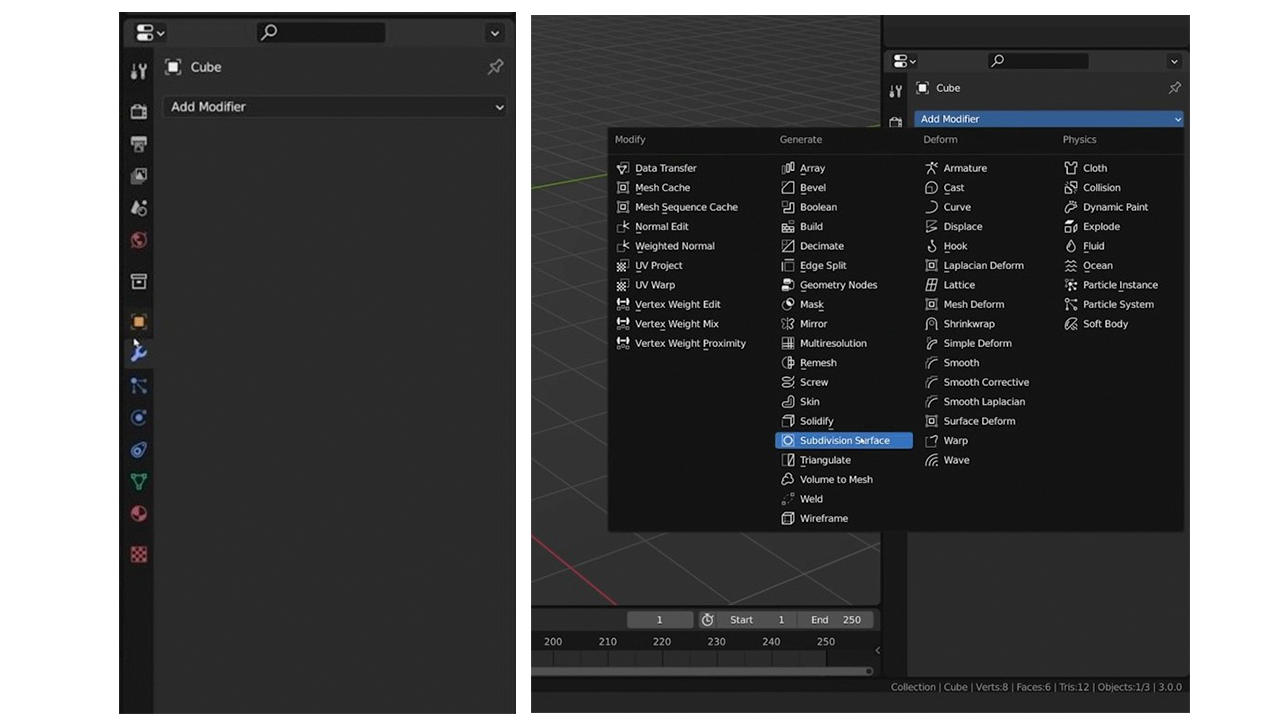
The Catmull-Clark option will distort the cube and round it out, which we don’t want, so
we’ll select the Simple option, which will remove the rounding effect but still increase
the subdivisions. We can also increase the Levels Viewport value to 2 to match the
Render value.
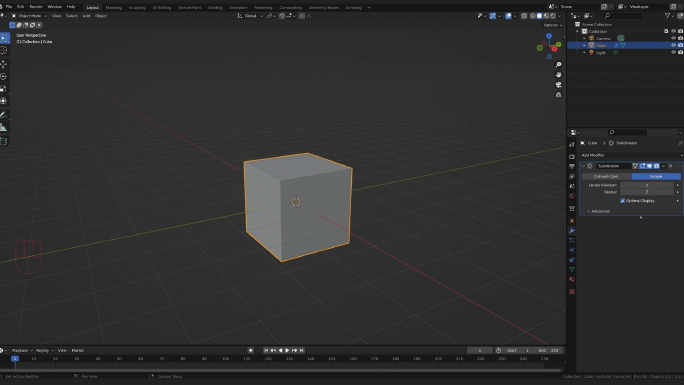
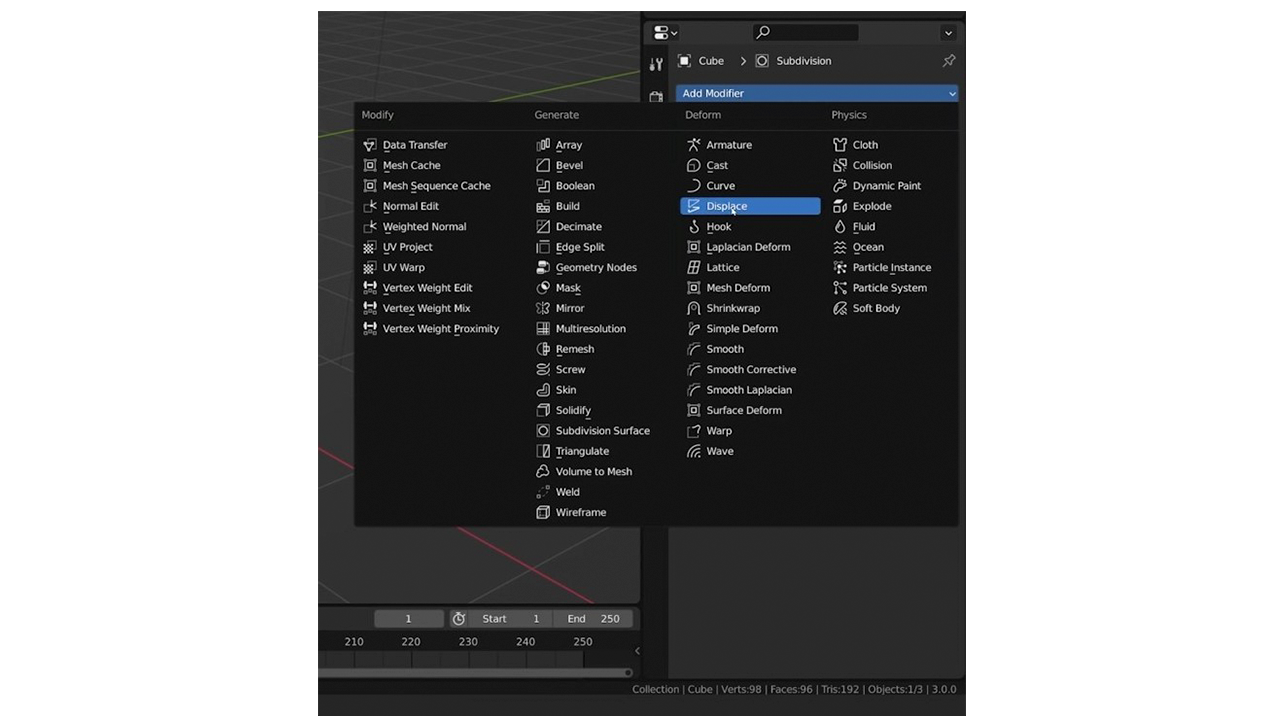
The next modifier we want to add is a Displace modifier, which displaces vertices in a
mesh based on the intensity of a texture.
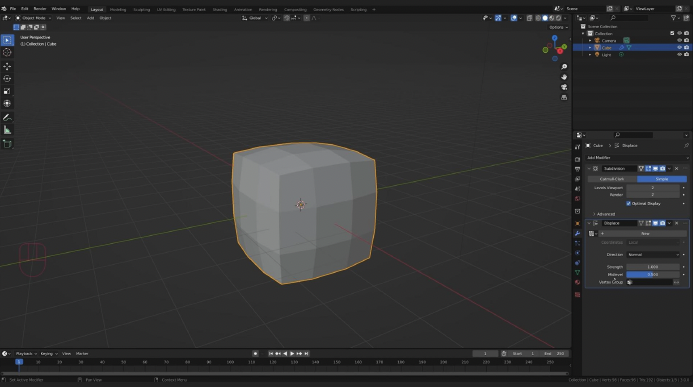
That gets us something like this.
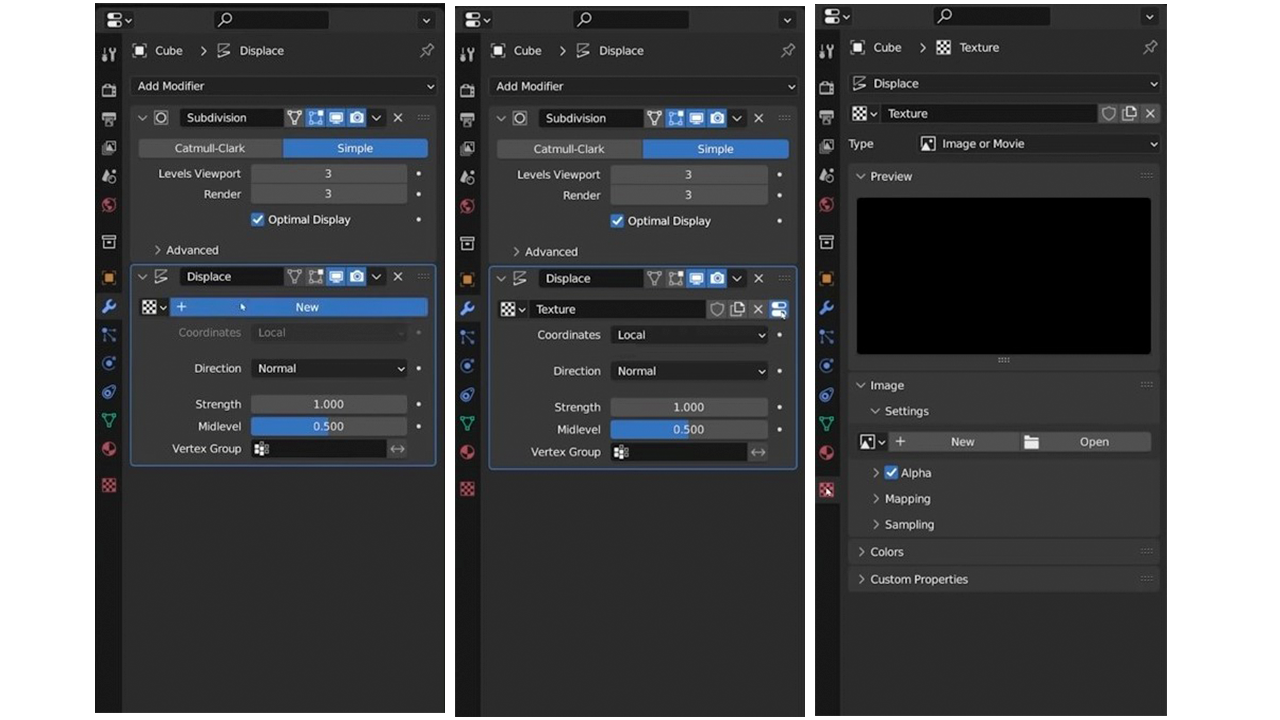
We can click “New” to create a new texture for the Displace modifier and then select the
“Show texture in texture tab” button, which will take us to the texture tab as shown
below.
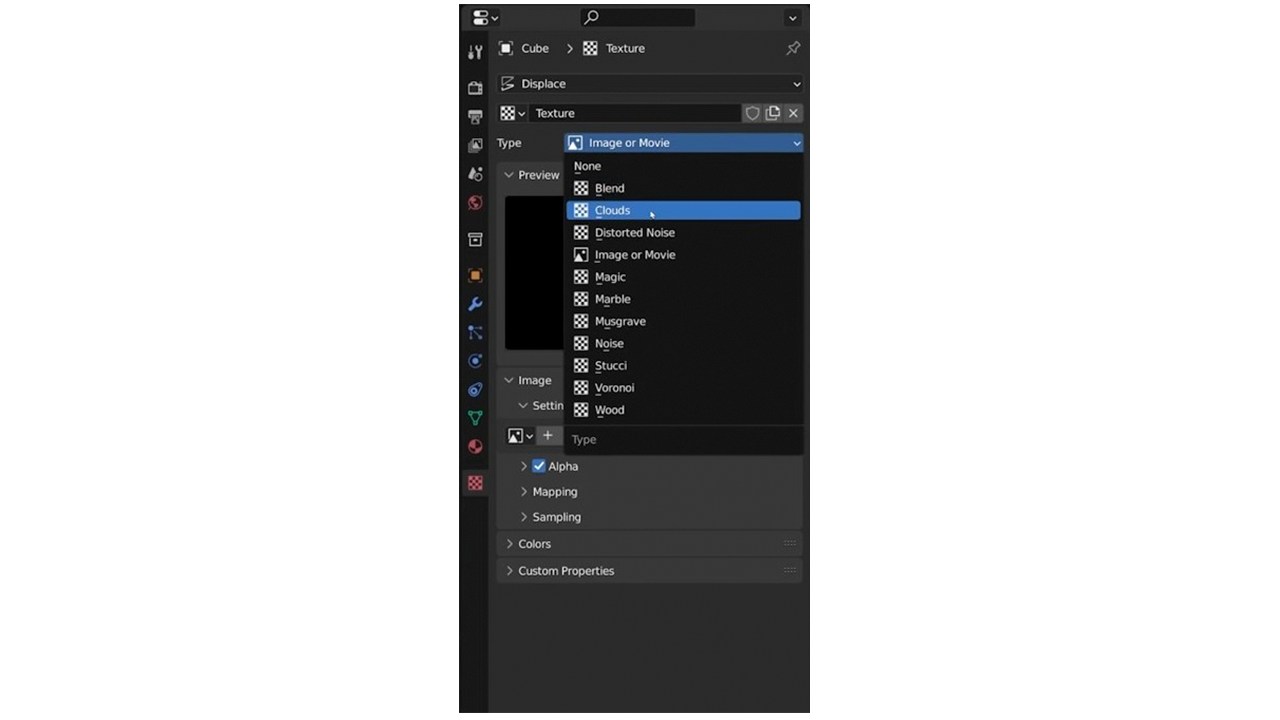
We’ll create a Clouds texture and bring the Size way up. The resulting shape of the cube
is something like what’s shown below.
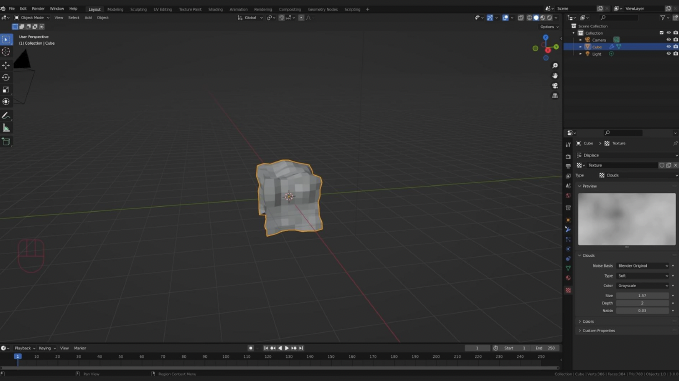
Next, we’ll go back to the wrench icon and change the strength of the Displace modifier
to something closer to our desired result, like below.
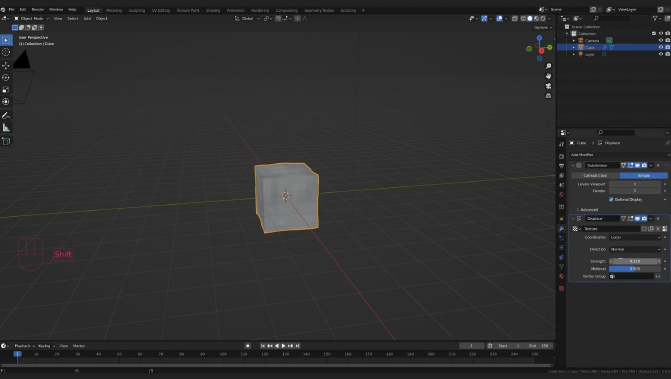
Then, we can right-click and Shade Smooth to get something like this.
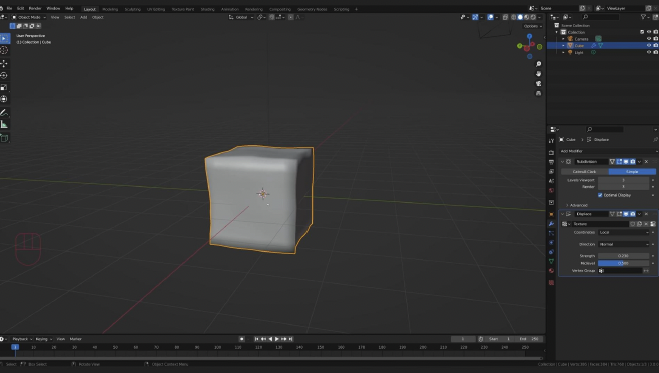
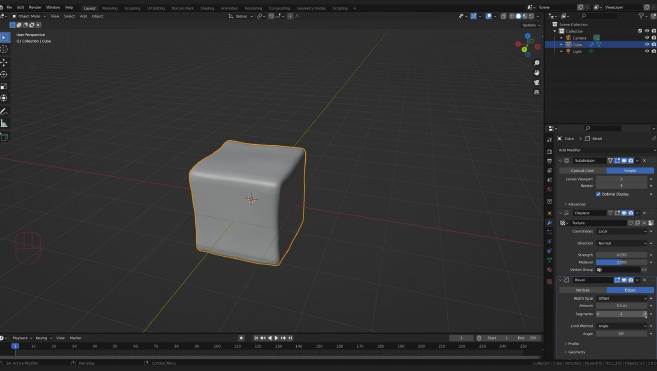
Finally, we’ll add a Bevel modifier.
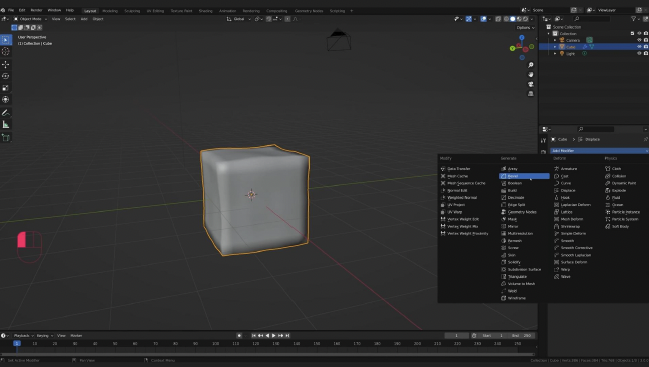
We can increase the segments value of the Bevel modifier to 2, getting us something like
the below image. As you can see, it’s starting to look a lot like an ice cube.
Environment
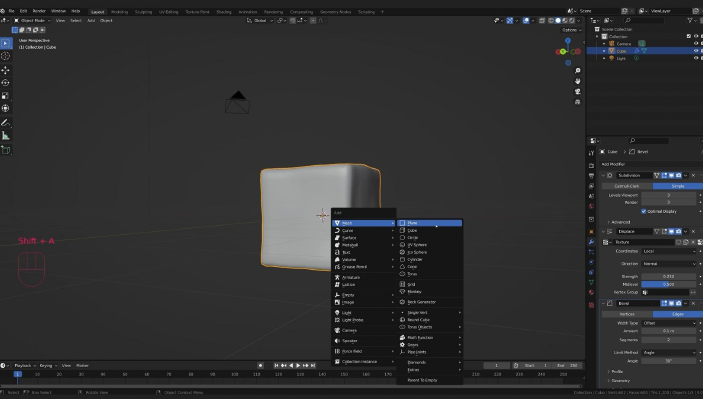
Our first step to getting the environment in order is to create a plane for our ice cube to rest
on. Let’s hit Shift+A > Mesh > Plane.
We can then press S to scale the plane and G and Z to move the plane into position.
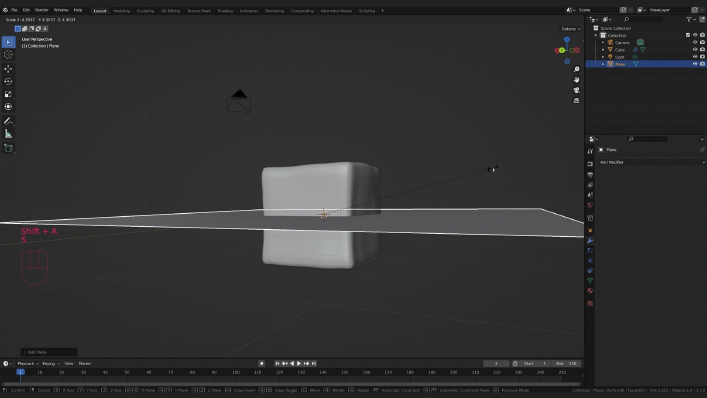
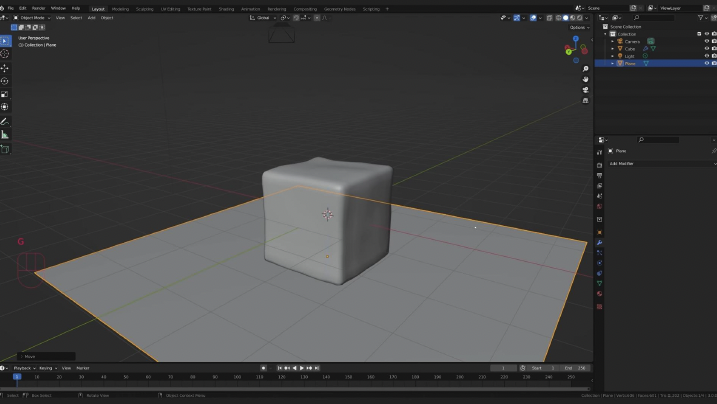
This will act as a floor plane for our ice to sit on so that we actually have something to
see through the ice.
Opacity
To start working on the opacity and transparency of the cube, let’s first split our view.
Mouse over the left border of the view until you see the crosshair, and then click and drag
right until the view is split in two.
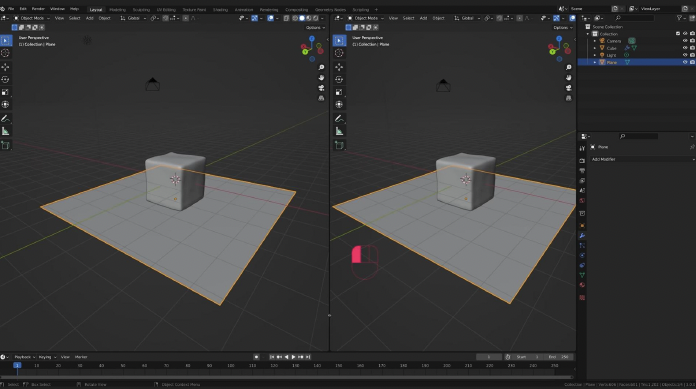
In the upper right-hand corner, open the Editor Type selector and select the Shader Editor.
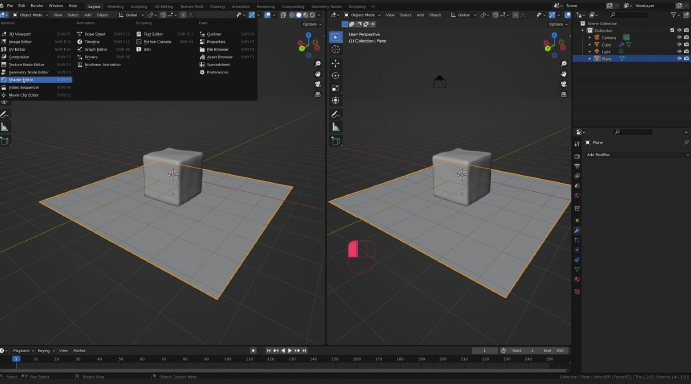
Now that we have the Shader Editor open in the left view, let’s select our cube, go to the
material tab, rename our material to Ice—since that’s what we’re working on—and
switch over to Rendered View.
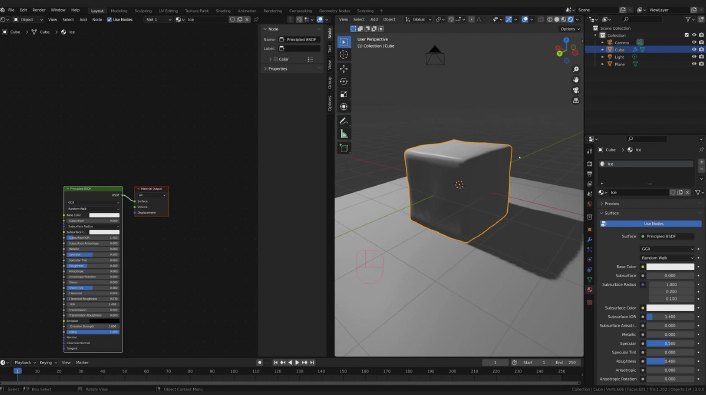
The Cycles render engine is the best choice for this, but we’ll start off using Eevee for
demonstration purposes. We have a number of settings that need to be set before we
can make our cube transparent.
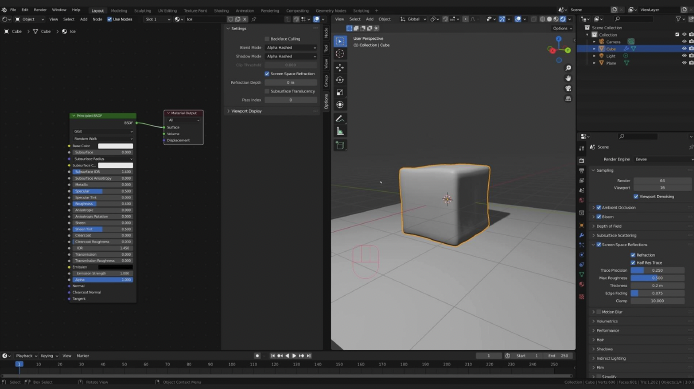
First, we’ll go to the options tab of our Shader Editor and
change the Blend Mode and Shadow Mode to Alpha Hashed. We’ll also turn on Screen
Space Refraction.
Then, in the Render Engine settings, we will turn on Ambient
Occlusion, Bloom, Screen Space Reflections, and Refraction. These options can all be
seen in the image below.
Now, to make our ice cube transparent, we can set the Transmission value in the
Principled BSDF node to 1. This refers to how much light hitting the object is transmitted
through, which in our case should be all of it.
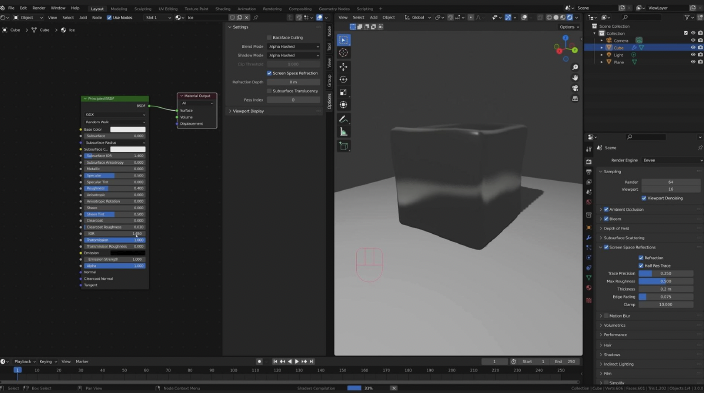
You may be able to see at this point that, while all of the light hitting the object is being
transmitted through, it is blurry. That is because of the Roughness value, which refers to
how rough the surface of the object is which in turn affects the refraction of the light
passing through. For our purposes, we can turn the roughness quite low for now, and we
should see that the ice cube is behaving almost like a window that we can see right
through.
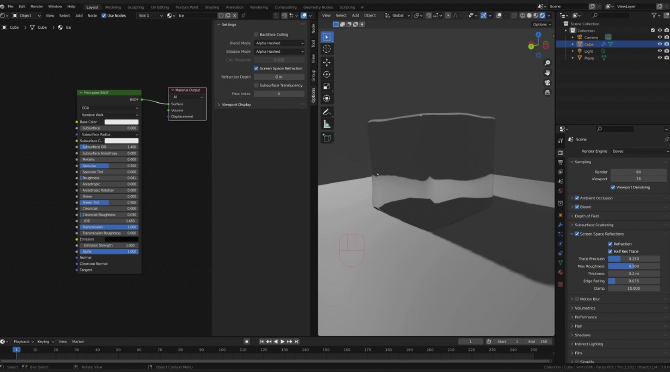
Environment Part two
You didn’t think we were done with the environment yet, did you? We have the floor
plane for our ice cube created, which is great, but the environment surrounding our scene
here is a little blank—and since we’re able to see the environment through our ice cube
now, we’d better have an actual environment to see.
To do this, first turn off the Scene
World setting from this dropdown.
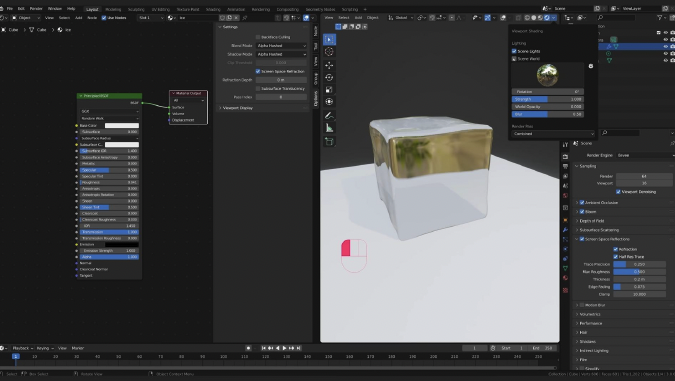
Next, let’s select one of Blender’s built-in HDRI environments. I’ll be using this one.

Finally, let’s take the world opacity up to 1 so that we can actually see our world.
Texture
Fine-tuning the bumpy texture of our ice is what’s going to really bring it to life, so let’s
get started on that now. To do this, we’ll go to our Shader Editor and use Shift+A to add a
Bump node, and then again to add a Noise Texture node. Connect Factor from the Noise
Texture node to Height from the Bump node, and then connect Normal from the Bump
node to Normal from the Principled BSDF node.
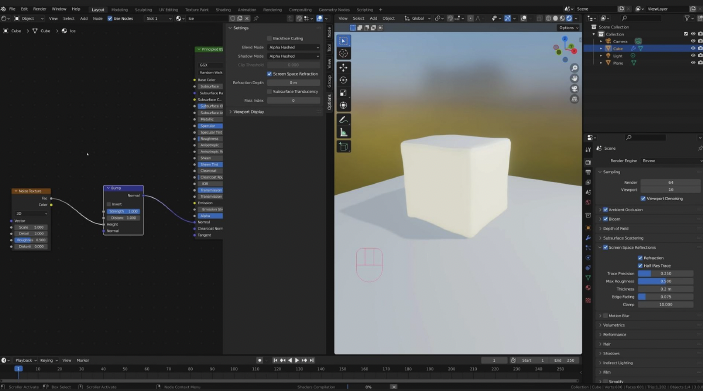
I know this is a lot of information, so I encourage you to check out the video version ofthis tutorial to see these changes in real-time.
For those who are unfamiliar, here’s how
this pipeline works: the Noise Texture node generates a black-and-white 2D image that
gets piped into the Bump map node.
The Bump node then interprets the noise that it’s fed
as the height of the bumps on the ice’s surface, with white being peaks and black. It then
translates those points into normals—which are simply the directions that a polygon face
is pointing—and passes those to our surface.
We aren’t actually changing the geometry of
our object, but the texture will be rendered convincingly enough to trick the eye.
I’ll then tweak the Scale, Detail, and Roughness values for the Noise Texture node and
the Distance value for the Bump node to get the following.
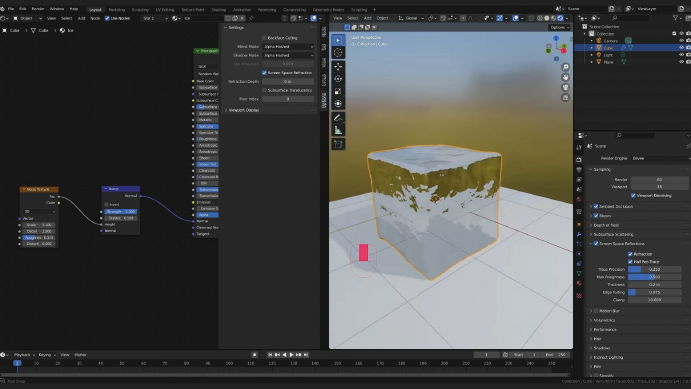
Something else that will help make this ice look more realistic is breaking up the
roughness a bit. Use Shift+A to add a ColorRamp node, and plug the Noise Texture
Factor into the ColorRamp Factor. Then, plug the ColorRamp Color into the Principled
BSDF Roughness.
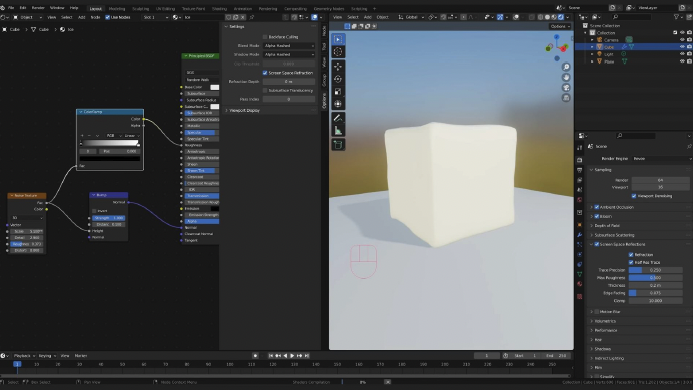
This will have the same noise that’s affecting the bump texture and also affect the roughness
of our cube.
Within the ColorRamp node, bring the blacks up and the whites down so that the ice is
never perfectly transparent or perfectly opaque, but rather somewhere in the middle.
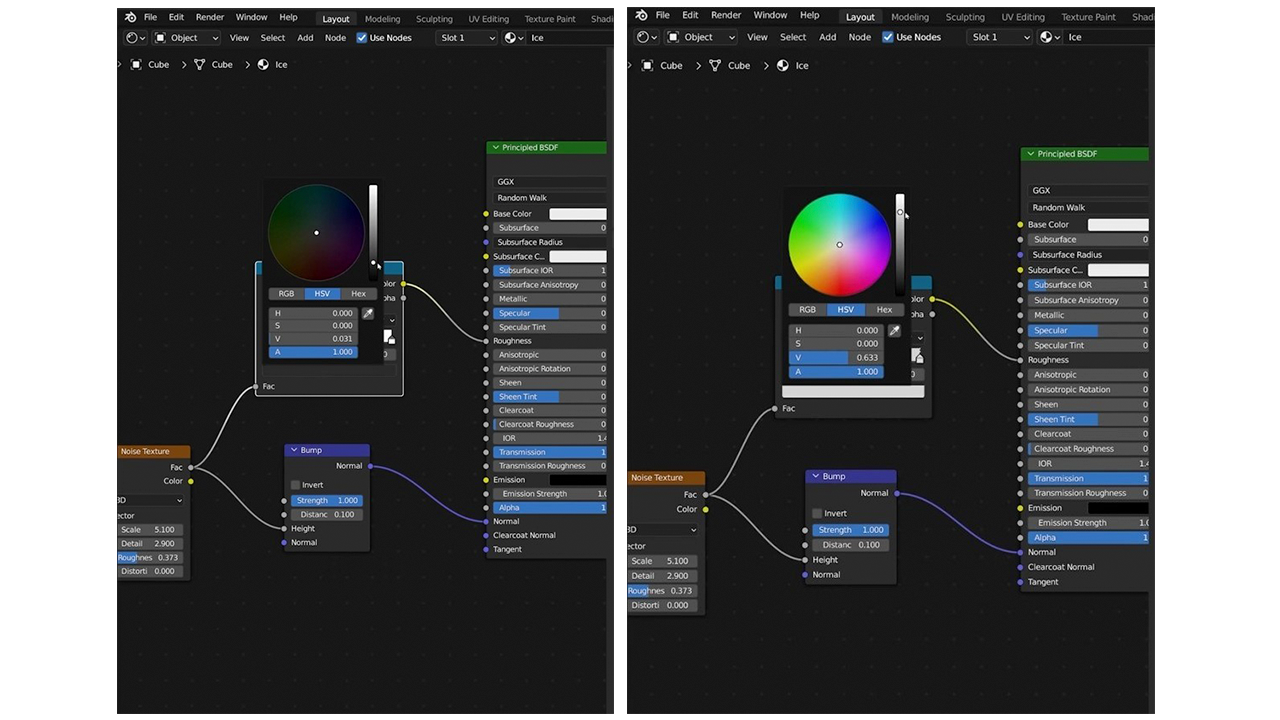
That will get us the following result
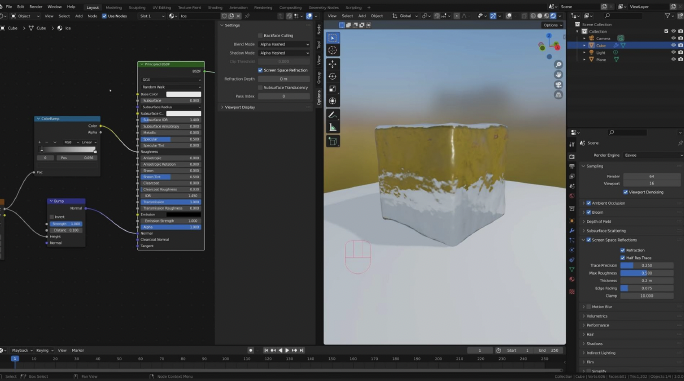
To really see how good our ice simulation is, we’ll want to switch over to the Cycles
render engine, change our Device to GPU Compute, turn on Denoise, turn up our Max
Samples to 3000, and turn our Noise Threshold down to .05.
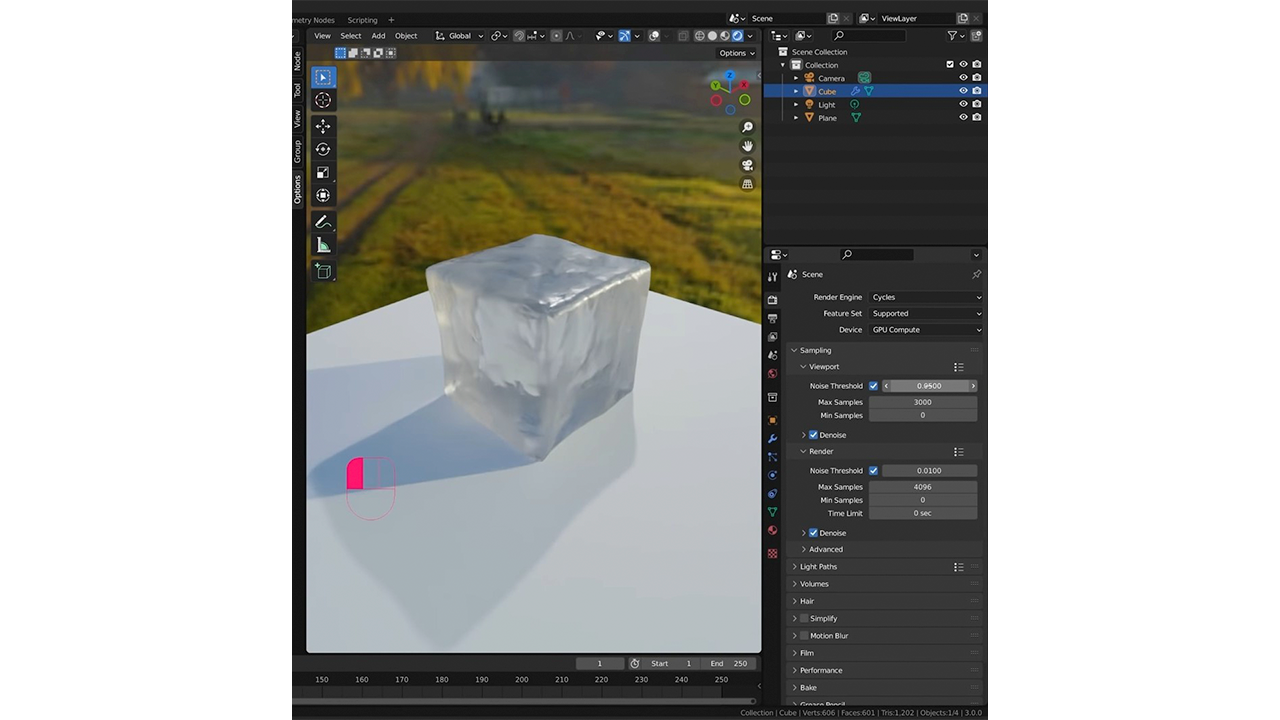
Now that we can see what our ice will really look like, feel free to refine the other
settings we’ve already set. I’ll bring our ColorRamp blacks just a bit higher.
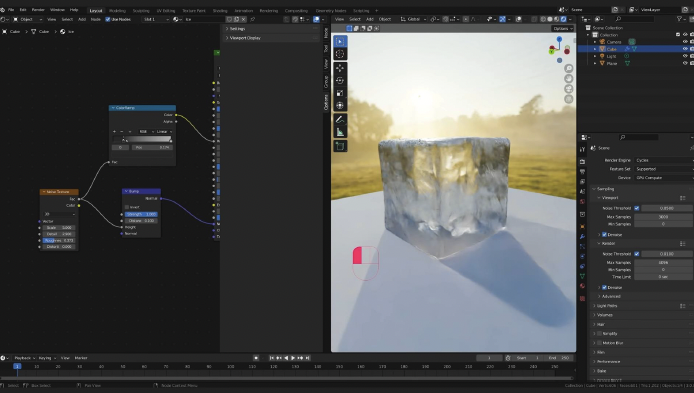
Environment Part 3
Our floor plane is looking a little bland, and giving it some visual interest will really
make our ice pop. Select the plane, navigate to the Materials tab, select New to create a
new material, and drop the base color down to a dark color to provide some contrast.
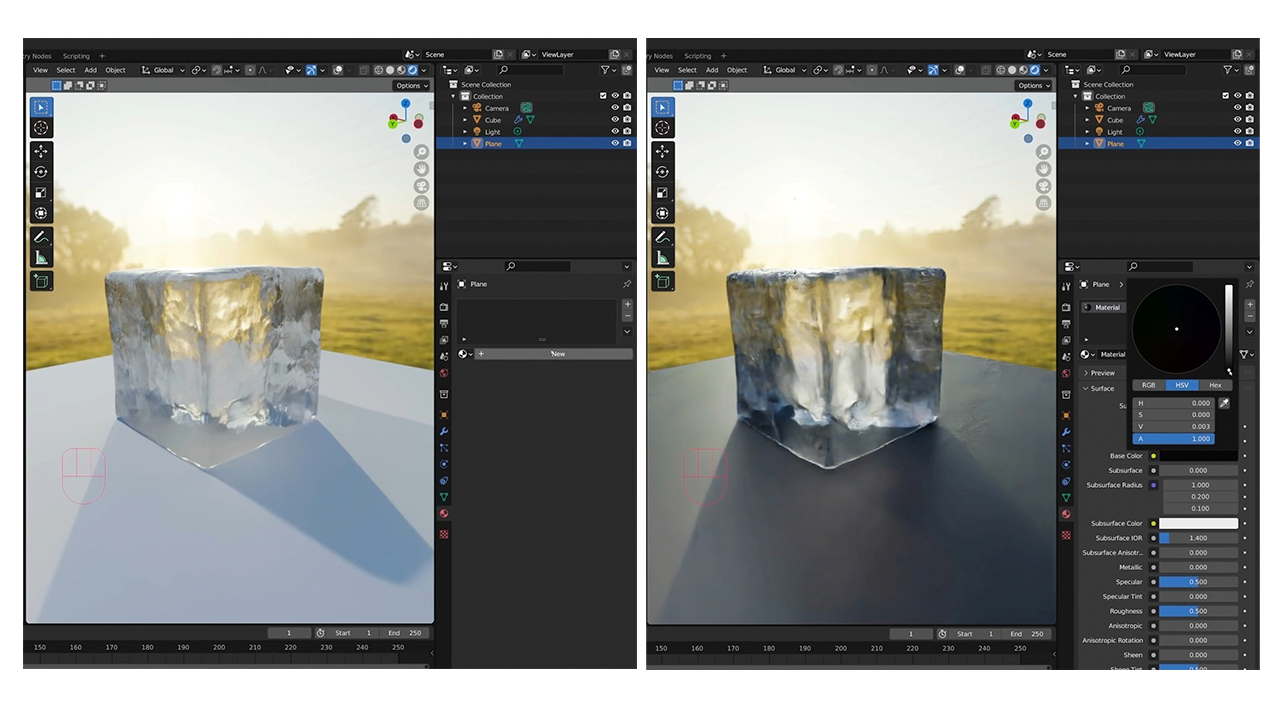
We can also make the surface metallic by turning the Metallic property up to 1 and
turning the Roughness down.
Texturing Part 2
There’s one last step we can take to get the ice material looking perfectly icy, and that is
setting the IOR—the index of refraction. In the Principled BSDF node, set the IOR to the
index of refraction for ice, which you can look up and find is 1.309.
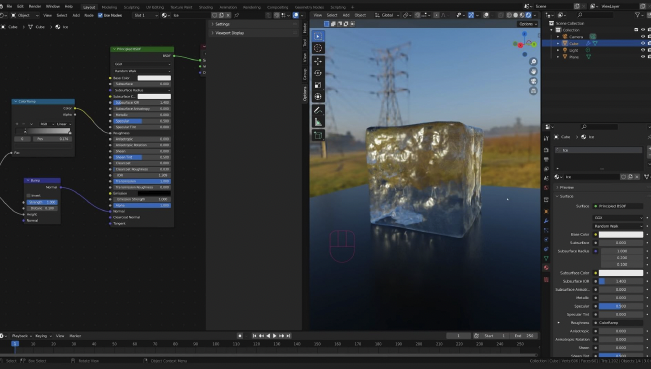
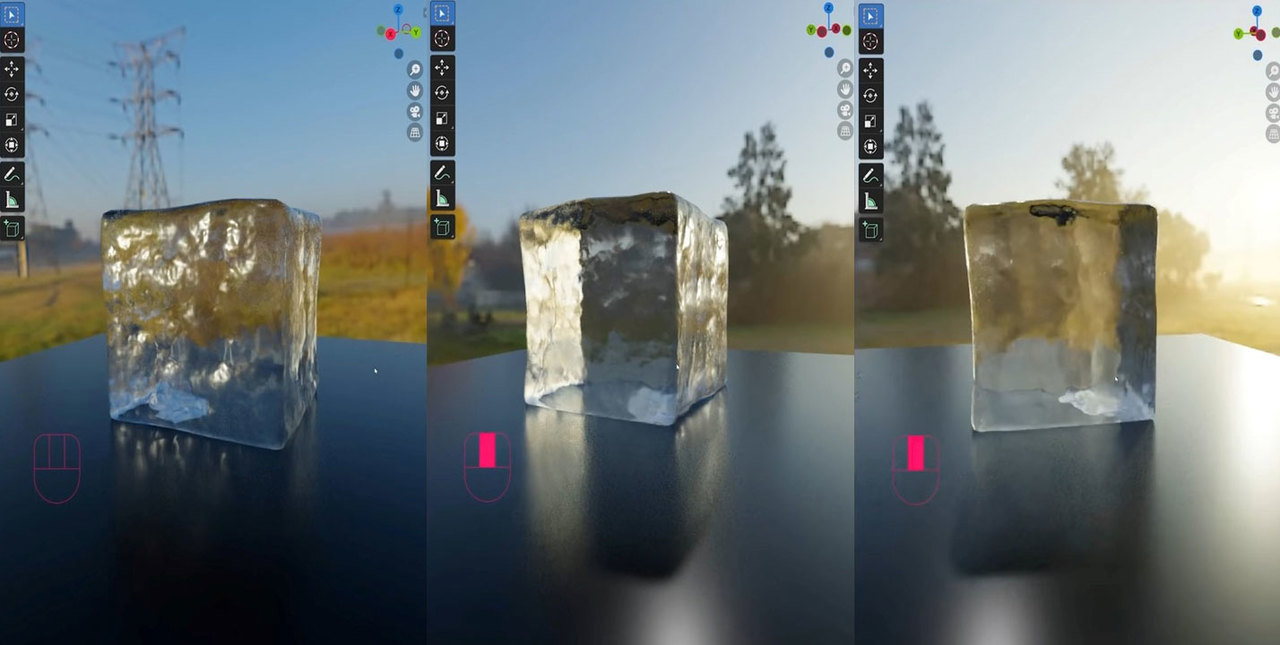
And that’s it! 😅 We now have realistic 3D ice in our scene. Here’s our final result.
Hopefully, you found this Blender tutorial showing you how to use procedural shaders to make
realistic 3D ice helpful. If you liked this, make sure to grab your CG Cookie subscription to stream 100’s of Blender tutorials.