
[WIP] CGC Challenge #2 – Vehicles
Forum Archive › [WIP] CGC Challenge #2 – Vehicles
- This topic has 27 replies, 5 voices, and was last updated 7 years, 1 month ago by
Jonathan Gonzalez.
-
AuthorPosts
-
July 5, 2019 at 1:54 pm #48074
Spent way more time on this than I thought I would, but I have some decent looking off road tires now
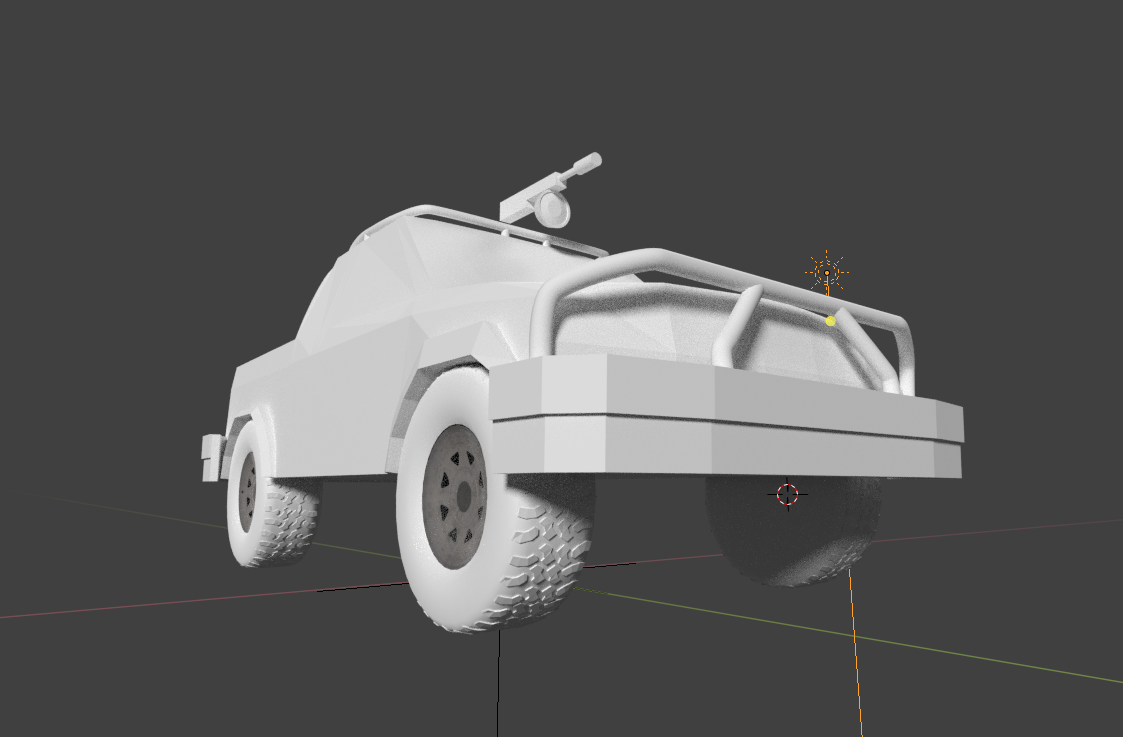
Probably way more high poly than necessary for a game asset, but I can probably bake it down from a high poly to a low poly tire in Susbtance Painter. I wanted to model the treads manually to get some nice depth and also more control over how it looks. I followed most of this tutorial: https://cgcookie.com/lesson/modeling-the-tires
And used these tire treads for reference: https://rfclipart.com/shabby-tyre-treads-traces-of-three-different-off-road-tyres-28487-vector-clipart.html
Added in the rim textures just to see how they would look. Initially my rims were too small so I increased their scale without making it seem impractical for a offroad vehicle. A lot of the tread details and tire details in general will be covered up by grime/dust/damage so any imperfections in it now will be fine.
Also added a spare tire in the back. Added some quick textures in Substance Painter.
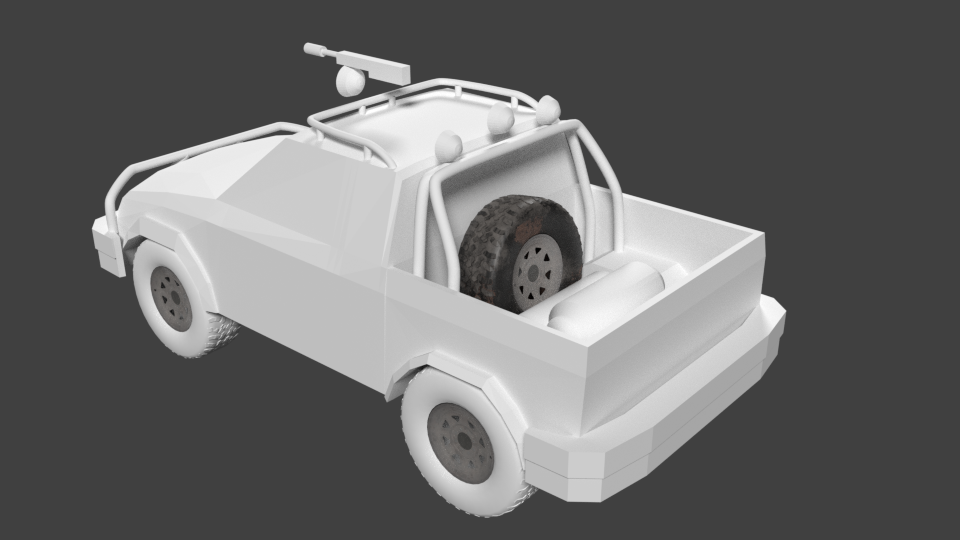
The tires are a bit too shiny in Blender, but the texture maps I’m using are intended for Unity so it’ll look different there.
July 7, 2019 at 2:18 pm #48075Started smoothing out the various parts of the truck and adding distinct sections.

Looking back I probably would have opted to keep the fender flares as separate pieces as it would be easier to keep clean topology but I’m keeping them together for now. I plan on creating the window grates low poly with a custom texture. Maybe even mix it up a bit with some unique window “armor” that can be swapped out.
July 7, 2019 at 11:03 pm #48076@jgonzalez looking good. actually one thing that i noticed with the rim now is that you could add one edgeloop on the edge and the pull outmost edge back to give actualy geometry to enhance the normal information for the edge, now it feels bit flat on the edge.
July 8, 2019 at 9:35 am #48077@louhikarme Yeah I plan on remaking them, sort of. The rims right now just looks like shallow bowls, but I can reshape them to look very similar to the actual rims while keeping the same geometry. I’ll then use project from view from the UVs again and get the best of both worlds. In reality the main reason I went the texture route with the rim was because I had trouble getting clean topology with the holes and I figure it wasn’t really that important to have high poly rims.
July 8, 2019 at 9:07 pm #48078Ok today I worked on getting the windows in. Spent more time on this than I thought I would but I got them in. Ended up cleaning up a lot of topology. One thing I’m doing more lately is separating out pieces and giving them unique topology so that the body isn’t super dense because of a smaller piece added in.
Also fixed up the rims. Added a bit of a lip to the rim and gave it a bit more depth than a concave dish. They look much better now.

I’ll probably add in some physical pieces for the center cap and possibly some low poly lug nuts but I think they look great for now. I had scheduled the first week for modeling alone, but I’m taking my time with this one. Texturing and rendering will only improve with a higher quality model. Tomorrow I’ll add in the headlights and possibly the grates over the windows. Since the windows will mostly be covered by other objects I’m not adding more details to them for now.
July 9, 2019 at 12:06 am #48079@jgonzalez This is coming together nicely. The rims look good 🙂
July 9, 2019 at 12:23 am #48080@jgonzalez the difference is subtle but still noticeable on the rims. you can do so much with normal maps, but sometimes you just need the extra polygons to give the last push. 🙂
July 9, 2019 at 10:59 pm #48081Added some more details. I spend a lot of time refining some details and end up redoing them a few times. Since this vehicle is going to be “apocalyptic” and a bit trashed I’m not too worried about it being perfect. There are a few things I plan on hiding or obscuring a bit with some additional meshes or fancy texturing.
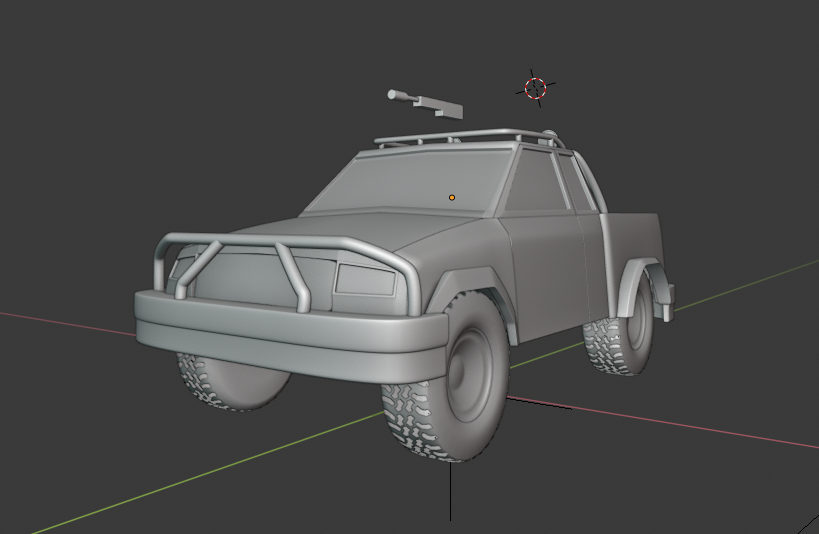
I won’t be adding a “mesh grille” to the bumper bars up front, but I’ll add a texture of a mesh grilled to the portion attached to the truck. Right now I just added in a plan I plan on using with that texture. I added some detail to the wheel guards. I wanted the rear wheel guards to be wider, but I didn’t realize they were so thin. I may opt for wider wheels in the back to make it look a bit beefier.
The rear is mostly complete. Not thrilled about the tail lights but I suppose they’ll do:
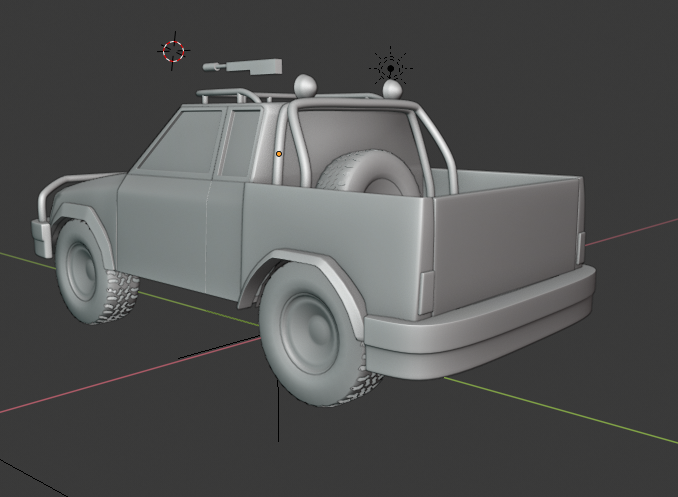
I put them a bit lower than usual and with the current rear bumper it sits a bit low. I may just add some makeshift bumper bar in the back or get a little crazy and add some spikes to fend off any tail gaters. Next up I’ll work on the weapon and the window grates. After that the rest will be mostly adding additional details to make it more unique and roughed up.
July 14, 2019 at 3:07 pm #48082Ok so I think I’m done with the base of the truck. I’ll model the weapon(s) separately but I wanted a nice base truck model that I can build upon in the future. I added some armor plates to various parts of the truck along with the window grates. I redid the bed of the truck a few times and decided to keep the door off. I’m not too thrilled about the barrels in the back so I may replace that with something else and/or throw a net over it to improve the look.
Other things I modified were moving the tires out a bit more as well as downward to give the truck more height. Now it looks more like an off road vehicle that you would expect to use in the apocalypse.
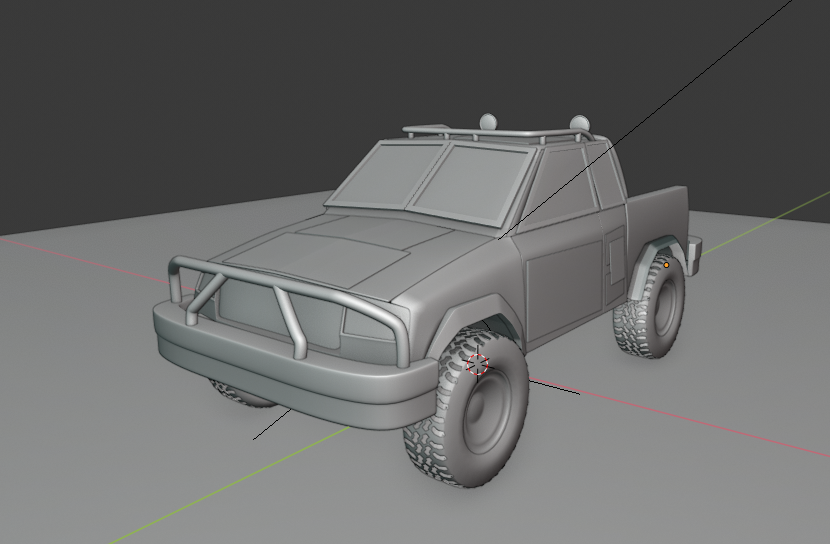
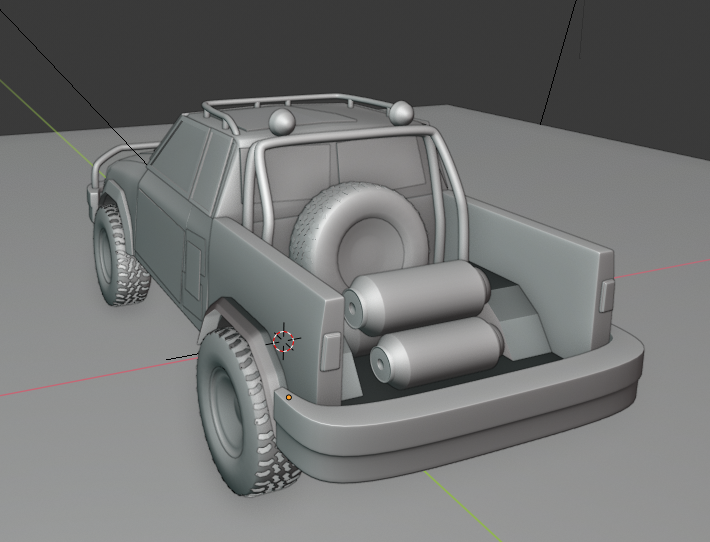
I’d like to add more to it, but next week I’ll focus on texturing and add some little details to the truck through that process. I’ll also be adding in at least one weapon for the top.
July 14, 2019 at 4:25 pm #48083@jgonzalez Nice work!! This is a versatile base model 👍🏻
Will you do some normal map & AO baking in the texturing phase?
July 15, 2019 at 9:46 am #48084@smurfmier1985 Yeah I plan on doing quite a bit with texturing. I don’t quite know how well it will turn out but I’ll work on that this week. I may remake the tires to include more details around the side wall and also tweak the treads to look “beefier”. Thankfully I still have the original tread mesh separated so I can redo that fairly easily.
July 15, 2019 at 5:51 pm #48085@jgonzalez smart to keep that 🙂
Looking forward to your results. Texturing and lighting is where the real magic happens!
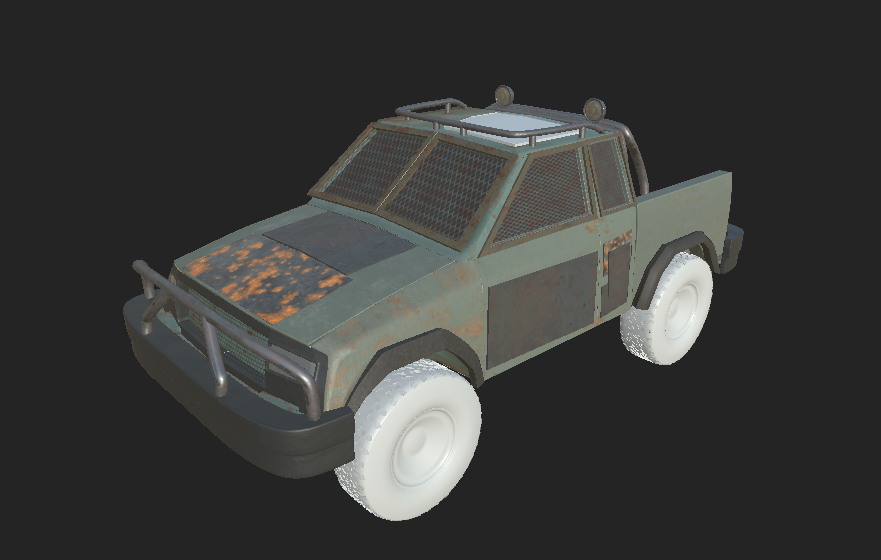
July 17, 2019 at 7:22 pm #48086Not happy with how the texturing is turning out. Realize I have a lot to learn in that regard. Nonetheless I’ll keep working on it even if it’s not as great as I’d like.
-
AuthorPosts


- The topic ‘[WIP] CGC Challenge #2 – Vehicles’ is closed to new replies.