
Tips for 360 Shot
Forum Archive › Tips for 360 Shot
- This topic has 14 replies, 5 voices, and was last updated 10 months, 2 weeks ago by
Martin Bergwerf.
-
AuthorPosts
-
October 12, 2025 at 12:42 pm #20870
Hi all,
I am attempting a shot which rotates 360 degrees around the subject. However I’m having a bit of trouble getting this looking right.
If I orbit the camera, I get my backdrop visible (see attached). I’ve tried making it impossibly big, but couldn’t mitigate the issue completely. I thought of perhaps making a curved backdrop to wrap around the scene – or just doing away with it entirely and having something in plain black.
I’ve tried rotating the backdrop in sync with the camera, or just rotating the object itself, but the result so far has looked a bit unnatural. I suppose the other main issue I’m struggling with is keeping the lighting looking good at every angle. Because it’s quite dramatic, directional lighting, I’m not sure how to keep it looking right for the entire rotation (without getting big dark spots at some angles).
Anyway I just thought I’d throw a line out and see if anyone has any experience with these type of shots, and if there were any tips or best practices.
Thanks in advance for your help.
Cheers,
Jack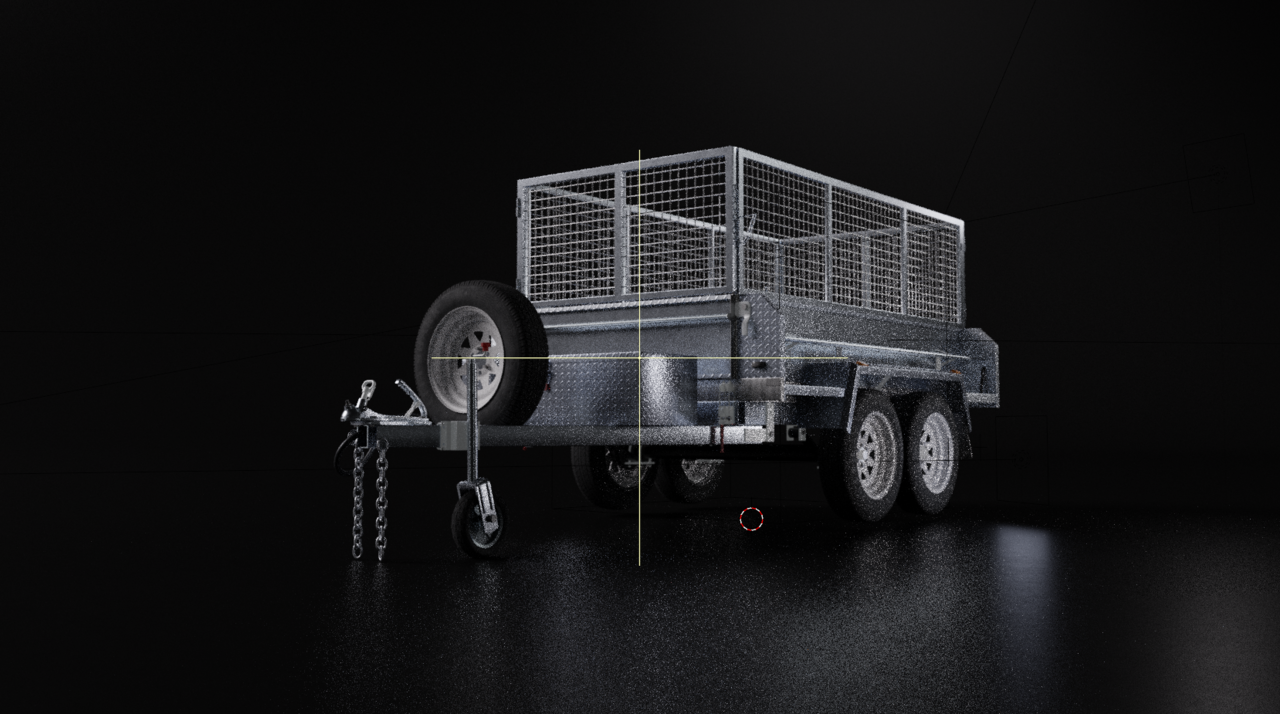
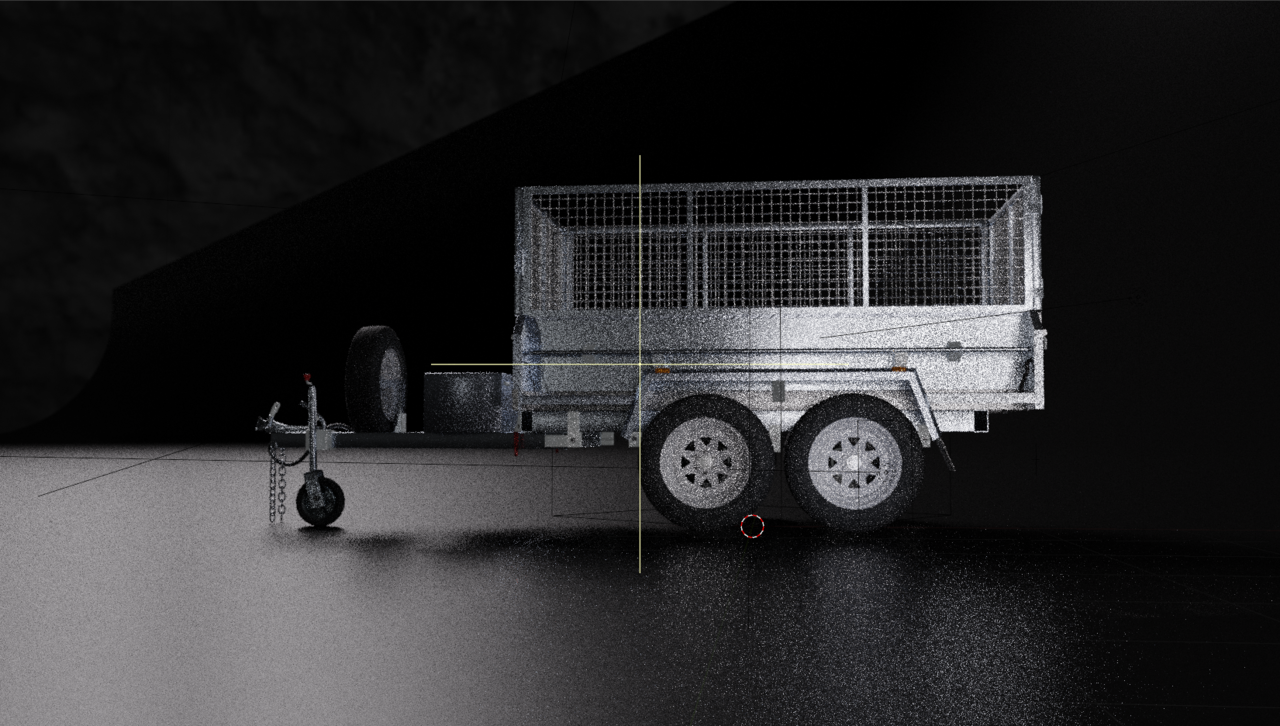 October 12, 2025 at 2:31 pm #97433
Quick fix is to convert your plane into a cube with the bevel modifier. to round all edges. For the lights, parent the Key, Fill, and Rim lights to the camera. Then give each light a damp track or track to constraint. point the constraints to the camera focus empty.
Longer fix is to remove the node setup for your lights and uncheck normalize for each light. The node setup is for studio look for lighting a person or smaller. I remove the HDR since it’s not really needed. I’d still use a beveled box for background. Move the Key light to above and point down on the trailer. Change to round instead of square. (This is how cars and trailers are lit in advertisements and as key focused platforms in car shows.) The Fill light I would move closer to the camera and parent it to the camera. This will simulate a light attached to a camera rig and thus follows the camera. I’d also parent the Rim light to the camera.
Artistic license: I would change the Wheel light to a spot light instead of an area light. This is more of a personal preference.
October 12, 2025 at 2:51 pm #97434Forgot to mention on the background. You will need to recalculate the normals to inside.(Shift+Ctrl+N or alt+n->Recalculate inside). Also create a second background light. Select background light. Press Alt+D and left click. Open N-panel and in the item tab->Transform panel->Under rotation click in Z and press End key to move to the end of the number.(Note it ends with a D) then type *-2 and press enter. This will double the the number and make it positive. Move mouse cursor over X under Location and press the minus(-) key. Do the the same for Y location. This should give you the same lighting on both sides.
October 12, 2025 at 6:22 pm #97435Yeah what Dwayne says works great. Also if it’s just for showcasing the model, rotating the model itself is not a bad approach. You see it all the time in behind the scenes of Marvel movies.
October 14, 2025 at 8:41 am #97436Thanks heaps guys, that’s a great help. I’ll try out the suggestions, that give me a lot to work with. I think I’ll try and do away with the HDRI and re-light the scene as suggested.
Could you clarify what you mean about the node setup? I’m using lightwrangler to add these HDRI’s to the lights – is that what you mean?
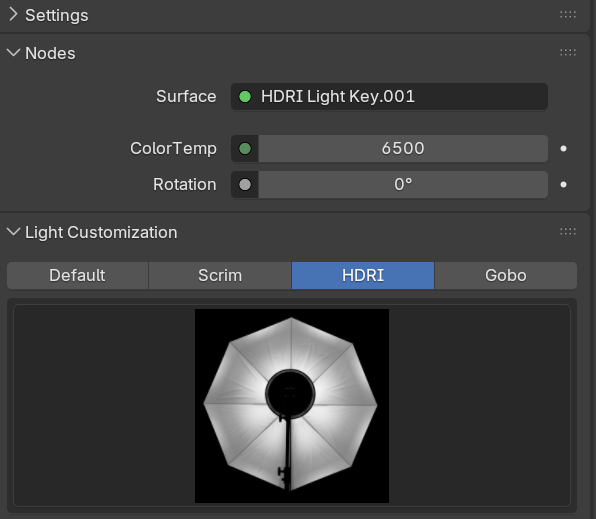
Thanks again
October 14, 2025 at 10:16 am #97437Before I begin, I just want to point out that there isn’t just one way to do things. Even photographers will use different light setups based on their artistic style. So, do what feels right for you. Now to the answer.
The light node setup adds shadows and a soft glow to give the look of a large umbrella reflector and light. This is common in photographing people and products. Cars and larger products usually use straight lights or light with a defuser gel, and reflector boards.
My point boils down to the fact that because your trailer is so large the node’s effect is very minimal. If you like the effect leave it. I personally don’t think the slight effects is worth the added render time. Plus I try to match real world common practice.
October 14, 2025 at 11:47 pm #97438Is that a plane in the background? if so, yet another tactic would be to parent the plane to the camera. As the camera rotates around, the plane will rotate around with it, staying between the camera and the background that you don’t want to see.
Simplest approach, though would be like Omar said and simply have the object rotate rather than the camera going around it.
October 22, 2025 at 6:15 pm #97439Apologies for the delay, work got in the way and haven’t had a chance to look at this again until today.
Thanks a lot guys, the bevelled cube tricked work and solved the background issues. And making it so the lights don’t affect the ground plane and only target the trailer helped things too, they are much less distracting.
I’ve tried rotating different combinations of lights with the camera, it does look better – but still get pretty inconsistent lighting as it rotates. I’m wondering if the solution may be to animate the lights, or add some new ones that on/off as it rotates to help fill things in? I don’t mind a few darker, silhouetted moments as it makes it a bit more dynamic. But there are parts where it drags on a bit long, or I get a light front on with the metal and it blows things out.
Updated file: https://www.dropbox.com/scl/fi/1k4gd7sqogo6uvgpqwsgt/rotation-animation-CUBE.blend?rlkey=mjxh2bbhuondif3ikcipjf7w2&dl=0
Dark patch example:
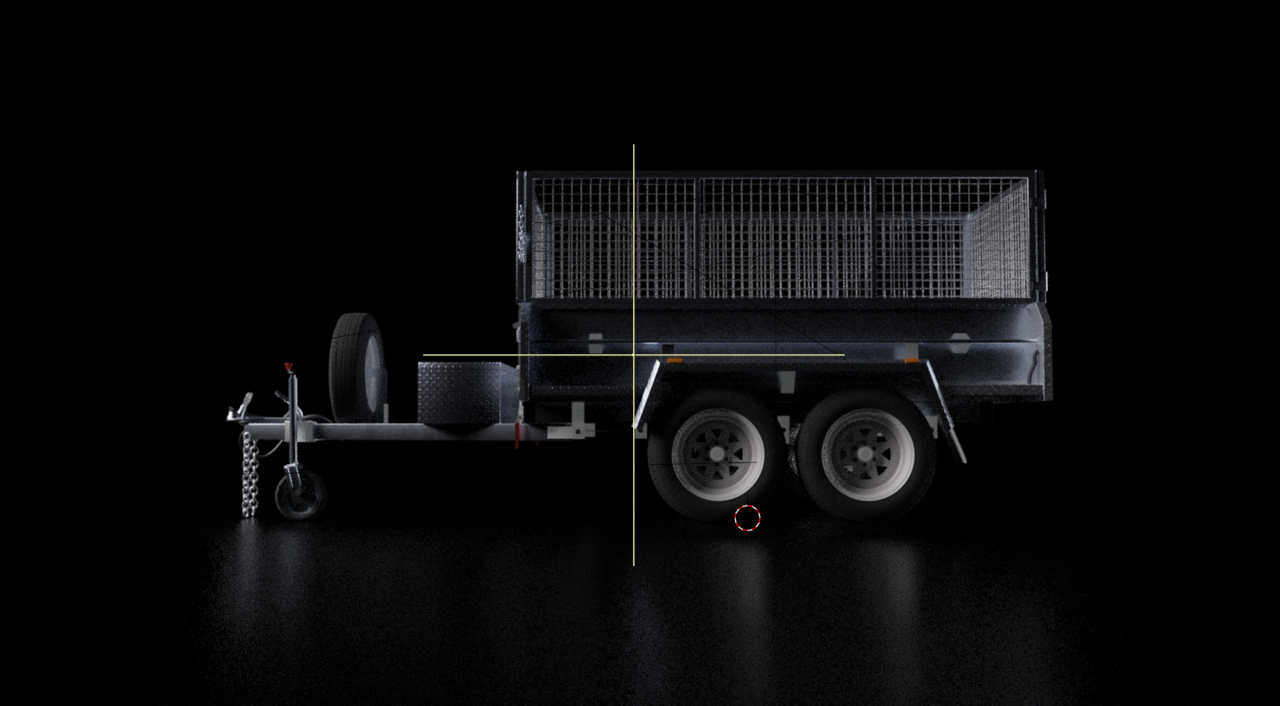 October 23, 2025 at 5:37 am #97440
You can animate the lights if you want to, that way you get exactly what you want. There’s a balancing act there, because if you do both versions, one just let it as is and the other one animating and moving the lights, if you show both versions to people, they usually wont notice the difference. Us, the person doing the thing is the one who’s intimate with the work and we notice all. So in a way we do it for ourselves, and sometimes it is wise to just let go. Other times you might be praised for the attention to detail, if someone notices it. So as I said, it’s a balancing act, decide what to let go and what is worth pursuing.
October 23, 2025 at 1:52 pm #97441It’s a matter of preference. personally would just add more lights and only animate the camera. I also like your idea of switching lights on and off or maybe just dim them. Maybe even speed up the rotation of the camera and have it slow down or stop at key angles. The do a light transition. This could help highlight key modeling area. There’s so much you can do.
October 23, 2025 at 1:56 pm #97442On the lights blowing out, I like it because it gives a more realistic feel. You can prevent this by checking normalize on the light causing the blow out or adjusting the exposure in the color management panel.
October 24, 2025 at 5:57 am #97443Thanks again for the advice. I rendered out a full rotation, and the dark spots don’t look bad in practice, in fact they probably add a bit of interest. And I think you’re right about some of those imperfections adding to the realism. I may just dim a couple when they blow out too severely – the direct light on the flat metal can be a bit much.
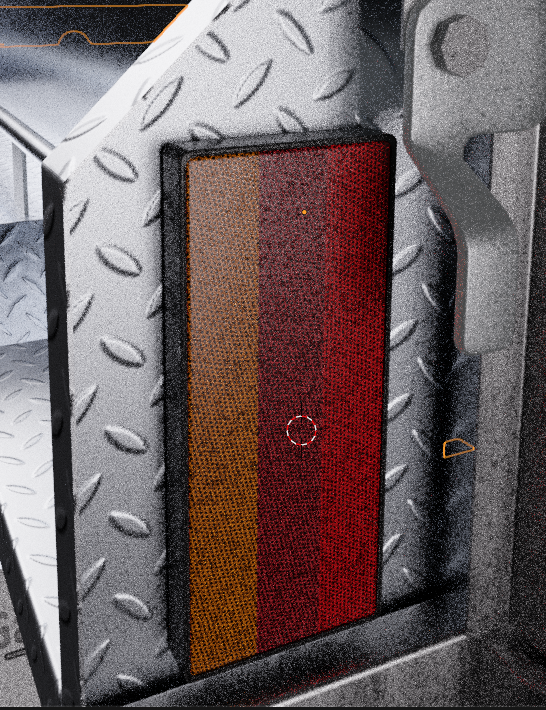
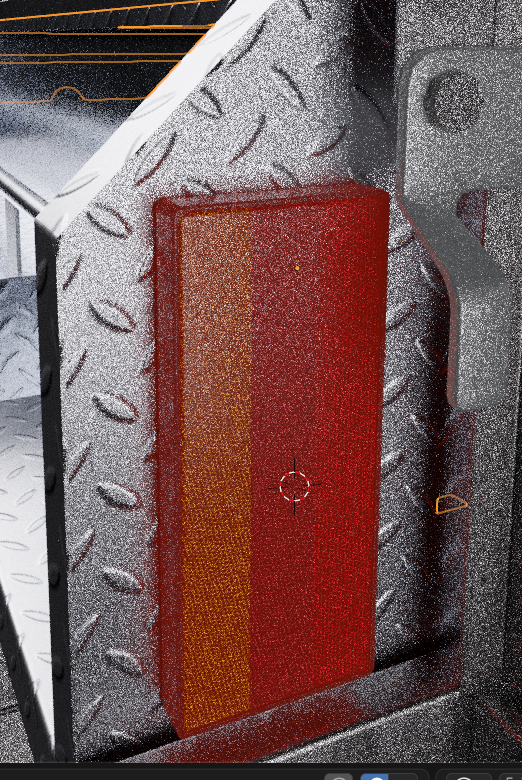
As a side note, does anyone have any tips for creating a simple emission material for the LED lights. I tried adding emission to the material, but it seems to block the visibility of the texture underneath?
 October 24, 2025 at 7:15 am #97444
I guess you can try and have it masked where the texture you want to occlude is. If everything is emissive, it will washout the details, but mask where grunge and smudges should be, maybe have it be brighter at the center than the sides with a gradient mask, and things will start to like much more nicely I think.
October 24, 2025 at 7:57 am #97445HI Jack,
That is right, Emision is a ‘flat’ Shader.
What you can do is model the texture of the glass and place an Emission behind it (sort of as it would be in real life).
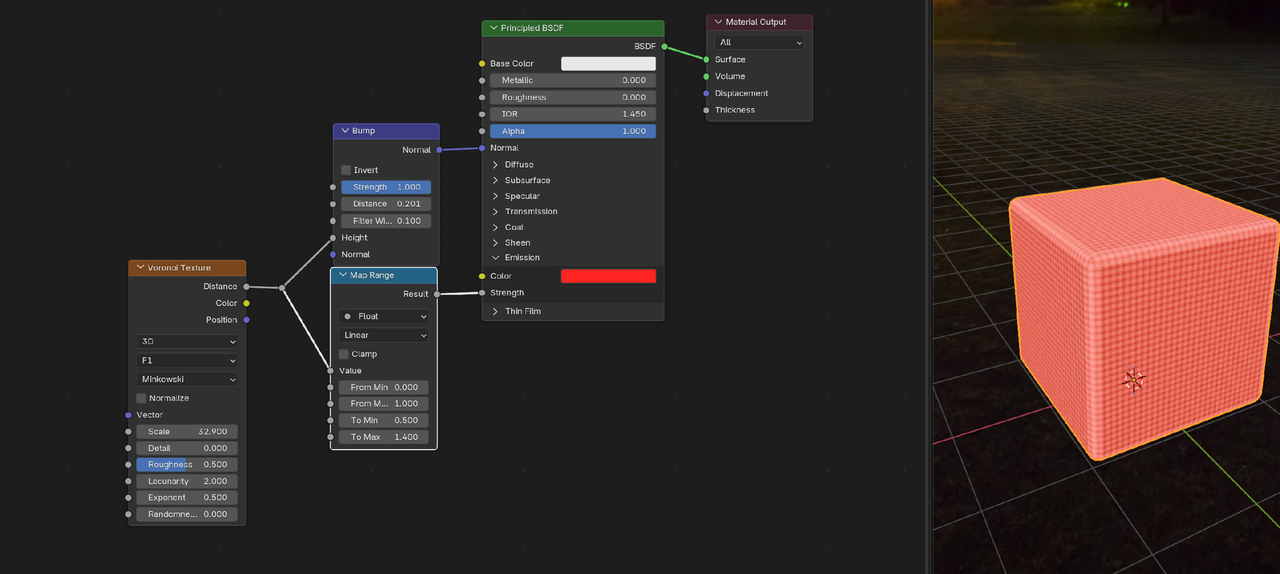
If some light hits the surface, you ccould maybe get away with a Bump (Voronoi Texture, Minkowski Metric, zero Randomness) Node in the Normal of A Principled Bsdf and use the Principled’s Emission, but as soon as the light is in the dark, it’ll be completely flat. (I hope this still makes sense.)
October 24, 2025 at 8:09 am #97446Or even let the Texture affect the Emission Strength and the Bump (you can of course use your own texture for that):
-
AuthorPosts


- The topic ‘Tips for 360 Shot’ is closed to new replies.