
The Outliner
Forum Archive › The Outliner
- This topic has 18 replies, 3 voices, and was last updated 2 years, 4 months ago by
Tom Fransson.
-
AuthorPosts
-
May 4, 2024 at 7:40 am #17944
Hey, I have got a scene With 4 cubes, A, B, C, and D. Where B is a child to A and D is a child to C.
May 4, 2024 at 7:41 am #85885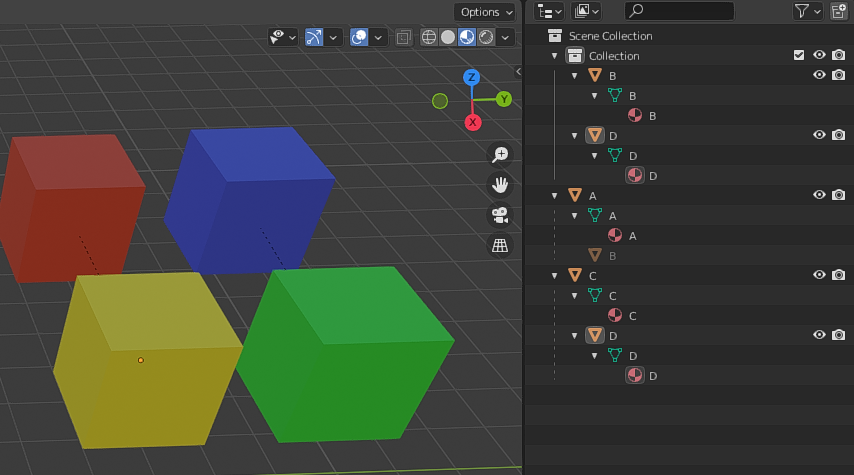 May 4, 2024 at 7:46 am #85886
I moved B from Scene Collection to Collection by click drag and drop, so B got grayed out in Scene Collection. D I also moved to Collection but this time I held Ctrl so it got linked and not grayed out.
What are the pros and cons of using just move versus move and link in this case?
May 4, 2024 at 8:10 am #85887Hi Tom,
That’s a great question and I do not really know the answer, but:
If you Link an Object to a different Collection, it ‘exists’ in both Collections.
If you, in your example, disable (or Hide) Collection, you will have only Cubes A, C and D left in the Viewport. The Parenting still exists, so if you Transform A in the Viewport, B will still follow, but you just can’t see B.
Like I said, I can’t really think of situations, where one way is much better than the other to be honest, but I’m sure someone else here knows.
May 4, 2024 at 9:36 am #85888Linked just means that it doesn’t remove the collections that you are moving the object from. In your case the B is grey because it’s not apart of that collection. In this case the Scene Collection collection. You can also see this by clicking the B object and in properties editor object tab collections panel. There are different situations where you my want an object in multiple collections. I’ll give my most common one as an example. Building a Living room for animation, you will want to remove a wall and some object when you are doing certain shots. So each wall and any lights or pictures on those walls will be in each collections. The floor will need to be in all four collection along with ceiling and lights in the ceiling. A TV my be in 2 or 3 of the collections but it will be in the way in a shot facing the couch/chairs. By setting up the collections you can easily hide the side of the room that your camera is going to be on which can be accessed by the number key on the top row in object mode or thru the n-panel->View->collections. This is also good for different outfit on charaters. It’s alot easier to hide/set no render a collection then having to go thru and do it for each and every object.
May 4, 2024 at 9:50 am #85889On a slightly different topic, Collections are linked to the scene collection, but they can be unlinked. This means you can have objects appart of a collection that isn’t shown in the scene view of the outliner. I like to use this in combination with Collection Instancing.(Shift+a->Collection Instance). You can create an unlinked collection by selecting the objects in object mode and pressing Ctrl+G then set the name either in box in bottom left hand corner or press F9 to bring it to the mouse cursor. you can also change the name by selecting the object and in properties editor->object tab->Collections panel. This makes selecting groups of object easier by selecting one of the objects and pressing Shift+g->collection, and doesn’t clutter up the outliner.
May 4, 2024 at 9:52 am #85890Hi Martin
I didn’t know that with hide, thanks
May 4, 2024 at 9:53 am #85891I’m going to build a room in this scene
May 4, 2024 at 9:54 am #85892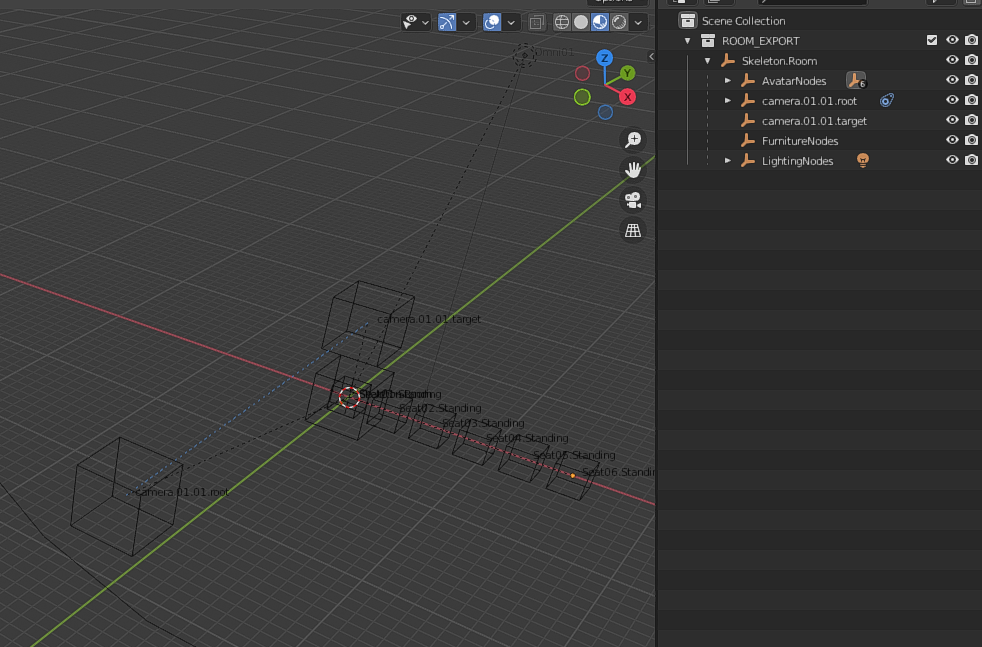 May 4, 2024 at 9:56 am #85893
And was thinking about how to organized all room objects, which all gonna be a child to Skeleton.Room
May 4, 2024 at 9:56 am #85894And this was what I came up with
May 4, 2024 at 9:56 am #85895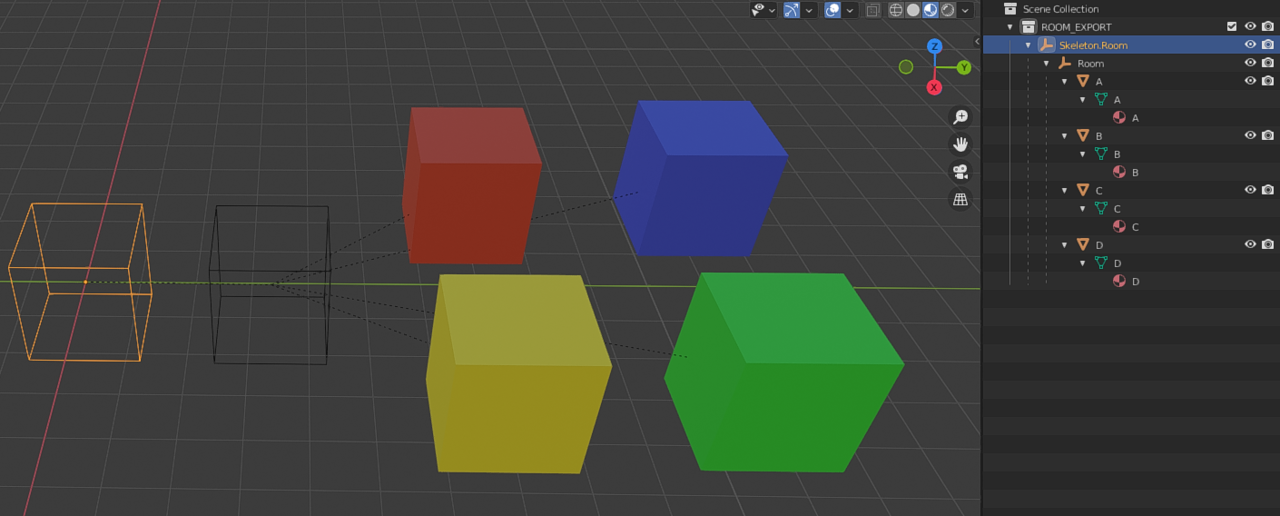 May 4, 2024 at 10:01 am #85896
I did an empty called Room which I made a child to Skeleton.Room. Then I made A, B, C, and D children of Room. This way I can close Room, when I don’t want to see all the Room objects in the Outliner. And everythings feels pretty well organized.
May 4, 2024 at 10:04 am #85897I usually create a collection called LCA for Lights, Camera, Action. When I teach people blender I have them make it LCF12 for Light, Camera, F12 to render. 🙂 I got the Idea from one of the user on here. I’m not positive, but I believe they got it from one of the instructors or one of the courses. That was a couple of years now. WOW I’ve been on here for a couple of YEARs. Sorry, just realized that.
May 4, 2024 at 10:05 am #85898Hi Dwayne,
Your explanation is very helpful. Thank you
-
AuthorPosts


- The topic ‘The Outliner’ is closed to new replies.