
Scattershot – How to Add Displacement
Forum Archive › Scattershot – How to Add Displacement
- This topic has 13 replies, 2 voices, and was last updated 4 years, 4 months ago by
Michal Dziewiatkowski.
-
AuthorPosts
-
April 13, 2022 at 7:10 pm #15056
Hi everyone,
I was wondering if their is a way to properly add displacement when using the scattershot addon. Currently, whenever I try to utilize the displacement map through the addon I end up with a lot of jagged edges. I attached a link to the file and some screenshots of the problem and my node tree below. Thank you for the assistance.
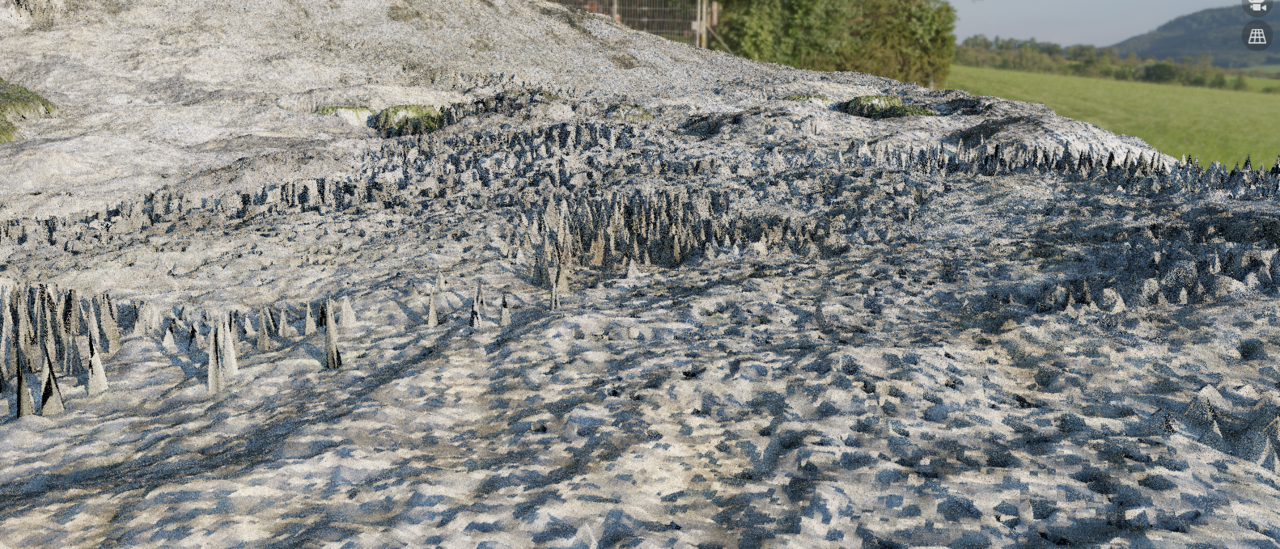
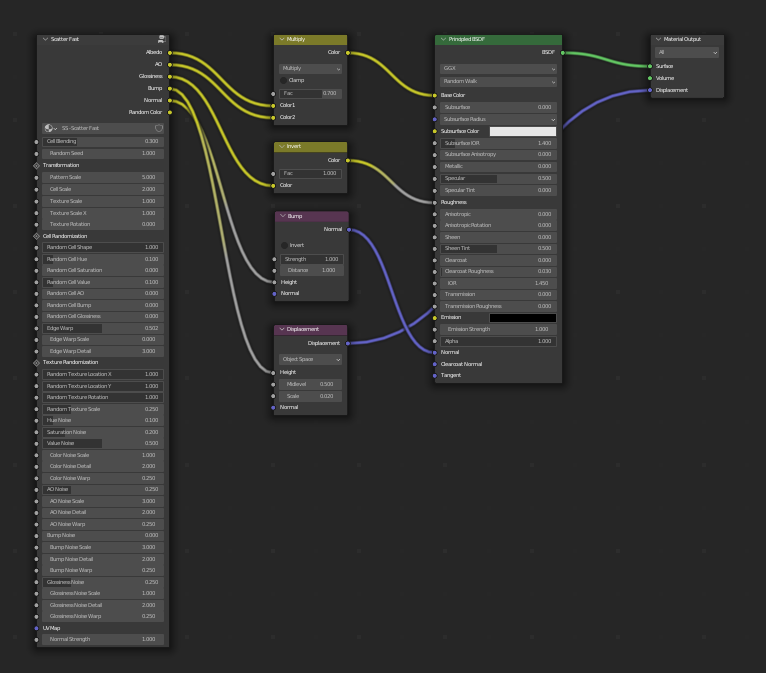
Google Drive Link:https://drive.google.com/drive/folders/1D-w52F7CIlcxl29bvFOCG9JJSsq25cm8?usp=sharing
Edit: Link Updated
April 14, 2022 at 12:01 am #74079Probably not enough geometry; remember, your Viewport Subdiv is set to 8 px.
Also check that all Textures, apart from Albedo, are set to Non-Color and make sure that everything is connected correctly (if the Normal output of the Scatter Node is indeed a Normal Map, then you shouldn’t connect it to a Bump Node.
And next time you add your .blend file (which is almost always a good idea!), please pack your External Files (in this case the Images).
April 14, 2022 at 12:19 am #74080Thanks for the response Spikey. Oops, forgot to include the texture files! I’ll be sure to update that. Thanks for pointing out the normal output, it is now directly linked from normal to normal. I also tried it with 1px, and the problem actually got worse, image below:
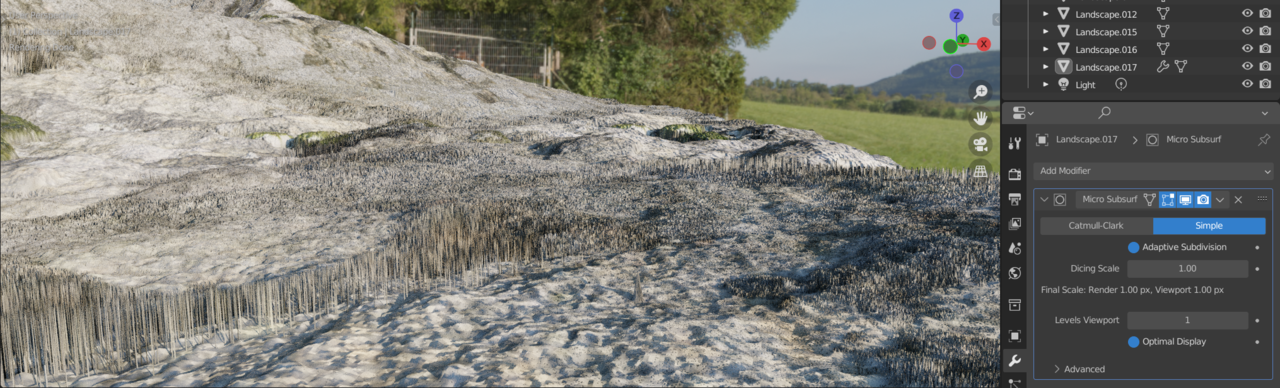
Link with all files included this time:
https://drive.google.com/drive/folders/1D-w52F7CIlcxl29bvFOCG9JJSsq25cm8?usp=sharing
April 14, 2022 at 1:05 am #74081Hi Miichal,
I don’t get any spikes with your settings (only changed the HDRI, because it wasn’t included and used a Normal Map Node):
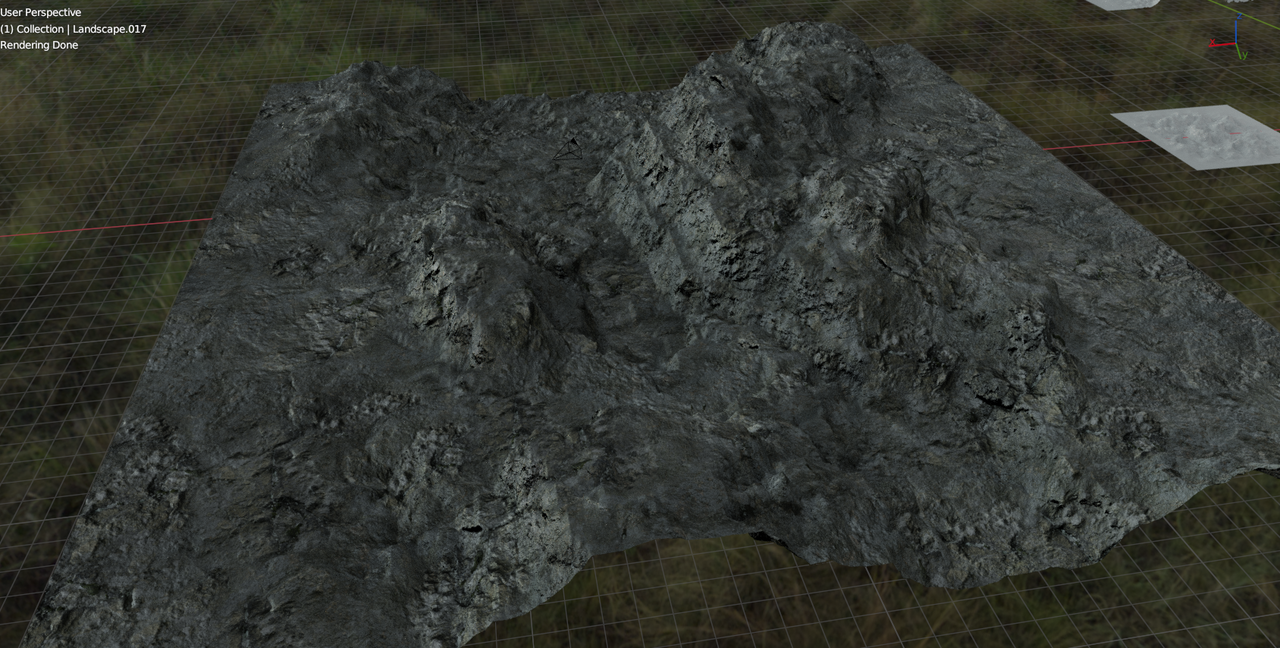
Probably a GPU issue. There has been a version of Blender, where the GPU Subdivision had a bug; try disabling that:
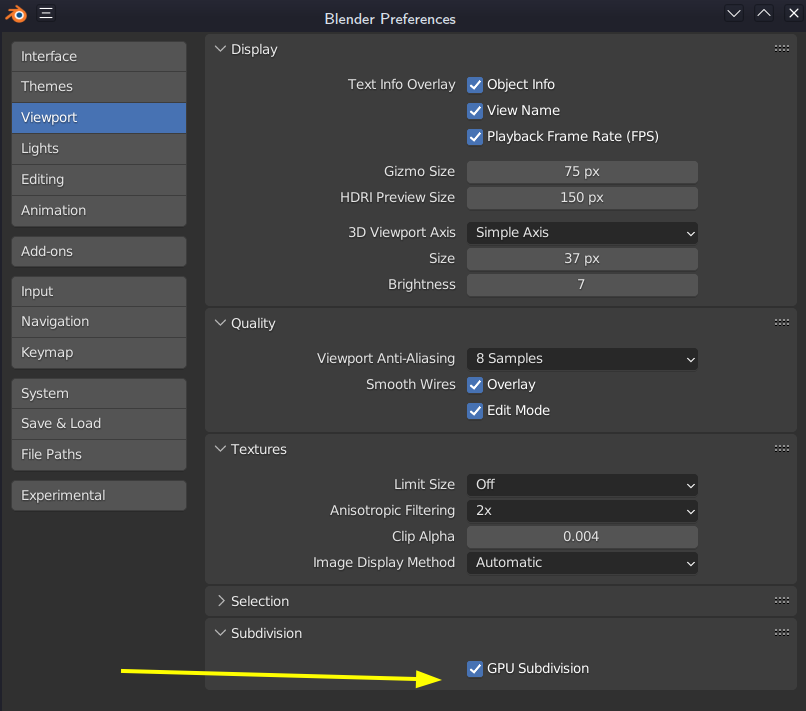
If that doesn’t help, try CPU Rendering.
Maybe you need to update your driver.
April 14, 2022 at 1:35 am #74082Okay, forget the above; I found the spiked area.
I will look into it a bit more, but my guess is, that this happens because your UV’s are not even:
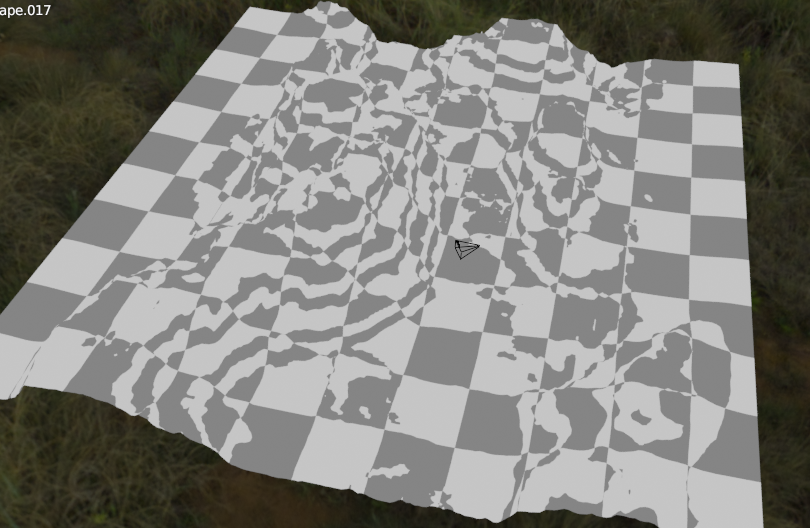 April 14, 2022 at 1:53 am #74083
Also, what doesn’t help, is that you are using a jpeg as a displacement texture, that is never a good idea!
Try textures from Polyhaven, they are free and CC0 and supr high quality up to 8K and available as jpeg, png and exr.
April 14, 2022 at 2:55 am #74084Reducing the Cell Blending seems to help a lot with the spikes:
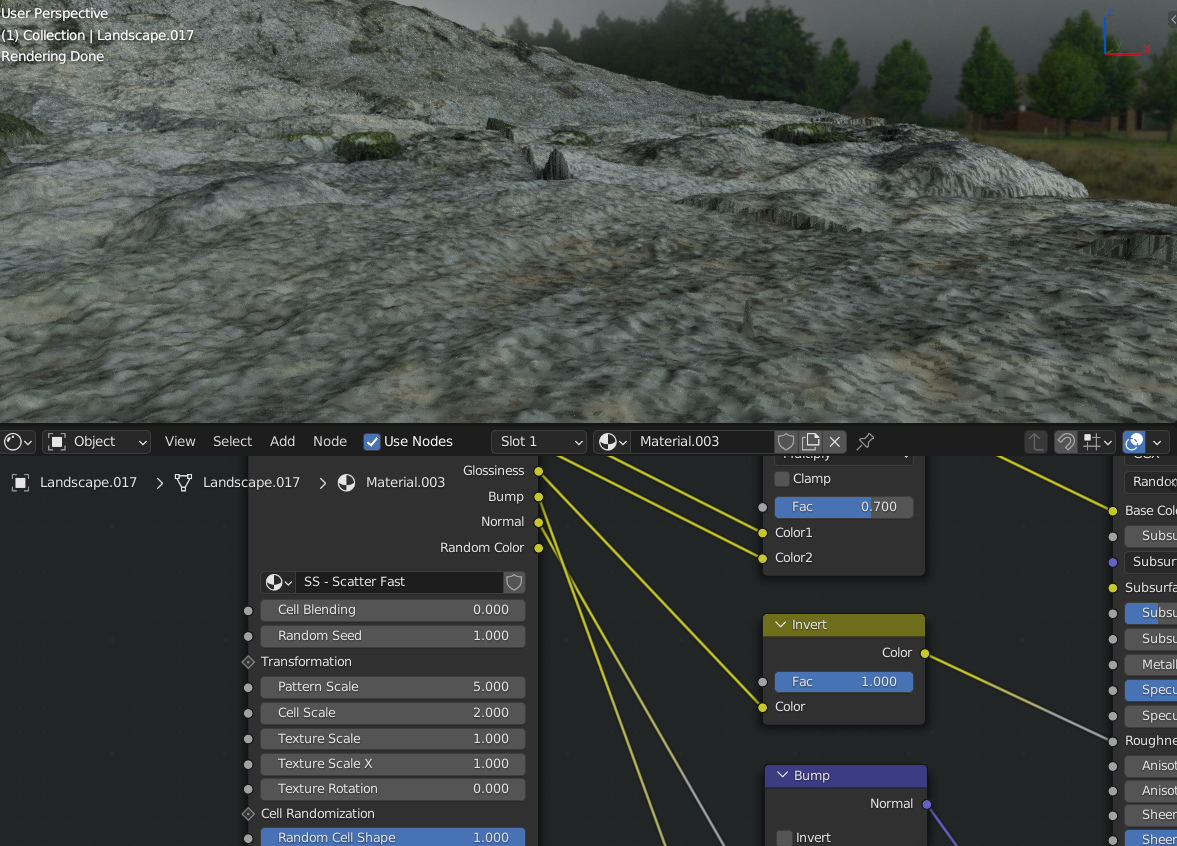
vs:
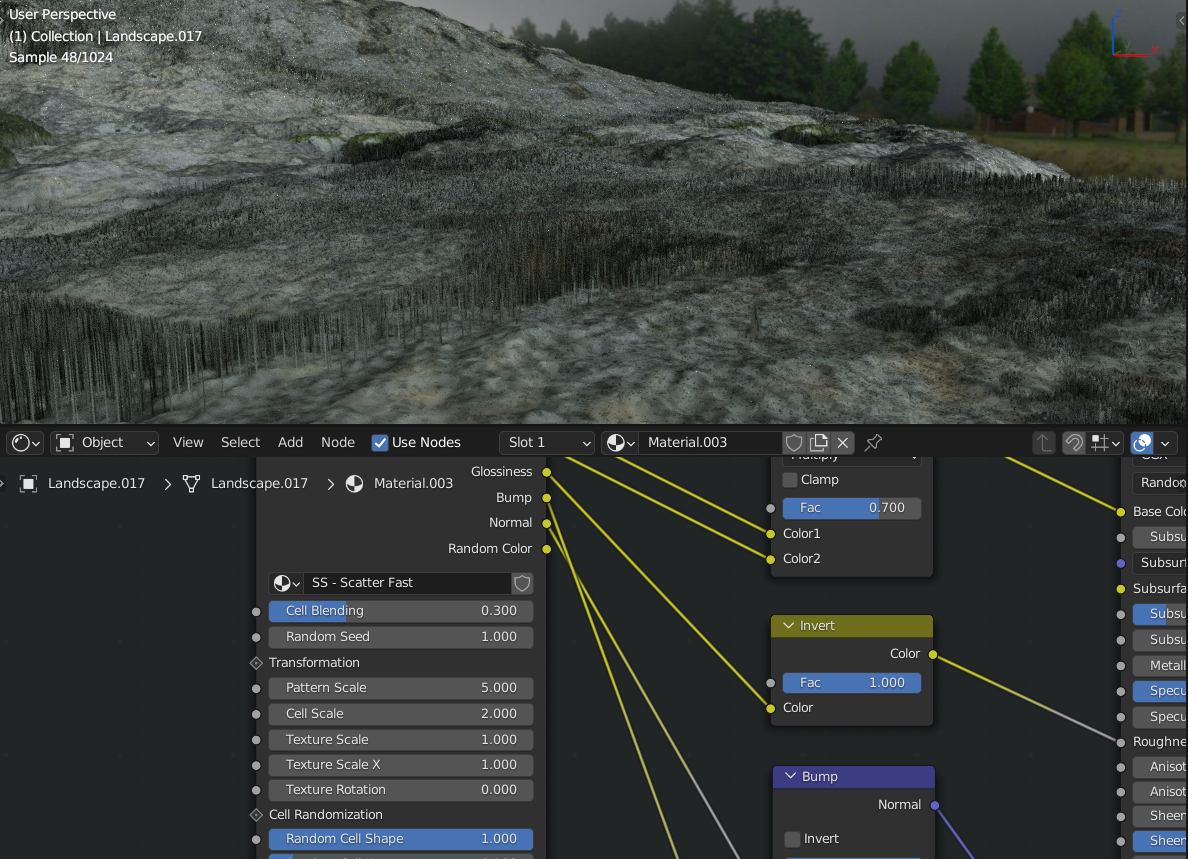
But of course cell borders become more obvious. A Blending of around 0.1 might be best.
Muddyness and stretching are due to UV’s and jpeg, like I mentioned above.
April 14, 2022 at 5:51 am #74085SO, the reason for this, is, that to blend between cells, a (probably White) Noise Texture is used to ‘mix’ between the two, which works great for images, to “blur’ the border, but when you have a border with a hieght difference like in A, it doesn’t give a result like B:
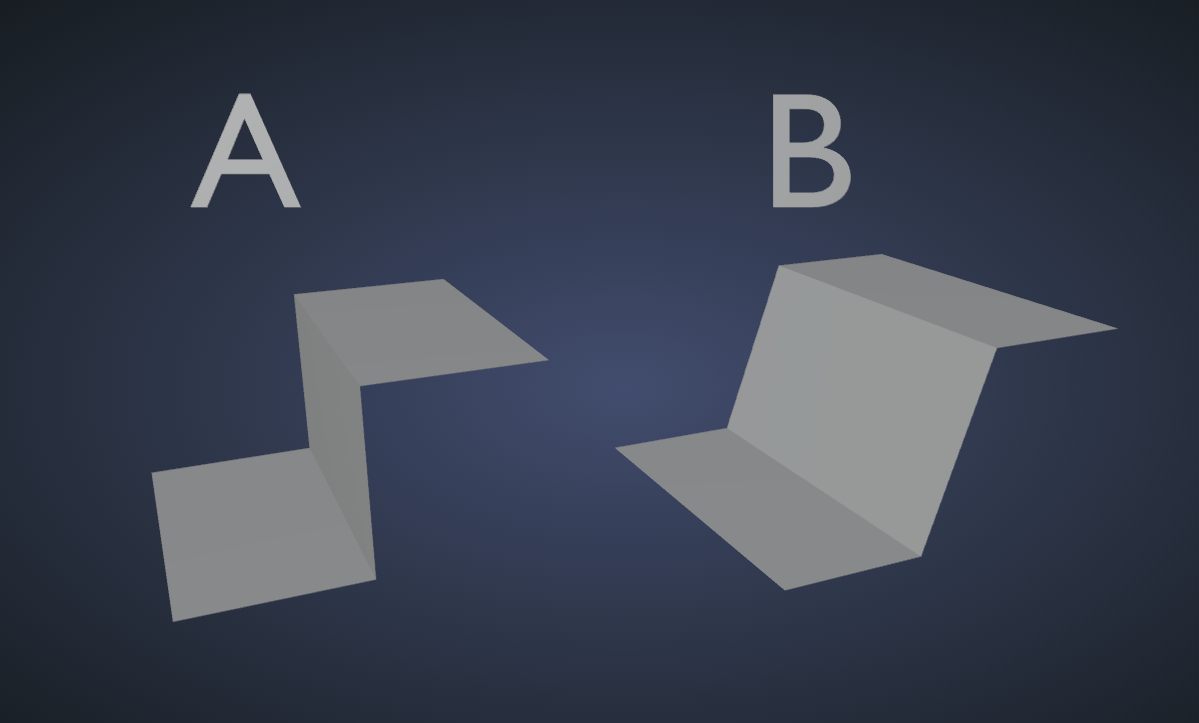 , but it picks either one or the other height (and maybe some in between, depending on how the Noise is used), thus producing those spikes and higher Subdivision only makes the spikes more and thinner.April 14, 2022 at 8:06 pm #74086
Thank you for taking the time again spikey. Do you have any suggestion or alternatives on what can be done to blend cells but also add a displacement, or is this mostly wishful thinking? Just curious if it can be done at this point, thank you again.
April 15, 2022 at 1:25 am #74087Well, you’d need a gradient between the cells, in stead of a ‘blur’, but that offers many problems, the most obvious being that the cells have different rotations of the Texture and when going smoothly from one rotation to an other, the Texture starts to ‘swirl’ on the cell borders like this:
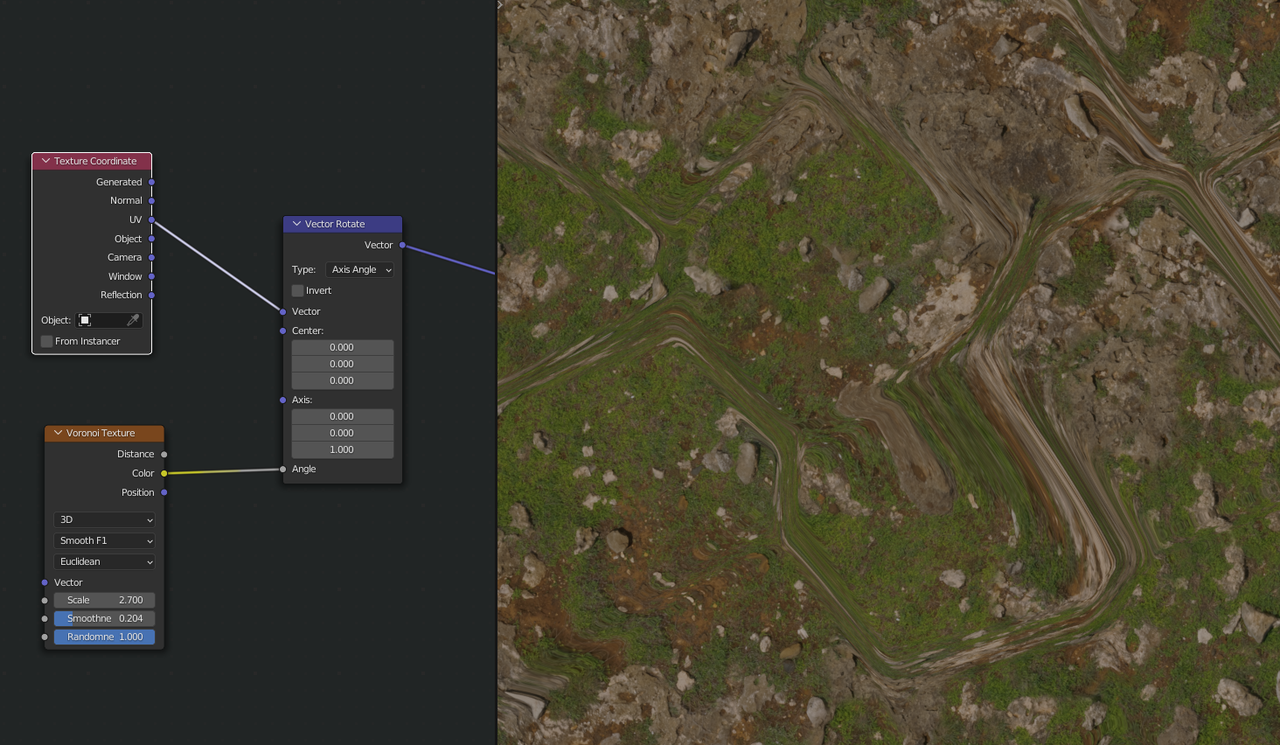
I don’t think there is a way around that, when using rotations to hide pattern repetitions.
The question is, do you really need it; the pattern repetition is only noticeable, when you look at it from far away, but then you wouldn’t need displacement and when you are close enough to need displacement, you wouldn’t need the Scattershot… (of course, when zooming in or out you’d need both, but not at the same time…).
What I would do, is to take two (or more) similar looking textures and mix between them (Color > MixRGB Node) with a Musgrave Texture as Factor, because that can have a smooth transition between black and white. (I know it produces values outside the 0 to 1 range, but the MixRGB Node automatically clamps its input.)
April 15, 2022 at 2:45 am #74088“The question is, do you really need it; the pattern repetition is only noticeable, when you look at it from far away, but then you wouldn’t need displacement and when you are close enough to need displacement, you wouldn’t need the Scattershot… (of course, when zooming in or out you’d need both, but not at the same time…).”
The faraway makes sense to me, and I’m guessing that when I am up close, since I am not trying to shift the original texture, the cell border problem doesn’t occur since I am using a different setup altogether.
This was incredibly informative! I realize I was trying to shoehorn the scattershot addon into something that doesn’t necessarily need it, especially when the tiling won’t be as noticeable. Thank you for your time again spikey!
April 15, 2022 at 3:06 am #74089One last question since you had mentioned it, regarding the UV’s being uneven: Is it better practice to use unwrap since its an uneven surface and gives you more uniform squares, or should I just use project from view, which gives me even UV’s, but when plugged in, the UVs appear stretched? Just a comparison of the two below from my test:
Uneven UV’s, regular unwrap
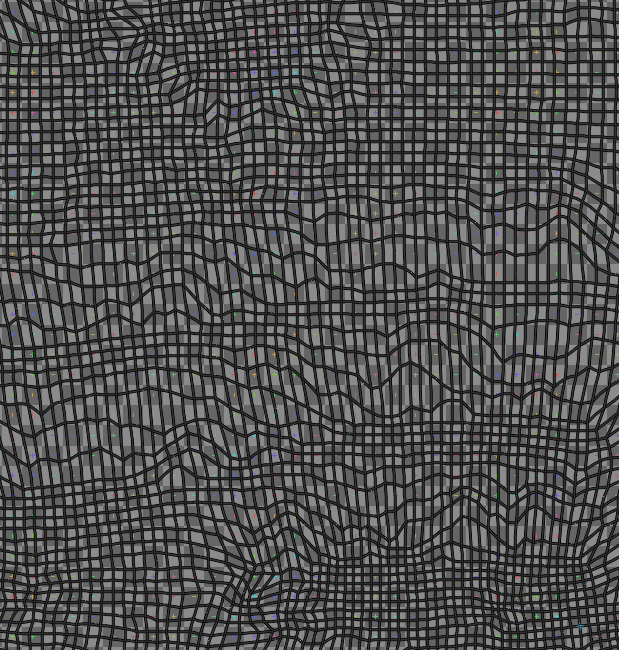
Appears clean on model:
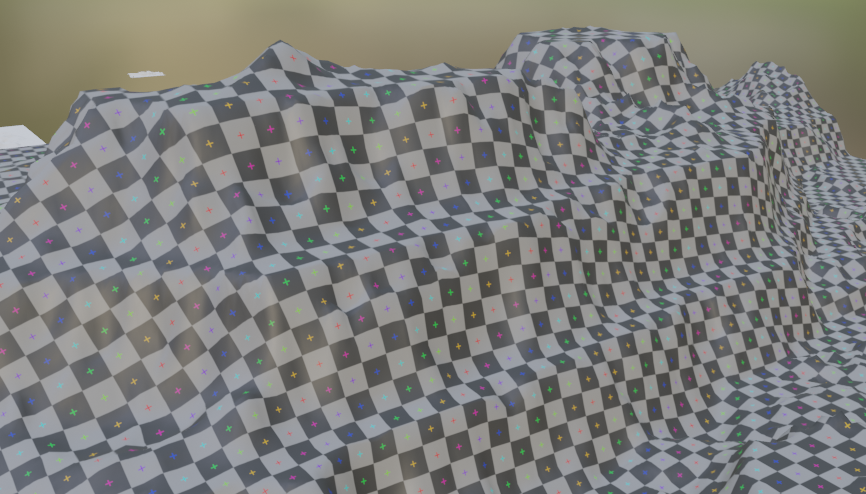
VS
Even UV’s, project from view
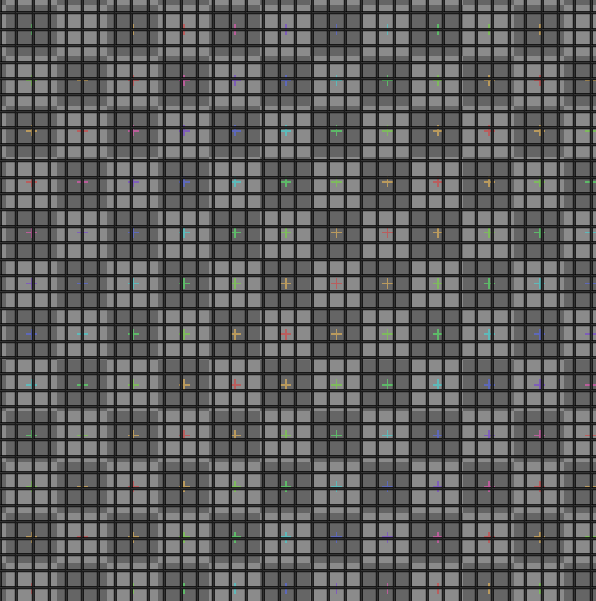
Appears stretched on model:
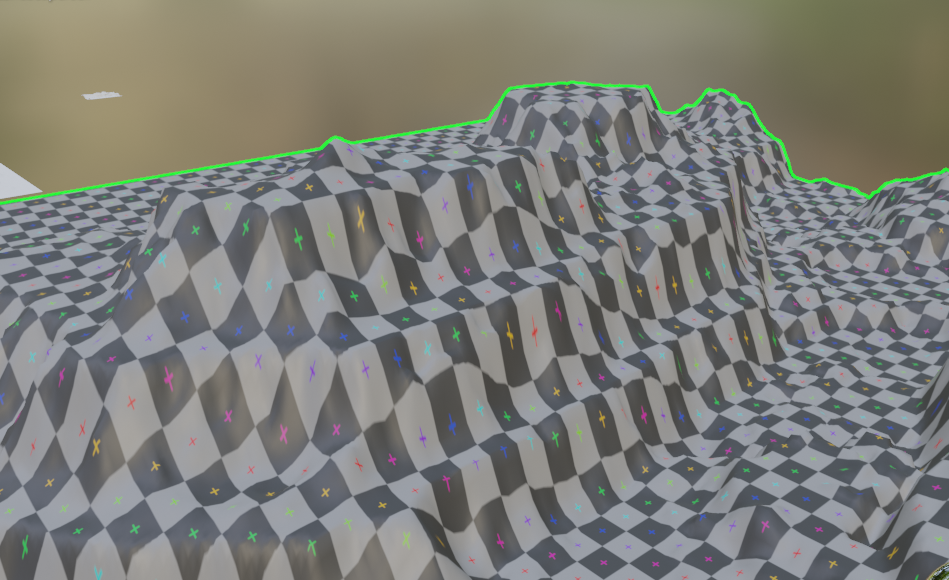
Im guessing the first approach is better, but I just wanted to confirm.
April 15, 2022 at 5:40 am #74090Yes, the first method is better. You want it to look as even as possible on the model, otherwise you get stretching of the Texture and that will be very noticeable and ugly.
April 15, 2022 at 7:10 pm #74091Sounds good, thank you for the help again spikey! 🙂
-
AuthorPosts


- The topic ‘Scattershot – How to Add Displacement’ is closed to new replies.