Regarding the correct use of shaders and imagemaps

Forum Archive Regarding the correct use of shaders and imagemaps

Viewing 11 posts - 1 through 11 (of 11 total)
  • Author
    Posts
  • #9600
    plasmavoyage
    Participant

      Hi there,

      so I’ve got a little issue that I haven’t been able to resolve yet. I want to make a concrete brazier, the modelling part went fine but went it came to textures and shaders I bumped into some issues.

      As you can see in the image below, the specularity is way too strong and makes it look like the surface is polished. Now the weird part is that inside the bowl, I have the specularity map completely dark. It’s literally black where you can see that yellowish and white light, inside the bowl and I don’t understand why.

      The idea is that the inside of the bowl is covered in soot and ashes so it definitely should not have any specular highlights at all, therefore I made the specularity texture completely dark and I still get those glossy highlights in there. I also made a screenshot of the nodes, so maybe that’ll help solve this mystery.
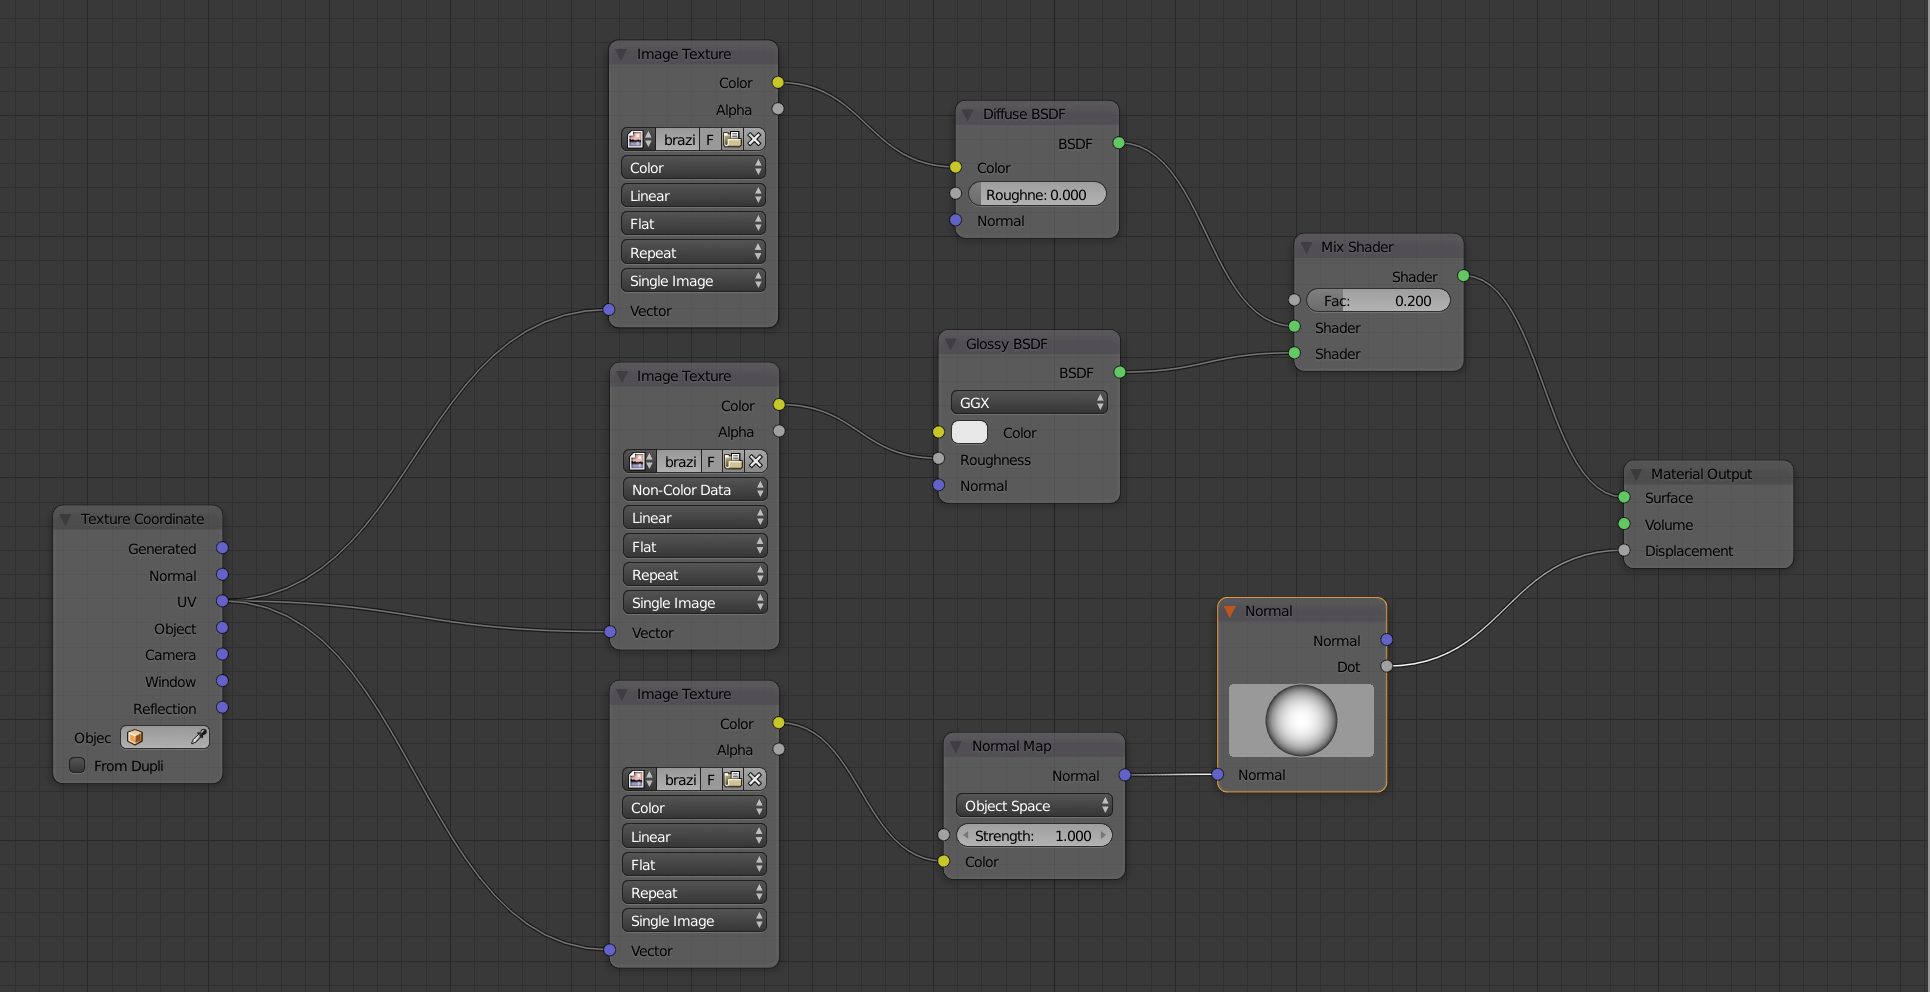
      I have checked the UV maps already, they do not overlap with other UVs and in the textured map they look fine too. (I don’t have a sreenshot of the texture map or the UVs available right now, sorry.)

      Thanks for your time in advance and have a nice evening 🙂

      #34749
      William Miller
      Participant

        I’m not sure, but I think the black in the image means zero, and so that is what is going into the roughness of the glossy shader.  Try making it all white.

        #34750
        plasmavoyage
        Participant

          Oh. Hadn’t thought about it yet, but that does sound like it would work.

          I mean it even says “Roughness”, so now that I think of it, it would make sense that the lighter areas would indicate a rougher surface which means less specularity and vice versa.

          Thanks a lot for your help!

          It will have to wait until after my nightshift until I can try it out but I suppose that’s it. 😀

          Cheers

          #34751
          William Miller
          Participant

            You’re welcome!

            #34752
            Ronald Vermeij
            Participant

              Perhaps these 2 free e-books on Cycles can help you also:
              https://cgcookie.com/t/1022-blender-free-ebooks-on-cycles-by-joakim-tornhill

              #34753
              Dolores 74
              Participant

                #34754
                plasmavoyage
                Participant

                  Thanks will check  it out!

                  #34755
                  plasmavoyage
                  Participant

                    Oh I see you have a way more efficient way. But at the same time, is it not better to seperate diffuse, spec and displacement maps for more accurate control? Like, I don’t necessarily want all the light-coloured parts of my diffuse map to be displaced or darkened.

                    And what is the difference of that principled shader compared to the other ones?

                    Is it just the effectiveness of having all those controls in one shader or is there something else about it?

                    #34756
                    Dolores 74
                    Participant

                      If 10 people post there way of doing it, you will have 10 different node setups. I’m just 1 out of those 10.

                      The problem with all those different maps is that you need to have them. Most of the time you don’t see enough detail to make it worth wile to spend the time making them.

                      In your case you might go true all the work because it is only one object and close to the camera but still, is it going to make that much difference ?

                      It is of course, a good exercise to learn what stuff is doing and where it is for.

                      There is no need for a ‘Texture Coordinate’ node if you have only one UV-Map. Blender takes that one automatically by default.

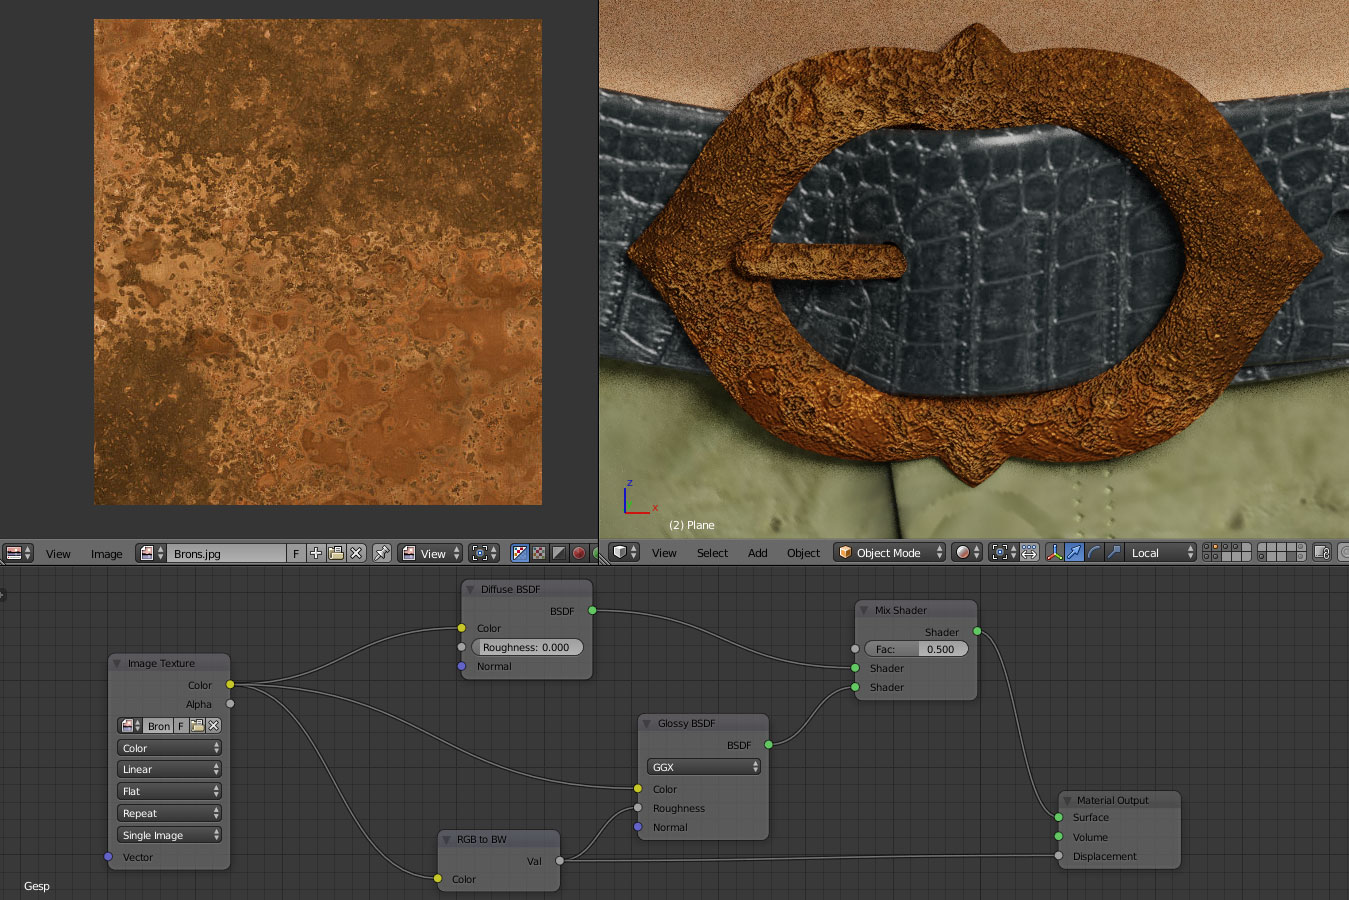
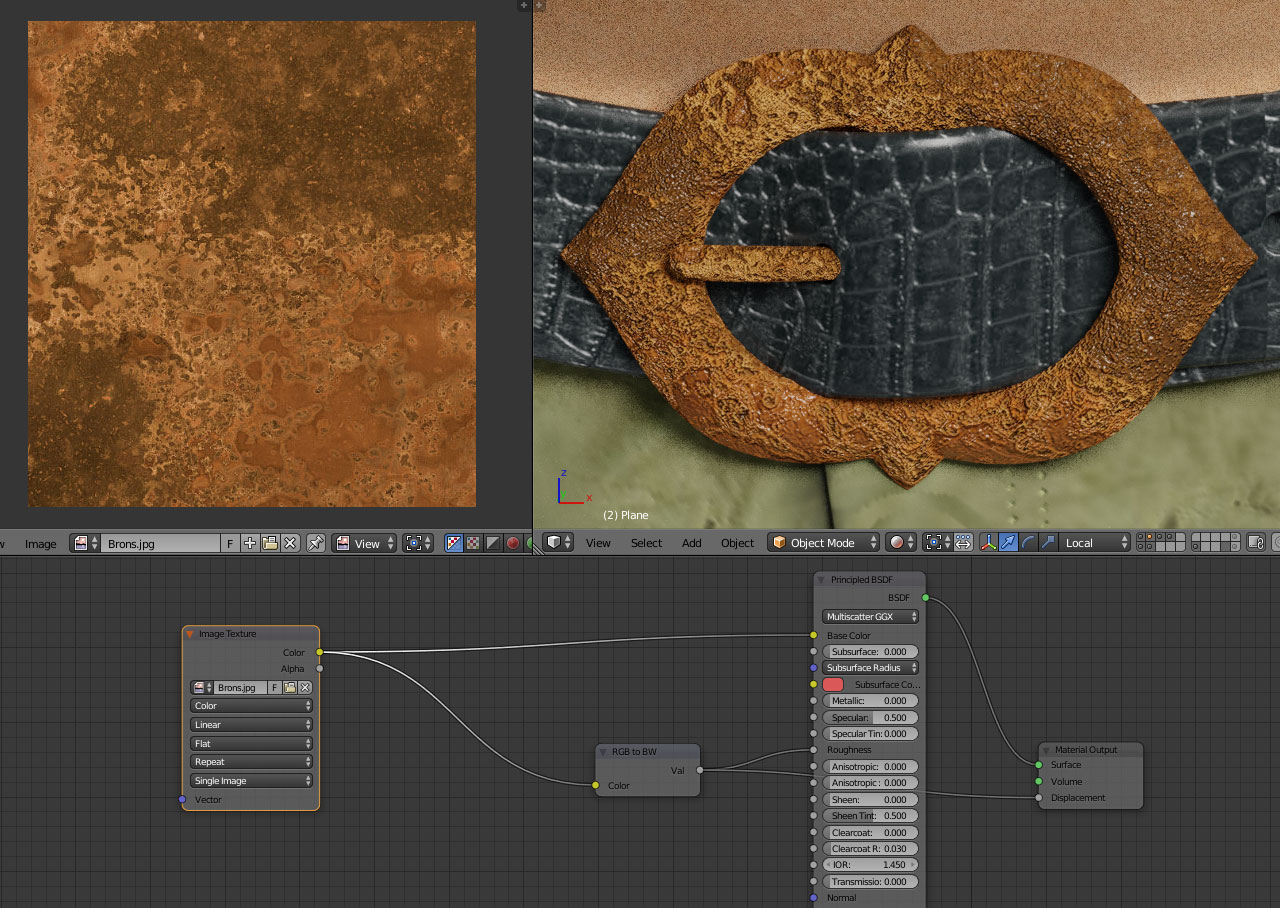
                      The principled shader is sort of all in one, I like to keep it simple. The Guru has a tutorial about it. As you can see in those two images it has a different result. As long as it looks good, I’m happy.

                      #34757
                      plasmavoyage
                      Participant

                        I see. Well thanks for your help. 🙂

                        #34758
                        Dolores 74
                        Participant

                          I believe I am misunderstood and/or incomplete. If you wish the inside different than the outside you will have to give it a different material. Did you ? 

                          Everything has a bit of glossy, even ashes. In your mix node you still have 0.200. try 0.05.

                          Also, the color of the glossy shader is white, try some gray or connect the color of the top image texture node as I did. You might achieve the opposite effect. If so, you will need an inverter node.

                        Viewing 11 posts - 1 through 11 (of 11 total)
                        • The topic ‘Regarding the correct use of shaders and imagemaps’ is closed to new replies.