
PolyBook 2020 – blanchsb
Forum Archive › PolyBook 2020 – blanchsb
- This topic has 87 replies, 11 voices, and was last updated 5 years, 6 months ago by
Shawn Blanch.
-
AuthorPosts
-
August 25, 2019 at 2:25 pm #50434
@williamatics My guess is turning on the ‘cavity’ option on the viewport overlays, which acts like AO and highlights the edges. You can set those to ‘screen’ or ‘world’, each has its own look. I typically use the world setting.
August 25, 2019 at 4:29 pm #50435@smurfmier1985 Miranda said it best. Although I am fond of the ‘Screen’ type of Cavity detection.
@williamatics It’s all found in the Viewport Shading Menu in the Header. The cavity feature is by far one of my favorite little nuggets in blender 2.8. I like it so much I wish it was native to the Eevee shader. You can also adjust the exterior edge and internal edge width settings using a slider bar (say you want more pronounced outer edges but less pronounced inner edges).
One cool thing is that you can technically render in the Workbench (LookDev) mode and send out quick renders with that enabled.
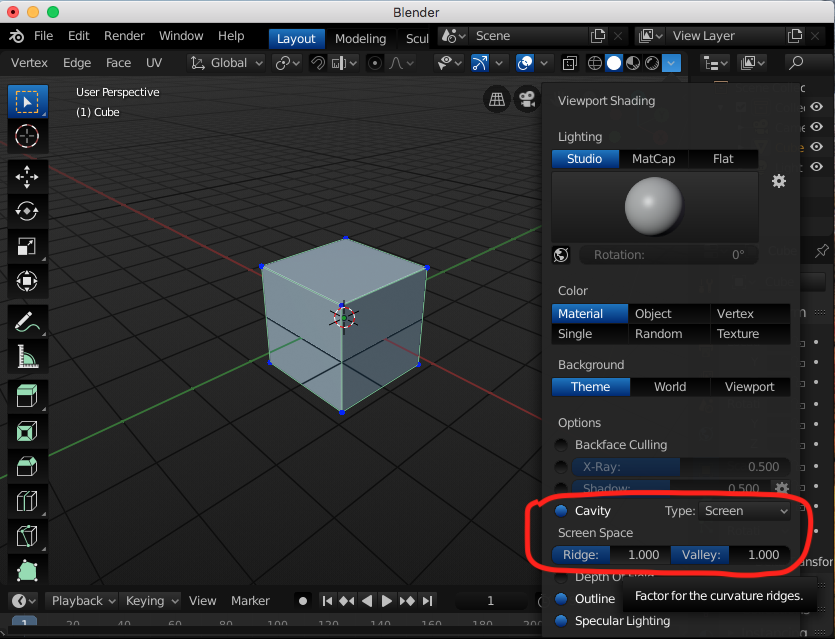
One question I have is: What do Specular Lighting and Depth of Field exactly do? I have toggled them various times and I don’t seem to see anything different.
August 26, 2019 at 12:10 am #50436August 24, 2019 – Day 4: Modeling Revolver – Adding Details: Handle
Wow! The hande extrusion section was a lot more rough for me than the tutorial. Somehow I ended up with a couple extra faces on the lower strap extrusion and it took a decent amount of work to flatten it even with the Loop Tools Add-On. But I am glad I had it handy or it would have been worse and I would have started the handle exercise all over again.
The screws taught me that sometimes it is better to extrude some faces as opposed to ‘cutting’ other faces back. Extruding the outer flat-head round part to make the flat-head slot was much easier than cutting the flat-head slot, mainly because I had already made the screw head somewhat rounded so cutting faces back proved to be troublesome. The tutorial training saved the day there.
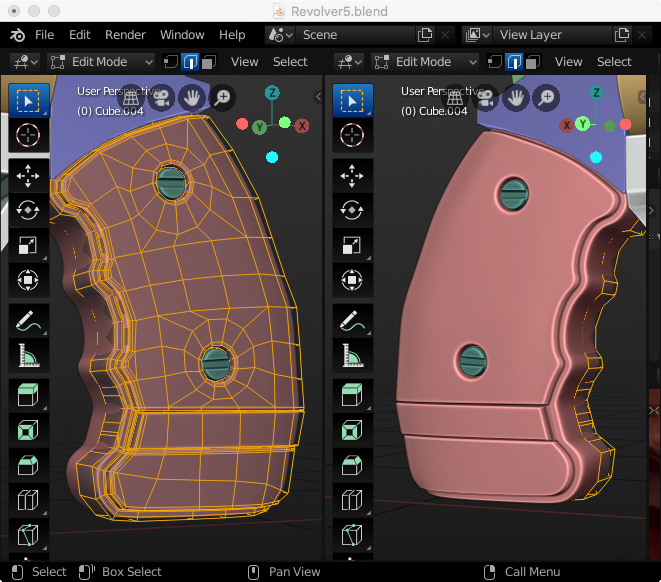
New shortcut keys learned today as well: F9 (context menu for last action), and Ctrl + Spacebare for toggle full screen. Huzzah! Also I kinda like seeing one side in edit mode and the other in object mode.
August 26, 2019 at 11:59 pm #50437August 25, 2019 – Day 5: Modeling Revolver – Completion
I finished the tutorial and tried the hammer on my own without watching first. It turned out decent I think!
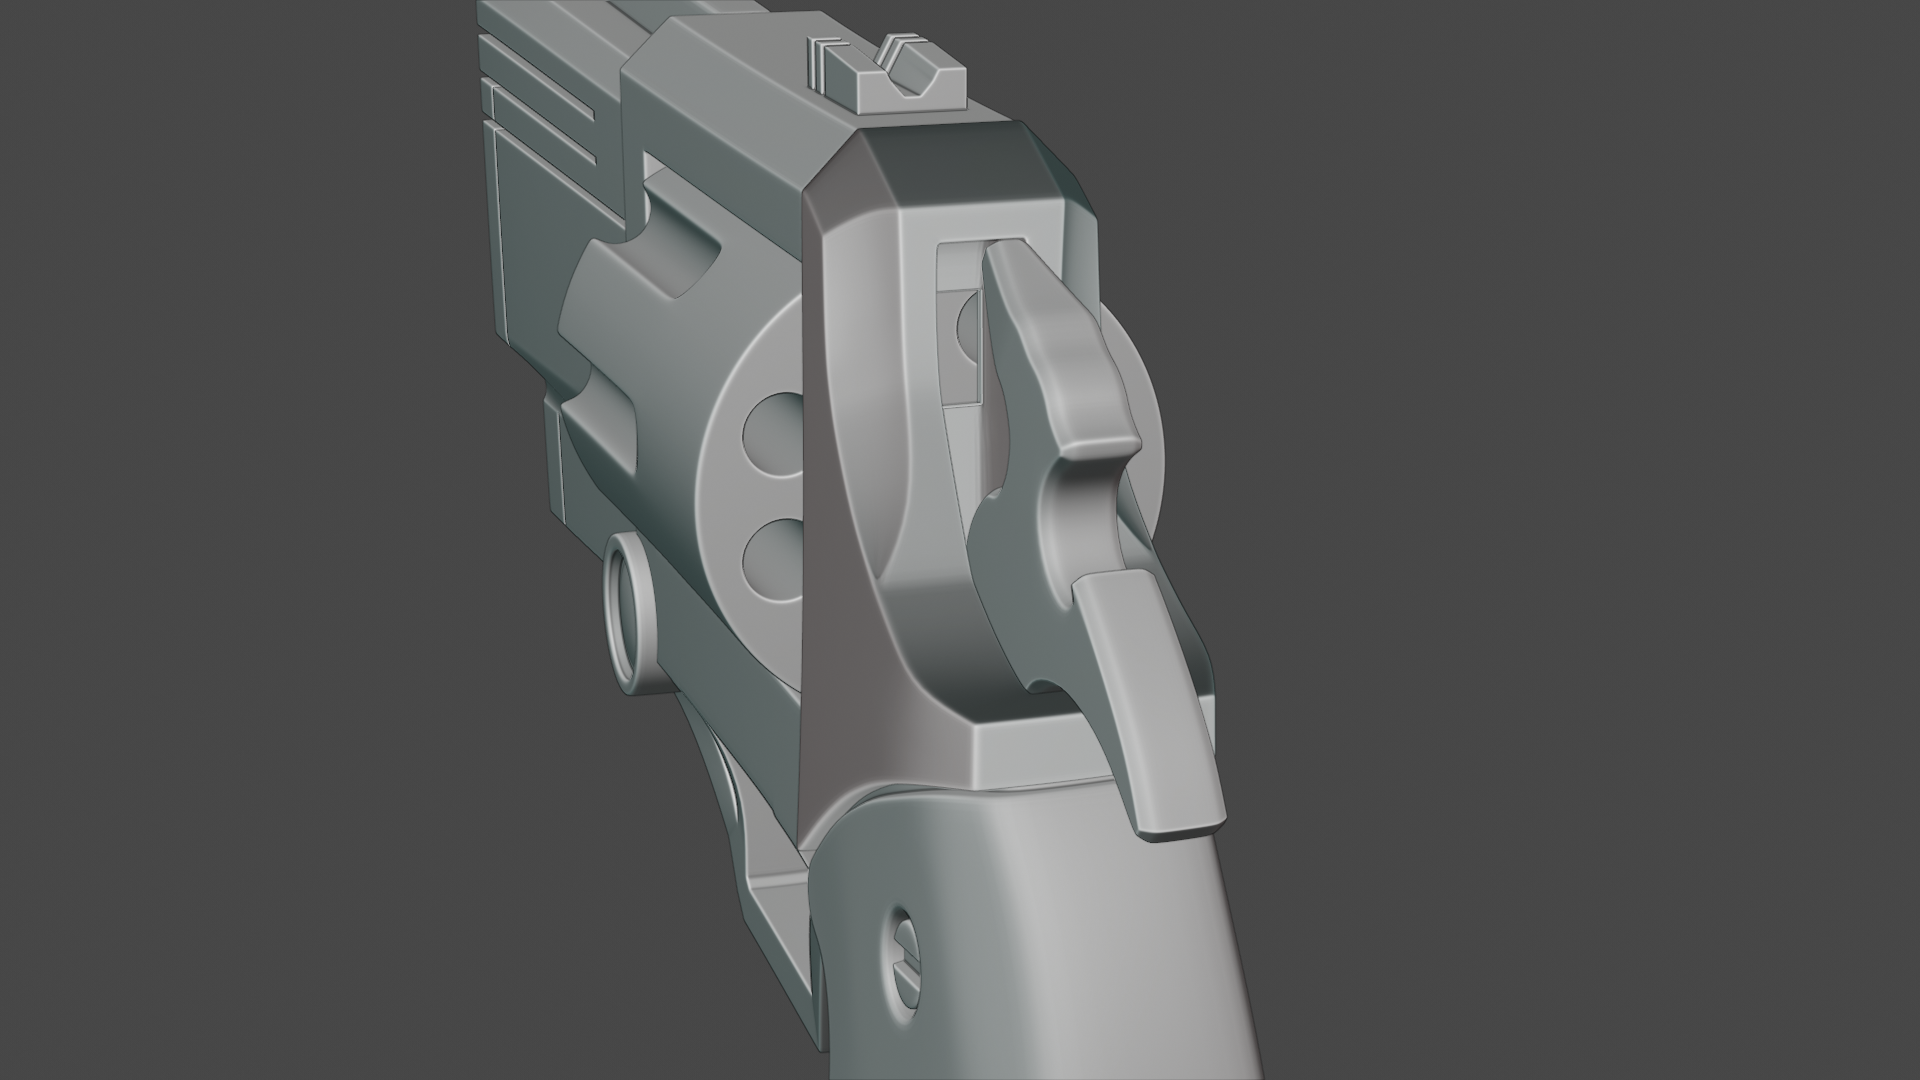
Here’s the overall look after completing the back end.

Then as a celebration I added a lattice modifier to all of the gun parts and made it look just a tad more stylized and added some stylized shading. I am happy I took this course because my detail loop modeling skills took a nice boost.

Next steps from here: I will begin working on my game character gun. (Much more simple of a concept hopefully). Details to come….
August 27, 2019 at 2:36 am #50438August 27, 2019 at 11:02 pm #50439August 26, 2019 – Day 6: Game Asset Creation – Shooter Gun
Shooter Gun is what my son Owen affectionately called my pistol I just finished. So we’re gonna roll with that for the first game asset creation.
Inspiration Context: My ultimate goal (one day in a far off future time) is to create a turn-based strategy game with silly-yet lovable characters. Simple mechanics. So I drafted up my first teams for the game 2+ years ago and they have been burning a hole in my soul telling me to complete them.
Shooter-Gun Backstory: First team up is the WarHogz. A group of zany pig (and not so pig) characters. The first of which that I drew up and also created in 3D was Pot Belly Porker. He is my avatar on this site after all. Well now it is time to do him some justice and make his ‘shooter gun’. Then following this it will be appropriate to move onto Hambo’s Bacon8r Inifite-Cyclical Pump Action Shotty.
Reference #1: Initial Image for artistic reference: Shooter Gun is wielded by Pot Belly Porker on the top left.
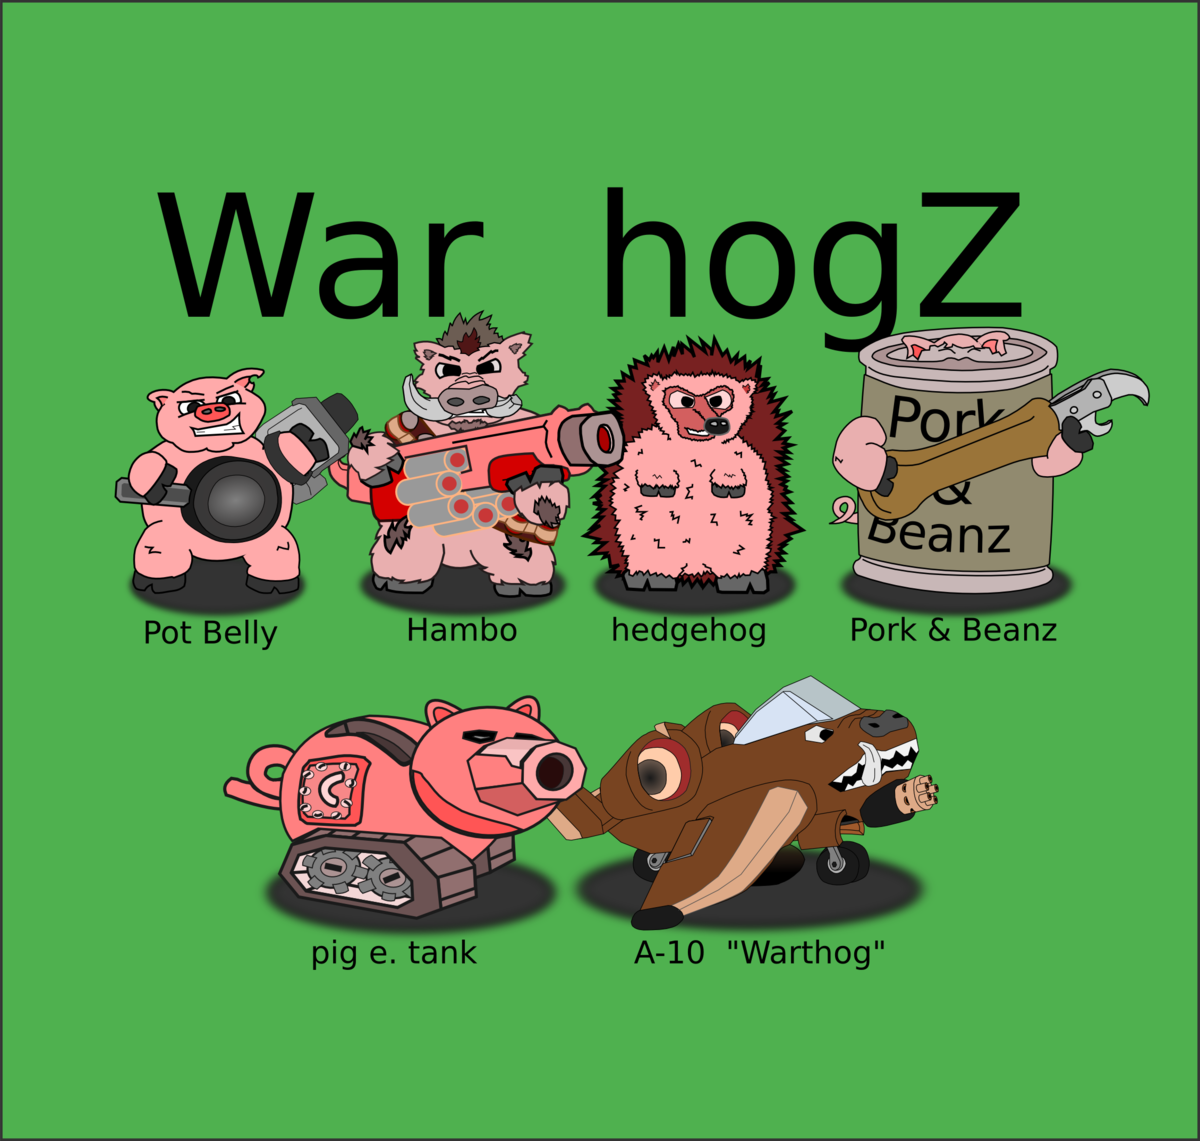 First thoughts are: “hmmm….. yeah but kinda basic and blocky, but a good first pass. I like the shape of the barrel and the strap, the rest can be improved upon.”
Reference #2: Pot Belly Porker in 3D. (WIP for better modeling days to come). He doesn’t have all the proportions 100% yet but he’s close. It is required that shooter gun strap onto Porker’s arm/hoof. Keeps it silly and zany when he fires because there is no trigger for this thing.
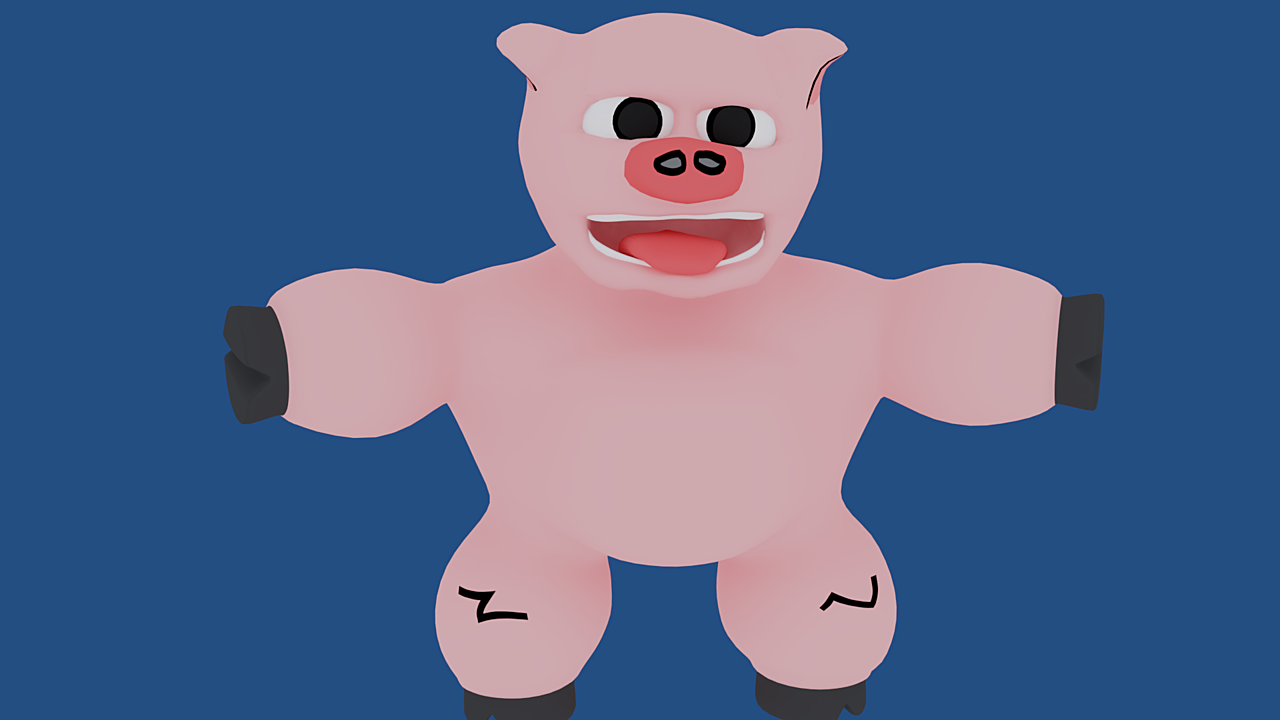 Requirement to make shooter gun be strapped to hoof/arm
Reference #3 & 4: Blaster Styles to pull inspiration from. I will also add a requirement to have a site reticle for ‘aiming’.
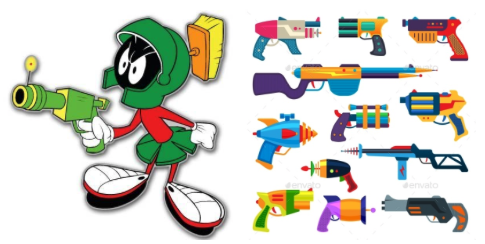 Simple yet Stylized – but no trigger
That’s it for requirements and inspiration for now. Time to get blendin. Any additional reference or ideas are definitely welcome.
Overview of requirements:
Stylized look
Simple
Needs a strap
Site Reticle
No Trigger
Lo-Poly style (optional but desired)
August 28, 2019 at 11:18 pm #50440August 28, 2019 – Day 7: Game Asset Creation – Shooter Gun
I have a basic blockout done. Not sure hoe much more detail I am wanting to get into for this since I want to keep things simple for the main shape.
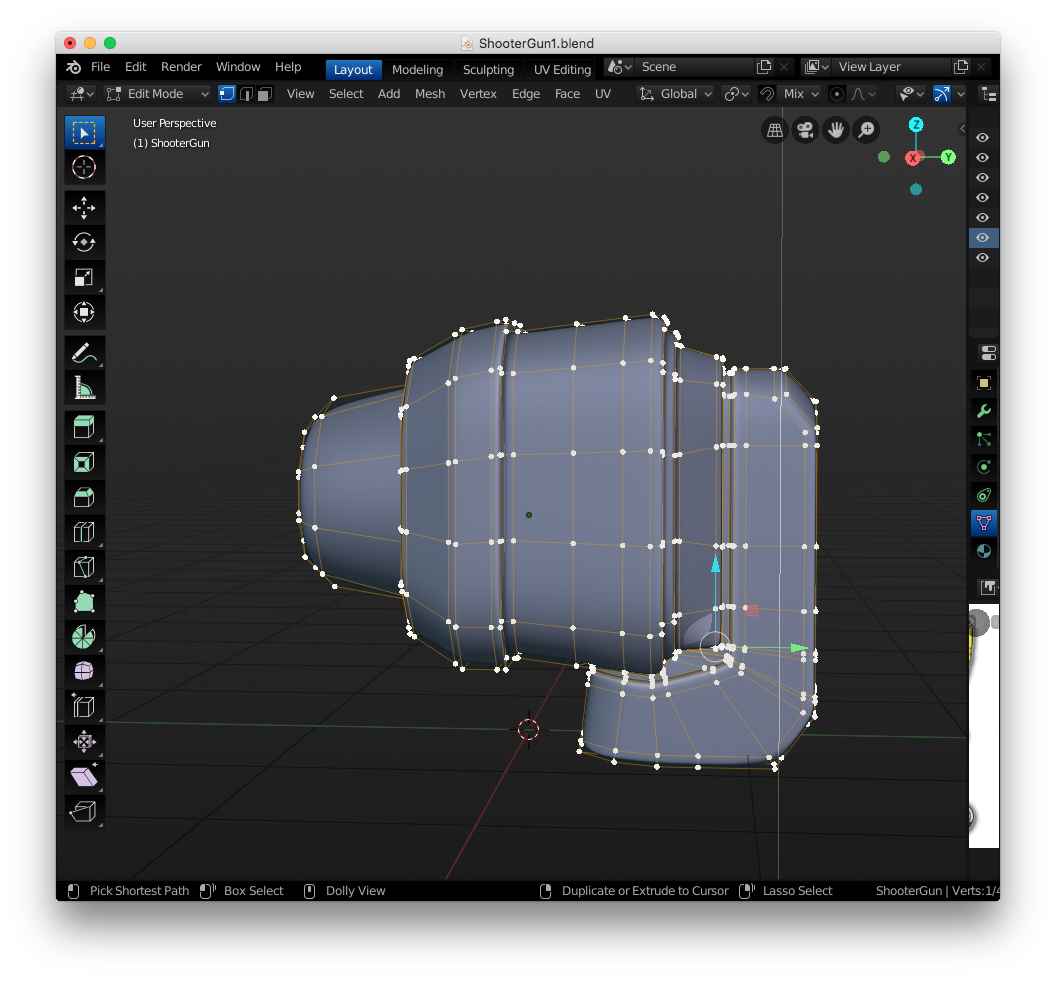
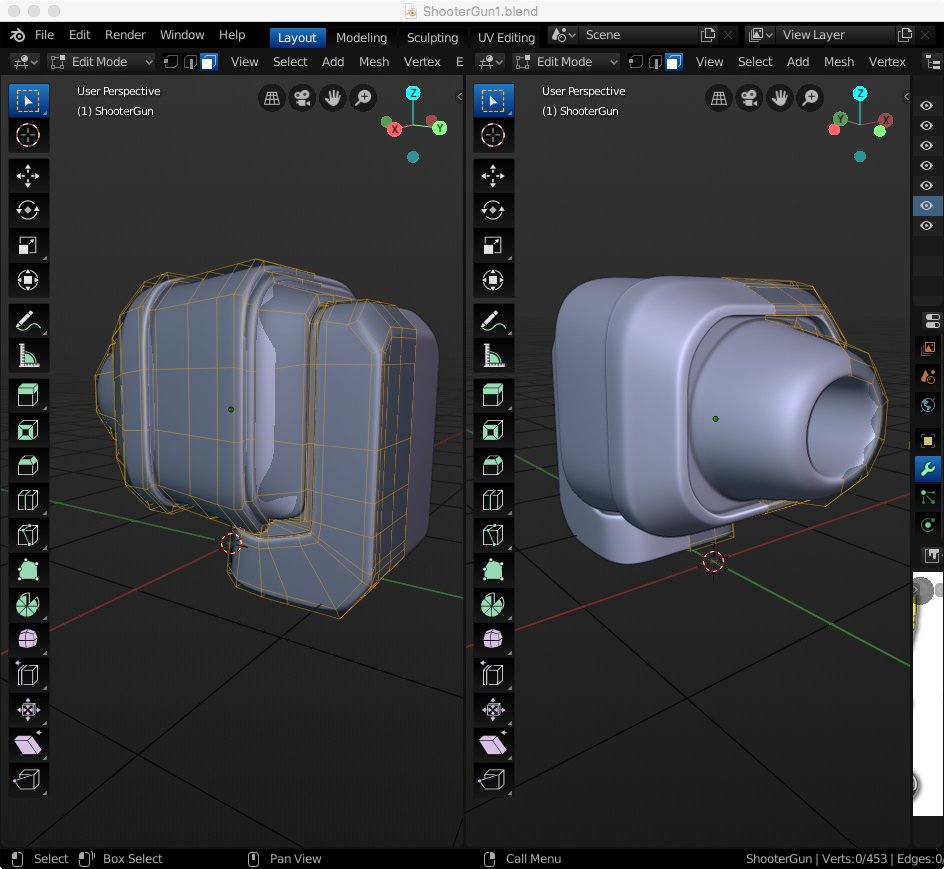
Next part is figuring out the reticle and making things tie together better.
Question to the veterans: Is it better to make separate objects or 1 single object? Many gun game assets I see in quick examples shown around CG town are typically 1 model. I’m thinking more in regards to when I want to get different colors/materials/shaders. Should I ‘Divide and Conquer’ or ‘Stick together’???
August 29, 2019 at 1:53 am #50441Hi Shawn, it really doesn’t matter that much; just do what makes you feel comfortable.
As for color, materials and shaders, one object can have as many different materials as you want, so no need to consider that…
What does matter is the modifiers. One object can only have one modifier stack.
Think logically. If you make a human for instance, you can make the hands and even the fingers separate objects, but (at least to me) that wouldn’t make sense (in normal cases). If the person is wearing a hat, it depends…is he/she always wearing it or maybe hangs it on a hook or whatever…You get the point;)
August 29, 2019 at 8:16 am #50442Yeah that makes perfect sense @spikeyxxx. I hadn’t thought about modifier contribution. Very important as well.
I was wondering more along the lines of performance as well. Maybe @jgonzalez would be better suited to answer to that being the unity mentor
August 31, 2019 at 11:16 pm #50443Needed to take a “life” break this weekend since my & wife’s family are in town for our daughter’s baptism. I’ll get back into the modeling come Monday. I have been thinking about adding in some kind of liquid/bubble in the middle of the gun and make the ammo be more of an energy ammo (like plasma or something). Still tinkering with the idea but the break is giving me time to reflect on it some more. Will post more on Monday. I am kind of partial to the Omolon liquid ammo look from destiny 2 and want to incorporate something similar but slightly silly.
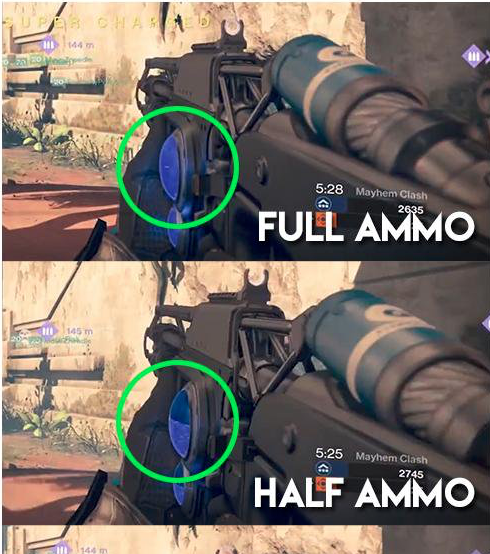 September 3, 2019 at 8:07 am #50444
September 2, 2019 – Day 8: Game Asset Creation – Shooter Gun cont…
I came back with a refreshed mind after family visits were over.
Went back to work on the Shooter Gun, deleted some geometry, and added Lt. Porker for size reference.
Need to think more about the handle since, it’s not really needed I want it to be there as a prop if anything.
Added a bubble port on the side and am thinking some green bubbly slime of similar for the contents on the inside.
Still need to add the strap, reticle, and work the handle some more.
I added some detail geometry on the top and will probably work on transitional geometry between the two objects for the top and bubble on the side. But for now this is what I got completed.
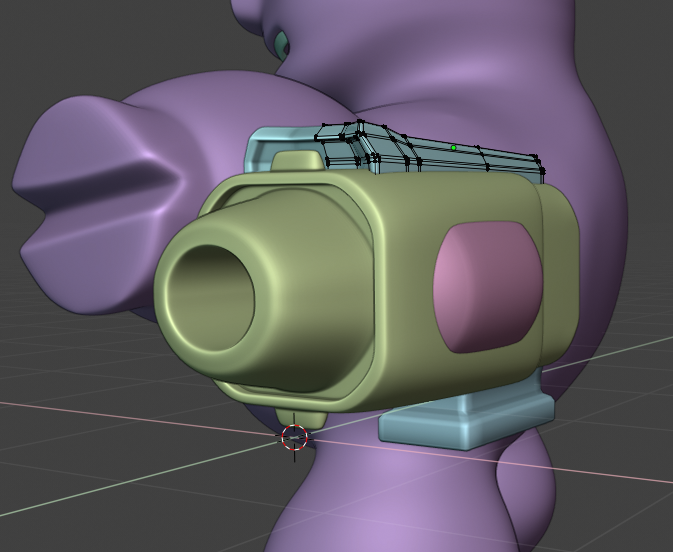 Shooter Gun WIP 2September 8, 2019 at 11:04 pm #50445
September 8, 2019 – Day 9: Game Asset Creation – Shooter Gun Wrap-up
I got the reticle and band created and did some wrap-up work for the handle and bubble. It is looking as complete as I think it should.
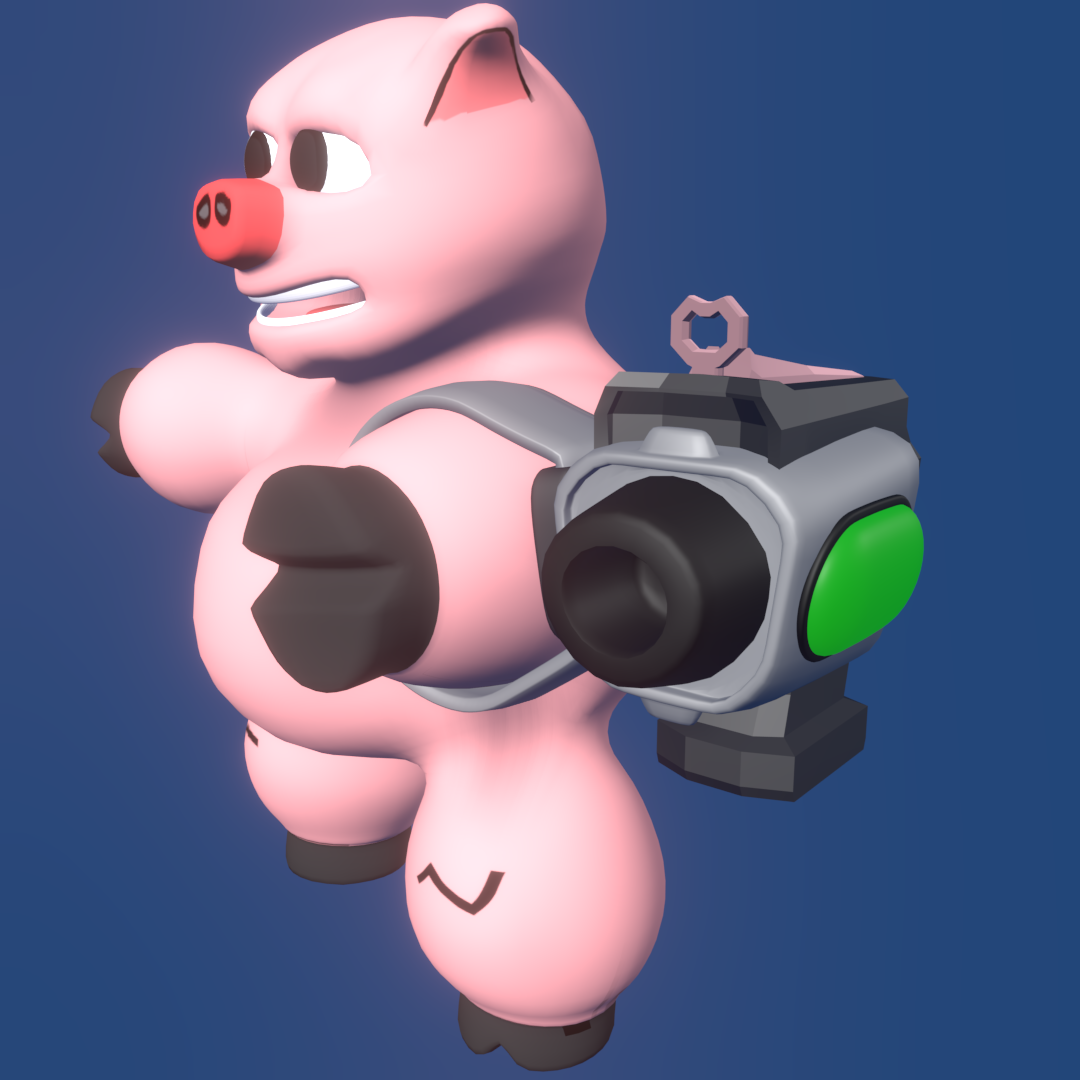
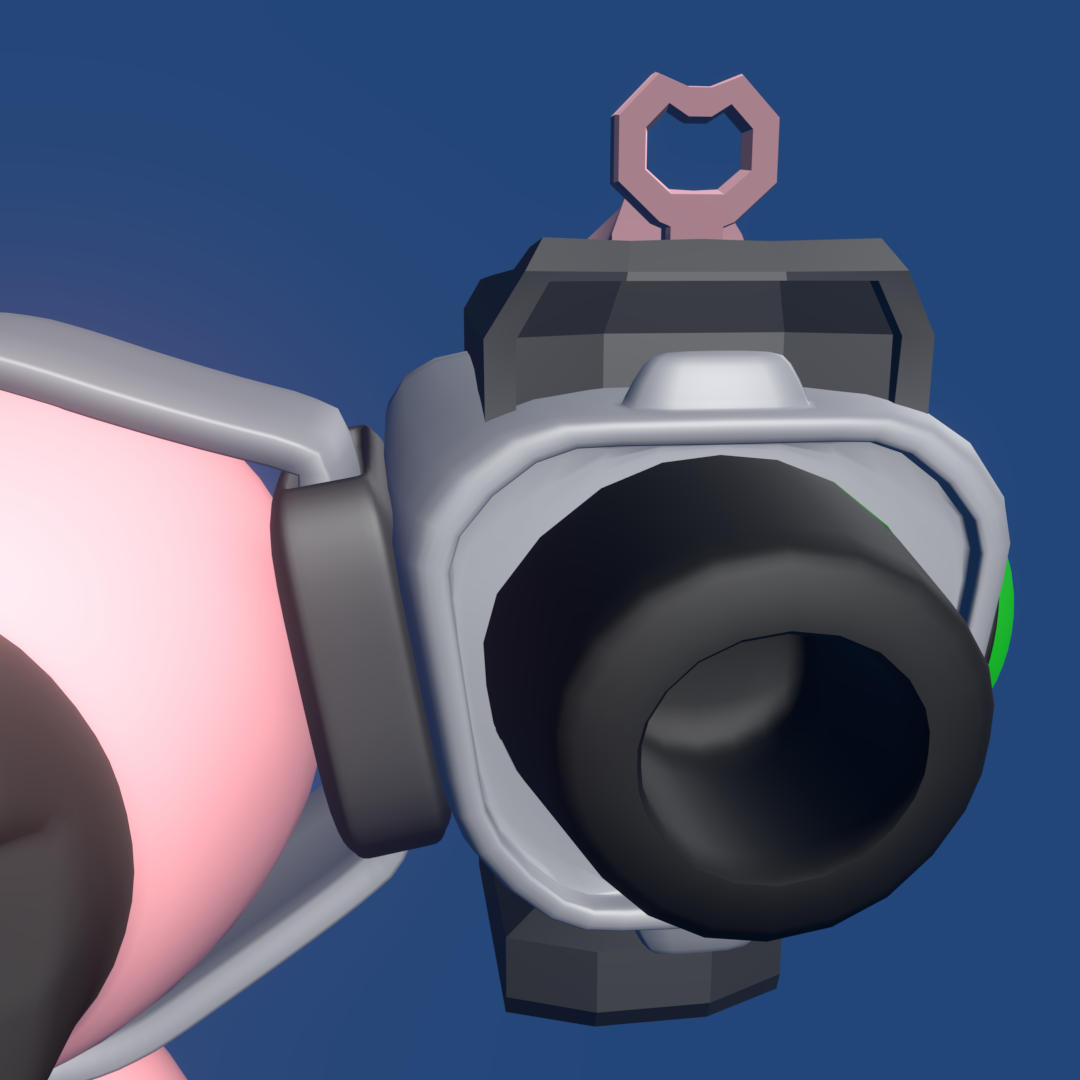
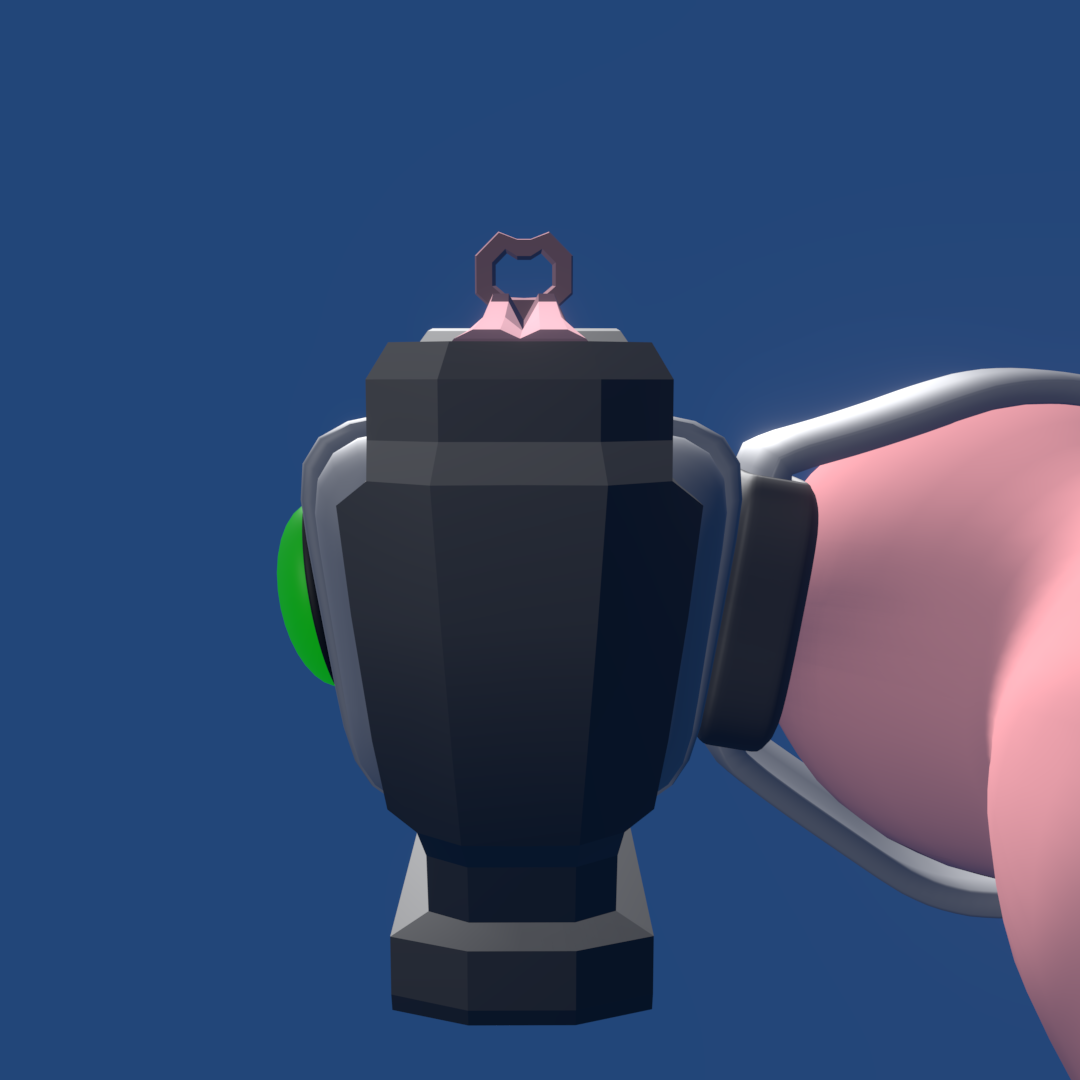
The only thing left for me to figure out is, how do I add a slimy-juice mixture with varying sized bubbles kind of stuck like Jello (I’m thinking of ‘flubber’-like material).
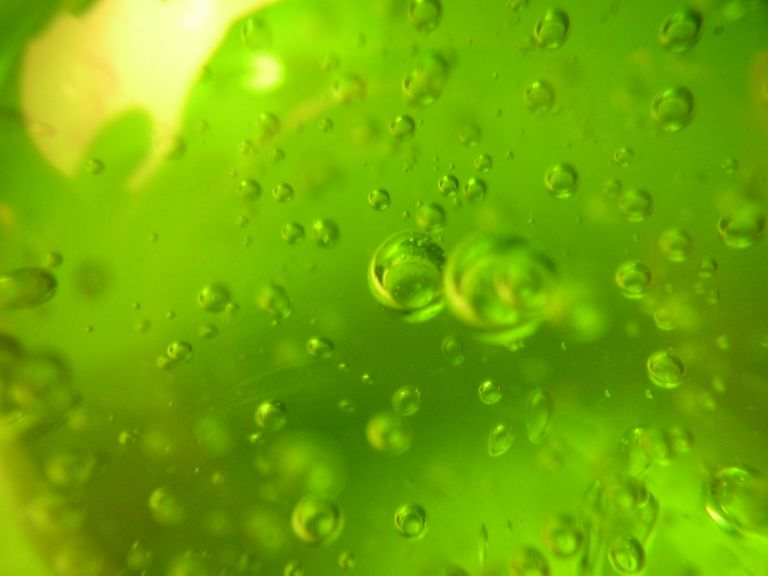
Anyone have any ideas how to make the green bubble on my gun look a little more like this image? I supposed I could make an image texture and ‘paint it’.
September 9, 2019 at 8:57 am #50446Are you doing the bubbles in blender or in unity or ue4?
September 10, 2019 at 8:46 pm #50447@louhikarme I was hoping on creating the bubbles in blender but the game will eventually go in Unity. I can do it there instead later I suppose.
September 10, 2019 at 10:59 pm #50448not sure how to do it in unity, but in ue4 i’d most likely do that with mixing different textures together and then have them move creating movement. and actually you could do this in blender aswell.
create black and white textures or create procedural ones. that has different sizes of bubbles and other details you want, blend them all together with color inputs and then animate. in ue4 that would be panning the textures. also since i don’t know how unity does procedural textures, you might need to create those afterall.
-
AuthorPosts


- The topic ‘PolyBook 2020 – blanchsb’ is closed to new replies.