
Pokémon Challenge 2022 – Celebi – WIP
Forum Archive › Pokémon Challenge 2022 – Celebi – WIP
- This topic has 89 replies, 12 voices, and was last updated 4 years, 2 months ago by
Wendy Robinson.
-
AuthorPosts
-
February 12, 2022 at 9:05 am #72474
Hello. That’s definitely a Celebi. As @jammingammon said you can work on the lighting and shading. Currently it doesn’t show the roundness of Celebi’s head and cheeks, which is what makes it cute 😃 I really like the house too by the way.
February 12, 2022 at 9:16 am #72475@wendy10698 I think it looks great, Wendy! Don’t become discouraged. Every artist will face obstacles such as these that questions their ability. Do not let fear become the driving force. Keep on pushing and don’t give up. Tell that devil whispering in your ear to flee. You are are more than capable and stand a very good chance to be selected as one of the top 4. Perseverance and Determination is key here. Remember, as Adrian has mentioned before, “this is not so much a competition, but an opportunity to challenge yourself and improve your skills.” Good luck to you, Wendy. Looking forward to some more awesome content from you.
February 13, 2022 at 3:30 pm #72476I agree with the others here Wendy – please don’t be too hard on yourself as you really are making nice progress!
I love your idea of Celebi sitting on the roof – that could look really cool! 👍
February 13, 2022 at 10:02 pm #72477Silenzio, Bruno!
 Sorry. That’s all I could think about when I read your reply. February 13, 2022 at 10:05 pm #72478
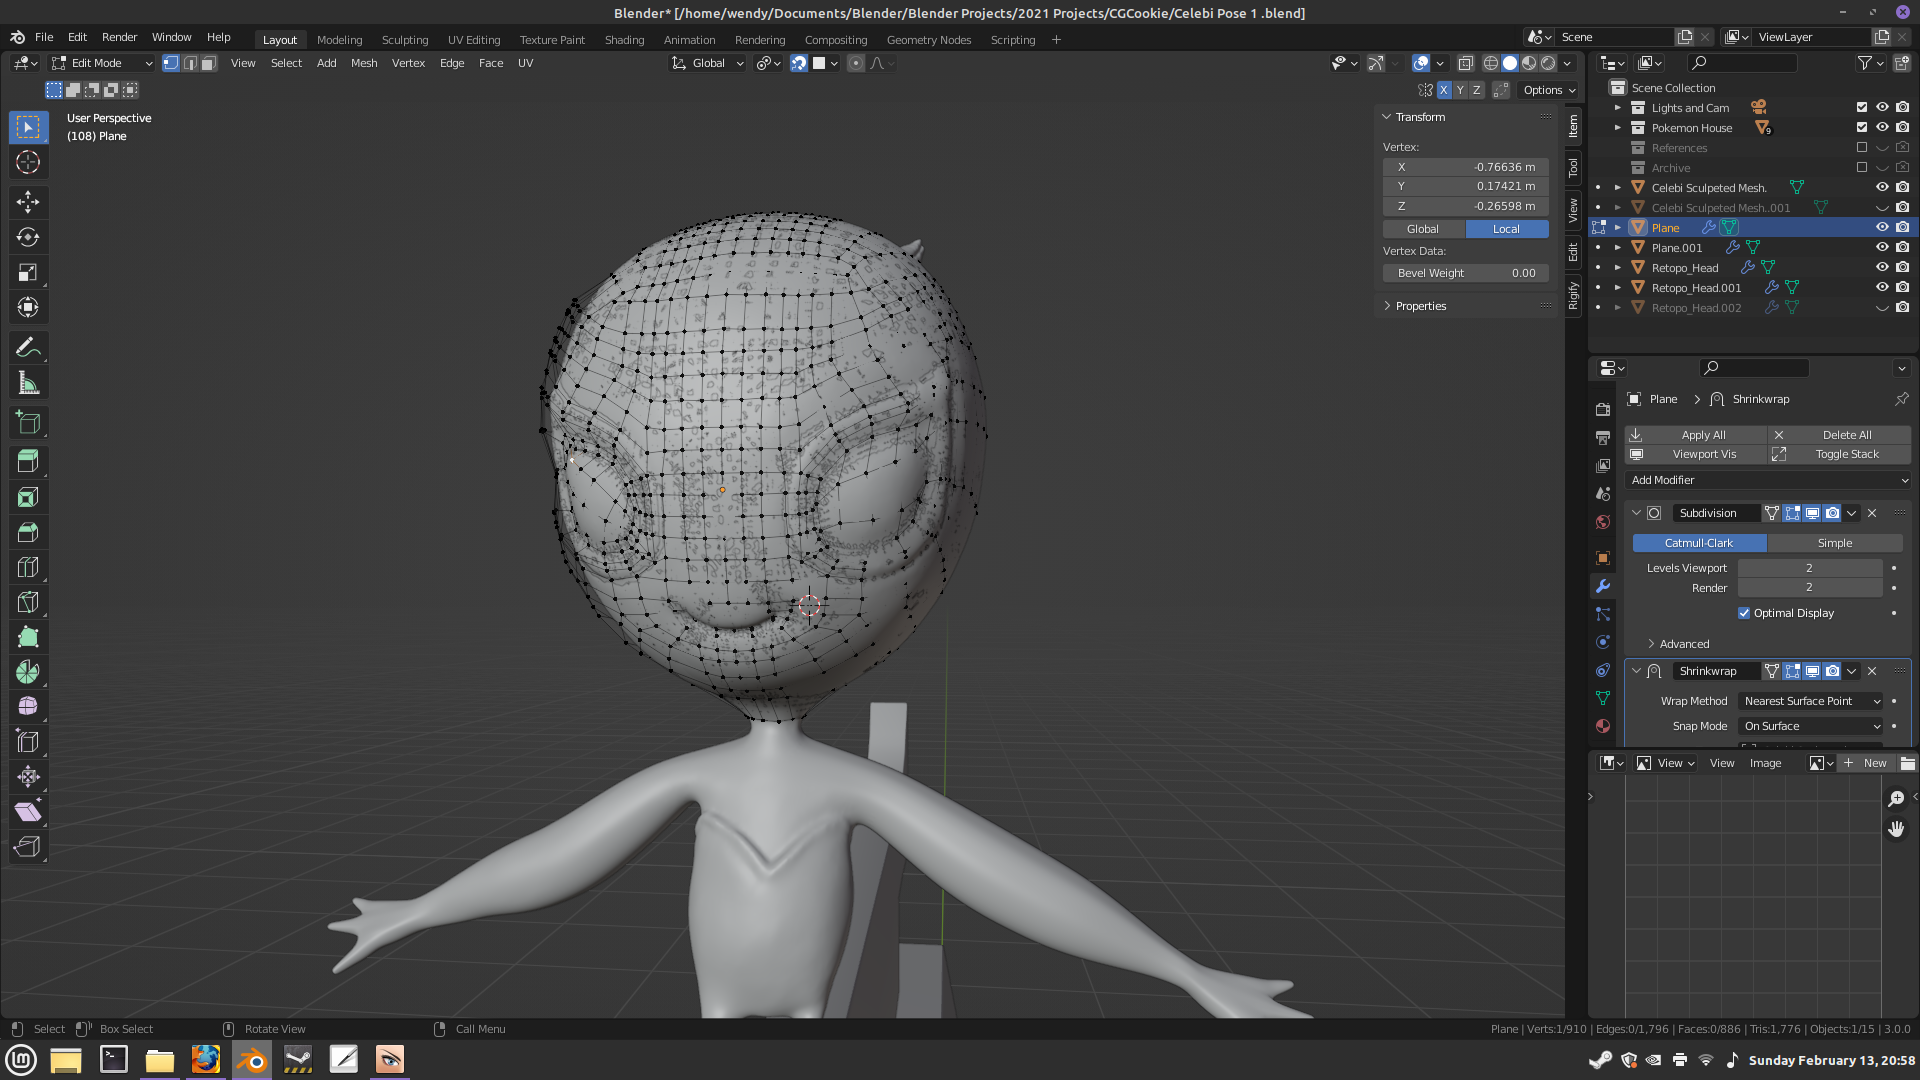
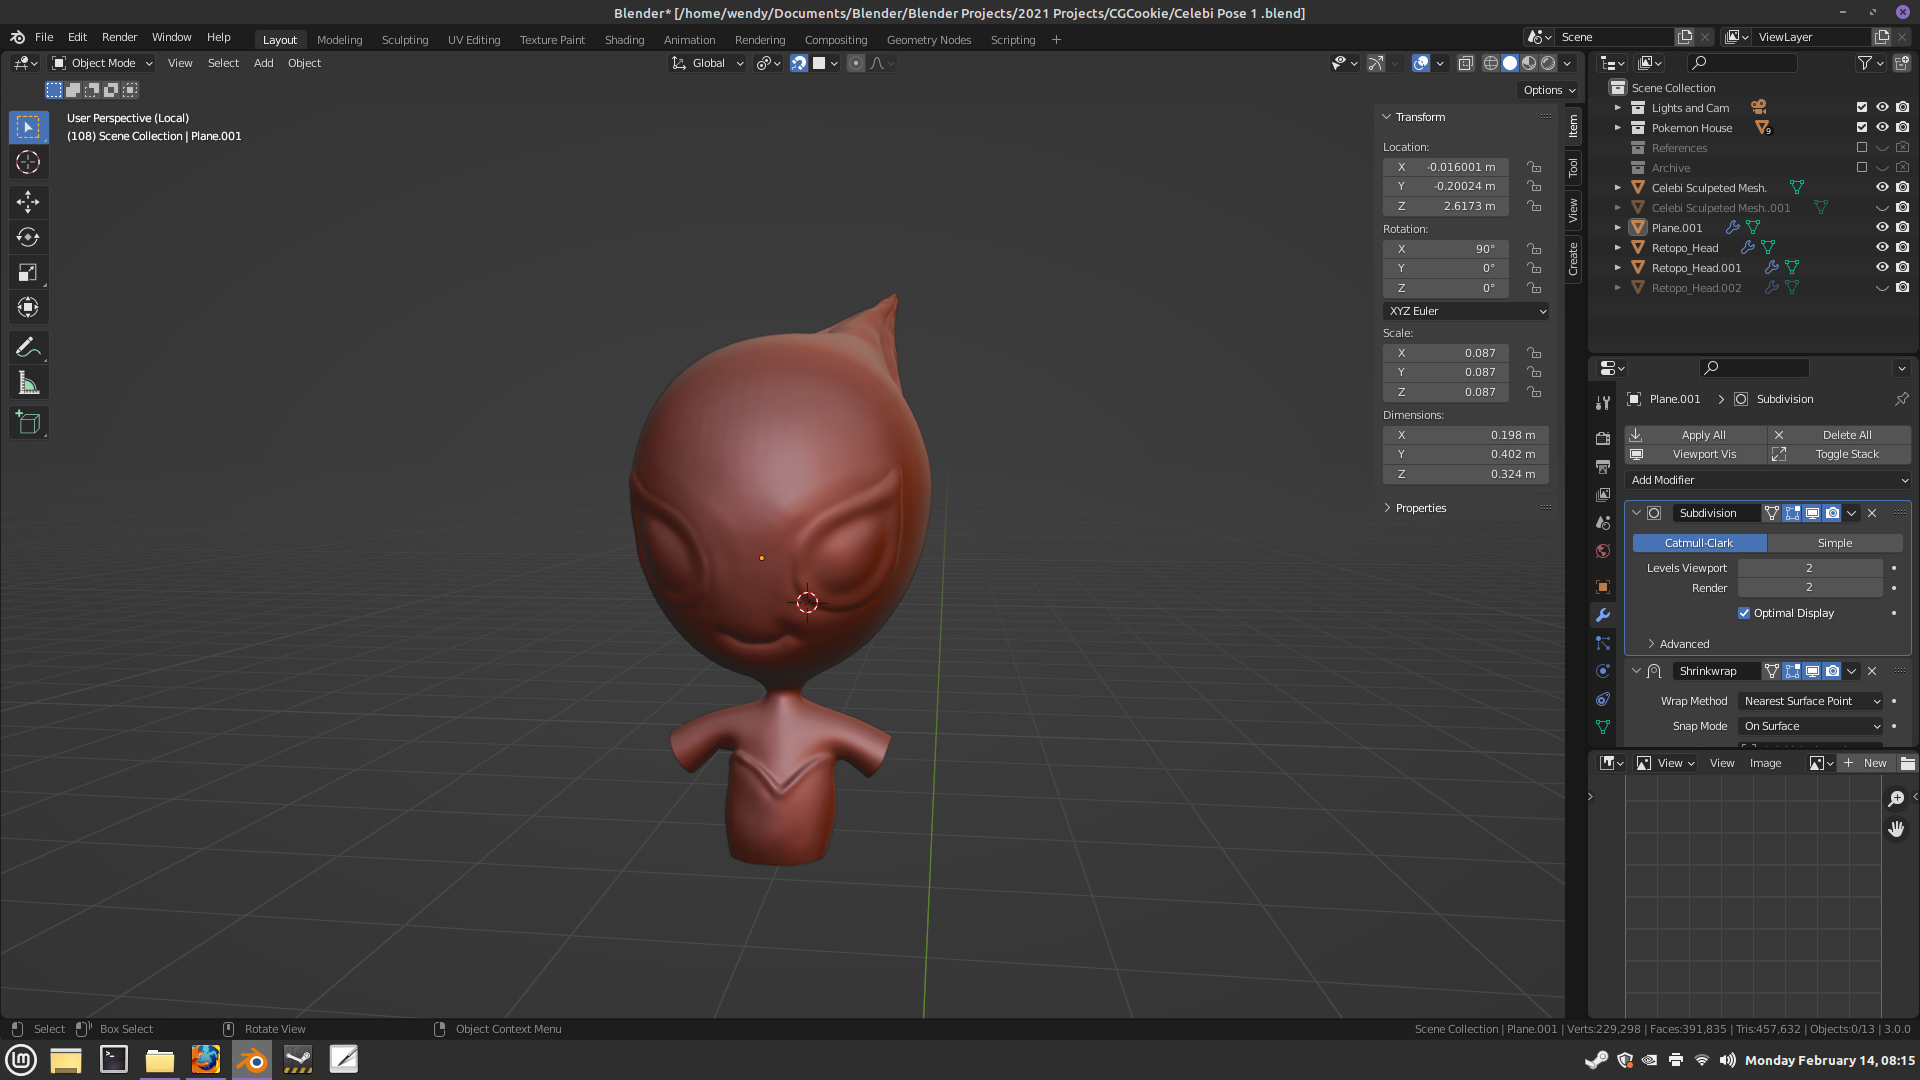
Ok….I’m retopologizing my sculpted mesh. I added some more surface detail. And I’m going to change up the lighting. How do I get more detail when I add material to the face? I color it in myself but it looks kind of grainy.
 February 14, 2022 at 6:32 am #72479
And I agree as well!
Your Celebi is looking so good.
I find it useful sometimes to turn on shadow in the viewport shading,
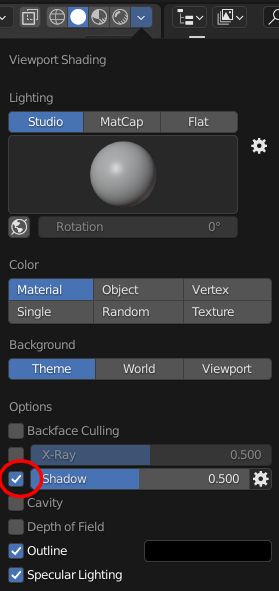
this will give you shadows in the viewport without worrying about adding lights at this stage, shadows can help see the 3d shapes you want. Without shadows it is difficult to see in 3d on a flat screen, especially when you are a beginner trying to learn.
Try changing to a Matcap also.
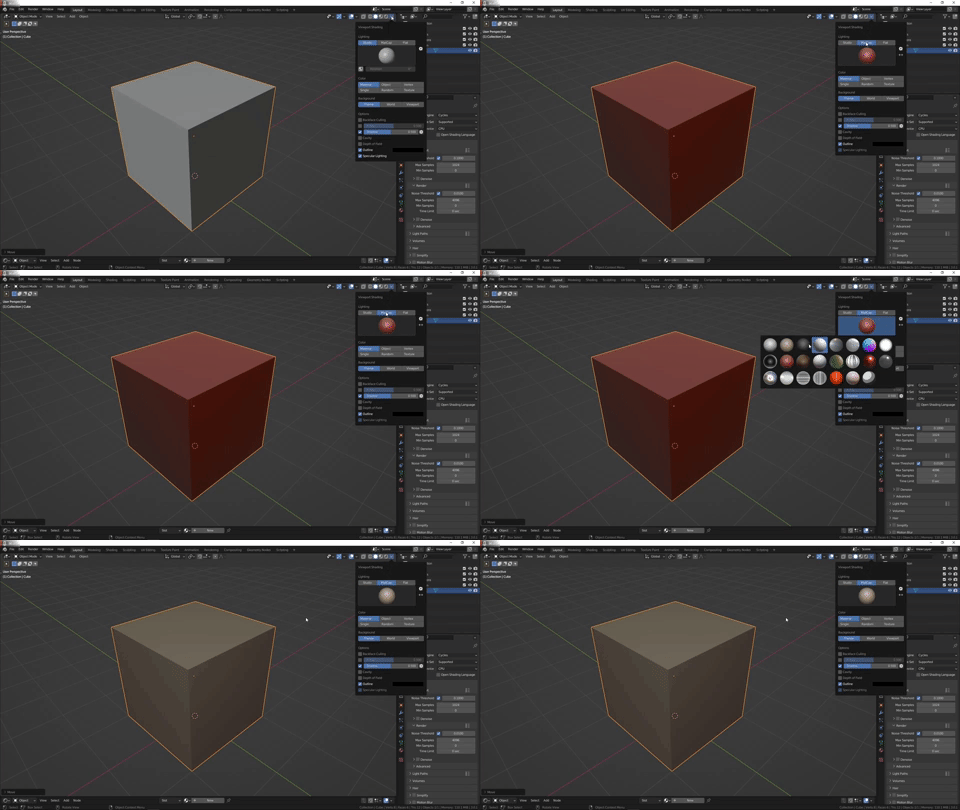
HDRi’s added like this, for me always make models look odd, the background isn’t in proportion with the model, and confuses the brain.
You can use an HDRi in the viewport shading,
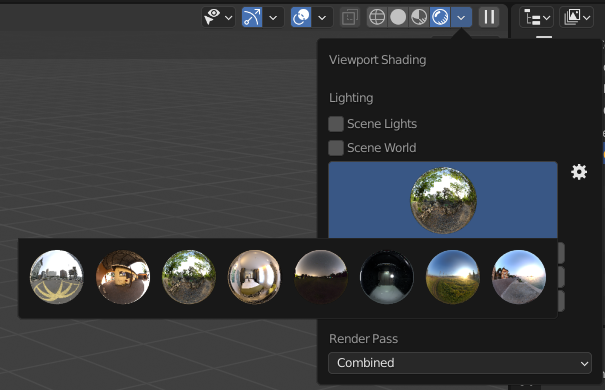
And render a viewport render, from the top of the 3d viewport, VIEW > VIEWPORT RENDER IMAGE.
This will give you the lighting info in the render without the background.
Keep it up Wendy,
you are doing awesome!
February 14, 2022 at 9:19 am #72480Thank you! That helped a lot! =D (Lighting is not one of my strong suits.) I’ve watched Andrew Price’s video on lighting and I learned a lot but I still have trouble applying it. Thank you for comment in the Pokemon Challenge, too!
 February 14, 2022 at 11:48 pm #72481
Is retopology suppose to take this long? Or am I missing something? I can’t afford the add on and so I am having to go in and do it by hand. It’s the only way I can think of to get the UV right so I can get the material right. It looks really good to me but is it suppose to be so tedious and take SO LONG?
 February 15, 2022 at 2:52 am #72482
Retopo definitely takes long and most people will agree with you that is is very tedious 🙂
You can speed things up a bit, by modeling symmetrically, so you only have to retopologize half of the model. Also, use less geometry; looking at ‘your’ feet, for instance, they don’t need that much geometry and also the rest of your figure can use way less. The Subsurface Modifier will take care of most.
Just as a (not so good) example, this:
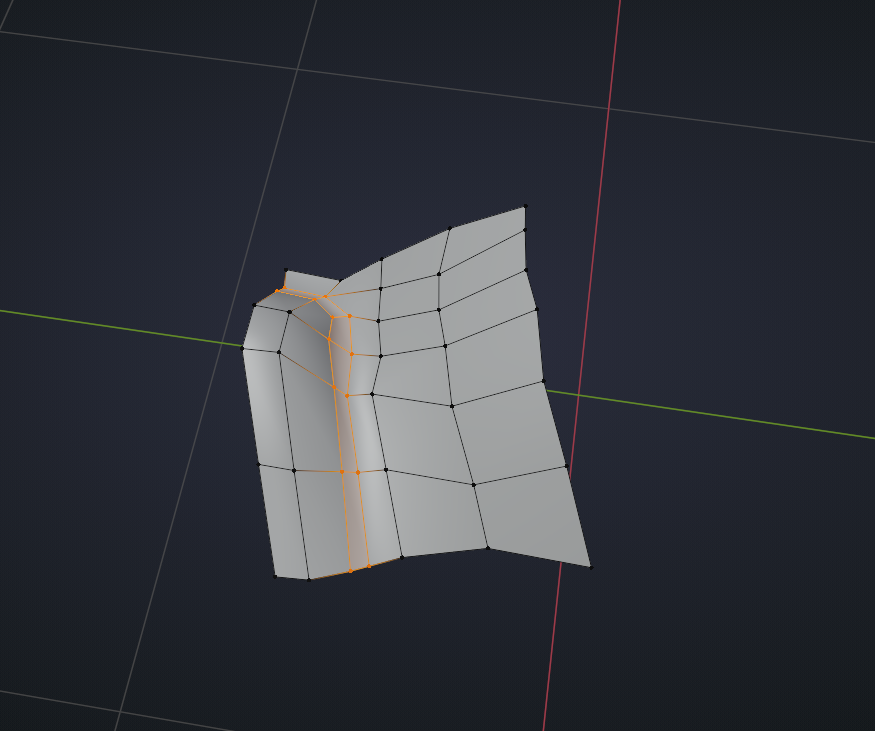 already gives:
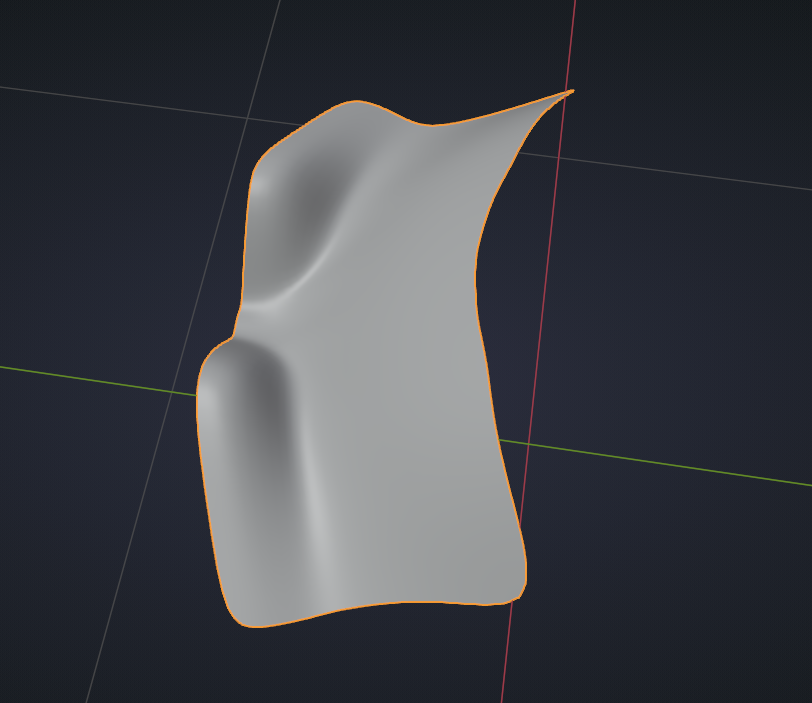 Make sure to have edgeloops around defining features (eyes, mouth,…) and use as little geometry as you can (no, even less!). it is really easy to add more, when you need to, later on.February 15, 2022 at 11:48 am #72483
@wendy10698 Hi Wendy, it really depends on the complexity of your model that will determine the amount of time you will have to invest. But yeah, for a beginner it will take a bit longer. Once you grasp the fundamentals of topology flows you will become faster at it. There are also add-ons to ease the process such as RetopoFlow (I have a copy and love it) and Quad Remesher. There seems to be a lot of hype around Quad Remesher. There are pros and cons to this add-on just like any other. It is so much faster than RetopoFlow however there seems to be certain limitations which RetopoFlow does not prevent you from. I really think that it all comes to what works best for the user.
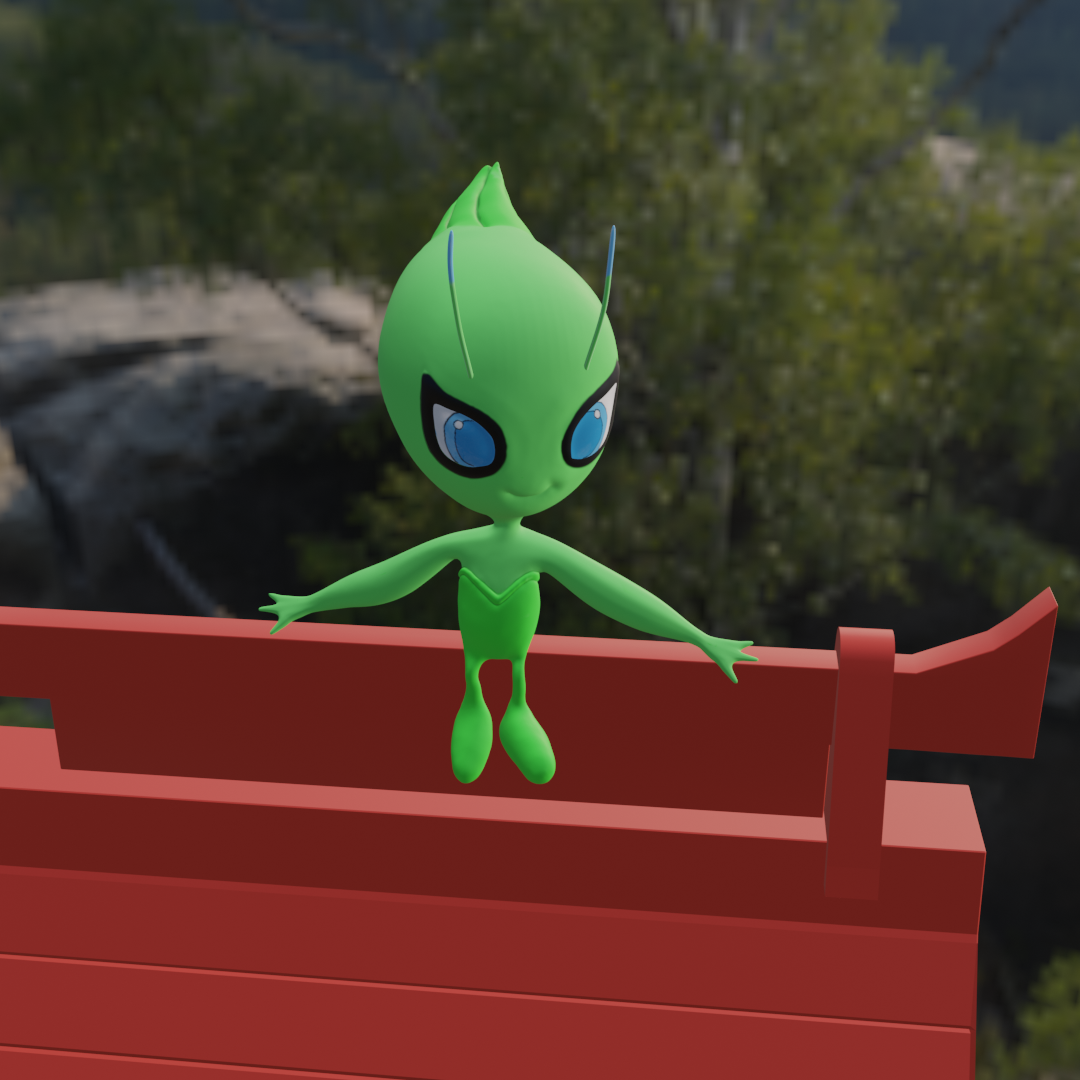
February 15, 2022 at 11:20 pm #72484It’s not perfect but I’m MUCH happier with this render. =D
 February 16, 2022 at 1:39 am #72485
Much better, yes!
But is it me, or is Celbi’s left arm Flat Shaded?
This often happens when you’re creating new Mesh, like with retopology, that, although the existing Mesh is Smooth Shaded, the newly created is still Flat:
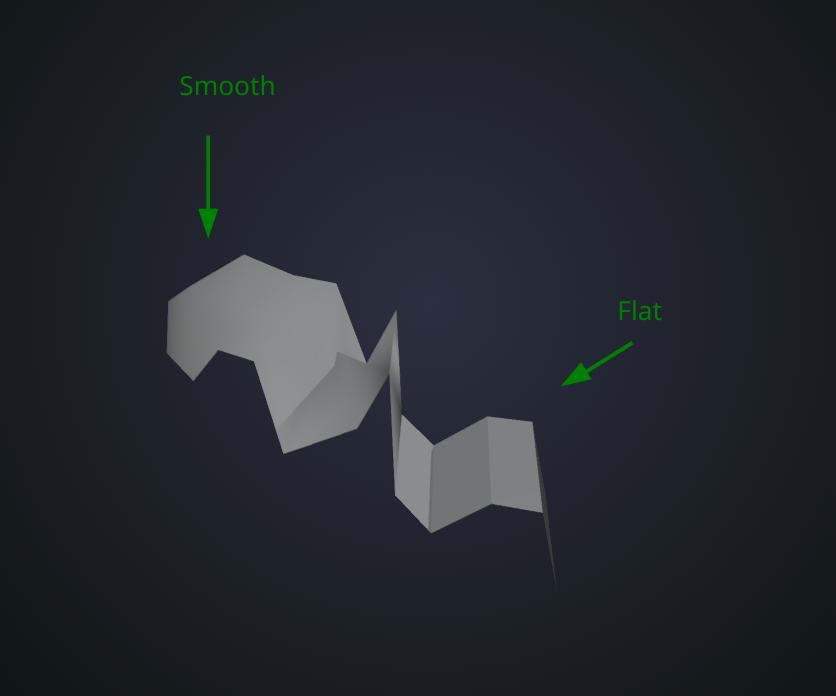 Just set it to Smooth in Object Mode.February 16, 2022 at 1:48 am #72486
It might need some tweaking. I had a hard time getting them to move to the correct place and angle that I wanted them. I found the easiest thing to do was go into sculpt mode and manually move and smooth them out. It may have flattened them, too. I will have to go in and add some more volume to the hands. (Thanks for pointing that out. I hadn’t noticed that. )
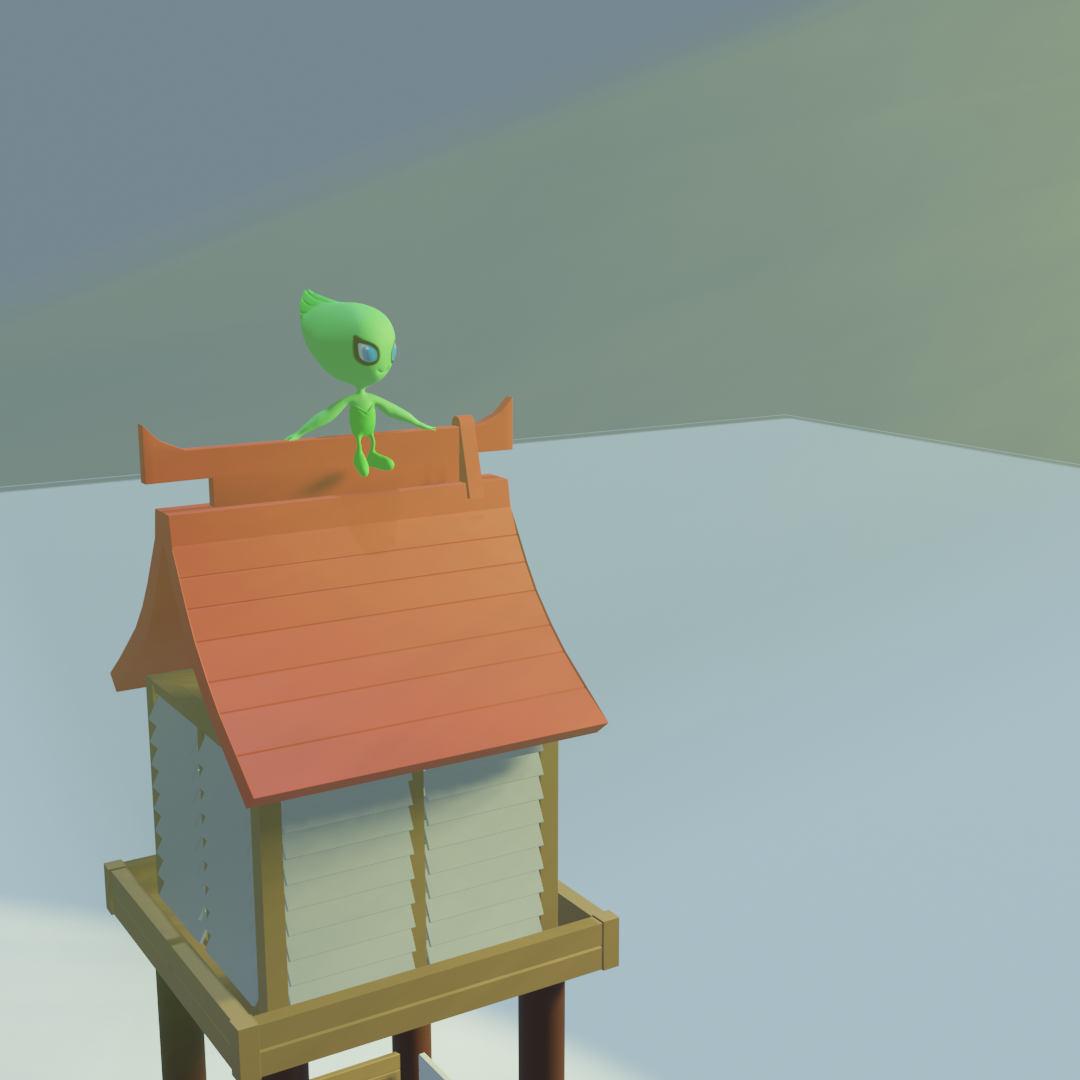
February 16, 2022 at 1:49 am #72487Experimenting with sun rays. I can’t seem to get them to stand out as much as I would like them to.
 February 16, 2022 at 2:34 am #72488
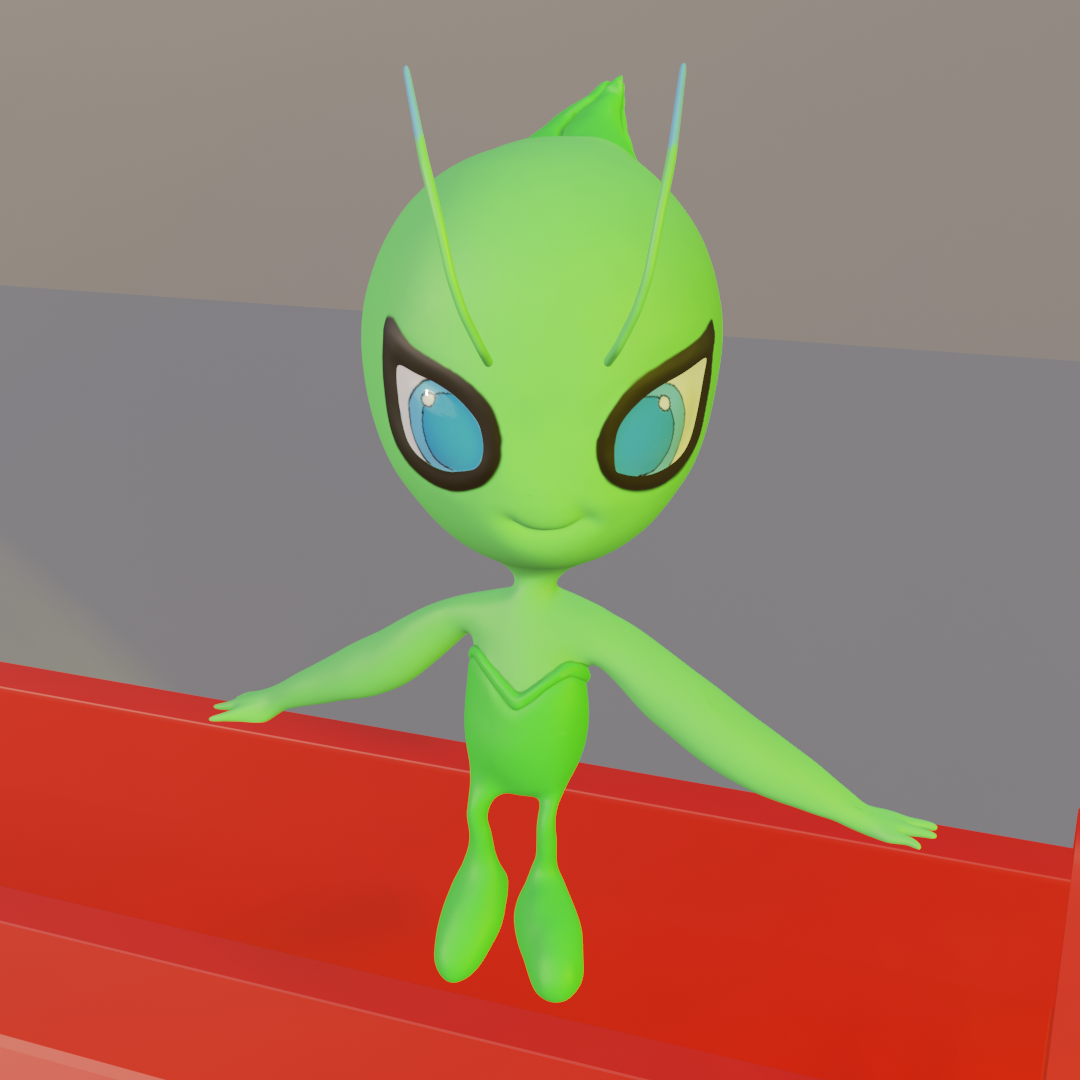
Went in and smoothed out the arms some more.
-
AuthorPosts


- The topic ‘Pokémon Challenge 2022 – Celebi – WIP’ is closed to new replies.