
Fixing object orientation/parent to allow proper animation
Forum Archive › Fixing object orientation/parent to allow proper animation
- This topic has 26 replies, 4 voices, and was last updated 1 year ago by
Jeff Bellune.
-
AuthorPosts
-
August 14, 2024 at 10:13 am #88130
With the armature there are 2 goals to answer.
For positioning goal: you would select the wiper and position the origin to the base edge loop. Then alt+g, alt+s, alt+r to clear all transforms. Then press / to go to local view(aka isolation mode). Tab into edit mode. Rotate and move wiper if needed. The only part that is important on alignment here is the base’s bottom needs to sit on the XY plane just like you want it to sit on that face. Next step is to rig it. You will need 3 bones minimum. A root bone that is aligned to the world axis. A base bone that is aligned to the base and a arm bone for animating wiper arm. Additional bones you may want to add for advance animation later are a bone for the truck and one for the blade(the rubber piece of the wiper). As for aligning it depends on if you add a bone for the truck. If you do then you want to align using the wiper base bone. If not then you can align with base or root bone. While in pose mode add a shrink wrap constraint to the bone and point to the truck as the target. I’m not sure if you want project or target normal project method. It should be one of them. The on surface. The. Move the bone until you are on the face you want. Once it’s in place press Ctrl+a->visual transform to pose. Now you can remove the shrinkwrap bone constraint and the bones will stay in that position.
Edit: forgot to mention that you can apply the armature modifier instead of applying to pose if you don’t plan on using the armature for animation. If this is the case then you only need 1 bone.
August 14, 2024 at 10:33 am #88131Goal 2 animation: you want the heads of the base bone aligned to the bottom of the wiper base. Then the tail of the base bone and the head of the arm bone you want at the pivot point of the arm. The center of the rounded part of arm that attaches to the top of the base. The tail of arm bone needed to be positioned so that the axis you want(x, y, or z) of the bone points/follows the normal of the rounded area of the arm. This will become the axis you rotate the wiper with. Technically you don’t need a root bone, but it’s common to have one. Also if you decide to add a truck bone then the root bone would be used to move both the truck and wiper.
August 14, 2024 at 11:35 am #88132Answer to the delta transform. Delta transforms are just another transform on top of your normal transform. This is useful in several situations. The most common is if you use empties for animation. Once you have the empty position where you want it you apply the transform to the delta so that later when you clear transforms(alt+g, alt+s, and alt+r) the empty will go back to the delta transform position. Basically the same thing as the rest pose with an Armature. Another use is if you have a driver on a transform channel and want to adjust or offset that value you can do it thru the delta.
August 14, 2024 at 11:40 am #88133Hi Dwayne,
Thank you for taking the time to explain the rigs in detail, and for giving me options for how to proceed. Both of your explanations are very in-depth, but I mostly understand what you are saying despite my extremely limited knowledge of rigging. I prefer the simpler Goal 2, I think. One question, please: I don’t know what you mean by the “truck”. Are you referring to the body of the tram?
August 14, 2024 at 1:53 pm #88134Yes the body of the tram. Sorry, somehow I got it in my head it was a firetruck. Don’t have any idea where that came from. I’m just going to blame it on being old.
August 14, 2024 at 2:40 pm #88135We should compare ages to see who’s older. I’m 66. If you’re older, then I still have hope and time to try to get better at this stuff. 😀
August 14, 2024 at 2:47 pm #88136I’m 52.
August 14, 2024 at 2:49 pm #88137Just a young fella, then! 😂
August 15, 2024 at 12:06 am #88138Quick proof of concept.
No armatures, 2 empties as controllers, no parenting/constraints only. But no animation in the geometry. Tram motion from a camera move.
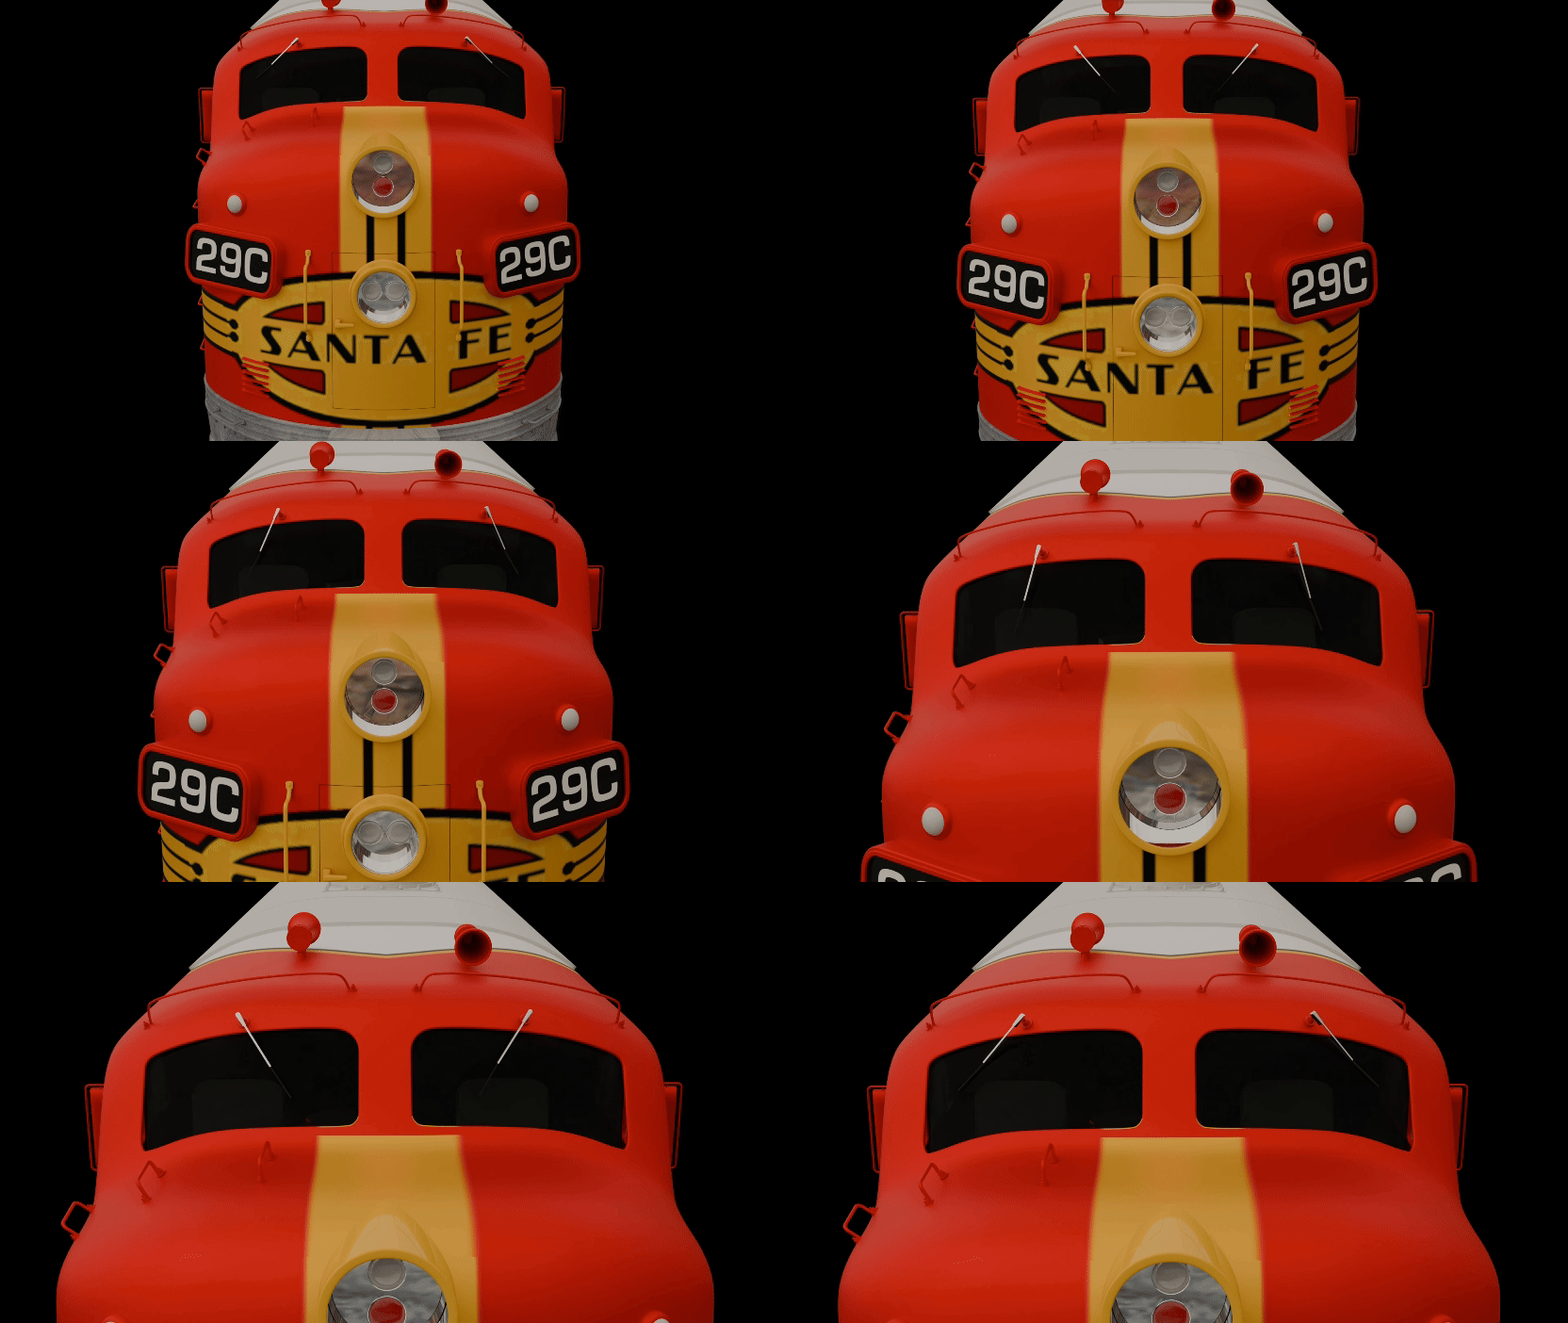
Thank you, everyone, for all the good information. I’ve learned a lot! 👨🏻🎓
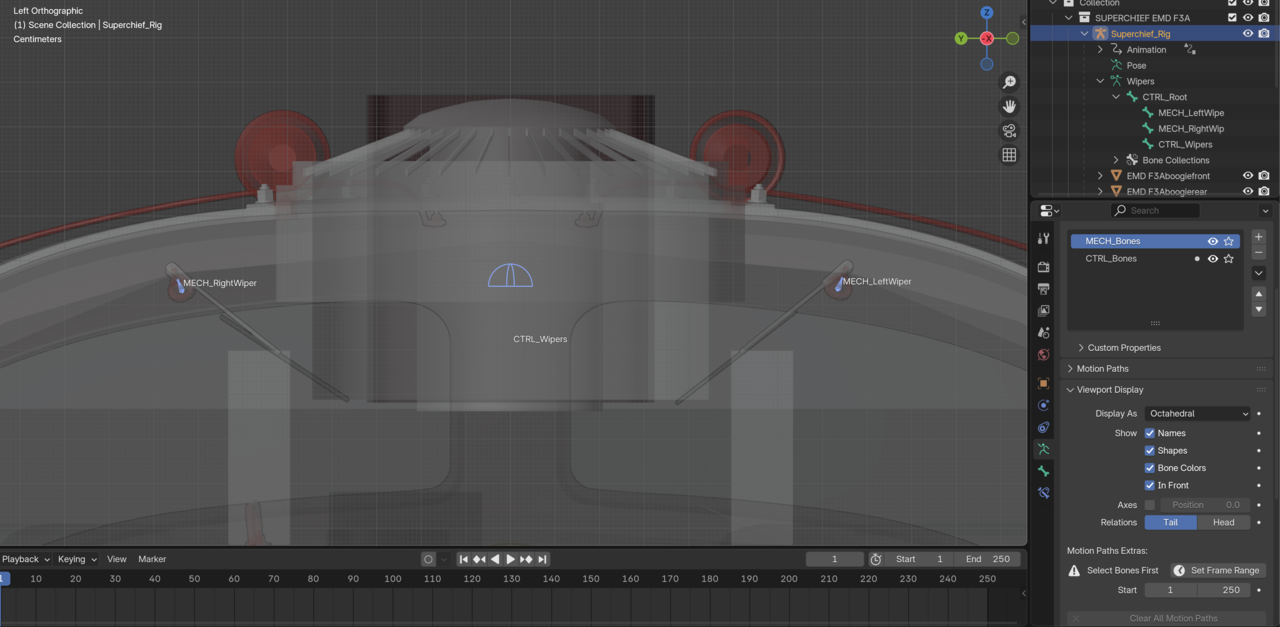
August 12, 2025 at 10:30 am #88139After doing some rigging work on a space station with Dwayne, I’m revisiting this tram thing (a year later) to get some practice with my new rigging skills.
The armature’s Root bone is represented by a wireframe box around the whole mesh, and the entire mesh is parented to it.
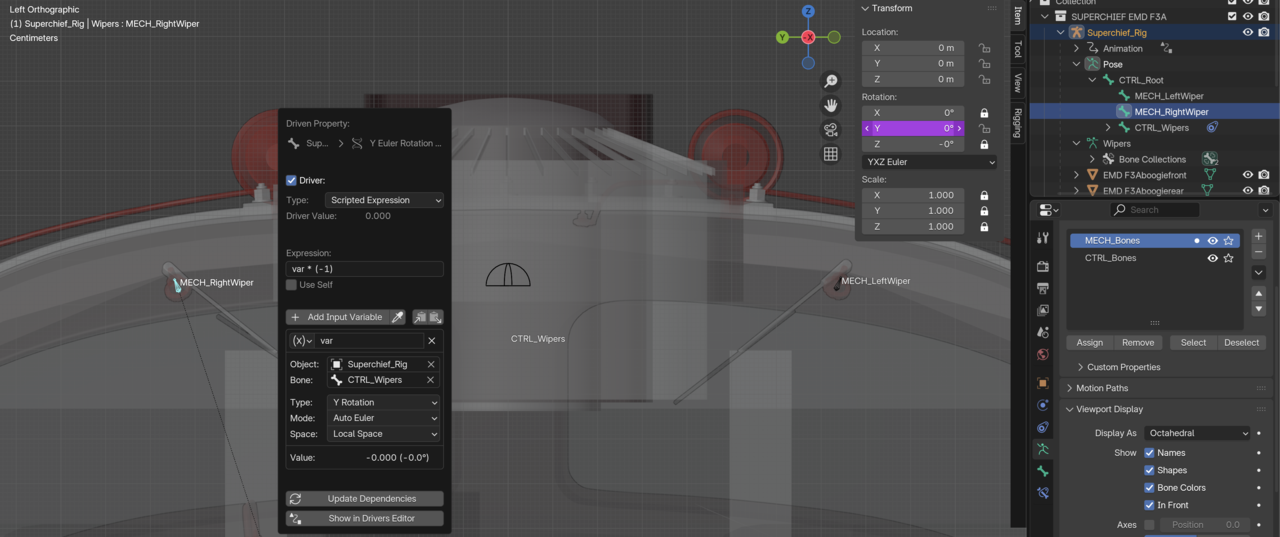
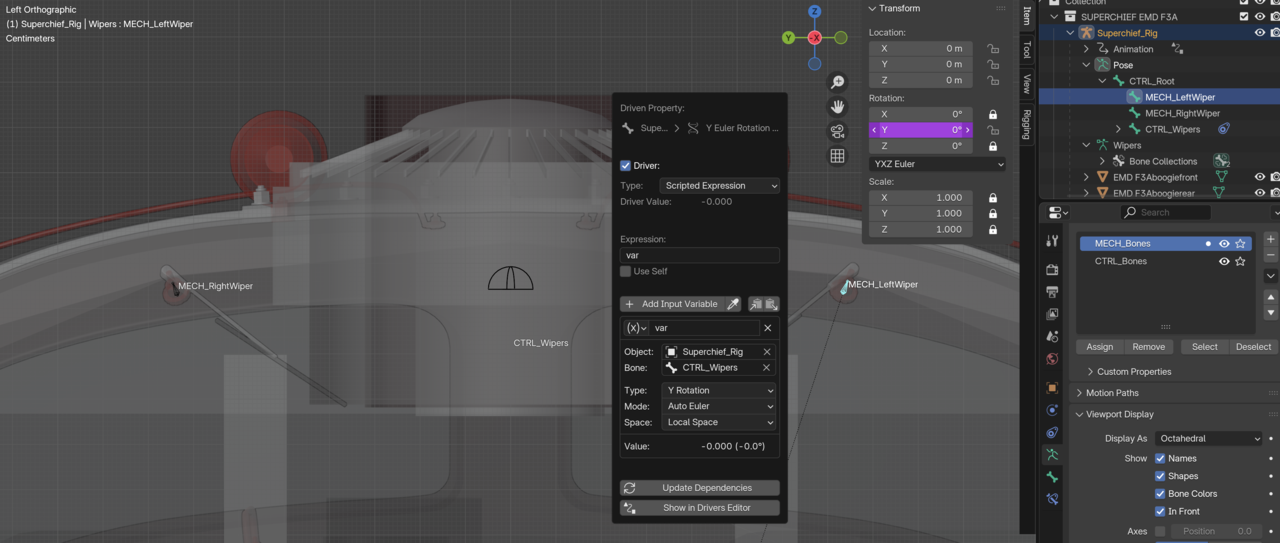
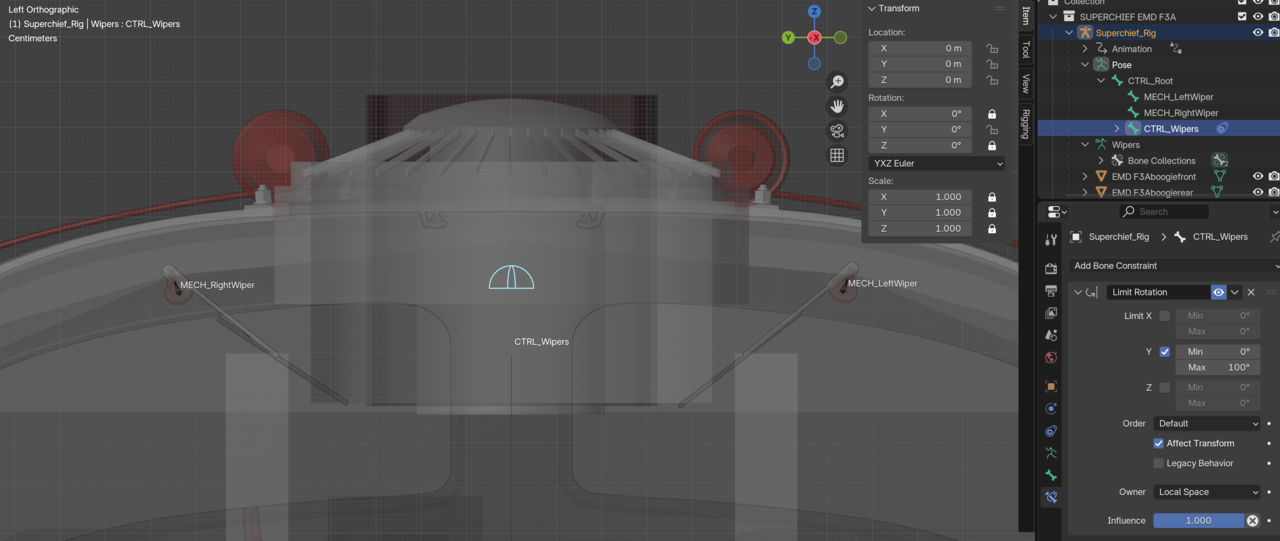
The MECH bones are aligned with each wiper’s motor spindle. I moved the origin of each wiper object to the center of its spindle and aligned its Z-axis with the normal of the body face to which it’s attached. The end result is that rotating the MECH bone around its Y-axis will rotate the wiper around its spindle’s Z-axis.
Getting the geometry in place and aligned correctly was the hardest part of this exercise. It only took about 30 minutes to do the rig and work out the driver logic.
I think this is a much simpler and much better rig than what I did last time. Then, I didn’t use an armature. Instead I used empties and constraints and Euler order changes.
Rig:
Drivers & Constraints:
Animation:
August 12, 2025 at 3:20 pm #88140That looks great. Be careful you might get addicted to rigging. Especially if you like puzzles.
August 12, 2025 at 3:24 pm #88141Must.Add.Armature…..
-
AuthorPosts


- The topic ‘Fixing object orientation/parent to allow proper animation’ is closed to new replies.