
Drennyn’s Polybook
Forum Archive › Drennyn’s Polybook
- This topic has 33 replies, 4 voices, and was last updated 1 year, 11 months ago by
Omar Domenech.
-
AuthorPosts
-
August 19, 2024 at 7:53 am #88373
You can also use a Lattice with the Lattice Modifier. Here is a lesson where Chunck applies such technique:
https://cgcookie.com/lessons/the-lattice-modifier
And a lesson from the Modifiers course where Paul explains it in detail:
August 19, 2024 at 7:58 am #88374Oh yes, I forgot about Lattices.
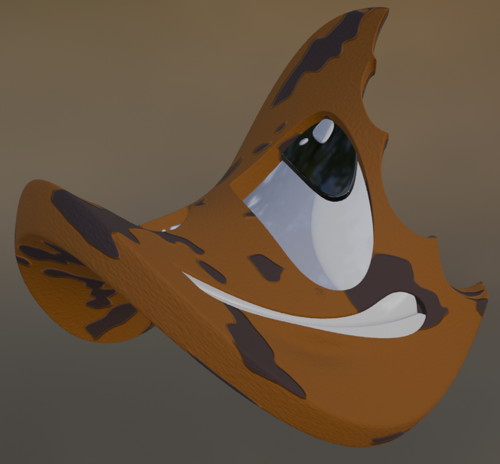
August 19, 2024 at 4:07 pm #88375Aha…I see what you’re talking about. Joined objects together, used a lattice to give the cookie some curvature on the top…which really can’t be seen because I then…deformed with a modifier:
 August 26, 2024 at 5:07 am #88376
Awesome work, and quick work too! Really well done.
September 2, 2024 at 7:52 pm #88377Session Practice: Graphic Landscape
My take on the assignment…the temple of Kukulcán at Chichen Itza.
- Added a tree line; learned I can’t draw trees
- Clouds drift slowly
- Night-time fire glow at the top of the pyramid
- Raised the camera angle; needed to add a ground plane
http://www.regalmedia.com/video/GraphicLandscape.mp4
(Might have to right-click below and Show Controls)
September 2, 2024 at 8:01 pm #88378CORE | Sculpting: Sculpt a Stylized Shark (2024)
First (worst?) sculpture ever; stylized hammerhead shark.
OMG I cannot sculpt. Wish I can blame the fact I’m using a mouse, but I’m pretty sure it has more to do with the fact that I have no artistic skill whatsoever.
Wow, is this different than modeling. For the life of me I could not get the tools to affect the surface to match the idea in my head. Resizing brushes, adjusting falloff, masking, smoothing, repeat. End result looks like a preschool class of little fingers went to town on it before the clay dried.
http://www.regalmedia.com/video/Shark.usdc
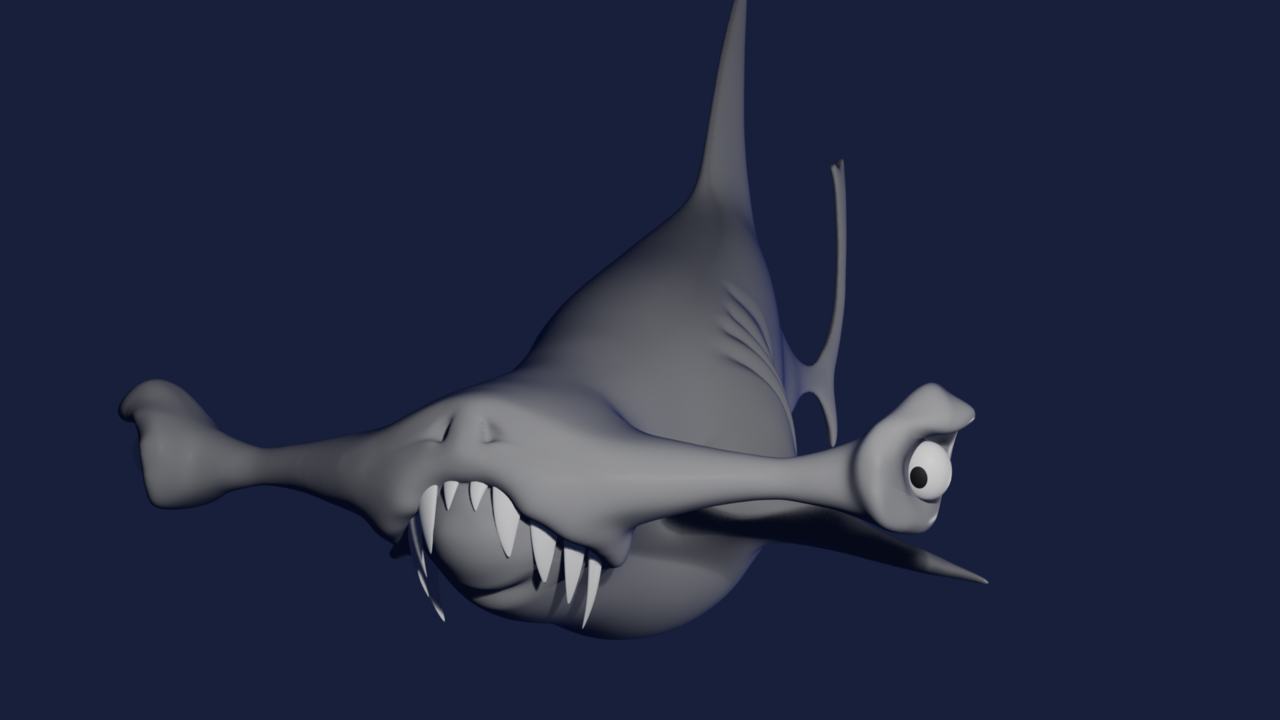
Self feedback:
- This was a lot more fun than I expected, but was also hell o’ frustrating.
- Smooth, flatten, relax…for the life of me, couldn’t get any tool set up to “smooth the surface without majorly adjusting the volume”. Wishing there was a tool that lets you lay down a Bézier curve and fit part of the surface to it. I’d build up macro shapes only to more or less undo them by smoothing. Just could not find a “good” size/threshold/falloff that did what I needed as situations changed. I wanted to reach into the display and mold the clay with my hands–just couldn’t find a tool to do what I wanted.
- In hindsight, maybe picking the hammerhead wasn’t the best choice for my first sculpture. I redid the eye stalks/sockets five times this week. The fins and tail about three times. Clay strips, smooth, inflate/deflate, crease/pinch, argh!
September 2, 2024 at 8:04 pm #88379Session Practice: Light Shape Hallway
Light Shape Hallway; R + G+ B = White
What’s the first S in KISS stand for? Completely disregarding criteria #2 of keeping it simple, I wanted to experiment with red, green and blue lights converging on the floor to make white. Used a simple volumetric shader for light shafts. Doorway in the far distance showing the sun light, beckons the viewer to move further in. Unwrapped the hallway so all bricks run horiz/vert.
The animation is a little fast, but took so long to render I left it as is. Should prolly have slowly moved the camera forward too.
http://www.regalmedia.com/video/LightShapeHallway.mp4
(Might have to right-click below and Show Controls)
September 3, 2024 at 1:24 am #88380Hey Paul,
That shark doesn’t look too bad at all! And, considering that it is your first sculpt and you used your Mouse (respect!), it is actually pretty great!
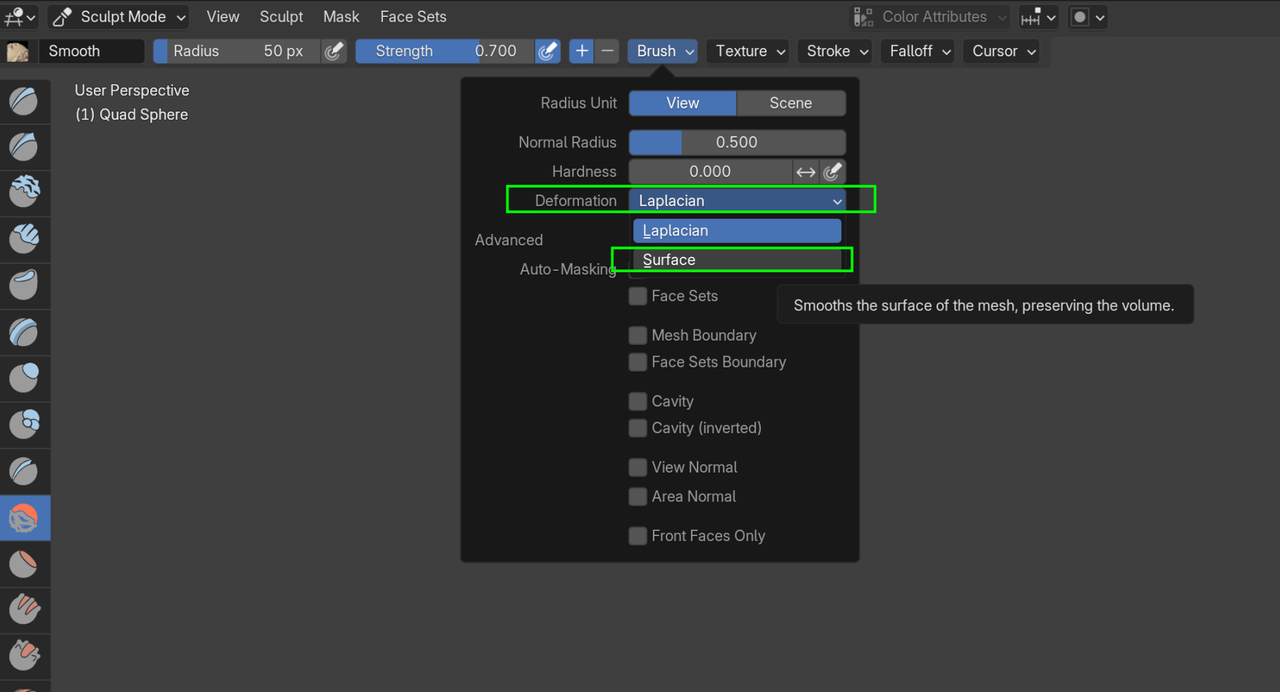
September 3, 2024 at 1:31 am #88381couldn’t get any tool set up to “smooth the surface without majorly adjusting the volume”.
Oh, you can switch the Deformation in the Smooth Brush from Laplacian to Surface:
 September 3, 2024 at 9:15 am #88382
Thanks! Now that you show that to me…I’m pretty sure Kent covered it…and I blanked out. Doh!
September 3, 2024 at 12:28 pm #88383Yeah, there is always too much to remember 😉
September 6, 2024 at 12:07 am #88384Session Practice: Museum
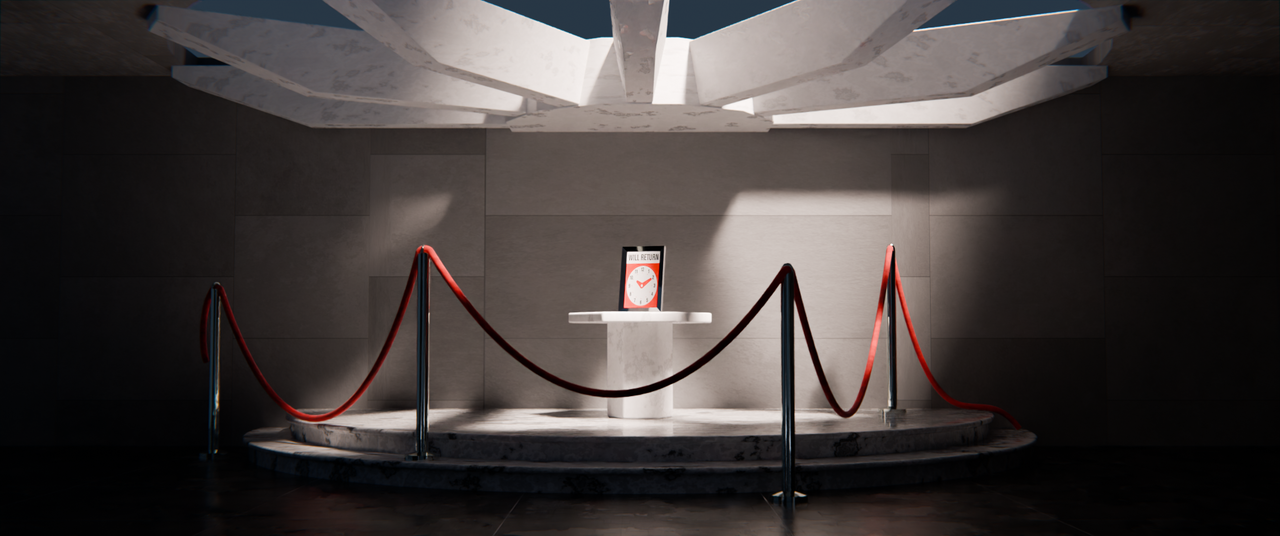
Couldn’t think of what to use as a focus object, so I tried modeling the lack of an object literally. Still image attached. Video link below.- Unique “focus object”
- Semi-circle display area
- Custom procedural materials; marble platform, white alabaster pedestal and rafters, velvet ropes, slate-like floor tiles
- Floor lights in main hallway
http://www.regalmedia.com/video/Museum.mp4
 September 15, 2024 at 11:19 am #88385
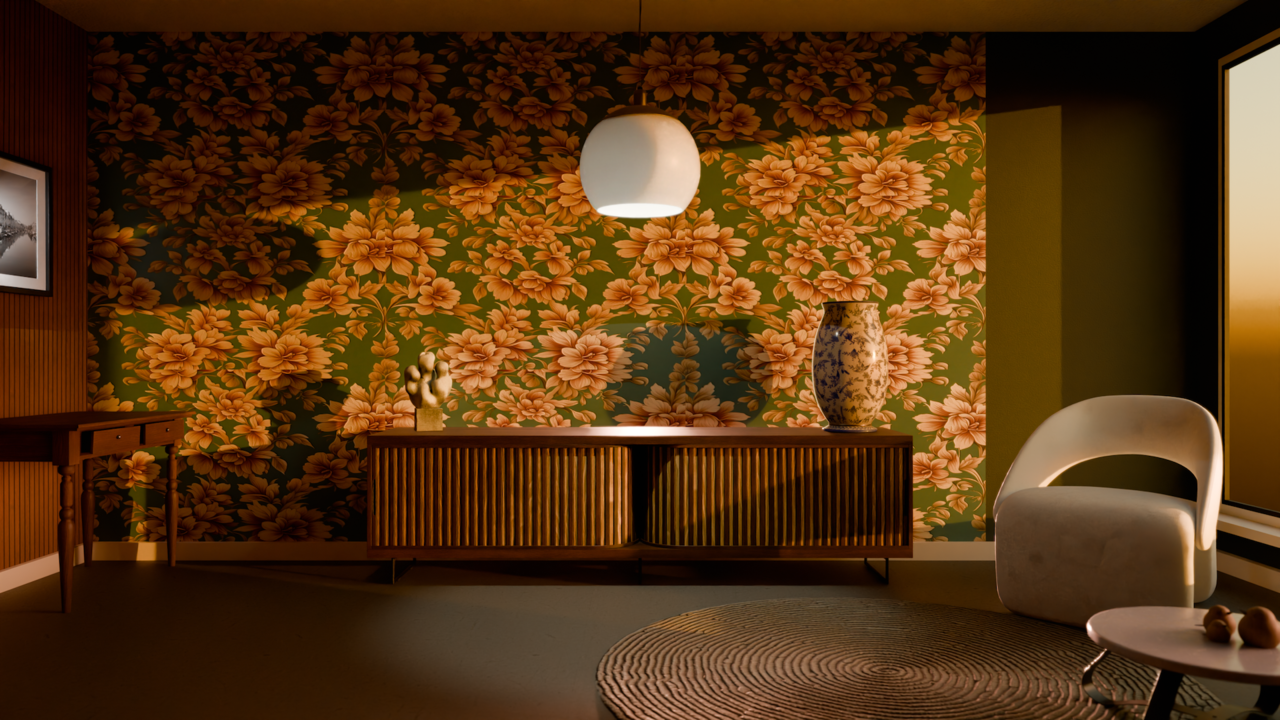
CORE | Fundamentals of Lighting: Scene at Sunset
I tried lighting the exercise scene at sunset. First time I’ve ever understood light linking…felt almost like painting with light. Neat!
- Sky texture with low sun and high dust–long shadows; warm color temps on most lights to match
- Light portal at main window (shaved off a few seconds; kept rendering to just over a minute–but with only 64 samples)
- Light Linking on lights to affect only desired objects
- Rim lighting on cabinet, statue and vase–might still be too much on the statue
- Fill light on desk and bird-table; raised the bird-table up a bit so it wasn’t clipping through the carpet
- IES texture on wall picture light
- Point and spot light on ceiling lamp
- Slight bloom in compositor
 September 15, 2024 at 11:26 am #88386
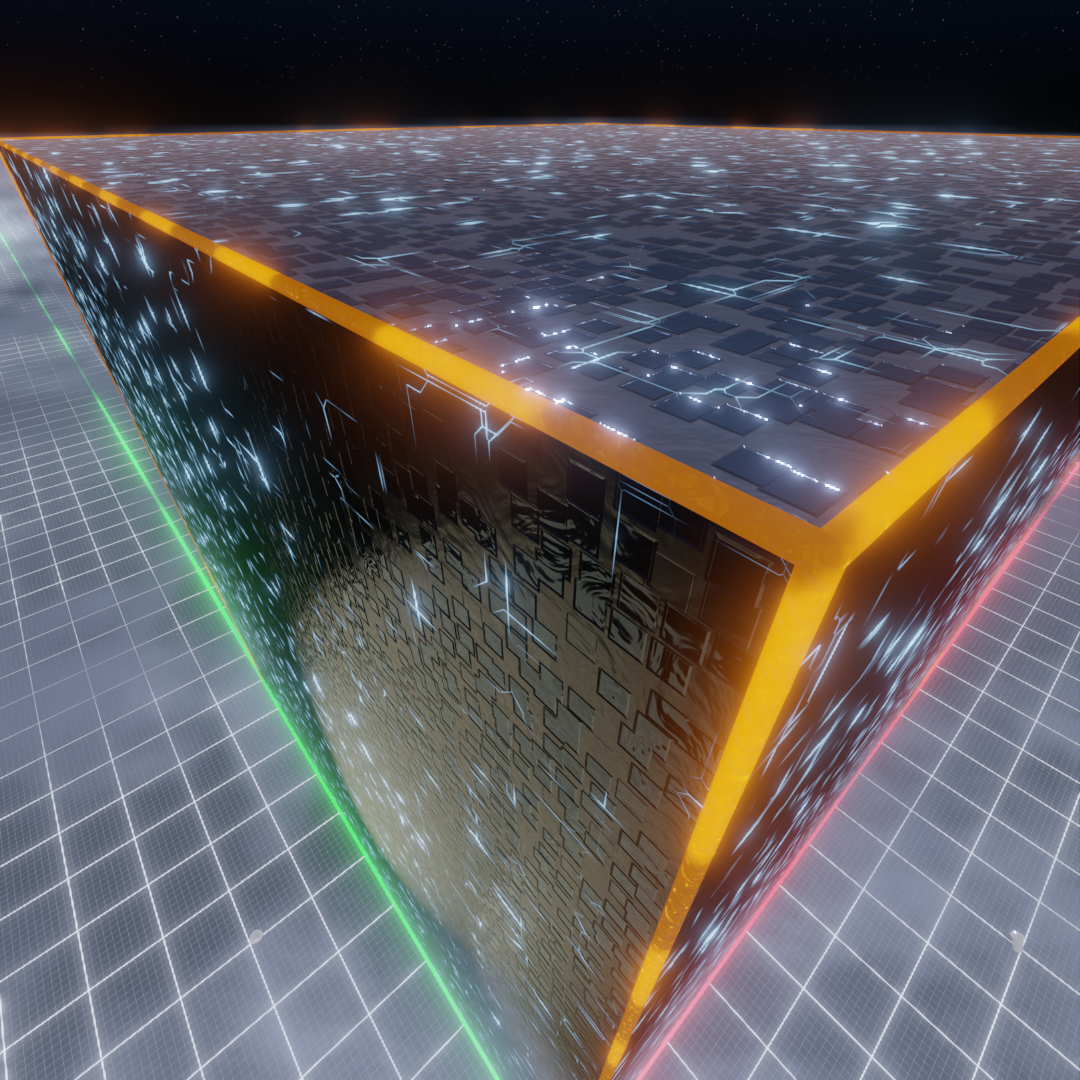
SESSIONS | Ancient Pillars: Don’t delete the cube!
Ever have those times when you have so many ideas running through your head but can’t decide what to do…and you sit staring at the screen for far too long? This is what happens.
I stared at the Blender cube while trying to think of a creative scene that was different from the lesson and wasn’t any of the direct suggestions. I drew blanks until I thought the cube could be the actual subject. How could I make the cube appear larger-than-life and imposing?
- Geometry nodes for the grid and cube outlining
- Let’s just say a “strange” material on the cube…obsidian-ish? Electric blue circuitry; animated
- Emissive outline material on cube; animated
- Volume clouds drifting by
- Camera focal length animated to make the cube seem larger.
- Spotlights down below attempting to illuminate it–where did this cube come from? What does it want? Who in their right mind would blindly delete it?
- Procedural horizon/sky and star field
- Smaller square aspect ratio and EEVEE used to finish the render in an acceptable time
Video: http://www.regalmedia.com/video/BlenderCube.mp4
Self Feedback
If I had more time I would have tried making it look like the cube was under construction or investigation…maybe some scaffolding or a crane up top to further give it some scale. As it was, I must have futzed with the cloud volume and spotlights for way longer than a couple hours in both Cycles and EEVEE.
Just could not get what I wanted. I’m afraid at the end of the day, it’s a cube with a strange material.
Still…think twice before you delete the cube next time. *smirk*
September 15, 2024 at 12:20 pm #88387Hi Paul,
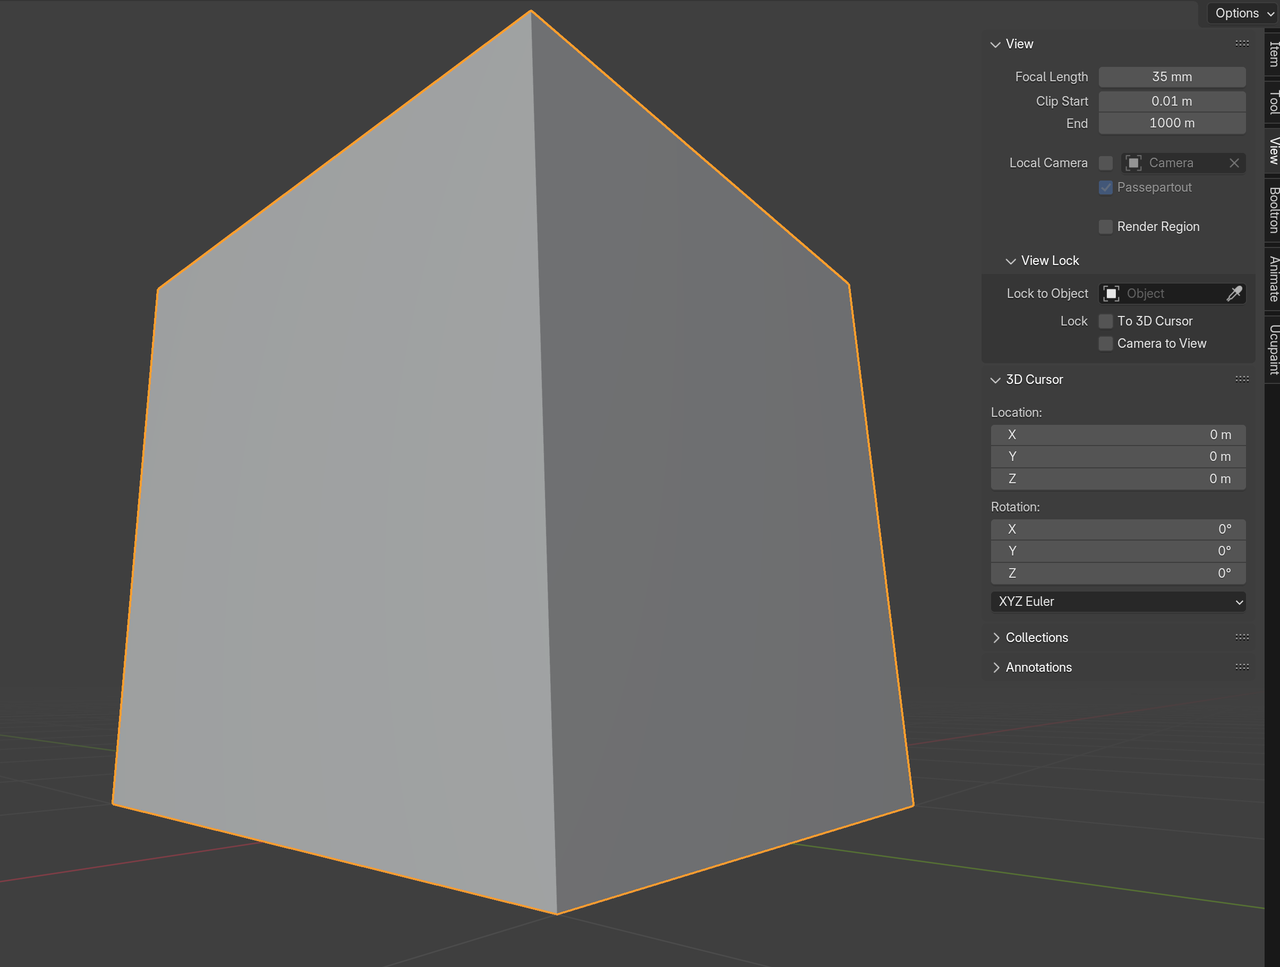
How could I make the cube appear larger-than-life and imposing?
As you have it now, but looking at it from below…maybe even lowering the Focal Length?
-
AuthorPosts


- The topic ‘Drennyn’s Polybook’ is closed to new replies.