
Course file
Forum Archive › Course file
- This topic has 17 replies, 3 voices, and was last updated 3 years, 3 months ago by
Omar Domenech.
-
AuthorPosts
-
May 17, 2023 at 10:24 am #16374
Is there a way to get a course file that is setup at the beginning stage of this video… somehow I’ve screwed up my file, and auto-saves seem to load funny… and I’m past point of undo… would be nice if there were “do-over” files at each stage of the video… as I build the file as I watch to reinforce the learning.
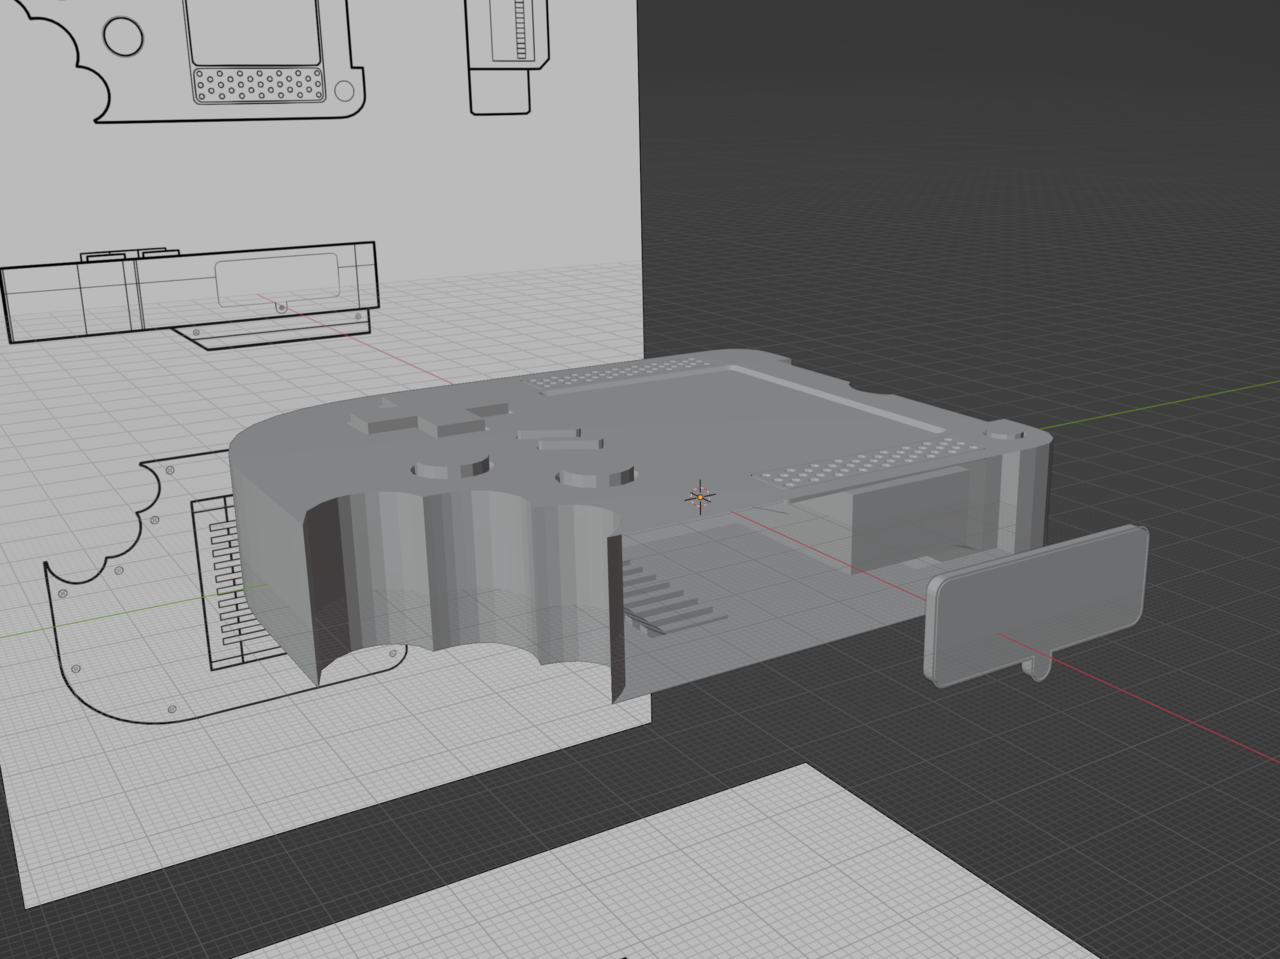
May 17, 2023 at 10:36 am #79225I went to open an auto-save, didn’t seem to work, then came back to my original file… now it has these huge black lines running infinitely off the model… what’s happening here? I’m stuck and can’t go forward, Files are here… both a screenshot and .blend file.
So confusing… and so easy to make mistakes it seems in Blender… and can Blender be buggy?
May 17, 2023 at 10:36 am #79226That is the case in courses, I’m not sure if that has changed. But in the course files there are .blend for each stage of a video course. In Press Start there’s only one sadly. But don’t be afraid to start over, it’ll only have positive results. You’ll get faster and get more experience points and you’ll level up in no time. Plus you’ll start to gain the Neo Sight, where you’ll start to have the foresight of what approach can get you into trouble from the start, because you’ve been through that road before.
May 17, 2023 at 10:41 am #79227Blender is always buggy, not just Blender, also Maya, 3DS Max, Zbrush, Windows, Mac OSX, that’s just how computers go. Blender is great when it comes to bugs compared to other software’s. Those black lines might be to a modifier, try turning them on and off and see if they go away. Perhaps is a flipped normals issue or just as simple of going in and out of edit mode. Try things around, maybe download a fresh Blender version, because I’m not getting them when I open your file here.
 May 17, 2023 at 10:49 am #79228
Hi @bal12345 ,
Some Courses have this, but this one hasn’t, but:
It is a good habit to make incremental Saves, each Lesson, or when you enter a new stage in your project.
This can be done really easily in Blender, if you Save As (SHIFT+CTRL+S) and then press the + sign:
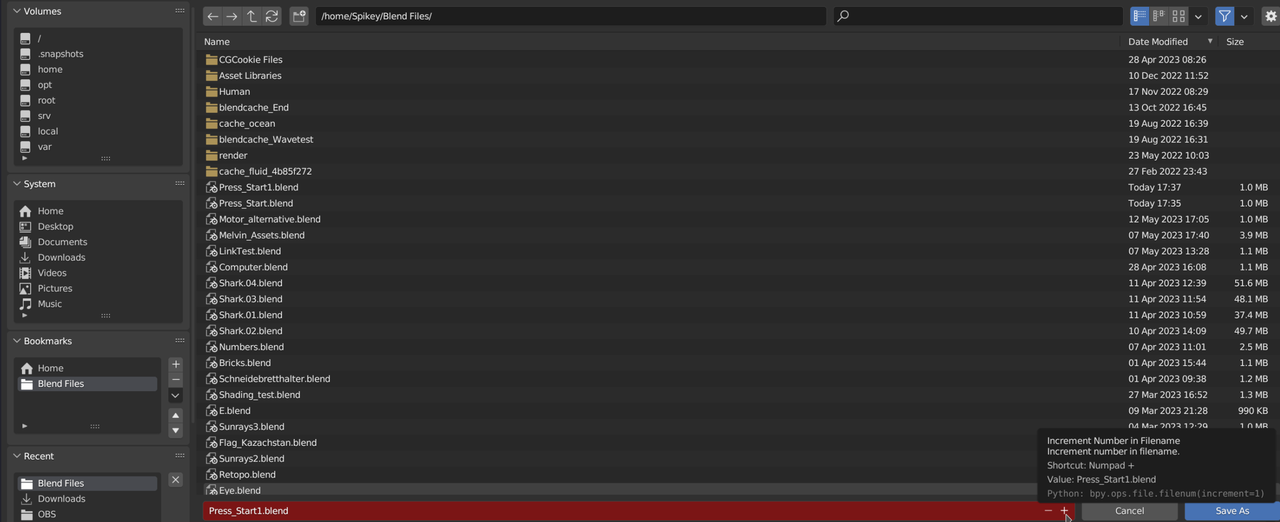
Also, you might find a recent version of your file in one of your questions here, so you don’t have to start from scratch…
…and, unintuitively, it is not a bad thing, to start from scratch sometimes (especially in the beginning of your Blender journey): it’ll be a lot faster than the first time, and you’ll be more aware of (some of) the pitfalls to avoid.
May 17, 2023 at 10:56 am #79229I opened your file in several Blender versions and I also don’t get those black artifacts…
Make sure your graphics drivers are up to date!
May 17, 2023 at 11:14 am #79230I’m using a Macbook Pro M1, running Ventura… not sure I can update graphic drivers… not a PC.
May 17, 2023 at 11:19 am #79231got it… so it’s the bevel modifier causing this… if turn off the Bevel > Edit Mode visibility modifier it goes away, / on/off…. so what’s going on? How do I fix this so I can see my bevels without my file going weird?
May 17, 2023 at 11:27 am #79232Never mind, solved it… deleted the modifier on the object, and then replaced and added back original settings… seems to work now… apologies for the back and forth, appreciate the help!
May 17, 2023 at 12:17 pm #79233One other question… the bevel modifier is causing this distortion ,see screenshot on one side of model, but not the other… from what I can tell in the file it’s all the same… probably not… but can you tell what causes this?
May 17, 2023 at 12:20 pm #79234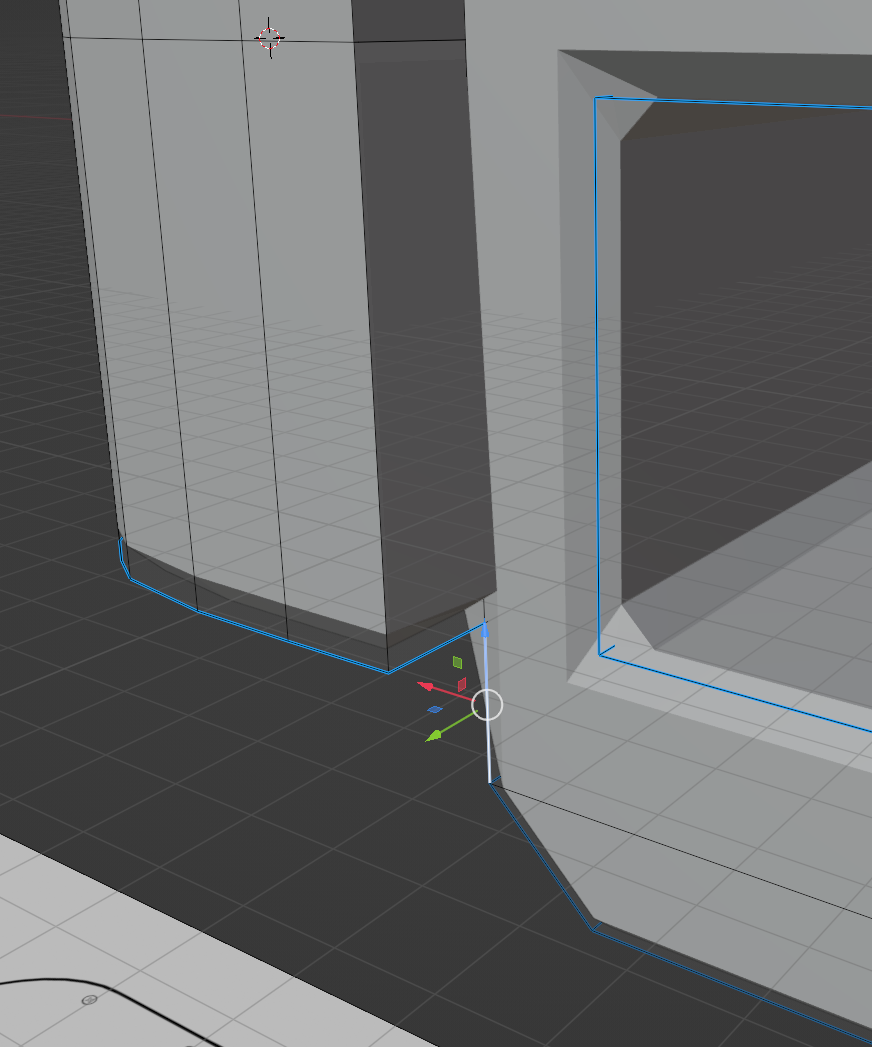 May 17, 2023 at 12:25 pm #79235
From what I can tell, it’s a mix of Ngons too big and having to disable clamp overlap so you can fine tune the bevel amount manually.
May 17, 2023 at 1:19 pm #79236Right, both sides are not exactly equal (and both are wrong, just the screen-right one is slightly less wrong than the left side):

You need to straighten out both sides bit by bit, for instance, you can:
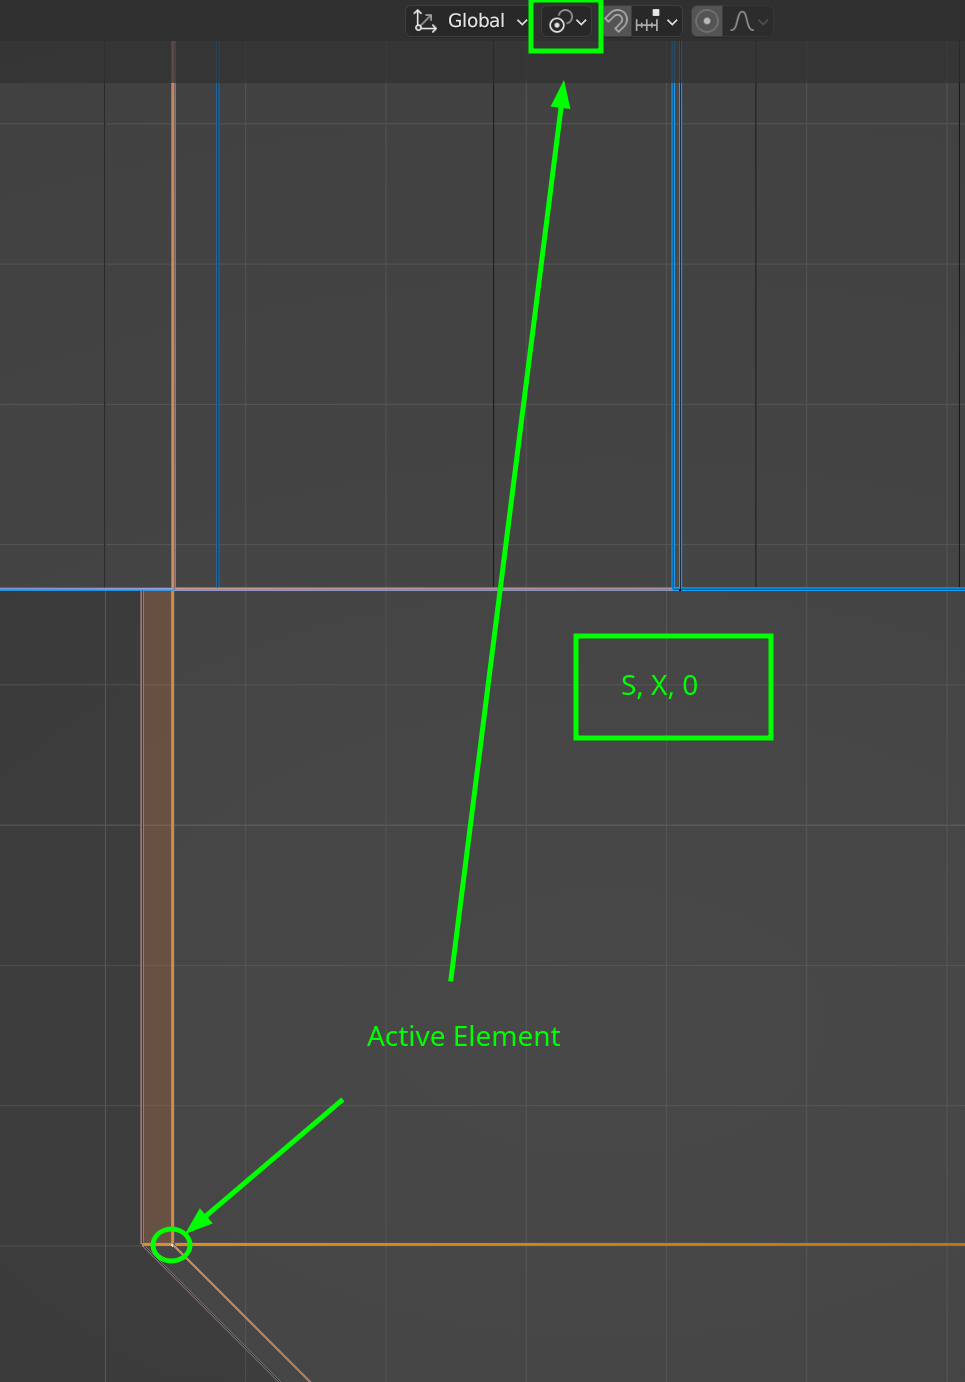
Make sure you are in Wireframe View and use Box Select (or Circle Select..)
Also disable Clamp Overlap, like Omar already mentioned.
Then there is still this angle buisiness that needs to be fixed:
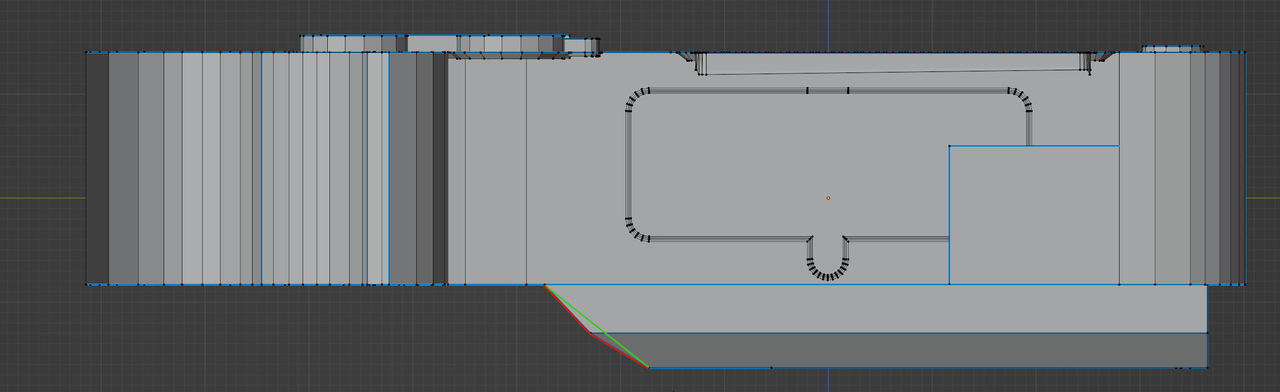
Did anybody tell you that modeling is easy?
May 17, 2023 at 1:52 pm #79237Exactly, modeling is hard, but no need to despair, hang in there, have grit, fall down and stand back up, in time you’ll be running, nay, flying.
May 17, 2023 at 2:18 pm #79238Martin what angle are you looking at the model in that zoomed up view? I can’t quite tell… trying to solve now… clamp overlap was off in my model from what I can tell… at least in edit mode… or do you mean in object mode?
Upon closer examination there are a few spots where this beveling is causing little problems… help me understand the core problem… is that that multiple vertexes aren’t perfectly aligned? duplicates? other issues? Definitely having trouble sorting it out, but trying to stick with it. Might go find some crazy long tutorial on beveling in Blender… maybe I missed something… 🙂
-
AuthorPosts


- The topic ‘Course file’ is closed to new replies.