Got it looking like it does in the video, but took a few tries to figure it out.
When I did “Object > Shade Smooth” and then a “Modifier > Smooth by Angle” and followed on with the rest of the lesson, when i got to the point in question, it was still the curvy object.
After another attempt, I applied the “Object > Shade Smooth”, followed the lesson up until the point where it had the unwanted curves, and at this point I applied a “Modifier > Smooth by Angle” which sits below the previous Mirror and Solidify modifiers, it then looked like it did on the lesson.
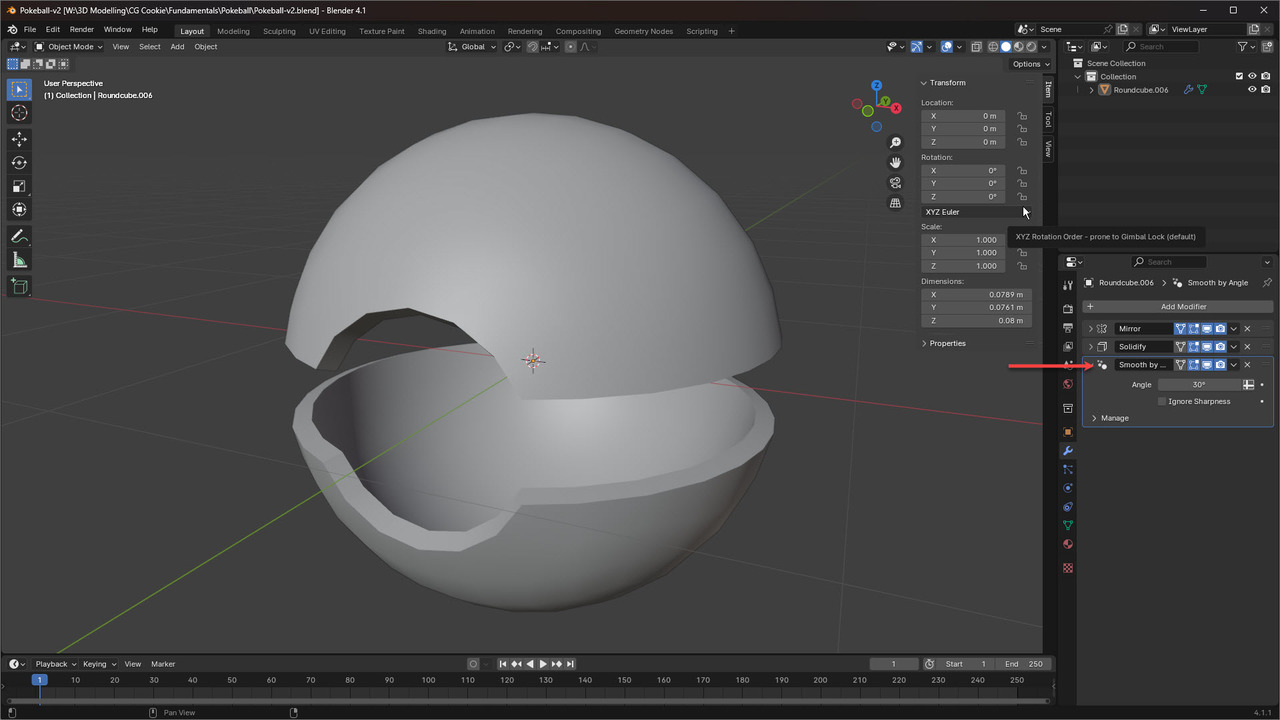
Hopefully this helps someone else in the future.

