
Reply To: Collab2021 – WIP wainscotting – onelombax – Team House Exterior
Forum Archive › Collab2021 – WIP wainscotting – onelombax – Team House Exterior › Reply To: Collab2021 – WIP wainscotting – onelombax – Team House Exterior

Hi everyone,
I think it’s time for a breakdown. I will show you the final result and will comment as much as I can.
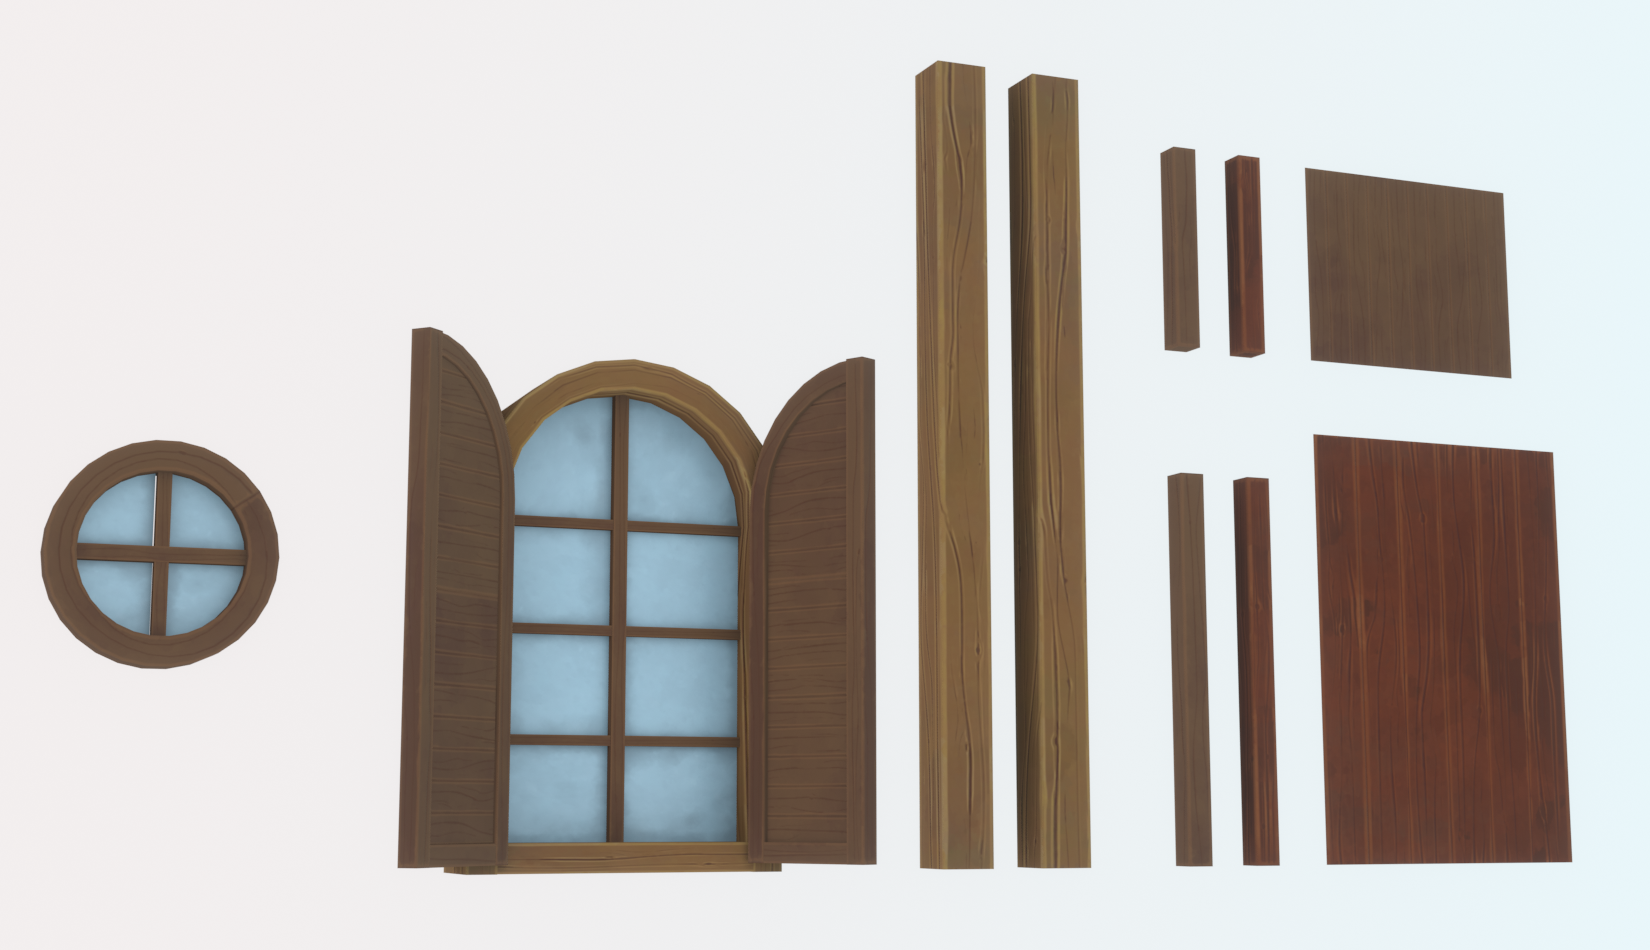 @splat21 This picture showcase my trimsheet and some of its uses. The most interesting one being the window and round window showcases here.
Now, why a trimsheet ? It’s one of the key skills I listed for an environment artist which I aim to become.
The good ? I am proud of the result, it looks fine and the trim sheet have a wide range of use, as showcase with the round window and arch window.
The bad ? I realized later on that I didn’t need to color each piece differently (the material could handle that just fine) and didn’t need to have 2 variations of each trim part. Taking that in account, I could have ended up with 1024px texture with the same result.
The best ? I learned a lot, so much that it led me to set a big project for the next few months. there’s a few skillset that I have yet to learn and this collaboration was mind blowing in terms of learning new skills.
Let’s breakdown the UVs part. First and foremost, a fact : blender built-in UVs tool didn’t provide the accuracy I needed for the trimsheet.
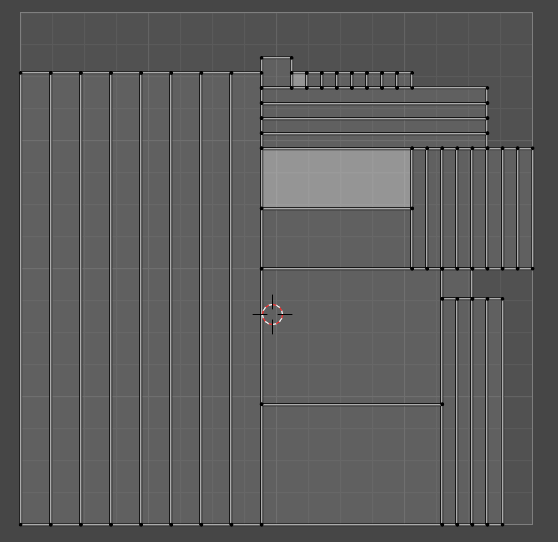 that’s the UV blender gave me when unwrapping… Every mesh I build was layed out in the 3D world with accuracy so that I could fit a 1:1 UV space. My beam were 3m high with .2m wide, the smaller one were 1,5m wide with .1m wide, etc. Another note, if you want to build a trimsheet, build your meshes with a power of 2, like a 2m beam instead of 3m beam because UVs are built around power of 2, it was logic yet I missed it… well that’s a mistake done and learnt after the facts.
To fix it, I tried several tools. One that I, previously, used for organic meshes is UVspackmaster and it usually does a good job and I was pretty close to the result I wanted. but I didn’t get the control in placement and pixel density I needed for the job. A solution came with two add-on (free btw), texel density and textools.
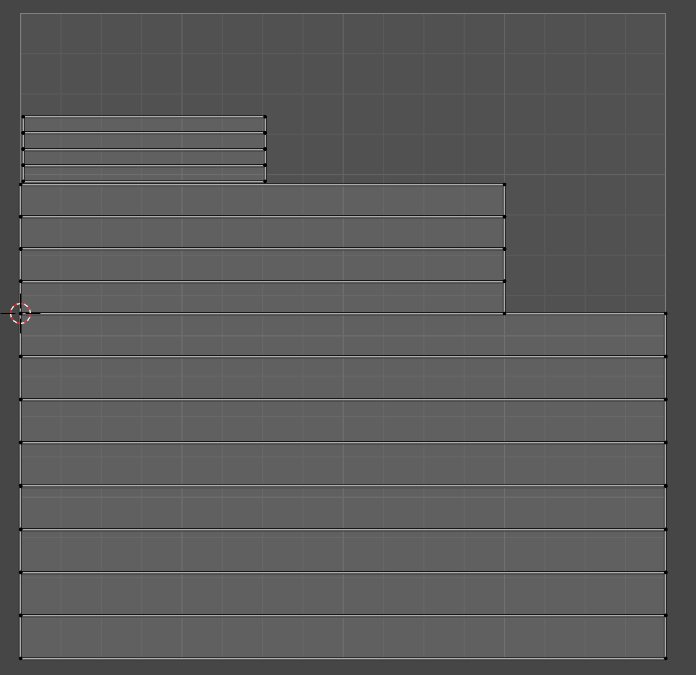 Here, you can see accuracy, one of the smaller beams is taking 1,5 of the UVs space and it’s an accurate representation of 1.5m beams (again a 2m beam would have taken the whole space but sometimes you have to do mistakes in order to learn)
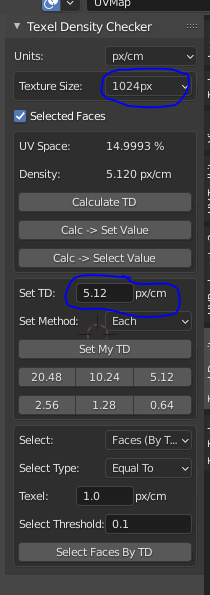 I said “I want a 1024px texture and set up my 1.5m beam as a 512px density.”the result is interesting as it gaves me insight to the logic behind the tool. the Set TD value is useful to tell your meshes how much space you want them to take, taking in accound the final size of your texture and how much relative space you want them to take. So, a little bit of math and here we are.
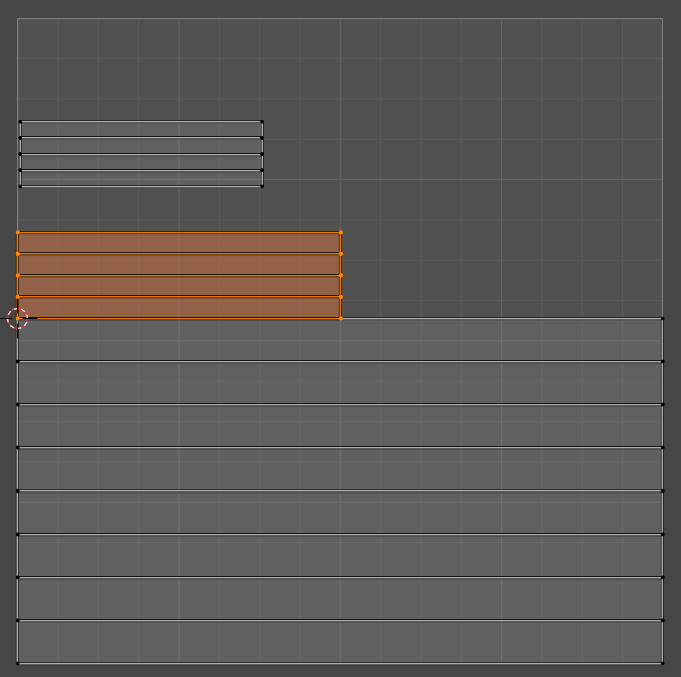 As you can see, the UVs takes half of the UVs space and that was my aim. In insight a 1.5m beam doesn’t do well when divided by 3 so it isn’t a perfect half but you get the logic and a bit of tinkering helped me faked the perfect half.
 As you can, overlap occurs due to the fact that a 1.5beam isn’t a power of 2 mesh but hell, I can fix that with the next add-on textool
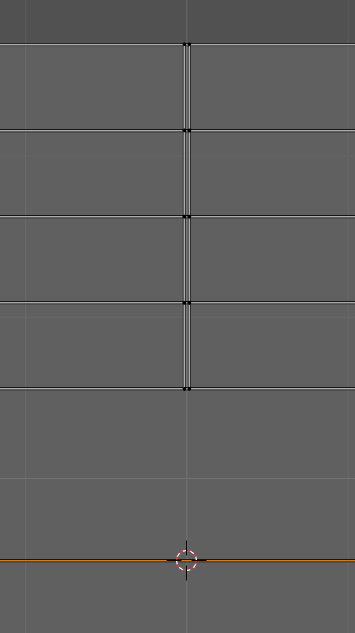 So, first thing you want to do is Shift+S and centered the cursor around a UV that sit perfectly in the middle.
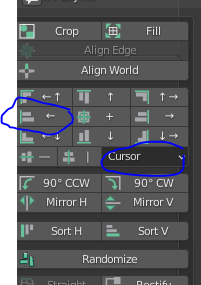 you want to make sure that it is set to cursor and click on one of the alignement option, the result speaks for itself
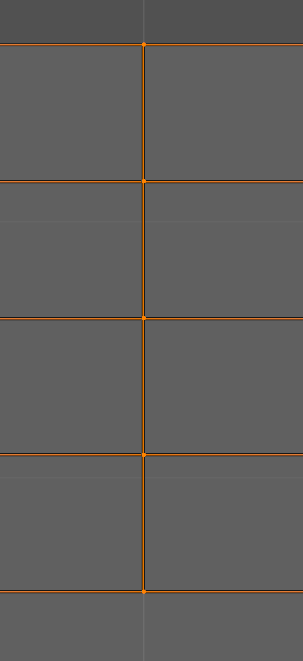 it’s was I called a perfect faked fix
with a little bit of work, you get a clean UV_trimsheet
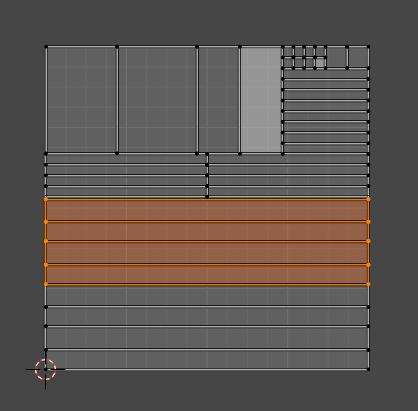 Nice UVs for a trimsheet
the sculpting part was the hardest part of the process. You can see several beams sculpt I’ve done in my previous post but this time, I will show you a bit more about the tool used to get the last result.
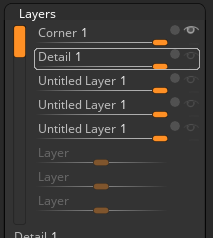 Now, the layer tool if you’re familiar with Zbrush is one of the many reasons I use it.
Basically, it works like photoshop, you can store sculpting data into a layer and turn on and off their opacity and that alone is great. Another reason is the fact that Zbrush handle millions of polygons easily even with a laptop.
 For example, I had one layer store the beam corner sculpt
 And several layer added on top of each other to give the desired result.
Since it’s a blender community, I won’t go on about the sculpting process but my previous post show that iterations, when beginning with sculpting, is the key to level up in my opinion. I tried a dozen brushes, differents approaches about how to sculpt wood and end up with a result that is stylized.
We go to baking, I could have said it is the hardest part but in truth, it is the devil ! Joke aside, I had to learn baking and it was a tedious and frustating learning curve.
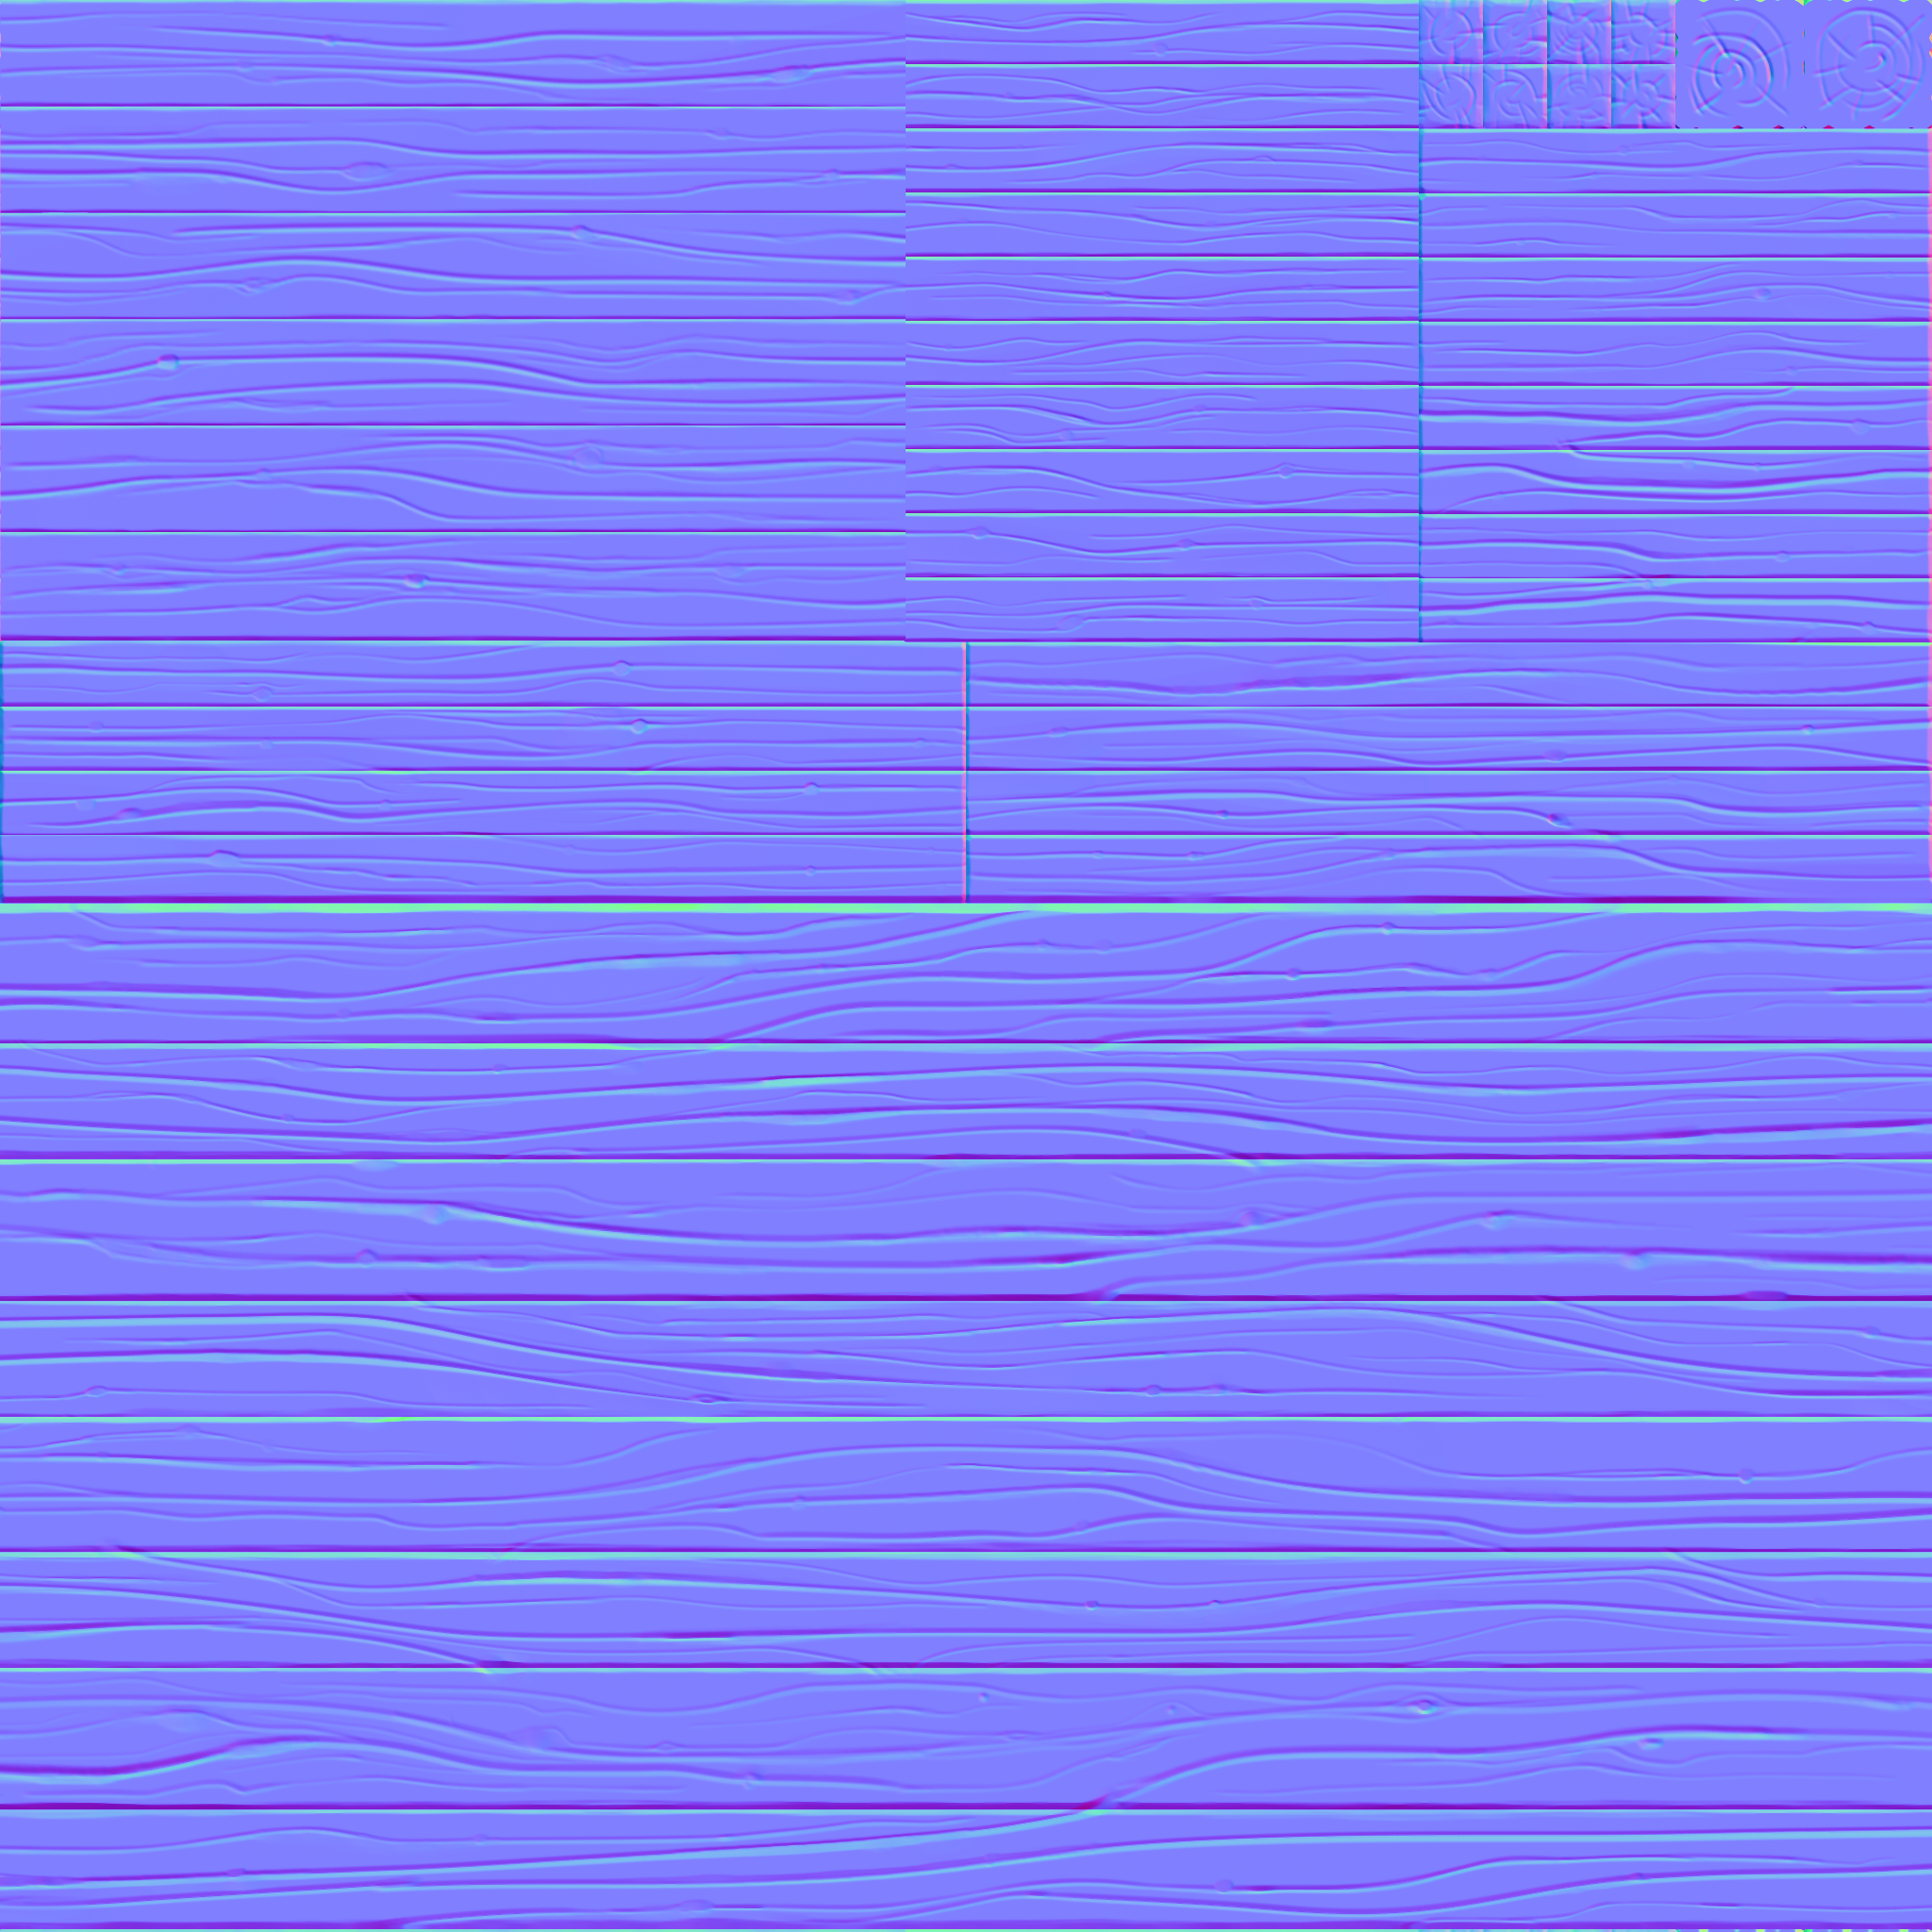 I had to showcase this, it’s clean, it does what I want, there’s no weird gradient, no weird color. Just baking with marmoset, that’s all and all the afore mentioned issues never happenned… on several occasion, on so many baking run. No, everything went just fine the first time
The truth is my baking level has definetily improved with the collaboration but I can’t say with confidence that I have control over it (for now). I’ve set up a new project that will fix my understanding and when that’s done. I’ll be happy to showcase my mistakes so that you can avoid them, hopefully saving you from some painful memories.
Finally, the fun part and the surprise as I thought I wouldn’t do well on that regard, the texturing using Substance Painter.
Why Substance Painter ? It is great, allow a lot of flexibility and control over you work and is widely use in the gaming industry. All these reasons and more makes it that it was a must to learn substance painter.
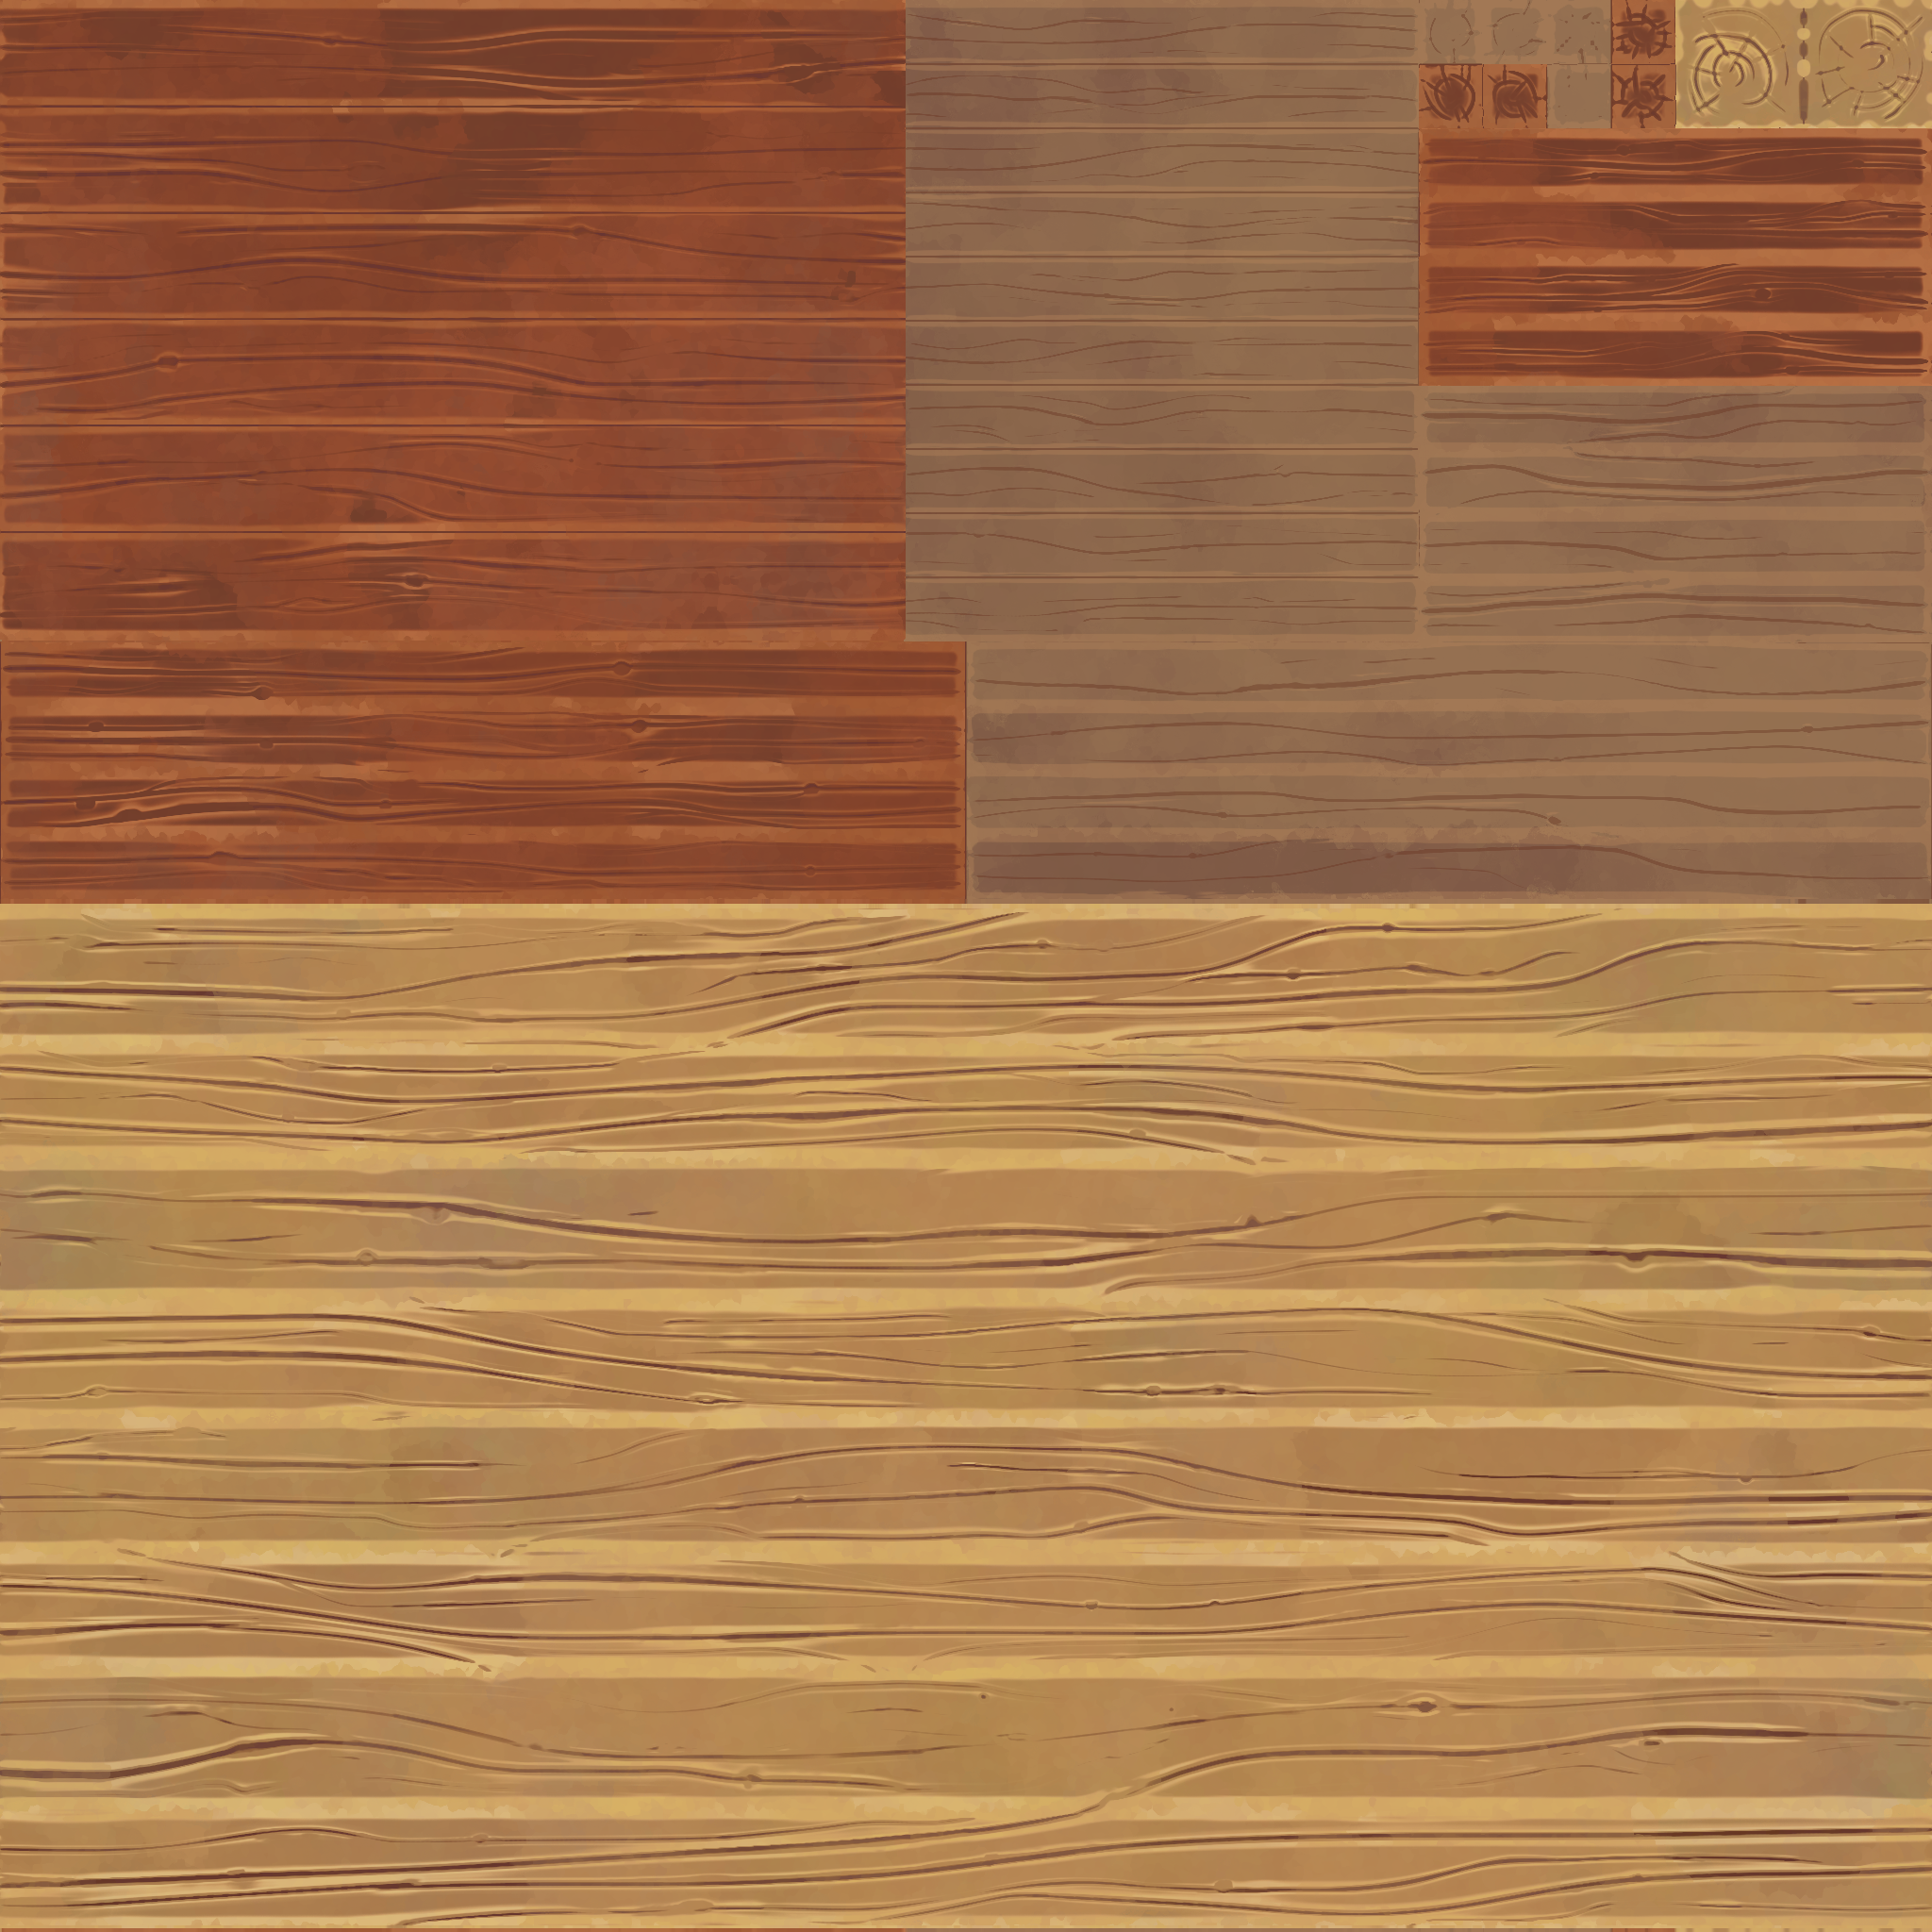 this is the base color after tinkering with substance painter. I’m no painter at all and I couldn’t have achieved this result with a regular paint.
Again, since it’s a blender community and I don’t want to step on Blender which I find great and just show you the work I’ve done 🙂
A quick conlusion, thanks for the collab, it was the best experience I had so far, never learned as much as in this month so thank you everyone 🙂
A note : what’s next for me ? I set up a project as big as the collab as I realized that when the task at hand is bigger than yourself, you have to improve. It will be a solo project but I will showcase everything in the forum 🙂