@yukinoh1989 With the Specular setting it’s best to leave it alone if you want realistic-looking materials. It essentially makes the reflections brighter or duller, but the roughness setting handles this much better so unless you’re going for something unrealistic and odd then just leave it at default.
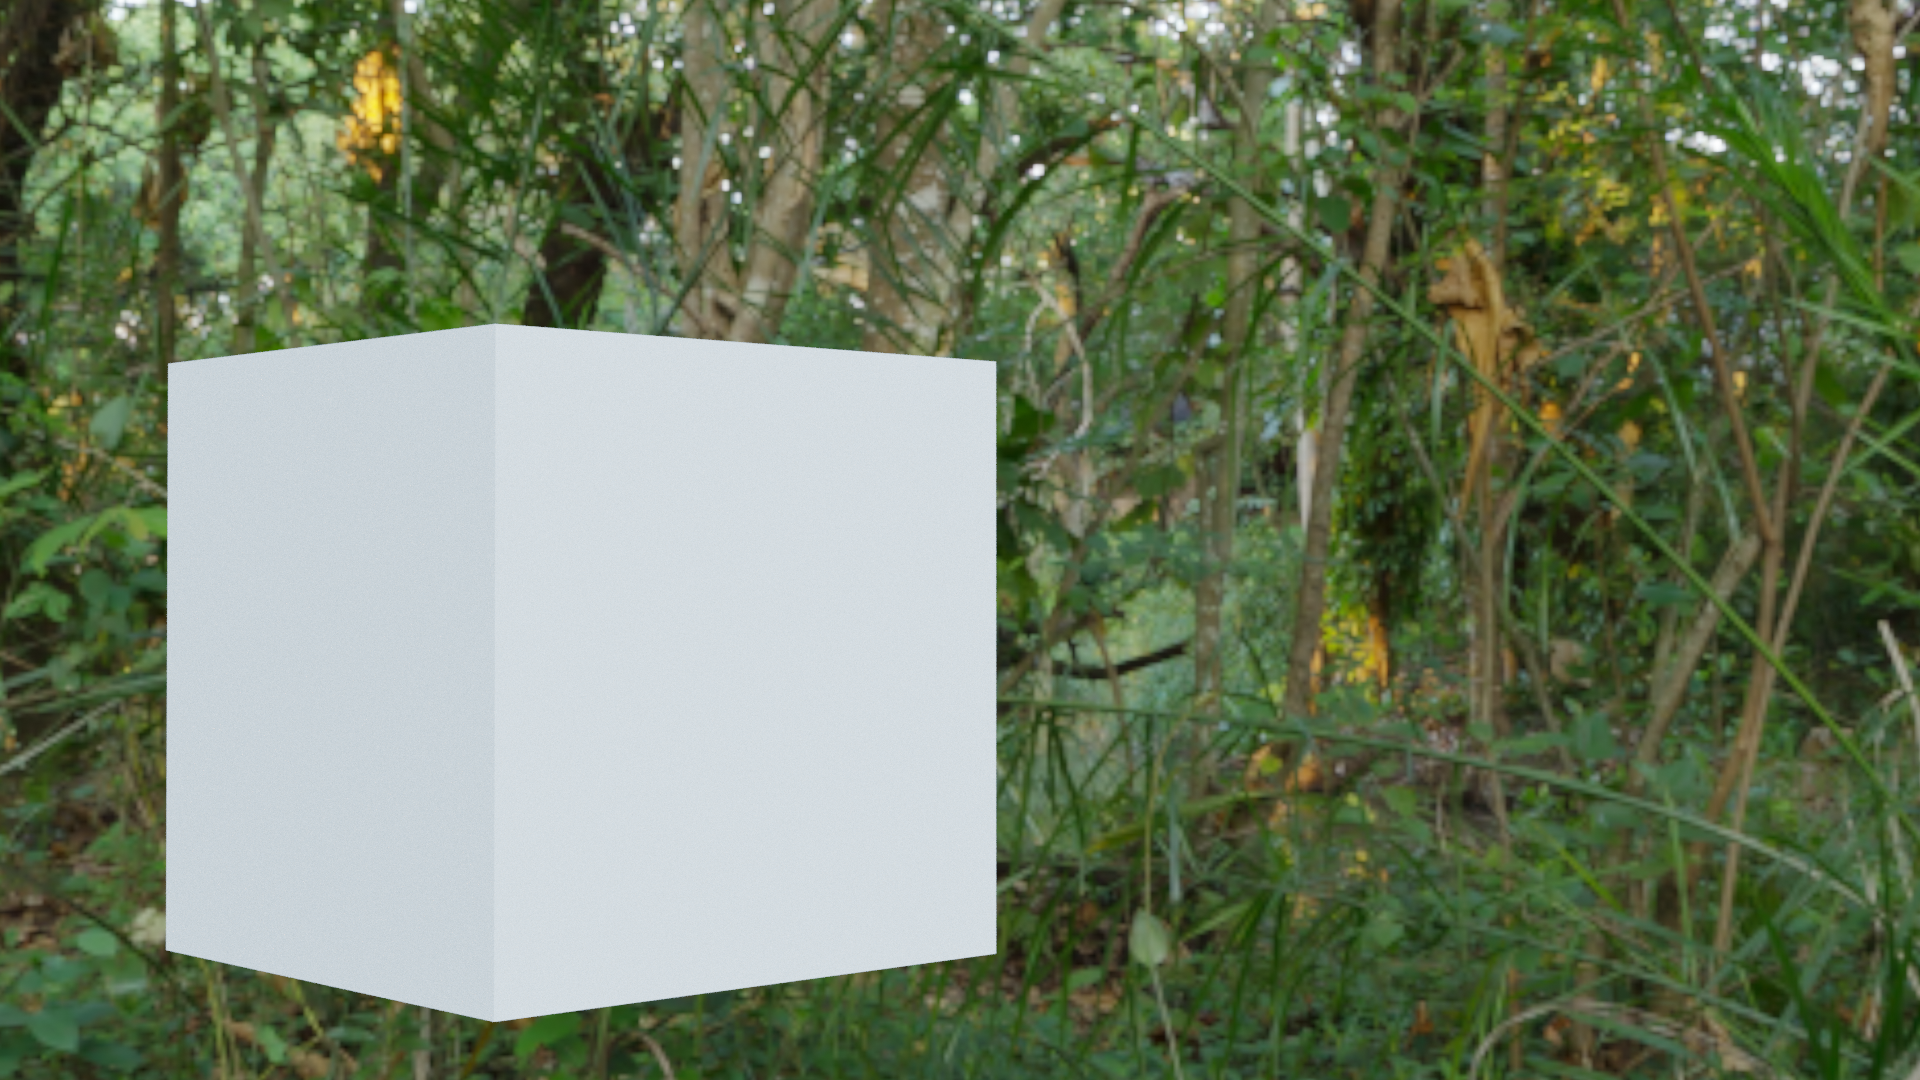
I made the background with what’s know as an HDRI (which stands for High Dynamic Range Imaging), which is basically a 360 degrees picture that’s quite commonly used in renders, because not only do they look nice and give something to reflect, but more importantly they give off light values depending on the image (for example if you had an HDRI that had two bright, red bulbs then the brightness in the image would affect you scene) to give realistic lighting. They’re admittedly a pretty advanced option so I wouldn’t worry about them for now but I’ll go over the basics of getting one set up.
First, download an HDRI. HDRI Haven is a great place for free, high quality HDRIs, it’s where I get all of mine from.
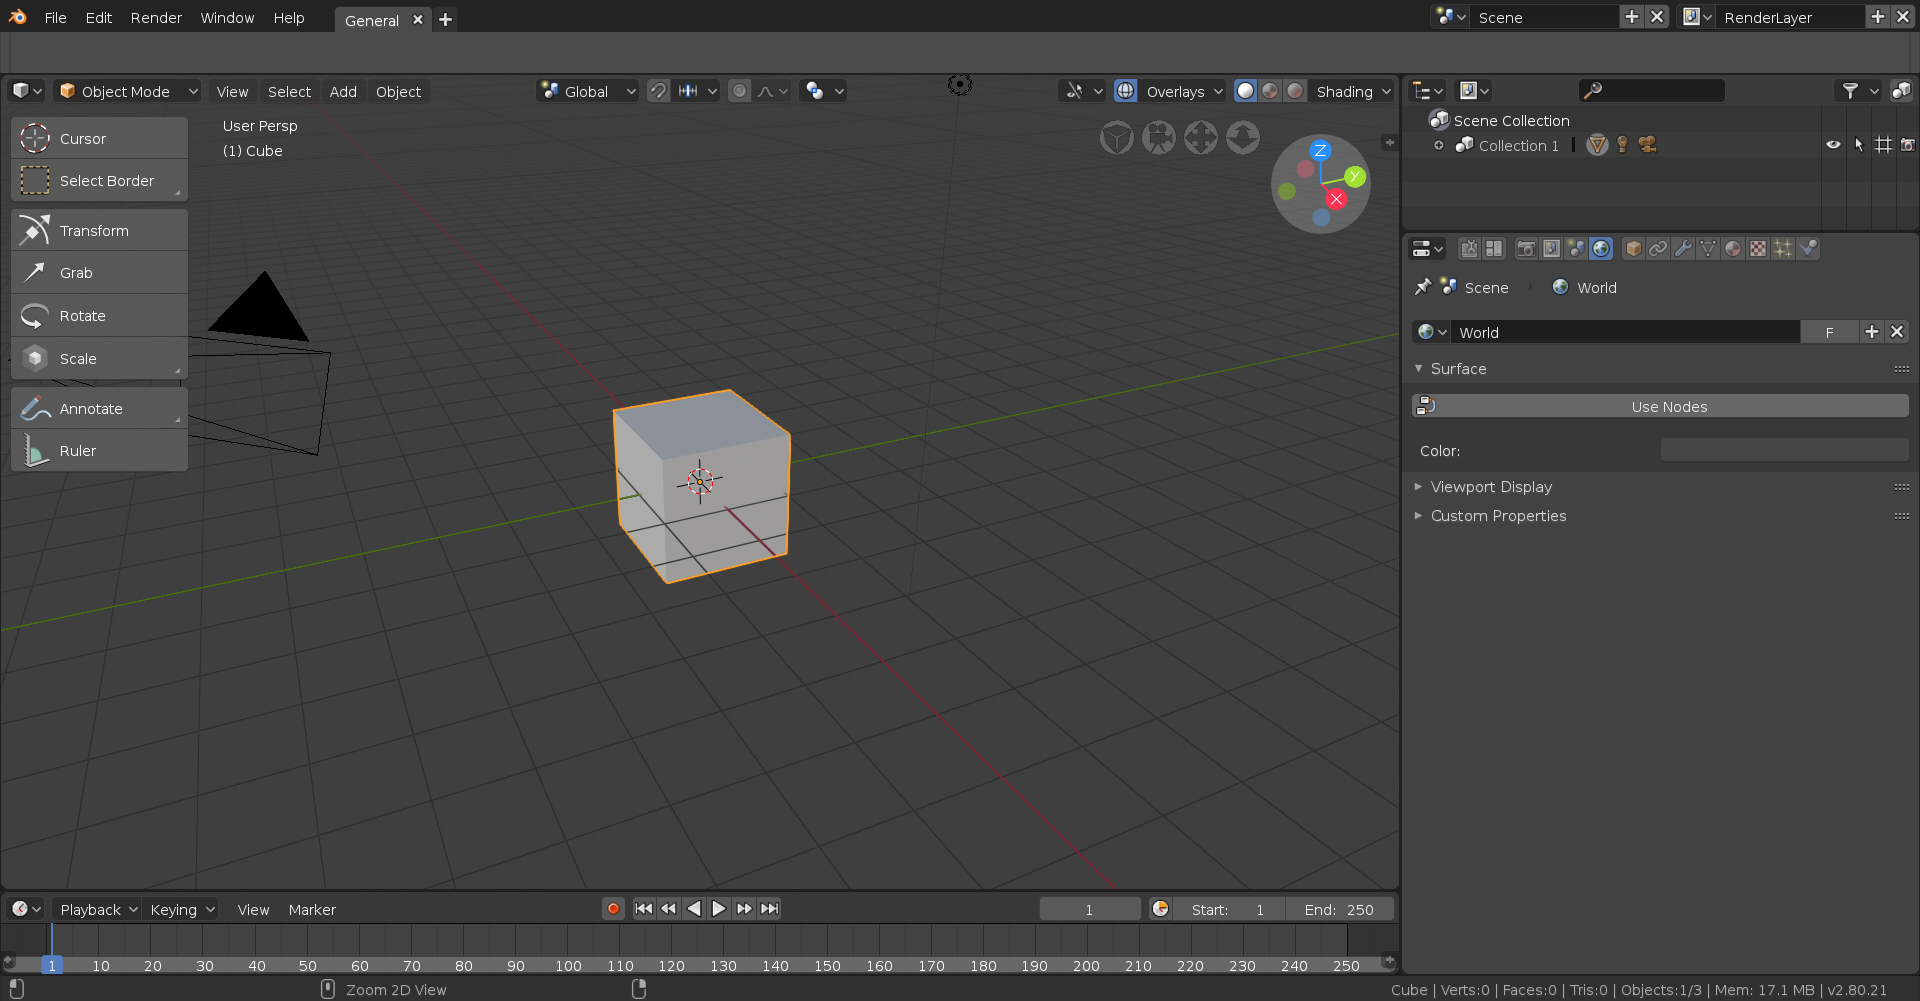
Once you’ve picked one you like, go to the World tab and hit “Use Nodes”.
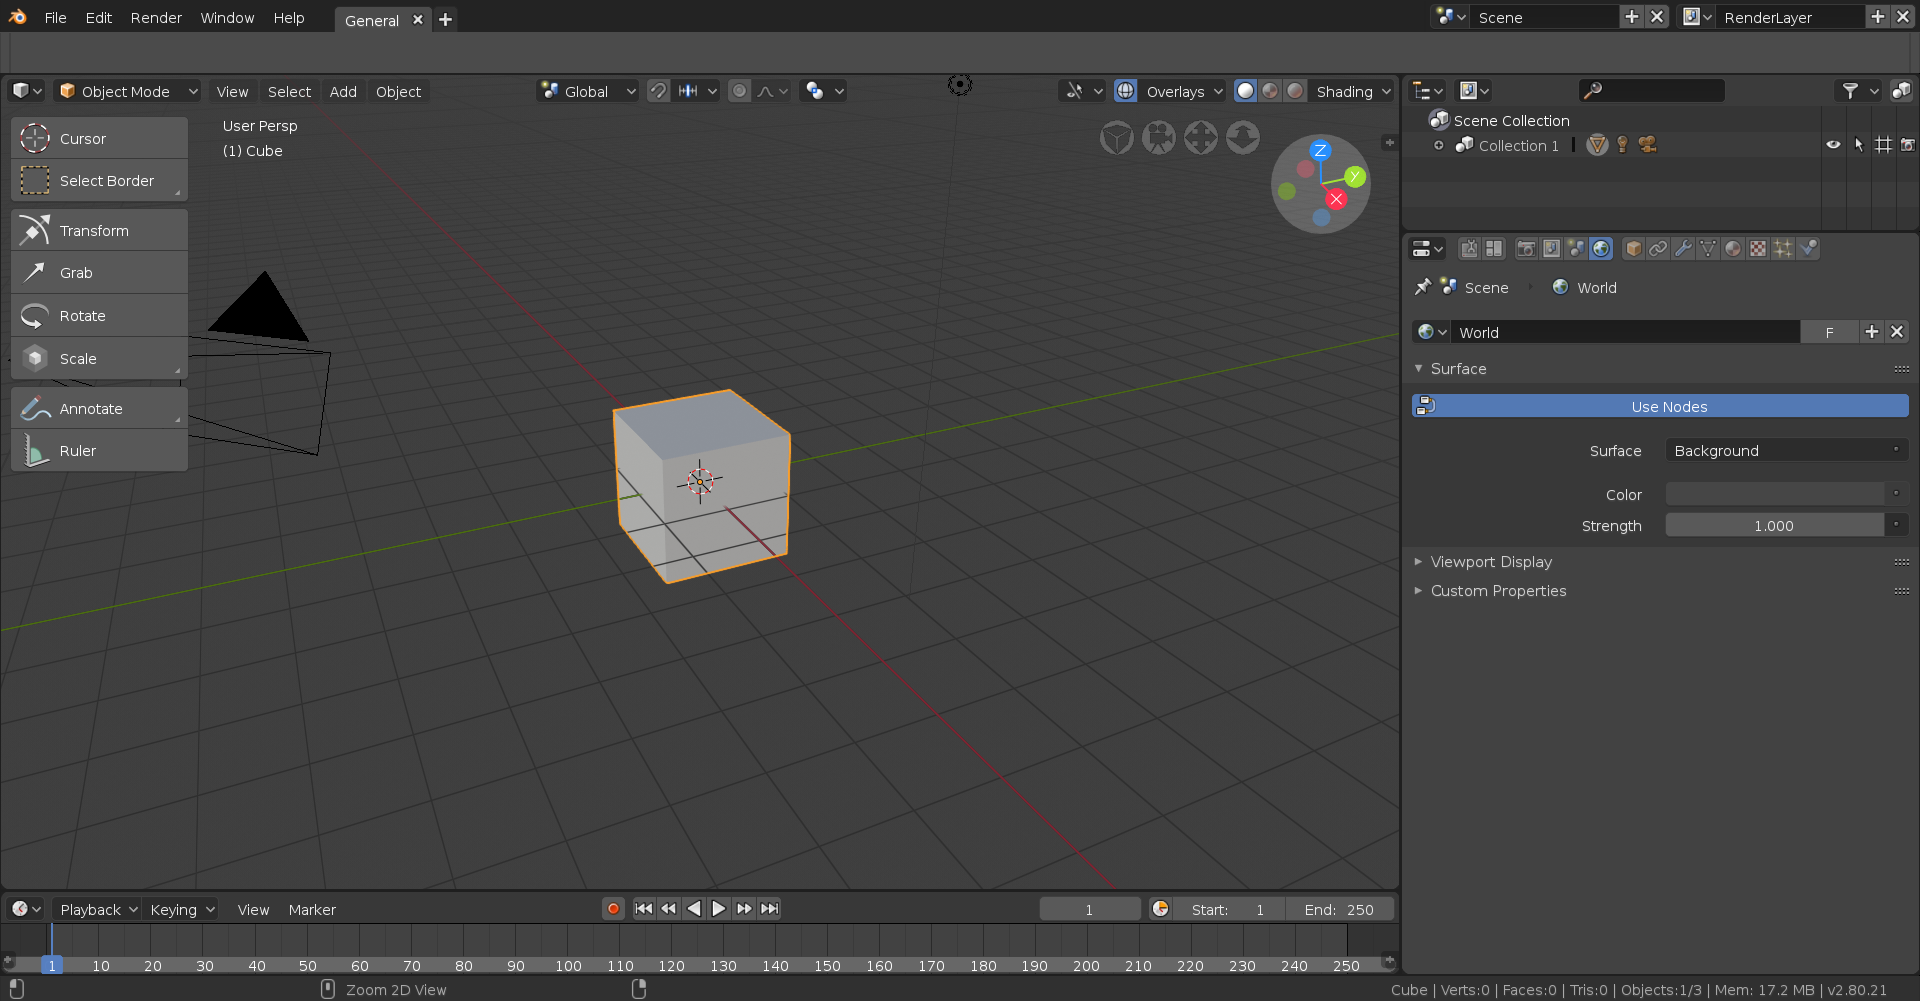
After that, next to the Colour option is a dot, click that and you’ll get a drop-down, then select “Environment Texture”.
Finally click the “Open” button and select your HDRI (do note though that they can be a bit memory intensive and can really increase your render times but they’re almost always worth it):
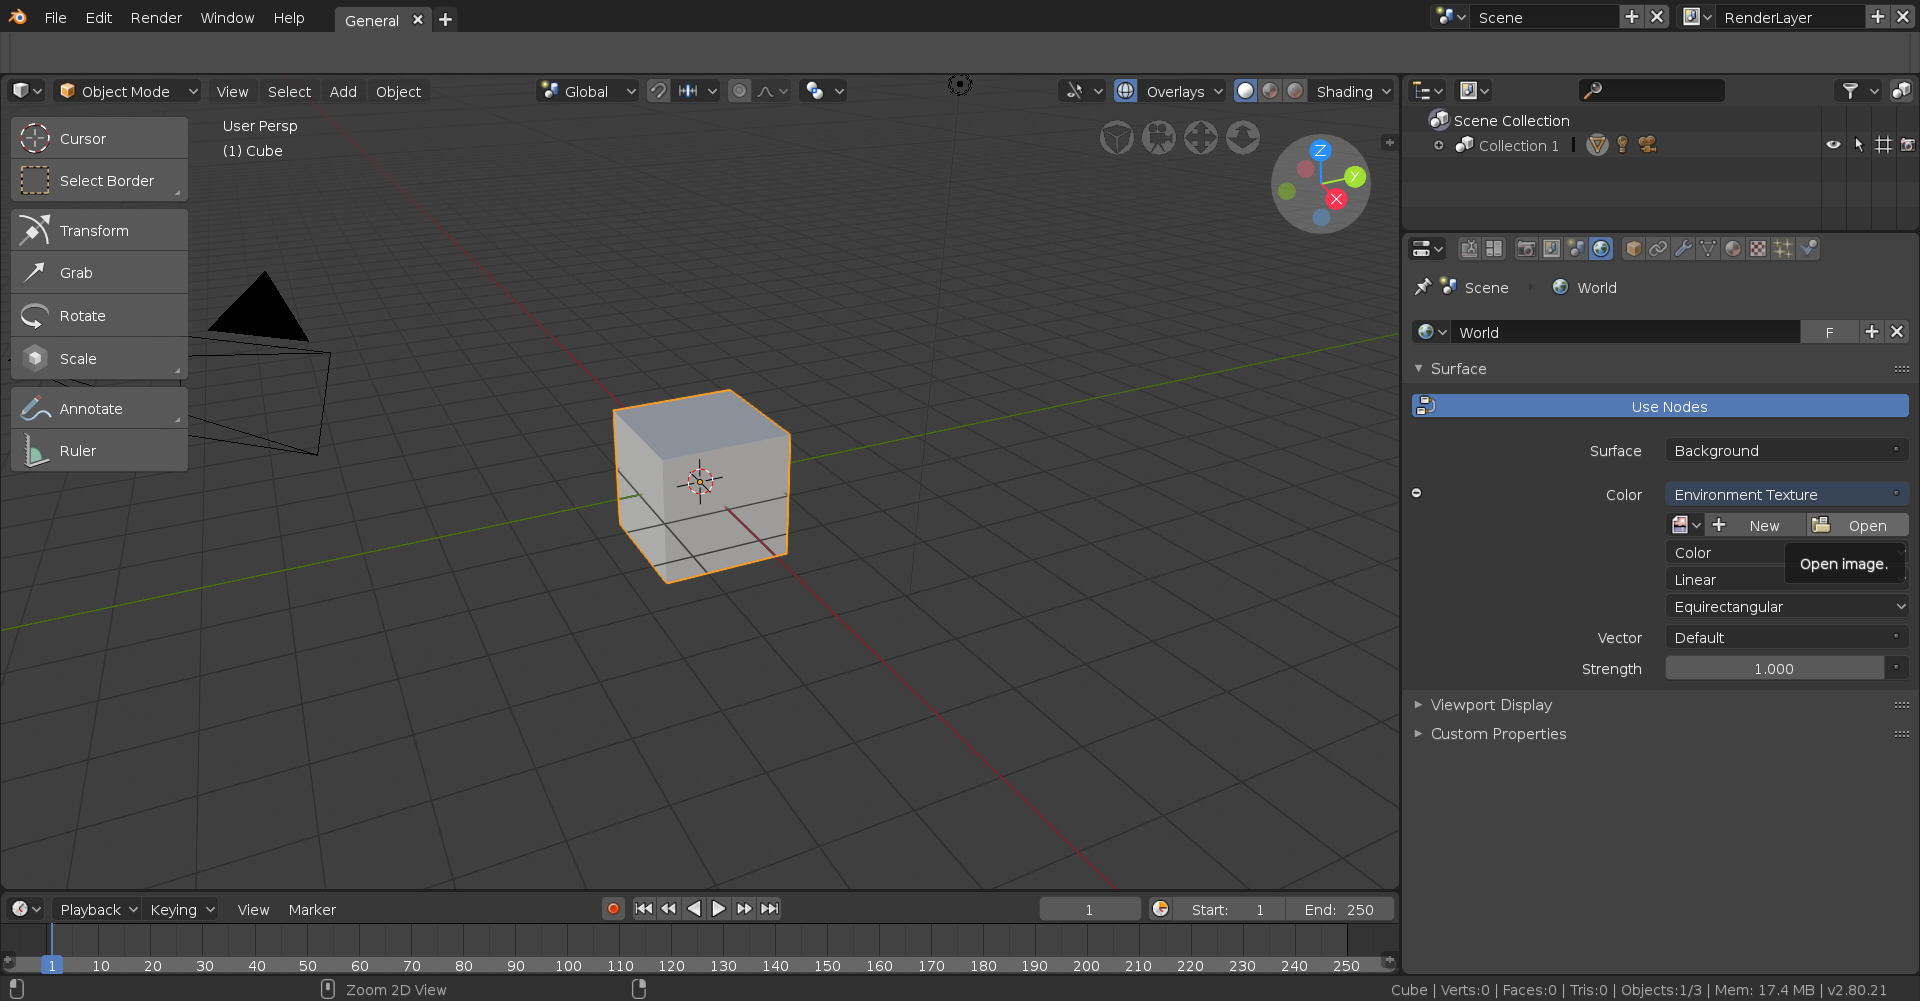
Boom, you now have an HDRI in your scene (though keep in mind it doesn’t appear in the default “Solid” mode)!