
Collab2021 – WIP – cooly
Forum Archive › Collab2021 – WIP – cooly
- This topic has 19 replies, 6 voices, and was last updated 5 years, 4 months ago by
yukino hatake.
-
AuthorPosts
-
April 6, 2021 at 4:09 pm #13760
Here is my WIP submission thread for COLLAB2021.
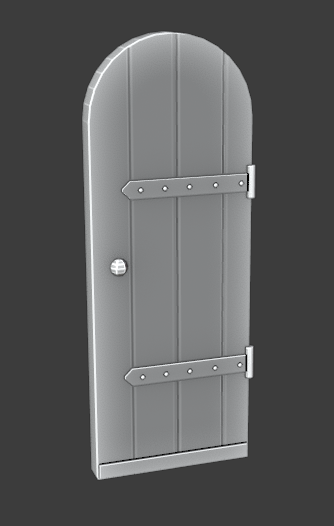
April 11, 2021 at 7:03 pm #66276Here is my blockout model for the main entrance doors.
The basic shape and size of both doors seem to be identical, but the details in the wood planks of both doors can be distinct.
 April 11, 2021 at 9:28 pm #66277
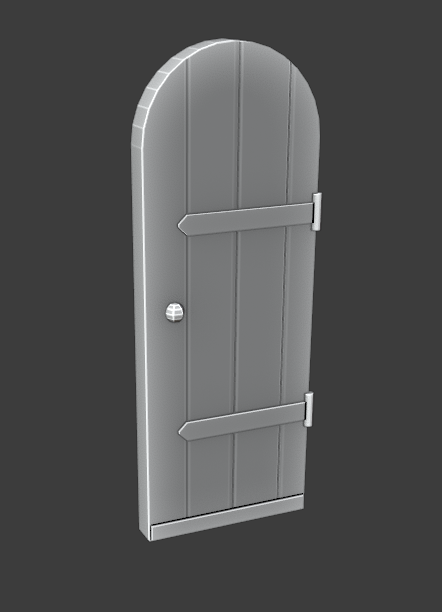
Homework Submission – Week 1 – Door
For the submission of the door I deleted the rivets to decrease the polygon count, because those can probably be done by texture painting. The number of vertices of this block-out model is 844.
 April 12, 2021 at 8:30 am #66278
I admire you use of verts @cooly . I don’t think you need to get that lo and you can always instance or duplicate-link a Rivet/Bolt after making 1.
Just some thoughts. I think the baking works better on these things if they stick out of the geometry if there is actual geometry to back to.Otherwise this is a good blockout!
April 14, 2021 at 12:32 pm #66279Solid work for week 1 @cooly! You’ve earned full points from me. It looks like the proportions can be better matched to the art, though I didn’t expect you to align your model to the art for week 1. Instead aligning with the placeholder scene will get you matched with the art:
/SPICE-VENDORS-HOUSE/SCENES/MODELS/WIP/HOUSE/EXTERIOR/WIP_house_door_cooly_00.blend
Nice job keeping the poly count low. You’re in good shape to sculpt accents for week 2 👍
April 16, 2021 at 6:21 pm #66280Thank you for the feedback, Shawn.
Indeed, I will duplicate-link the rivets in the final model or simply use sculpturing.
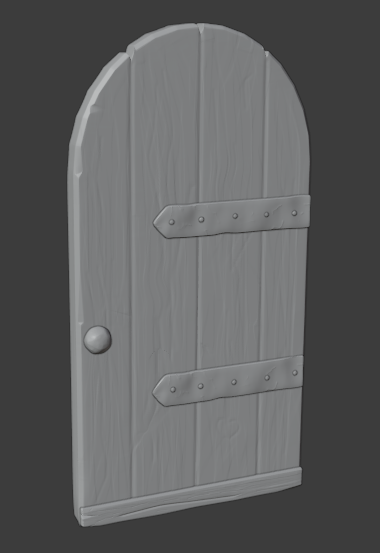
April 18, 2021 at 11:04 pm #66281Homework Submission – Week 2 – Door
Here is my attempt to add details to the door. I also matched the dimensions to the proxy and got rid of the hinges, which are not seen in the concept art.
I think I would like to add some imperfections to the door planks and increase the contrast of the grain.
 April 21, 2021 at 2:01 pm #66282
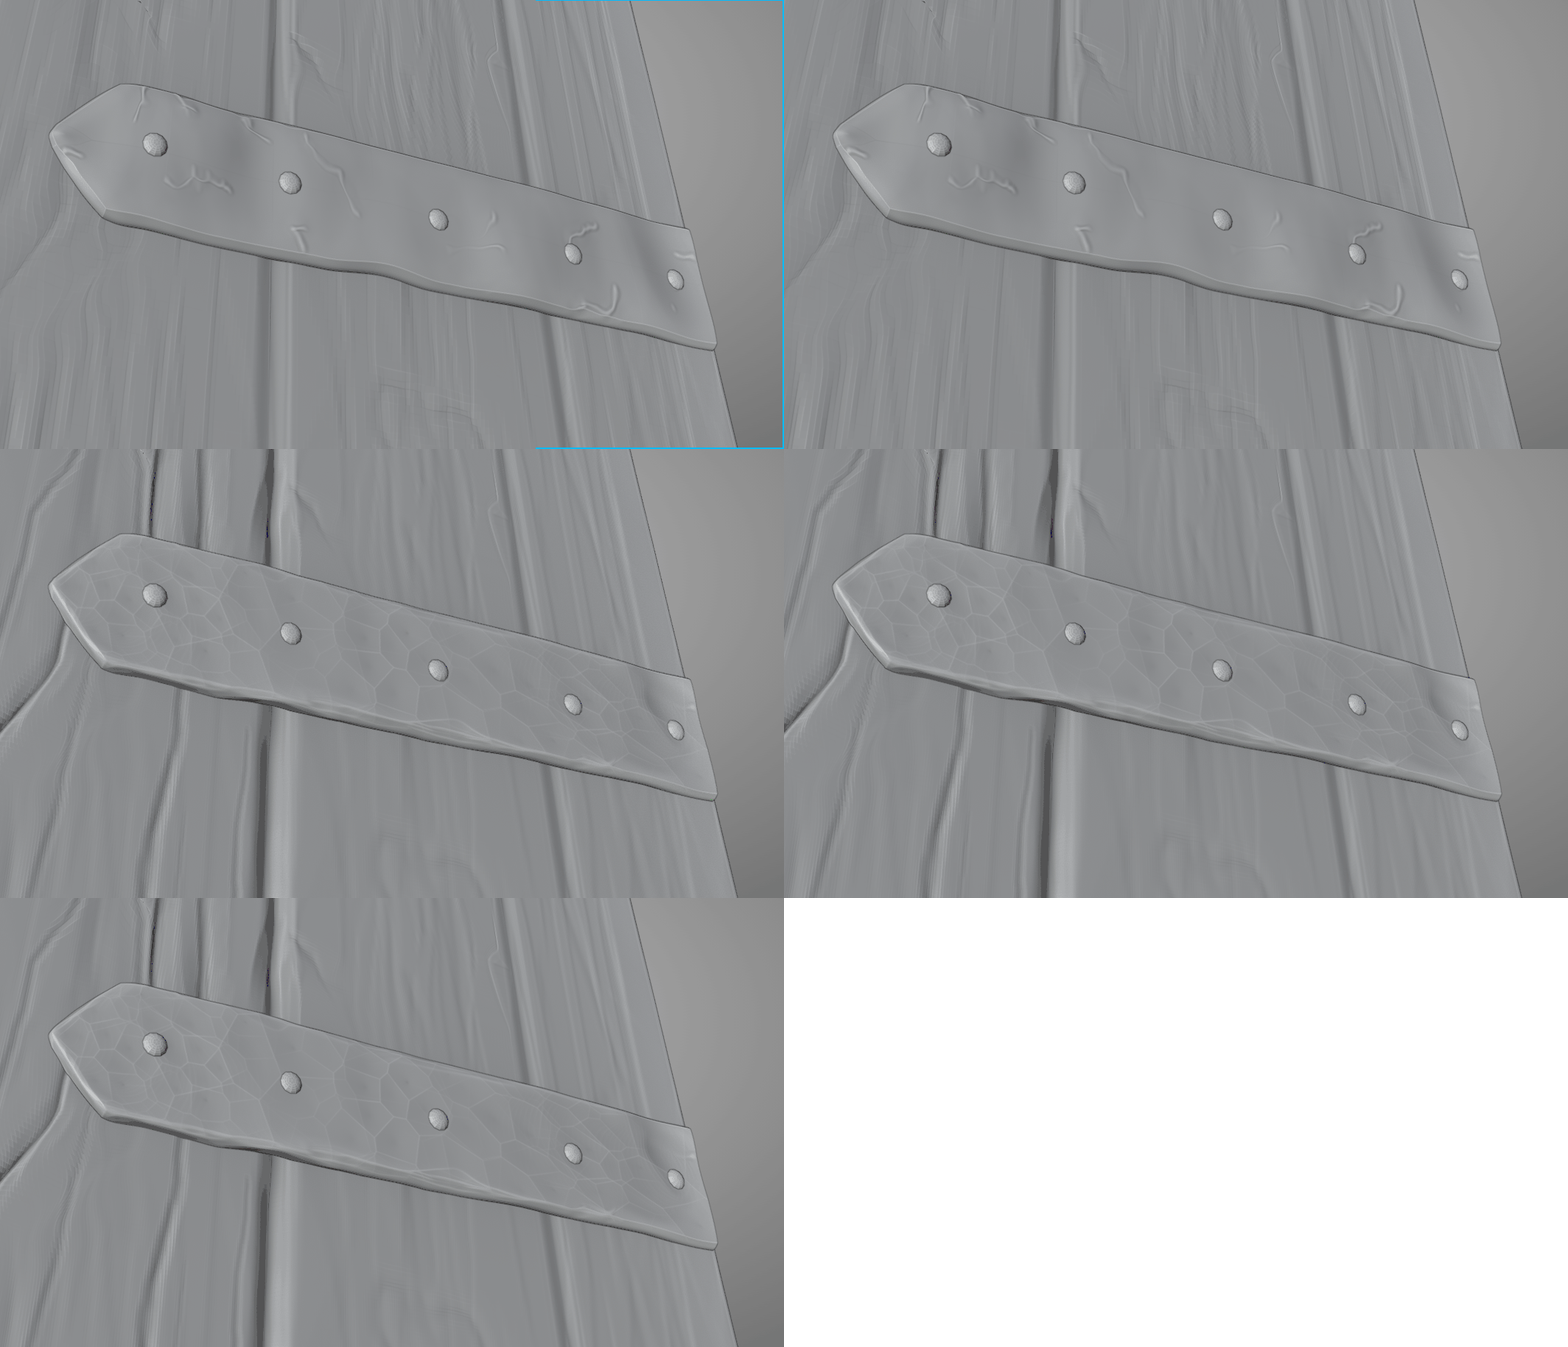
Nice job for week 2 @cooly! Everything about your wood details looks great except that they’re not strong enough. I would like to see you go deeper into the crevices between boards and grain cracks:

Also the metal is a little soft and wobbly. To me it looks more like taffy than metal. Also there’s “veins” or “worms” poking outward. I noticed that the normals of the faces are reversed on the metal brackets. You can visualize this in the overlays menu, enabling Face Orientation:

Red means the surface faces inward which inverts the sculpt brush behavior. I think that’s why the crevices pushed outward instead of inward.
I recommend flattening the bracket to diminish the wobby and rough-bevel the edges with the scrape brush. Lastly a voronoi procedural helps to make it look like hammered metal:
 April 21, 2021 at 2:13 pm #66283
@cooly that is looking good man. I have nothing else to add.
April 25, 2021 at 6:30 pm #66284Kent: Thank you so much for the suggestion and feedback. I especially like the animated effect switching between before and after.
Your version looks really great. I have been trying to re-create it, but I ran into a couple of problems.
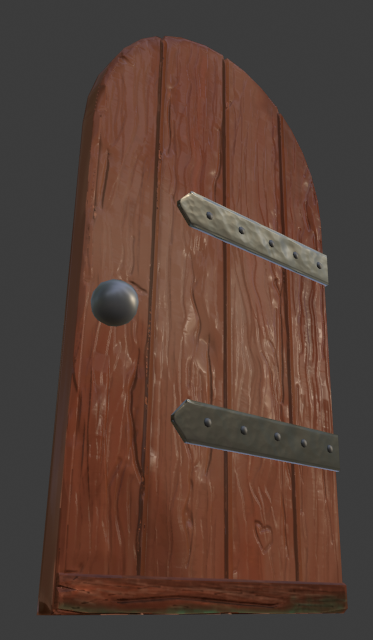
Most basically, I wasn’t able to bake the different parts of the door (those from wood and metal) onto the same UV map. Every time I bake a texture, only the selected object is baked. So I ended up with normal- und cavity maps for all 5 parts of the door (3 metal parts and 2 wood parts). I only uploaded the texture maps of the main wood part of the door for now.
Also, the cavity map of the main wood part of the door is very low contrast. I need to fix that.
The cavity and normal maps of the door knob both had this weird pattern, maybe because I used a too-low poly version of the knob for baking. I also need to redo this part. I removed the texture of the knob for the screenshot.
 April 26, 2021 at 6:04 pm #66285
@cooly Hey Cooly. Great work! I am also doing the door, and I am running into some of the same issues. To get the 2 different models to bake onto the same UV map, try disabling the “Clear Image” option in the Bake settings, under Output. Then try baking each part again.
Best of luck to you!
Mike G – Undiscovered
April 28, 2021 at 11:29 am #66286The update looks great @cooly! Undiscovered took the words right out of my mouth – Sounds like the Clear Image checkbox is to blame. You can definitely bake to the same texture map from multiple objects with that turned off. Here’s where I covered that in the live stream.
April 30, 2021 at 7:09 pm #66287Thanks, Kent and Undiscovered!
The ‘Clear Image’ checkbox indeed solved this issue.
I, like Undiscovered, also had difficulties using the same COLOR, CAVITY, and NORMAL maps for both metallic and wood materials. The way I approached this was through vertex colors (Kent, you hinted at that in your week 4 live stream): I gave the wood materials a black vertex color and metals a white vertex color. Then I used the the vertex color input node in the material node editor to apply separate materials.
May 1, 2021 at 5:08 pm #66288@cooly, it looks like you are finishing up with your project. And, your door looks great. I’d love to post your artwork in the TSMF Blog. Please let me know if you create a money shot.
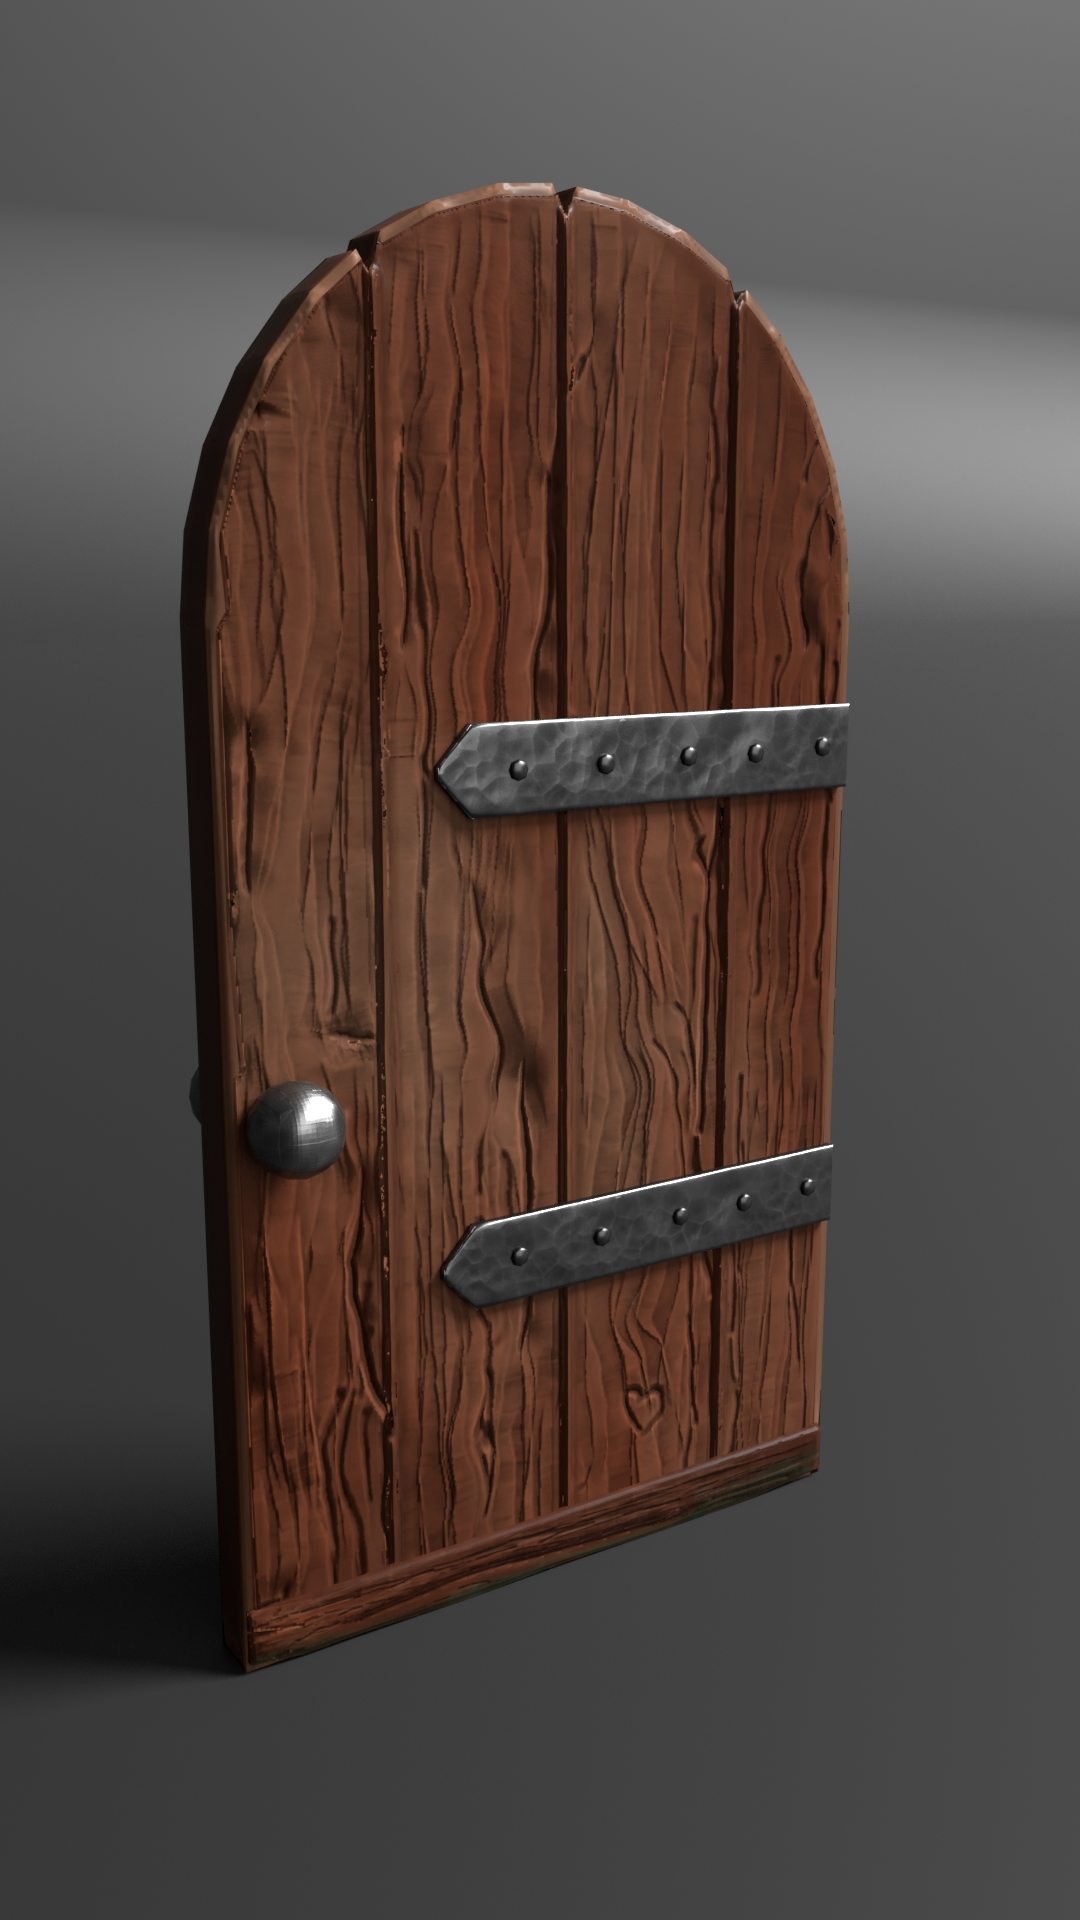
May 2, 2021 at 7:29 pm #66289The model has 698 verts or 1364 triangles besides the three 1024×1024 texture maps.
Here is my “money shot”:
-
AuthorPosts


- The topic ‘Collab2021 – WIP – cooly’ is closed to new replies.