
Reply To: Smoke simulation in Blender
Forum Archive › Smoke simulation in Blender › Reply To: Smoke simulation in Blender

@gasteropode Hi again Umberto, sorry for the delayed answer!
So in this post I will try to describe as thoroughly as possible two methods that could be used in order to get similar visualization.
Method one – using only Paraview
Basically, what your student is trying to obtain from the flow visualization is usually called volume rendering in the computational fluid dynamics field. If he/she uses Paraview, there’s actually a tool to obtain the volume rendering directly from the simulation results, and in addition get the proper scalar colors range, which is in few words the scale used to show for exemple the flow’s speed. There’s a good tutorial in this video:
https://www.youtube.com/watch?v=UwKFg0yOlCA
Pros: you have the actual simulation results, with correct scalar ranges
Cons: Paraview’s rendering capacities are limited and if the purpose is to get a nice looking animation like you showed, it will be difficult. You cannot handle shaders, lighting and so on as well as in a CG software.
Method two – using Paraview AND Blender
Step one – in paraview:
Once the simulation result is loaded in Paraview, there’s the possibility to create flow structure named streamlines. It represents the path that a given flow particle would follow. Here’s how to generate them:
https://www.youtube.com/watch?v=BwPwPVy93oM
The streamline can be turned into a tube or ribbon, but leave it as is (a line). Then, you can export the said streamline(s) from paraview, by going in File > Export Scene and choosing either .vrml or .x3d format. That will export the whole scene, geometry included.
Step two – in blender:
Start by importing the previously generated files ( in blender it’s in import > X3D extensible). Note that the streamline is treated as a curve. If note, convert it as a curve. For the sake of it, I downloaded a compressor model from GrabCad , and made up a curve that represent the streamline. (DISCLAIMER: it’s not a computed streamline so not physically realistic). I used a boolean to show the inside of the compressor (with bool-tool).
Then, apply a force field to it, and set it to Curve Guide. You should see a circle at both curve’s extremities. If not, go in the curve setting and toggle Path Animation.
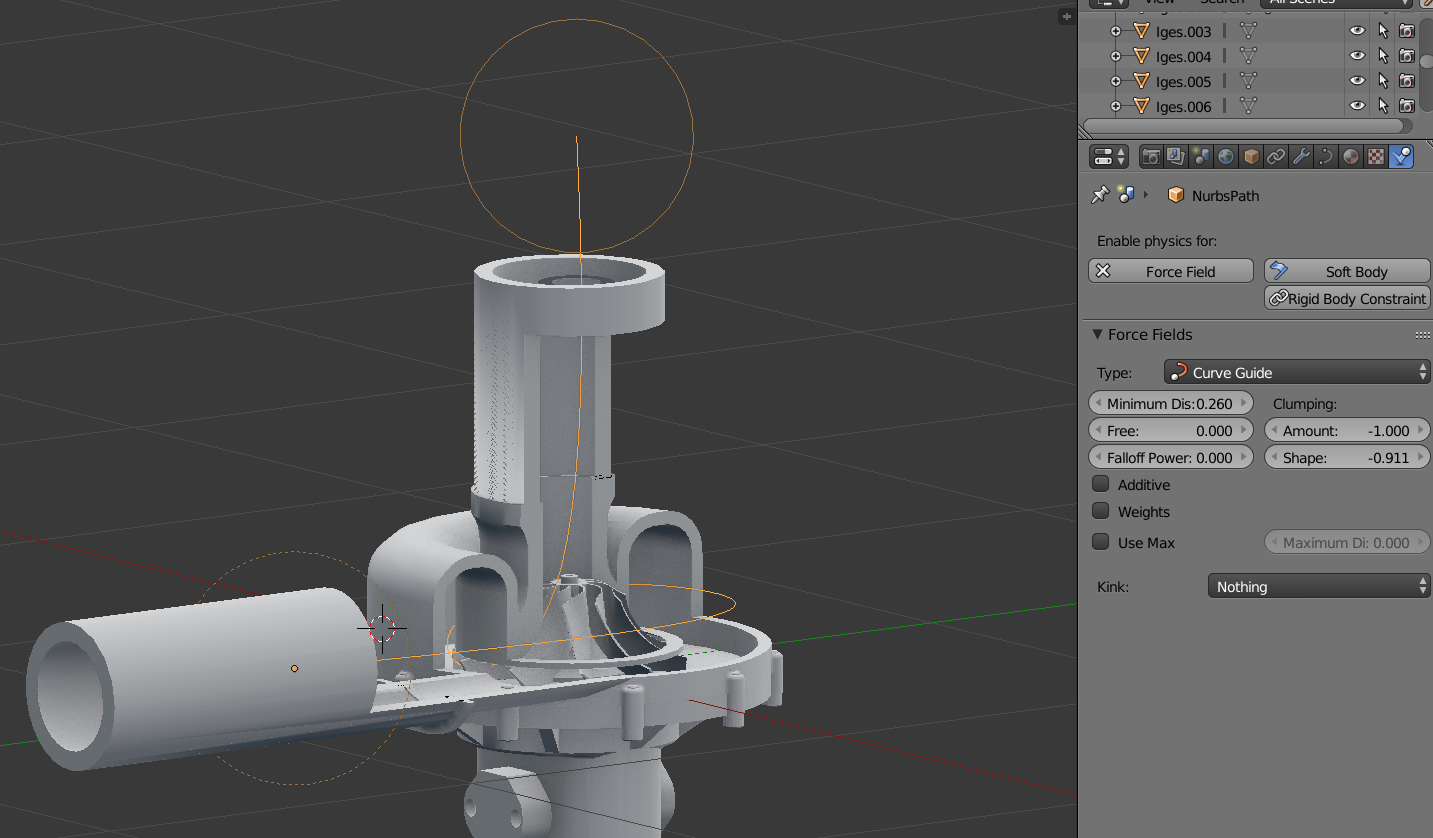
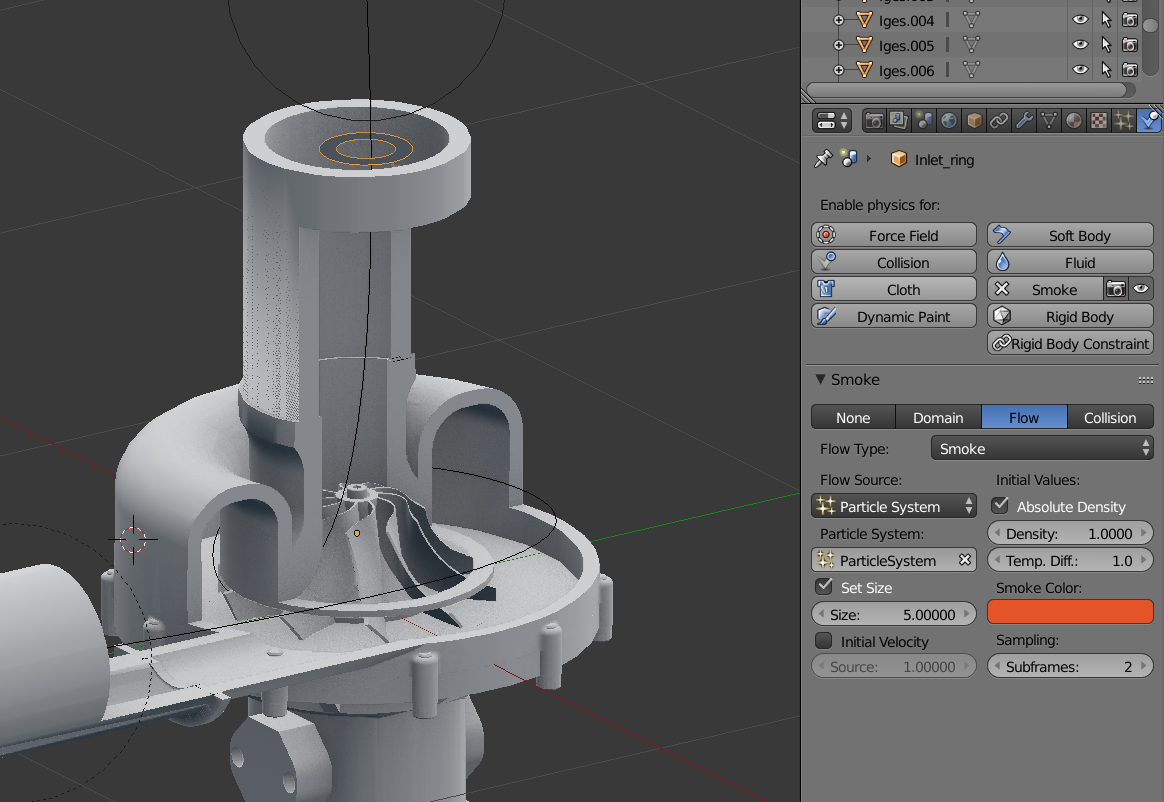
Next step: create a particle emitter. In this case I used a ring, you can do anything you like. Then create a particle system (amount of particles is up to you). If you animate it (ctrl+a) you should see the particles following the curve!
The step after is to generate a smoke simulation. For that I select the emitter, hit space and search for “quick smoke”, and use the following setting. You can of course fiddle around to get another style.
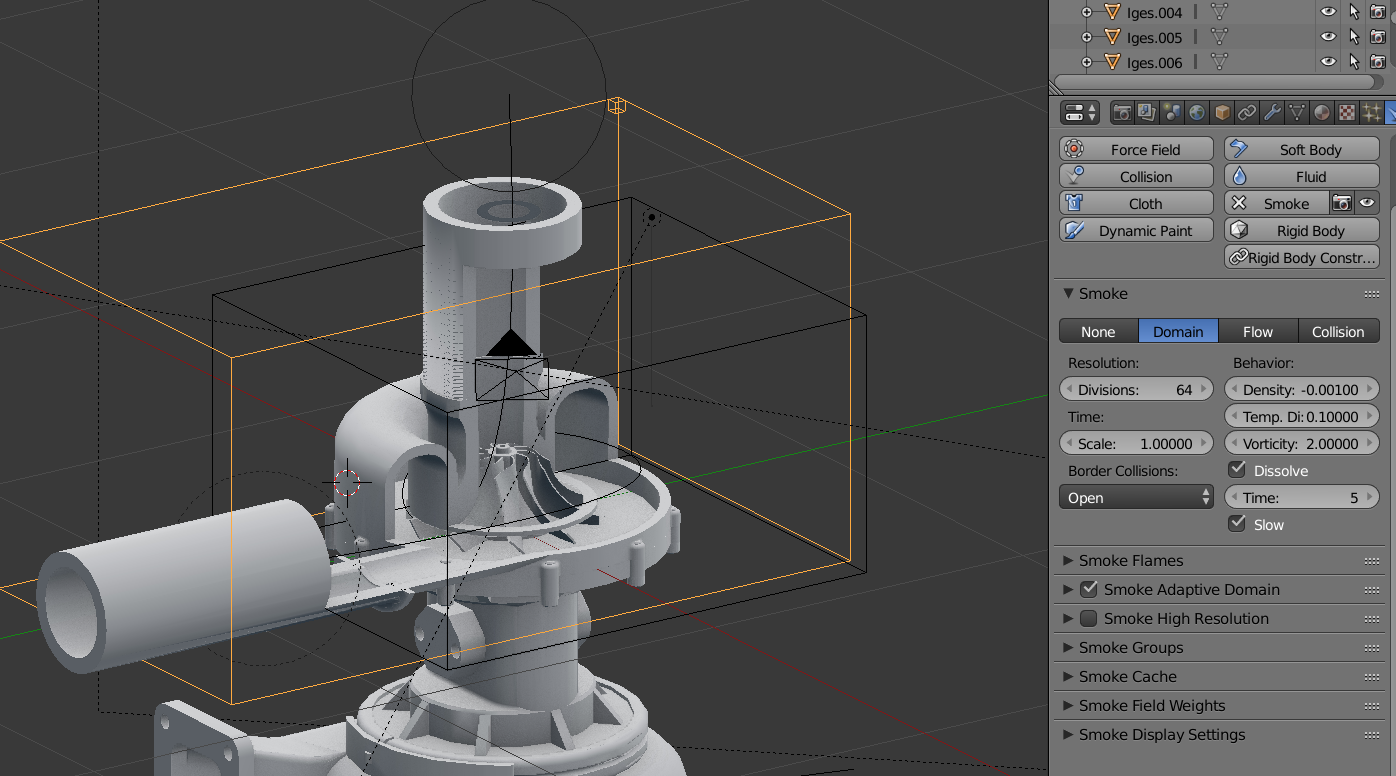
For the simulation domain I used a rather low resolution for the sake of speed. I suggest to crank up to 128 at least:
You can verify that all works by baking and animating the simulation. You can see that I added some rotation key to the rotor so it looks nicer
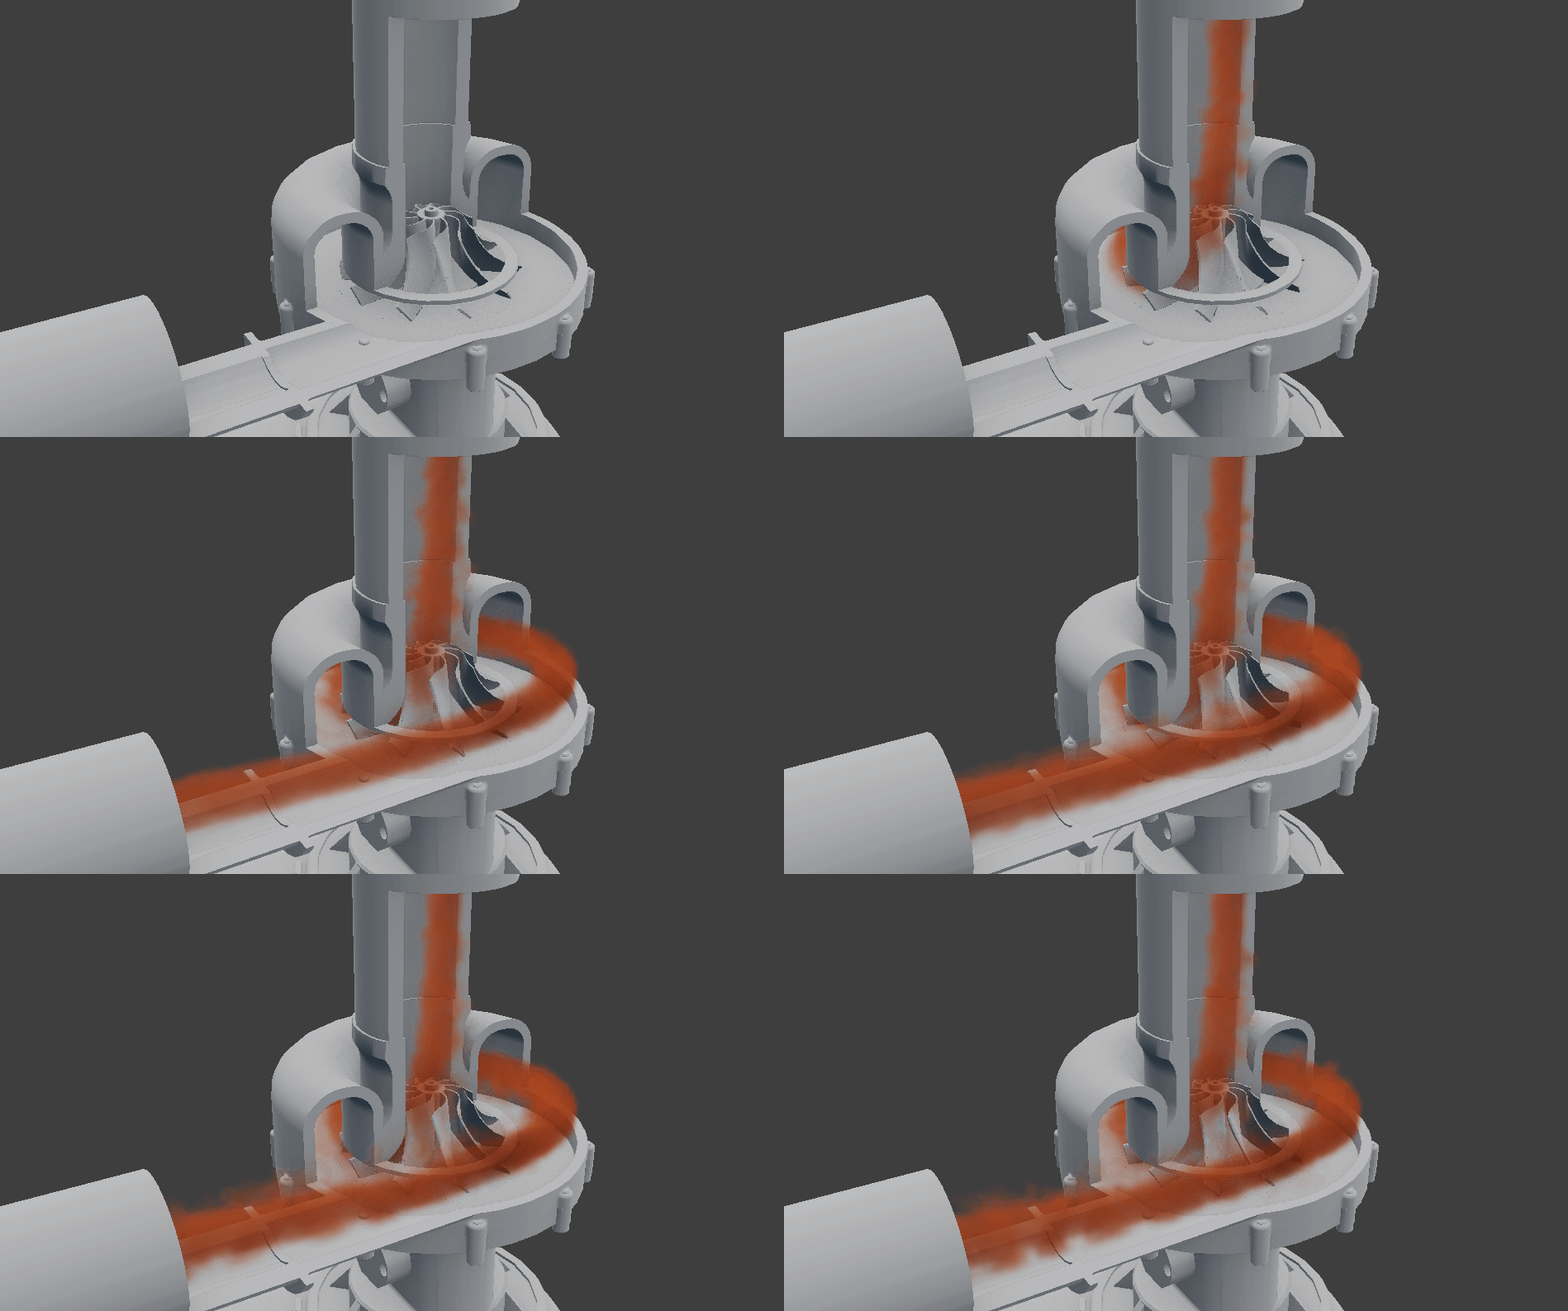
For the shading, with a simple smoke shader (using volumetrics) you can get something like the image bellow. There’s room for improvement and if you have some tips and tricks for smoke shader I’ll be interested.
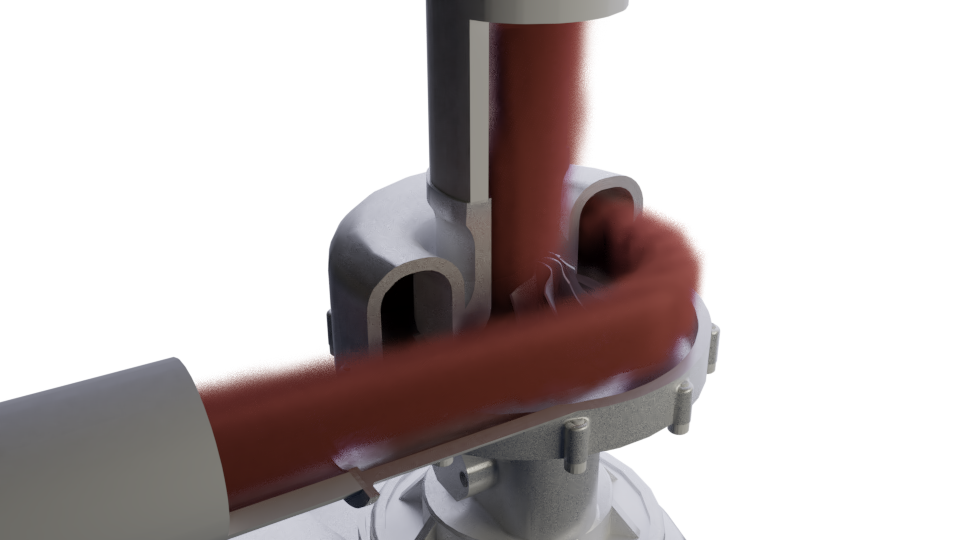
PROS: better sgeometry haders, more flexibility with light etc.
CONS: cumbersome to set up, tricky to get a descent smoke shaders that respect the scalar range (when needed).
That’s it for now, I’m still under investigation for better handling of volume rendering in blender. It unfortunately cannot be exported from paraview to blender directly, since it requires the data for each cell that was computed. I have some ideas to get it done but that takes time 🙂
Anyhow, I hope this can be of help, I tried to be as clear as possible which is quite difficult simply by writing. Don’t hesitate to ask for more details and CFD questions !
Cheers,
/Thibaut,