
Reply To: Sharpie’s Polybook
Forum Archive › Sharpie’s Polybook › Reply To: Sharpie’s Polybook

I finished the Hard Drive from the Hard Surface Modelling, but I haven’t watched the video on how it was done. Here are my solutions to the problems presented and the final result.
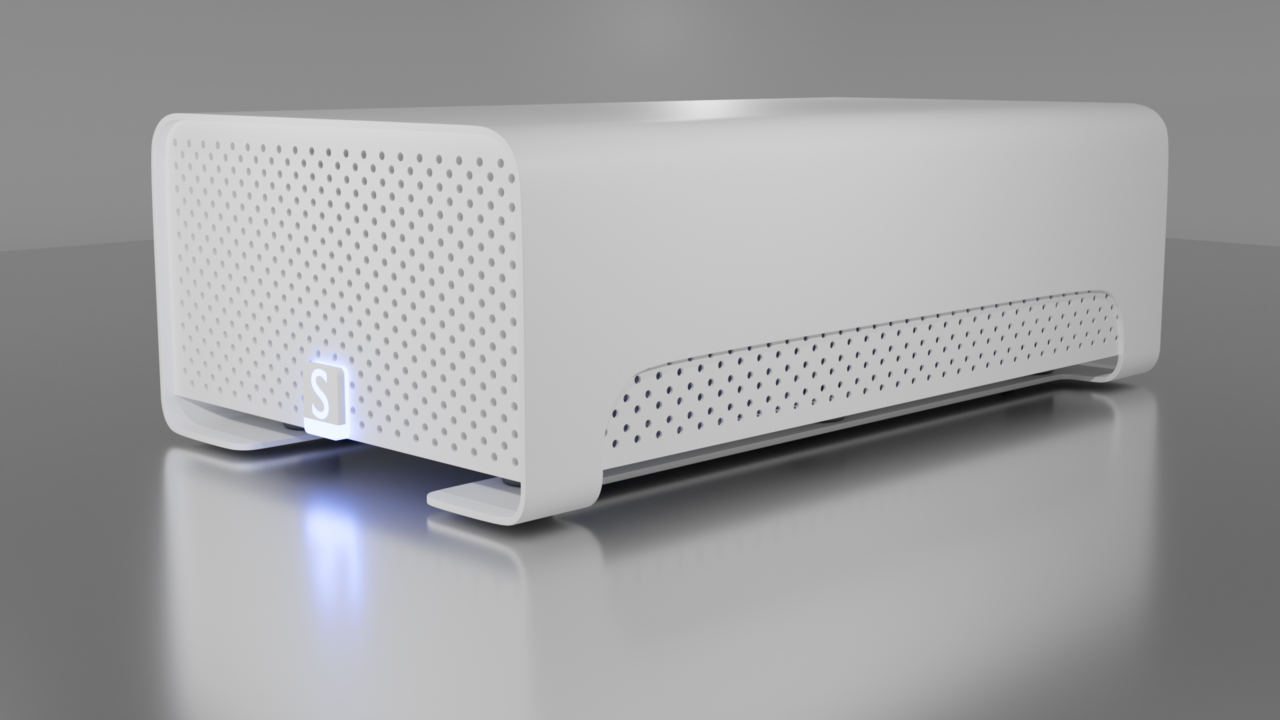
The Shell
First, I started with the curved outer shell, making use of the Solidify modifier to make managing the geometry easy because it is a single plane. This was useful, because when I was preparing my final render, I realized my Hard Drive was too short, so I had to make the shell and front face taller. I created manual bevels for the curves by either Edge Beveling or Vertex beveling. In the past, I have had the “Only quads unless it’s impossible” mantra reinforced a lot. I tried that out here, but like any tools in 3D, sometimes the supporting edges provided for a quad are required: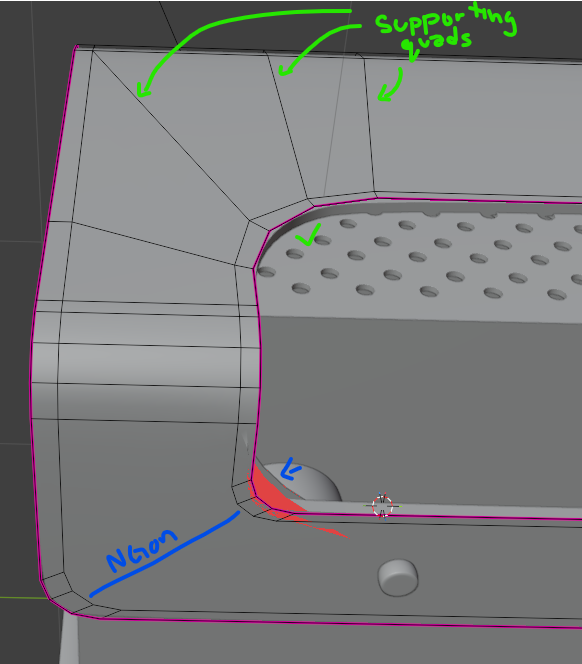
The final result used a lot of non-destructive modifiers, making modifications to the mesh easy, even if changing from edit mode to object mode took a couple of seconds. I recognize that the two loop cuts that go across the top are probably unnecessary, since they’re really only there to support the curve on the side. Would it be worth localizing that geometry for this model by adding a loop cut that runs along the side? Perhaps this is answered in the course video I plan on watching after this post.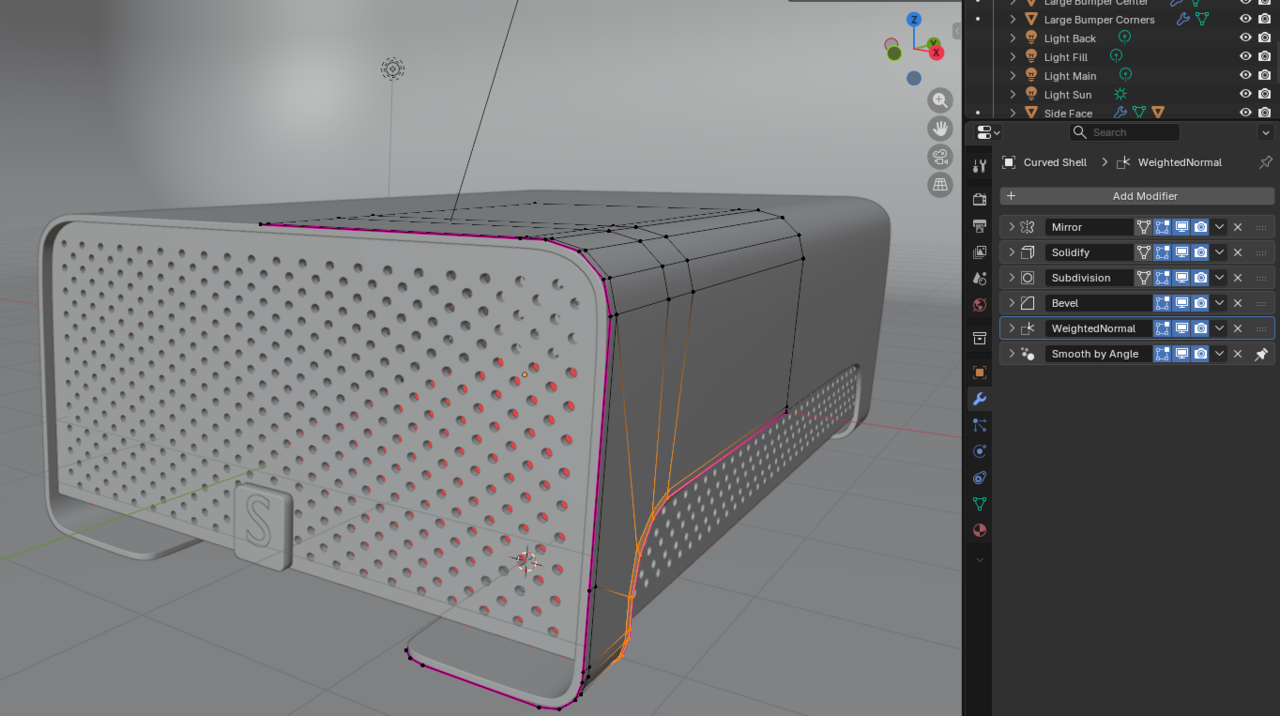
The Panels with Holes
I next set out to make the holes required for the front face and the interior side panels. I recently tried my hand at creating a diamond plate texture, so this was familiar territory for me. Blender 5.0’s new Array tool with the gizmo is incredible for this type of work! First I created a cylinder with an array that offsets it to the right and down to make a diagonal pair (blue below). A second array was made to tile that diagonal pair horizontally (red below), and a final array tiles that whole strip vertically down (green below) to fill the area with these cylinders.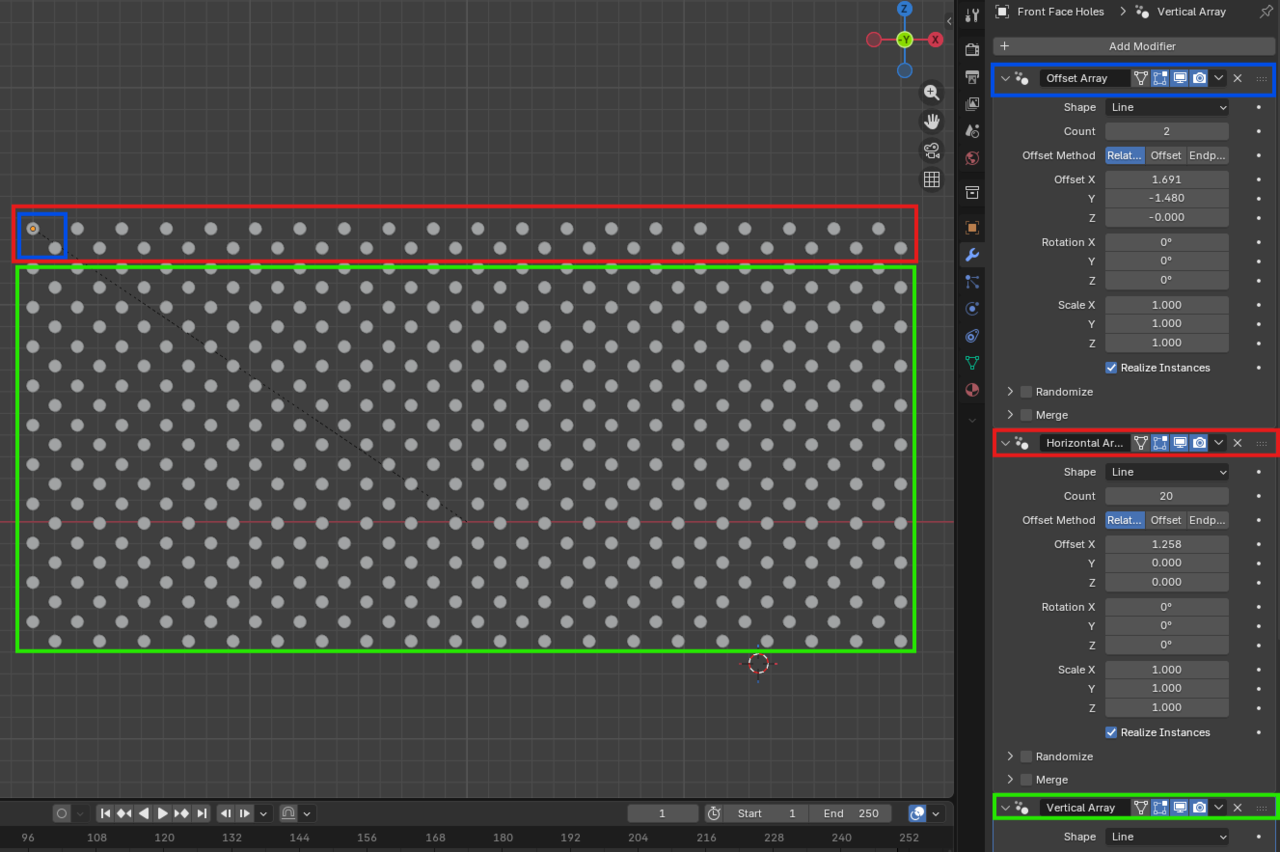
With these cylinders laid out, I used it in a boolean to cut it out of the front face. Then I added some bevels and mirrored it to make the side you don’t see on camera. All of this was duplicated exactly for the side panel.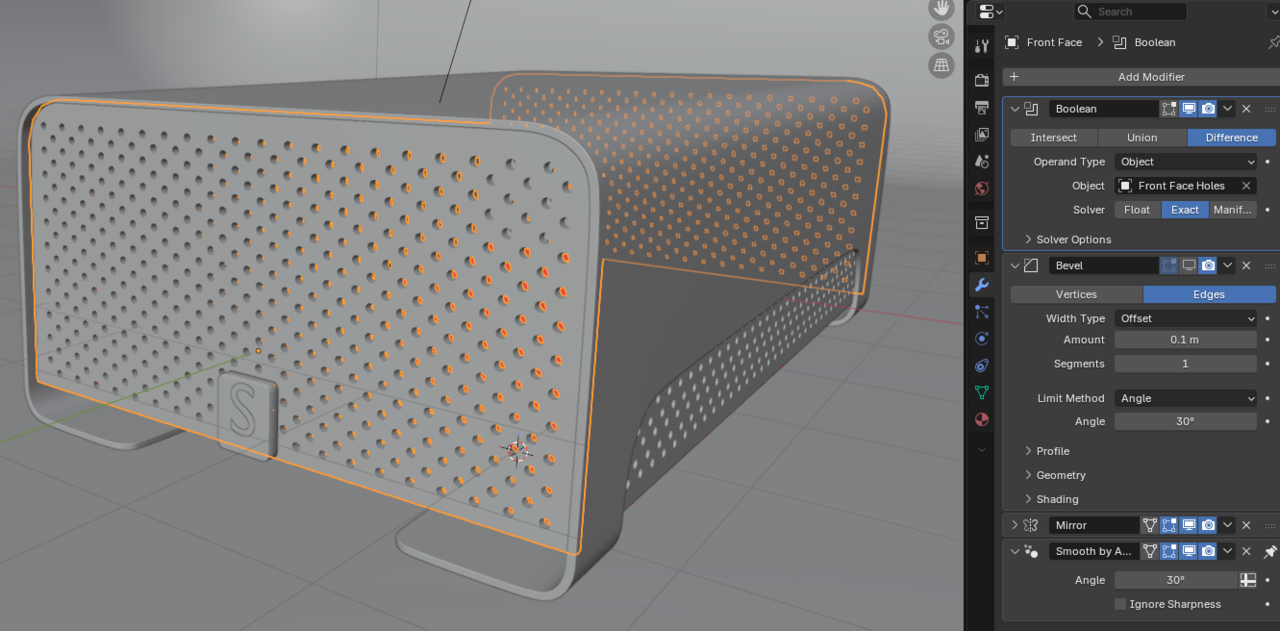
The geometry here is entirely ngons. The result here is fine since I am not subdividing this face. A lesson for later, my cylinder had the default 32 vertices, which resulted in the side face having almost 4,500 triangles! I probably should have used fewer faces, since 32 is overkill for such a small hole. My computer struggles to manipulate this boolean because of these calculations.
The Glowing Letter
I added an S for my username. It is a separate object from the little rectangle it sits on and is still a text object that just has a solidify on it. The problem I had here was finding a simple way to replicate the reference render with the emission. I haven’t done very many textures with emission, so I couldn’t figure out how to make the texture bright while properly reflecting a dark blue light like in the original render. The cube has some manual bevels on the edges, and a bevel modifier to soften the rest of the edges, pretty standard stuff at this point. I added an edge loop to the bottom and around the side so that the light texture could be applied to those faces. I’m also now realizing that the plate should have been skinnier. Oh well!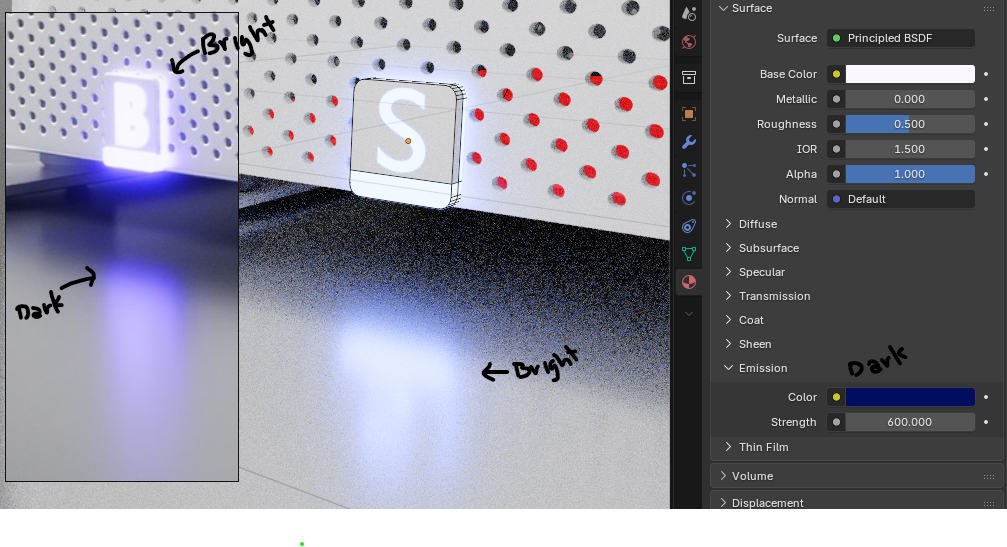
Rendering
Another thing I couldn’t quite figure out was how the background of the original image seems to transition from a reflective surface to a rough background smoothly. My attempt was to make a curved backdrop like so, with a rough texture on the back and a low-roughness texture beneath the hard drive to get those nice reflections. When I tried the whole backdrop with a reflective texture, there were highlights from the lights.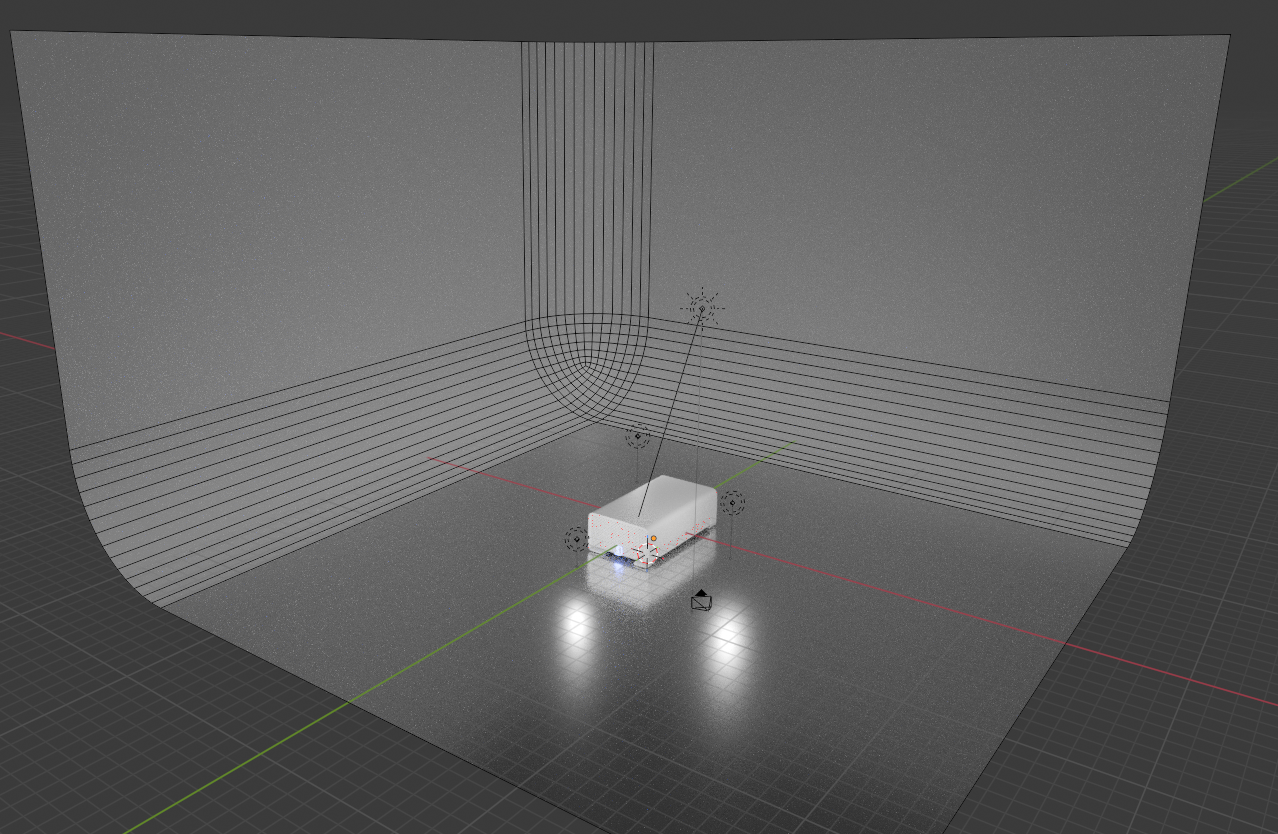
As we all know, lighting is incredibly important to making a render look nice. I attempted a 3-point lighting system, with a primary point light at 1000 power, a fill light in to the left of the camera at 500 power, and a backlight at 300 power. I also added a sun with a power of 1 to brighten the scene as a whole. I fiddled with this for a few hours, but that’s probably for a later lighting course, so I stopped. Perfection is the enemy of done, after all.
Thanks for following along so far! I appreciate the feedback I have received until this point. Time to see how I went wrong by watching the how-to video.