
Reply To: Sci-fi room Challenge 2021 WIP – Personal Space Ration
Forum Archive › Sci-fi room Challenge 2021 WIP – Personal Space Ration › Reply To: Sci-fi room Challenge 2021 WIP – Personal Space Ration

Thanks for taking an interest @duerer ! But, know that I kind of just played around with things until I arrived at something that looked how I wanted it. I’m not sure if this is the most efficient way to accomplish what I did, nor do I understand all the specifics on why/how it works.
First, I created the curves by just taking an edge from the from the mesh of the doors and converting it. So, I am using poly curves.
Here are the base curves.
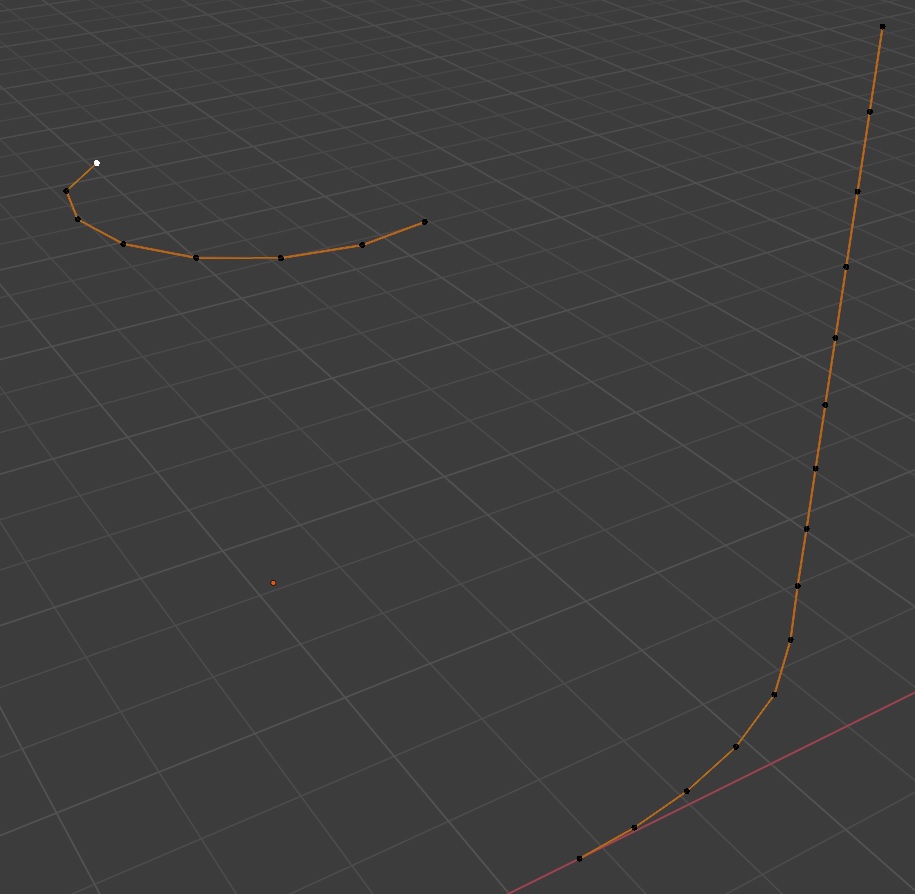
And, here are the curves shape keys.
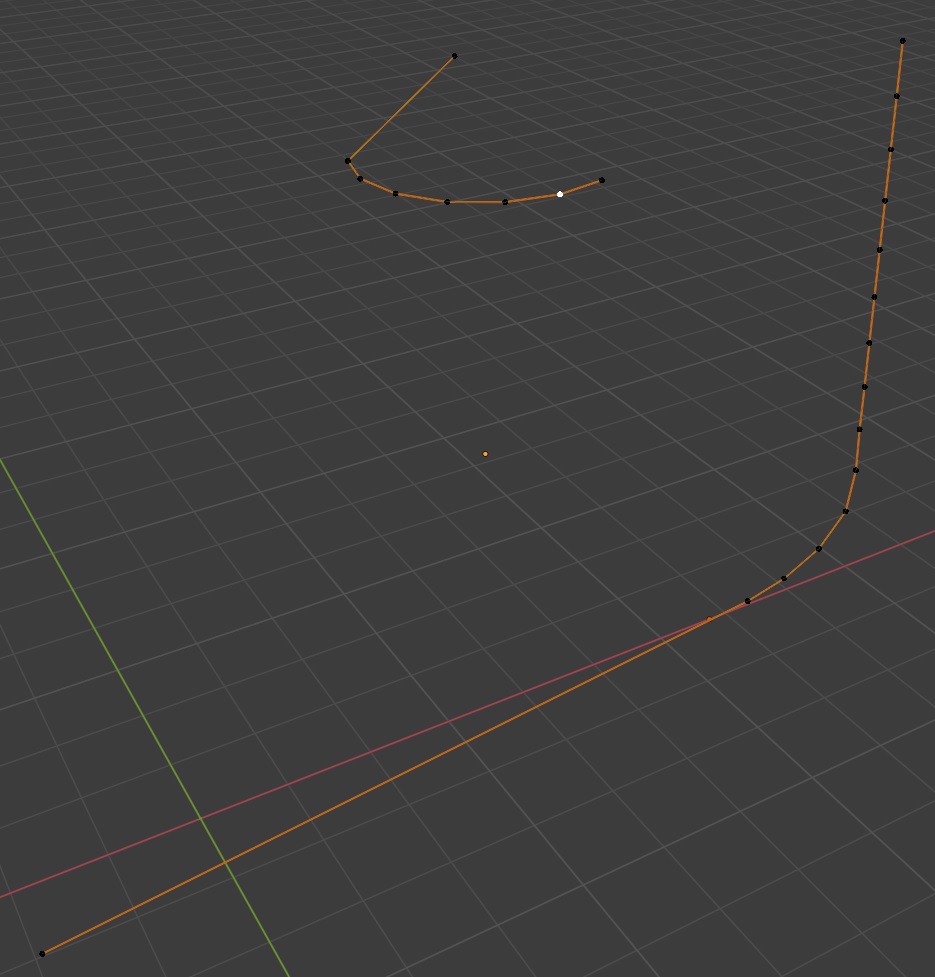 Note that only one control point is transformed on the shape key.
Here are the bones.
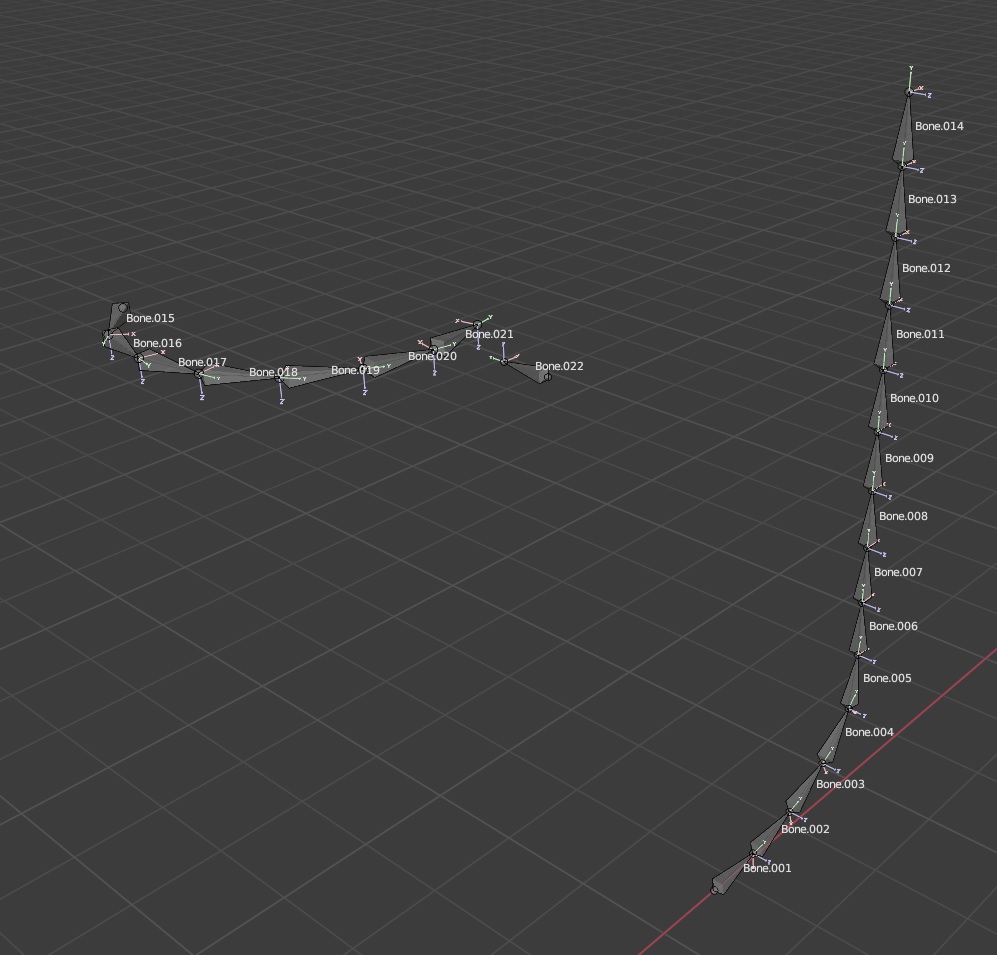 Note that they align exactly with the curves base, and that the head of the bone chain aligns with control point on the curve that is transformed in the shape keys.
And, here is the setting on the Spline IK constraints, which are placed on the tails of the bone chains, Bone.014 and Bone.021. Switching between Bone Original and None for the Chain Scaling settings had the same desired effect of preventing the mesh of the doors from stretching, whereas the other options did deform the door meshes in undesired ways. I’m not sure which one is more appropriate since they seemed to do the same thing for me, but I’m sure there is some reason/cases to use one over the other, so you may need to play around with those settings to find the one that fits best.
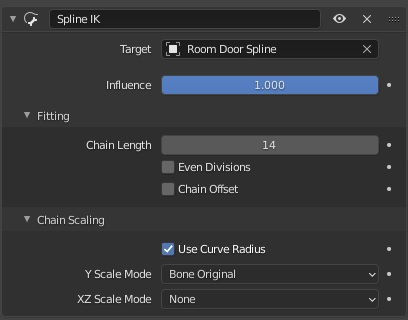
(The chain length should equal the number of bones in the chain.)
Hopefully this helps. Again, I’m not exactly sure of all the specifics on why this works. It is a little counterintuitive to me that moving just the single control point on the curve that is at the head of the bone chain pulls the whole bone chain along the shape of the curve, but thankfully I just kinda stumbled upon that while messing around.
Let me know if you have anymore questions and I’ll do my best to answer.