
Reply To: COLLAB2021 – The Spice Must Flow (TSMF) Blog
Forum Archive › COLLAB2021 – The Spice Must Flow (TSMF) Blog › Reply To: COLLAB2021 – The Spice Must Flow (TSMF) Blog


Using fSpy to Establish our 3D World
Kent has been using a Blender model of The Spice Vendor’s House concept artwork to setup our project. Have you wondered how this was created and how it aligns to the artwork with near spot-on accuracy? A free open source program called fSpy was the tool that is responsible for the great start to our project.
fSpy is a standalone software application that uses a technique called Camera Matching in order to calculate camera data. Given an image, the user assigns parallel lines in the image that converge into vanishing points. These vanishing points can be located either inside or outside of the image. Visualize that you are standing between two straight railroad tracks. Looking toward the horizon you see that two parallel tracks appear to converge in the far distance – that would be a vanishing point. The software takes this information and estimates camera parameters, such as orientation and position in 3D space. With the corresponding add-on, this information is imported into Blender giving the user the ability to match the same proportions as the reference image. The user can start blocking off elements of the image.
The concept artist, Vadim Zaitsev, created the art by first modeling it in Autodesk 3DS MAX and then added finishing details in Photoshop. The focal length of the model is 33 mm. While this is not a photo, it is still a good image to be used with fSpy as there are no lens distortions. Images with lens distortion, such as a photo taken with a fisheye lens or a stitched panoramic, would not be candidates for using fSpy.
Ingmar Franz (duerer) got a head start on our project by using fSpy to block off The Spice Vendor’s House. Below is how he setup fSpy.
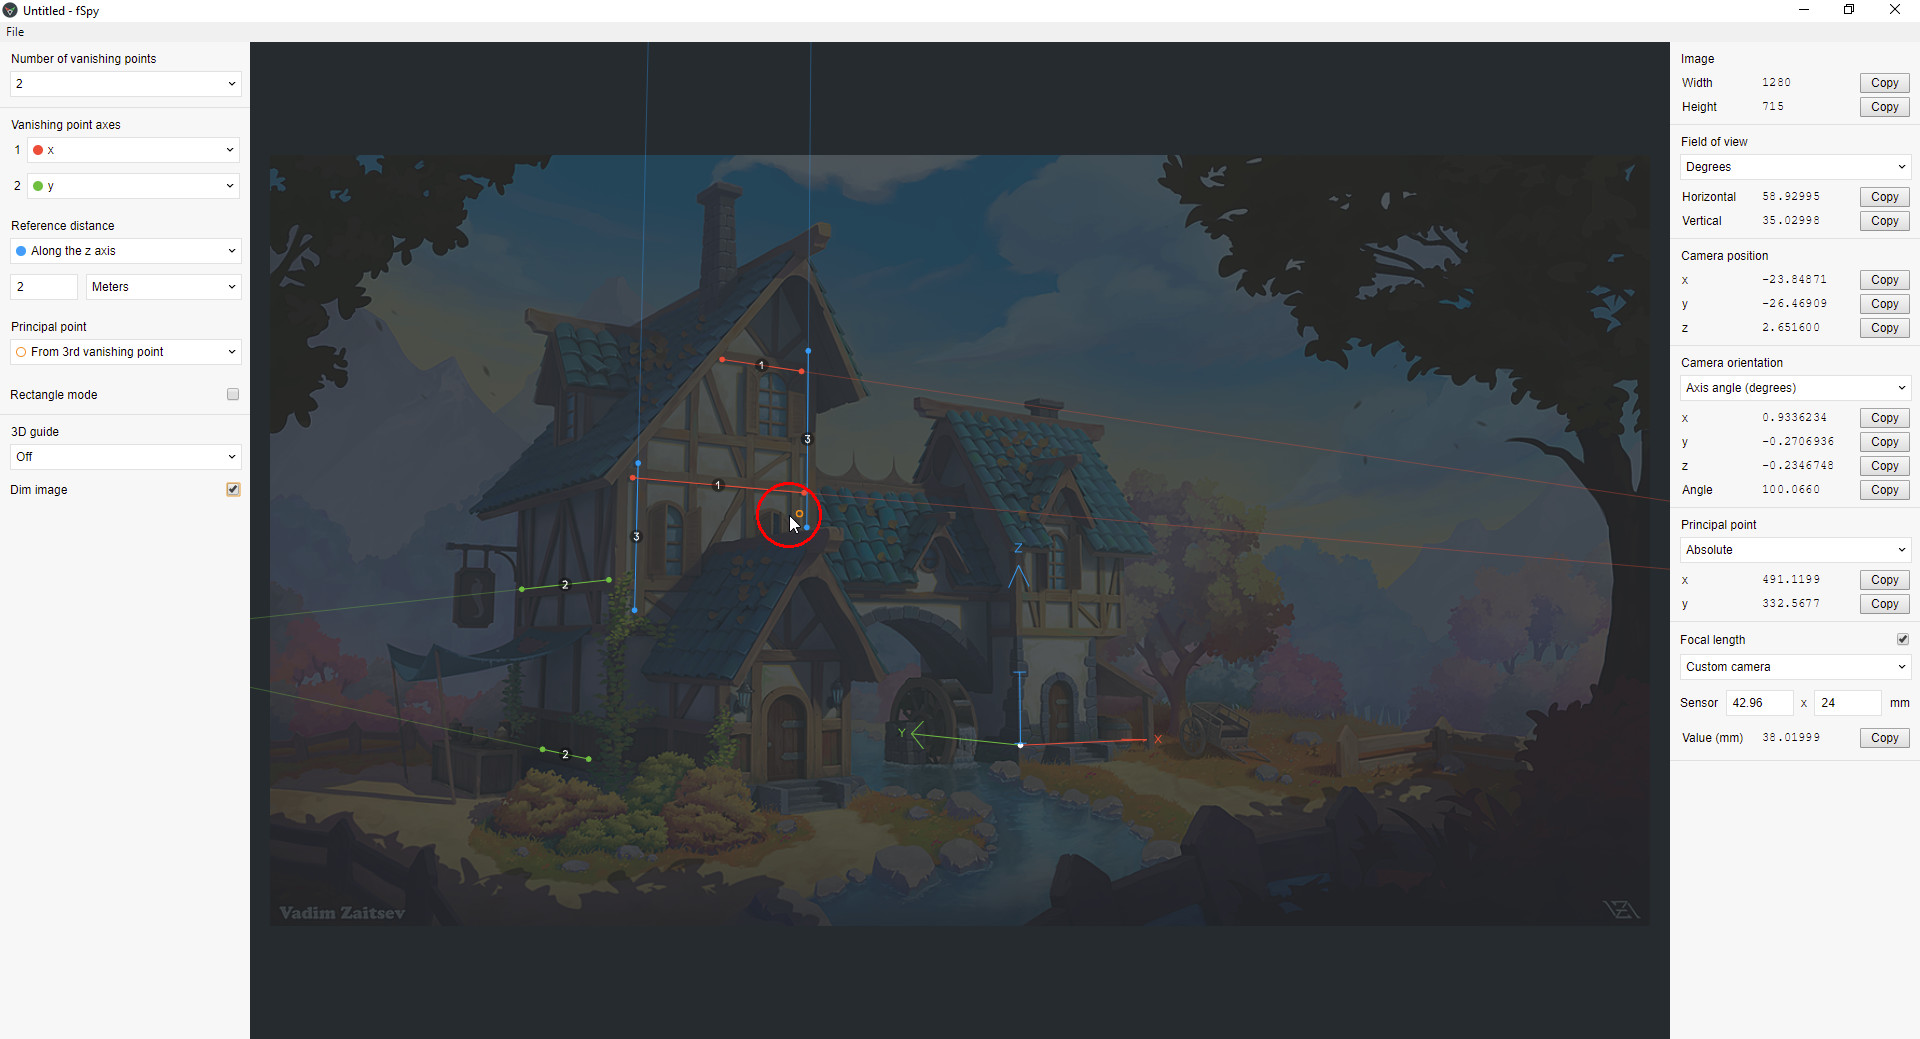
This is configured for the maximum of three vanishing points, one on the X axis (red lines), one on the Y axis (green lines) and one on the Z axis (blue lines). The handles on the ends of the lines can be positioned so that the lines are aligned with straight features in the image. These lines would be parallel on the same plane of a real world object but converge due to the so called perspective distortion, which makes an object look smaller the further away it’s positioned from the camera. Note, the more vanishing points used will produce more accurate results. For a higher precision positioning of line endpoints, press the SHIFT key to enable a magnifying glass which will refine the placement of the handle. A reference distance is established on the Z axis and set to two meters. Although, the user can freely choose any axis to be used for this scale referencing. This height is assigned to the door on the production side by the XYZ coordinate axis. Note that the blue Z line spans the vertical height of the door.
A principal point can be explicitly established. Visualize a straight ray of light going through the center of the lens of a camera. Where that ray of light hits the sensor (or film) is the principal point. Usually, this is the midpoint of the image. But it can also be established by adding a third vanishing point on the remaining axis, as it was here by selecting “From 3rd vanishing point” in the “Principal Point” dropdown menu. By adding the two blue Z lines, the small orange circle’s position is determined. A red circle annotation (added after the screenshot) has been used to more clearly identify the principal point.
The fSpy setup is then saved.
A companion add-on needs to be installed in Blender. From there, the saved fSpy file can be imported into Blender.
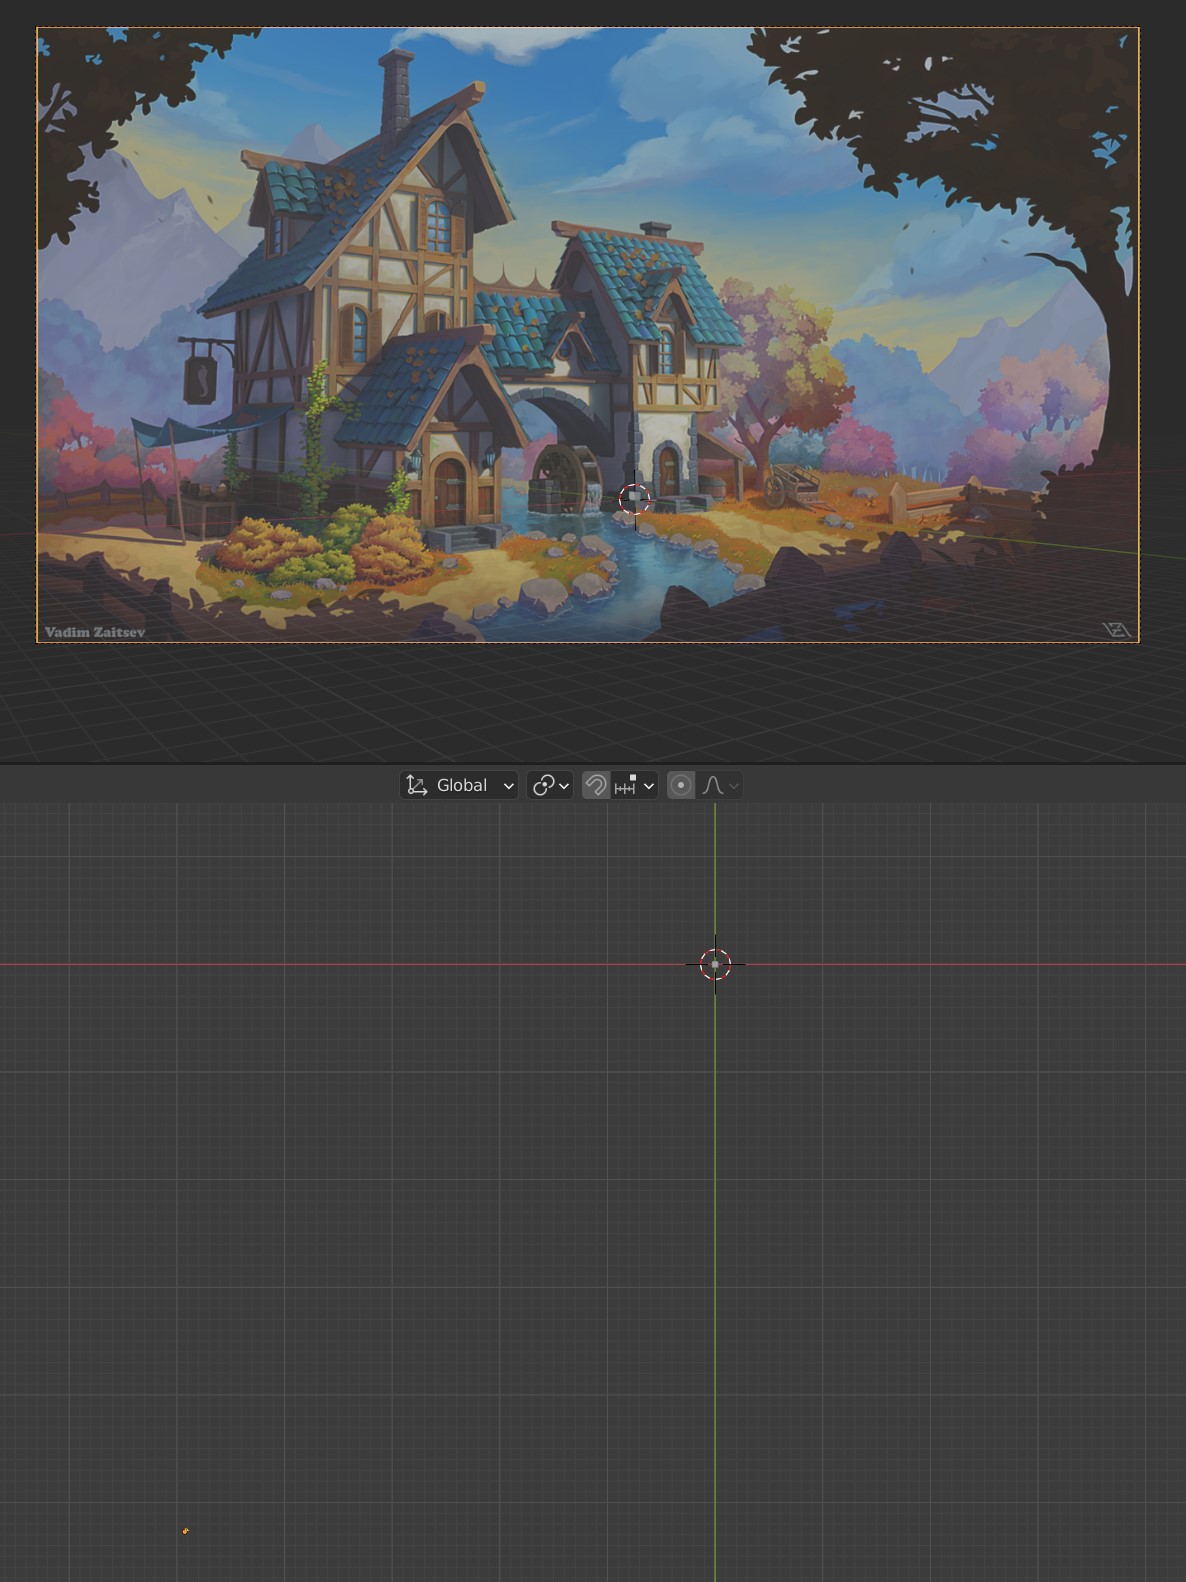
Notice in the top viewport that the world origin (located to the left of the production side’s door) is set to where the XYZ coordinate axis was established in fSpy. The camera was automatically added by the fSpy add-on; it is the orange dot in the bottom viewport.
The camera’s focal length needs to match the focal length of the original image. As mentioned previously, it is 33 mm. The fSpy program calculates this. Using the Blender fSpy add-on, the camera properties are imported automatically into Blender. Blender is now good to go.
Blocking off the model can now be started. Cubes can be added, positioned, and modified to match the image’s elements.

More details can be added to continue to refine the model.
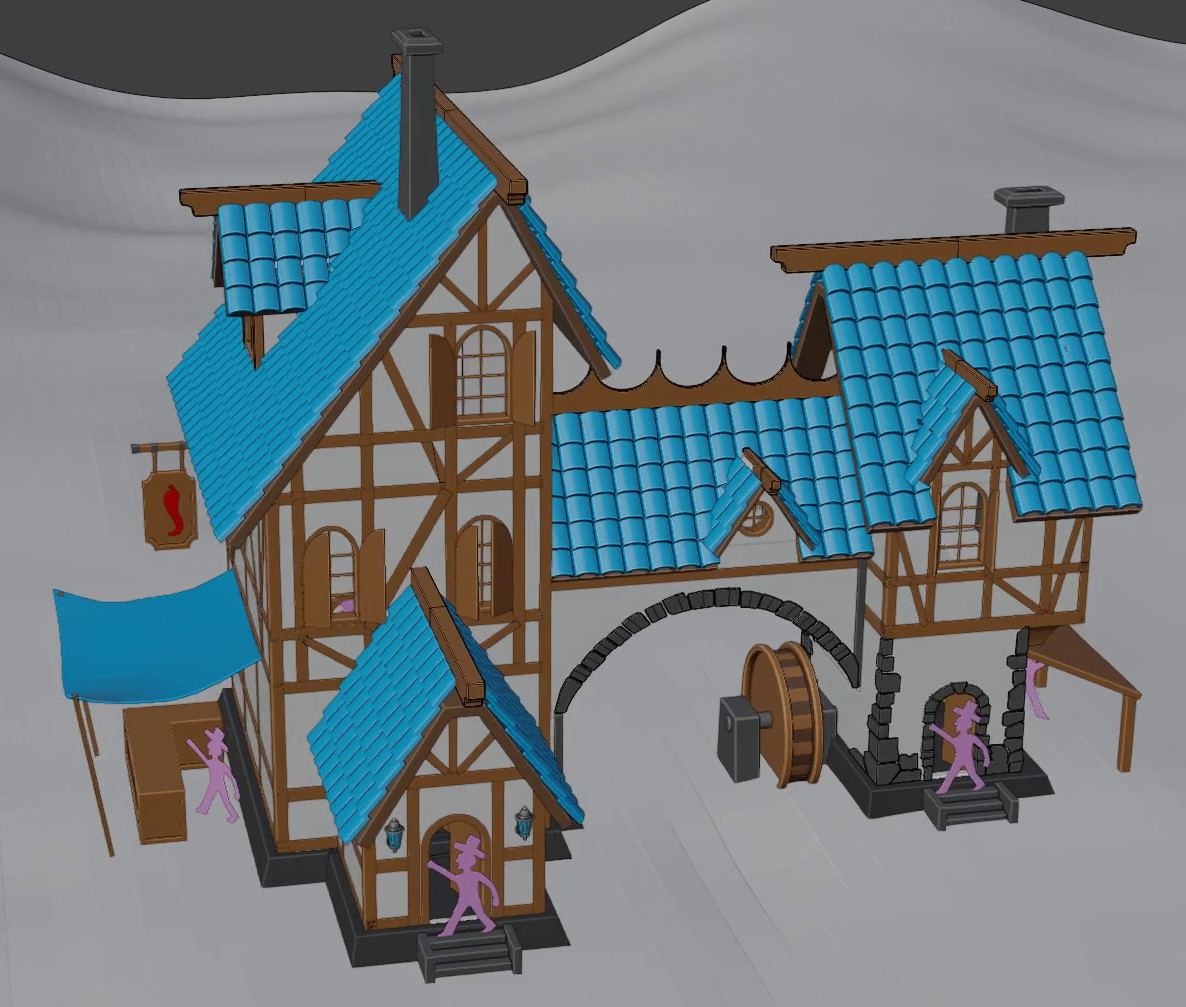
Before you get too far into adding details, make sure that the model is an accurate representation of the image. Look at a side view and see if the model is disproportionally stretched or compressed on the Y axis. Also check for Z height issues from one side of the model to the other. These types of issues could be related to setting up the vanishing points, not matching the focal length between the image and Blender camera, or even the angle that the camera is pointing toward the model. Slight changes in these parameters can result in large changes with the results. This could be an iterative process until you get satisfying results.
Having the ability to take a photo and transform it into a Blender 3D model is very powerful. fSpy can also be used to add a 3D model into a photo or perform interesting 3D camera moves in a photo, like a Ken Burns Effect. fSpy is one of those add-ons that you definitely want in your Blender toolkit.
Links:
- General
- Tutorials
- Capturing a Simple Environment Map for Compositing CG Elements
- Create Photoreal Environments Fast in Blender 2.8 with Camera Projection
- fSpy – Match the Correct Scale in Blender 2.8
- Modeling FROM Photos in Blender Using the fSpy Add-on
- Add 3D Effects to Your Photos with Camera Projection Mapping in Blender 2.8
End fSpy
